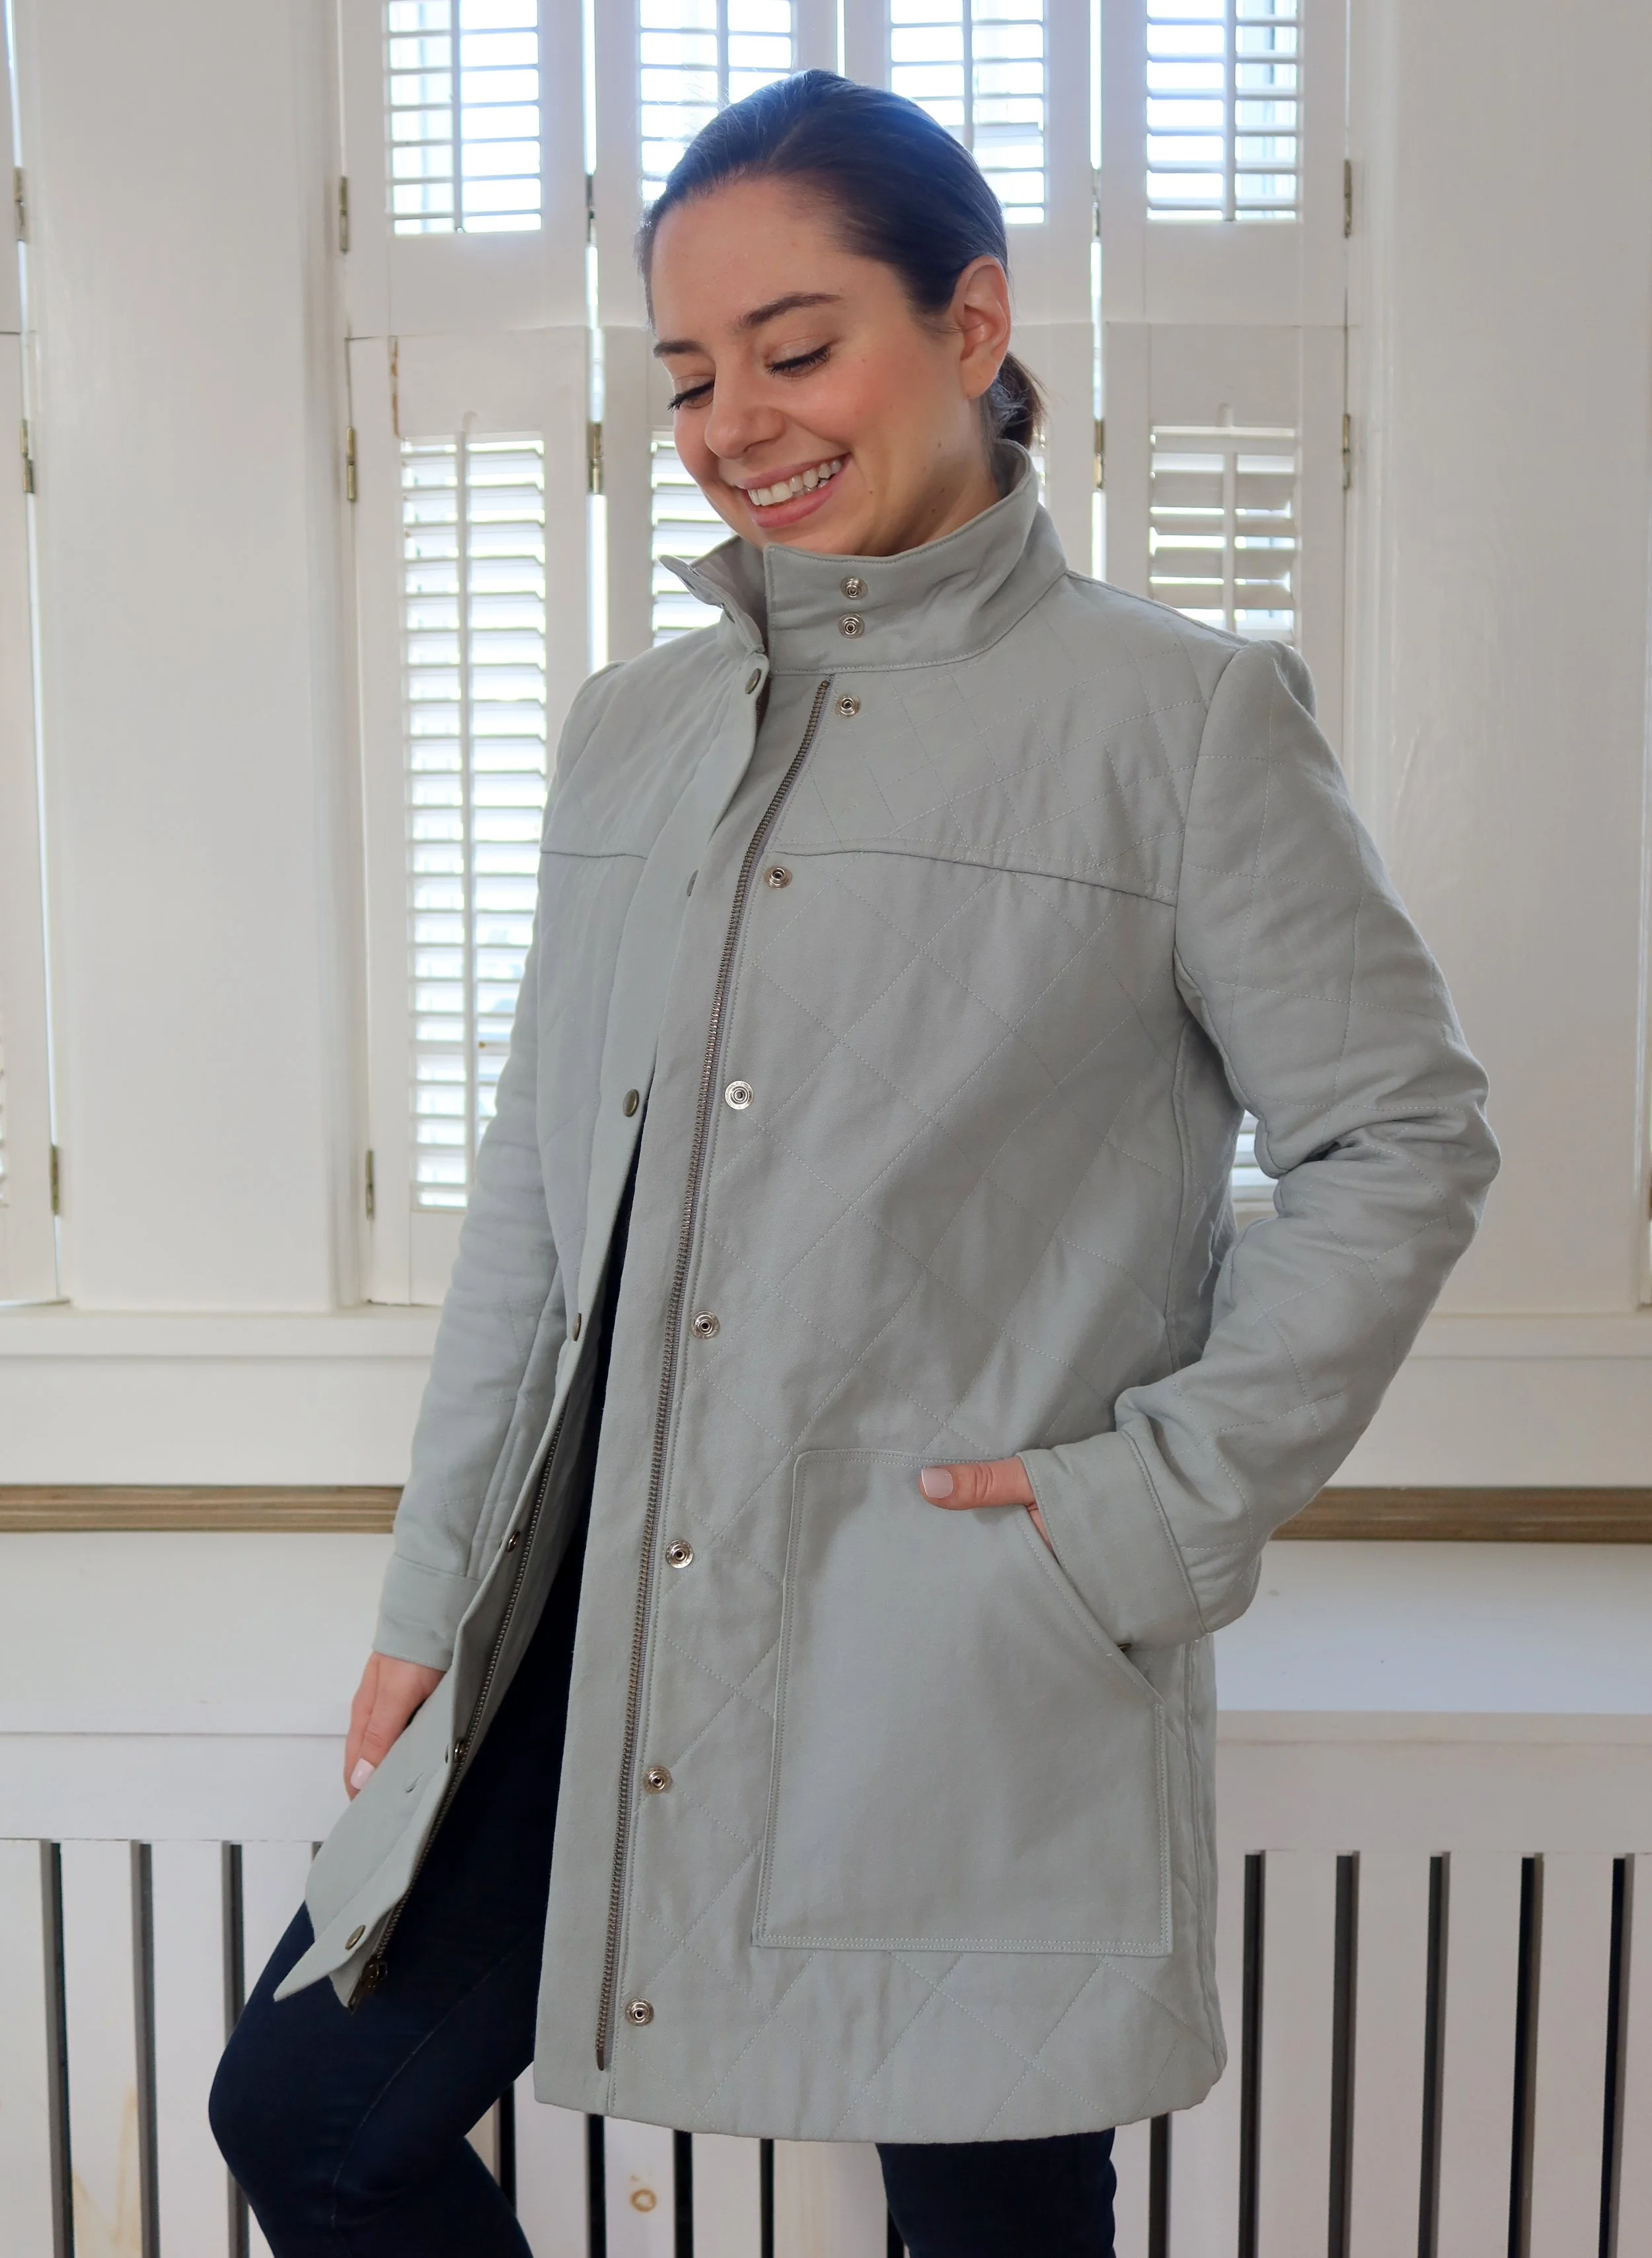
Quilted Kelly Anorak
You may have seen this jacket on my instagram a few months ago, but I finally took some photos of it and wanted to share the details from this make!
Back in March I saw a tiktok of a woman wearing a blue quilted jacket with a bomber jacket neckline, and closed with both snaps and a zipper. One day, while in line at Target, I spotted a jacket that looked very similar to what I had been looking for, and sure enough it was the jacket! (Original jacket no longer on Target's website, but I found a photo of it here) I really wanted to make an ever-so-popular quilted jacket, but I didn't want to make a jacket from an actual quilt and this inspiration piece was exactly what I was looking for to get started on my own version.
I found the perfect secondhand fabric from A Thrifty Notion, a Sage Cotton Twill, and bought three yards. I had been looking at bomber jacket patterns but couldn't find anything with the closure details I wanted. The only pattern I knew of (and made before) with the snaps and zipper close was the Kelly Anorak from Closet Core Patterns. Using this pattern would mean I wouldn't have the same neckline as the inspiration piece, but I was ok with that change.
I previously made View A (view it here), and have used the pattern pieces in several projects over the years. The Kelly Anorak has been one of my favorite patterns, and I really enjoy the sewing process because of the instructions and sew-a-longs that are online. For this version I went with View B, and made different pockets to get a similar look to the inspiration piece.
I measured at a size 4, but cut a size 6 to account for the extra material and batting. It fits perfectly but a little tight in the arms if I were to wear a thick sweater underneath. (Closet Core makes a lining expansion kit for the Kelly with a new sleeve pattern, for those interested).
Going into this make, I knew I didn't want a jacket with a separate lining. The idea was to make the quilting on the front and have the interior look like a solid backing. It took much longer, and I removed and re-stitched basting stitches a few times, but I love the finished look.
The quilting was a very long process, and I spend a few days just stitching the body pieces of the jacket. I cut 2x the body and front facing pieces, as well as the sleeve pieces (more detail on this down below!) I cut 1x batting pieces for the body pieces, sleeves and front facings. Since the full back had batting, I didn't think it was necessary to add more batting to the back facing. (I also added batting to the collar)
I marked the stitching on each piece with an erasable fabric pencil, and basted the batting pieces to each pattern piece. (Also, if you are looking for a fabric pencil, I've had the Sewline Mechanical Pencil for years and love it so much! You can get white, black, blue and pink lead.) I wanted to try to match the quilting lines as much as I could, so once one piece was marked out, I matched it up with the next piece to continue the lines. It didn't work out perfectly, but I did create some pretty side seams.
After the quilting was stitched, I trimmed the batting seam allowances on each piece. This kept the bulk out of my seam finishing's which helped during construction. Once the pieces were quilted, I basted the "lining" to each piece to create my final fabric. This took a lot of ironing, and a lot of patience at the sewing machine, but once the fabric was complete, the construction of the jacket was straightforward.
I finished my seams as the pattern recommended, with flat felting, (tutorial from Closet Core here).
I didn't have enough fabric for the sleeve "lining" and I didn't want them to be too bulky so I took apart an old make for the extra material! I made this raincoat a few years ago but never wore it and moved it into my refashion pile. I had to do a little bit of "franken-stitching" to get the full sleeve piece, but the color and weight of the fabric was perfect for my sleeves!
I only made one size adjustment and that was in sleeve length. I didn't think about it before cutting and quilting my sleeve, but before attaching the cuff, I realized the sleeve was just a bit too long. Since I already did the construction for my cuffs (out of order on the pattern instructions), and stitched the sleeve to the body, and finished the seam with bias binding, I wasn't able to alter the length anywhere else but the hemline. Instead of a 5/8" seam allowance, I sewed the cuff at 1 1/4". It makes the sleeve extension shorter, but left the sleeve intact.
My hem was finished with binding and hand stitching. And the last step was adding the snaps, which I made Drew hammer because I was terrified of messing them up! Cutting holes in a completed garment is so scary!
I am so proud of this jacket! I've already worn it several times, and can't wait to keep wearing it once the temperatures get back out of the freezing zone!
Quick Links:
Pattern: Closet Core Kelly Anorak: View B, Size 6
Fabric: A Thrifty Notion: Sage Cotton Twill, Secondhand


