Jeans to Lander Shorts Refashion
I haven’t been thrifting since February, and while NJ is starting to open back up, I probably won’t be comfortable going to a thrift store for a while. Thankfully when I went thrifting pre-Covid, I always picked up all sorts of pieces, for all seasons so I still have a good stash to work through!
When I saw these J Crew jeans in the store many months ago, I gasped. Liberty of London fabric - jeans that look like they would fit me - was it the ultimate score? Sadly not. Upon closer inspection, there was a lot of wear on these jeans, some staining and a less than stellar low rise waist. These were tagged as a size 25, which is one size up from mine. But after washing them and trying them on, they were so tight it was uncomfortable. So to the refashion pile they went.
I was originally planning on making a chambray top with the jeans but after planning it out I knew I would have to incorporate another fabric and I didn’t want to do that. A few months passed and the weather was getting warmer. One wardrobe item I am always in need of is shorts. I buy some of my shorts secondhand, and the last few years I was buying whatever was available in my size, not based on if I actually liked the style or fit. So I thought this would be a fun opportunity to make a pair of shorts!
I went with the Lander Shorts from True Bias since I already had the pattern and I love the button fly and high waist. I cut a size 2, and made no changes to the pattern.

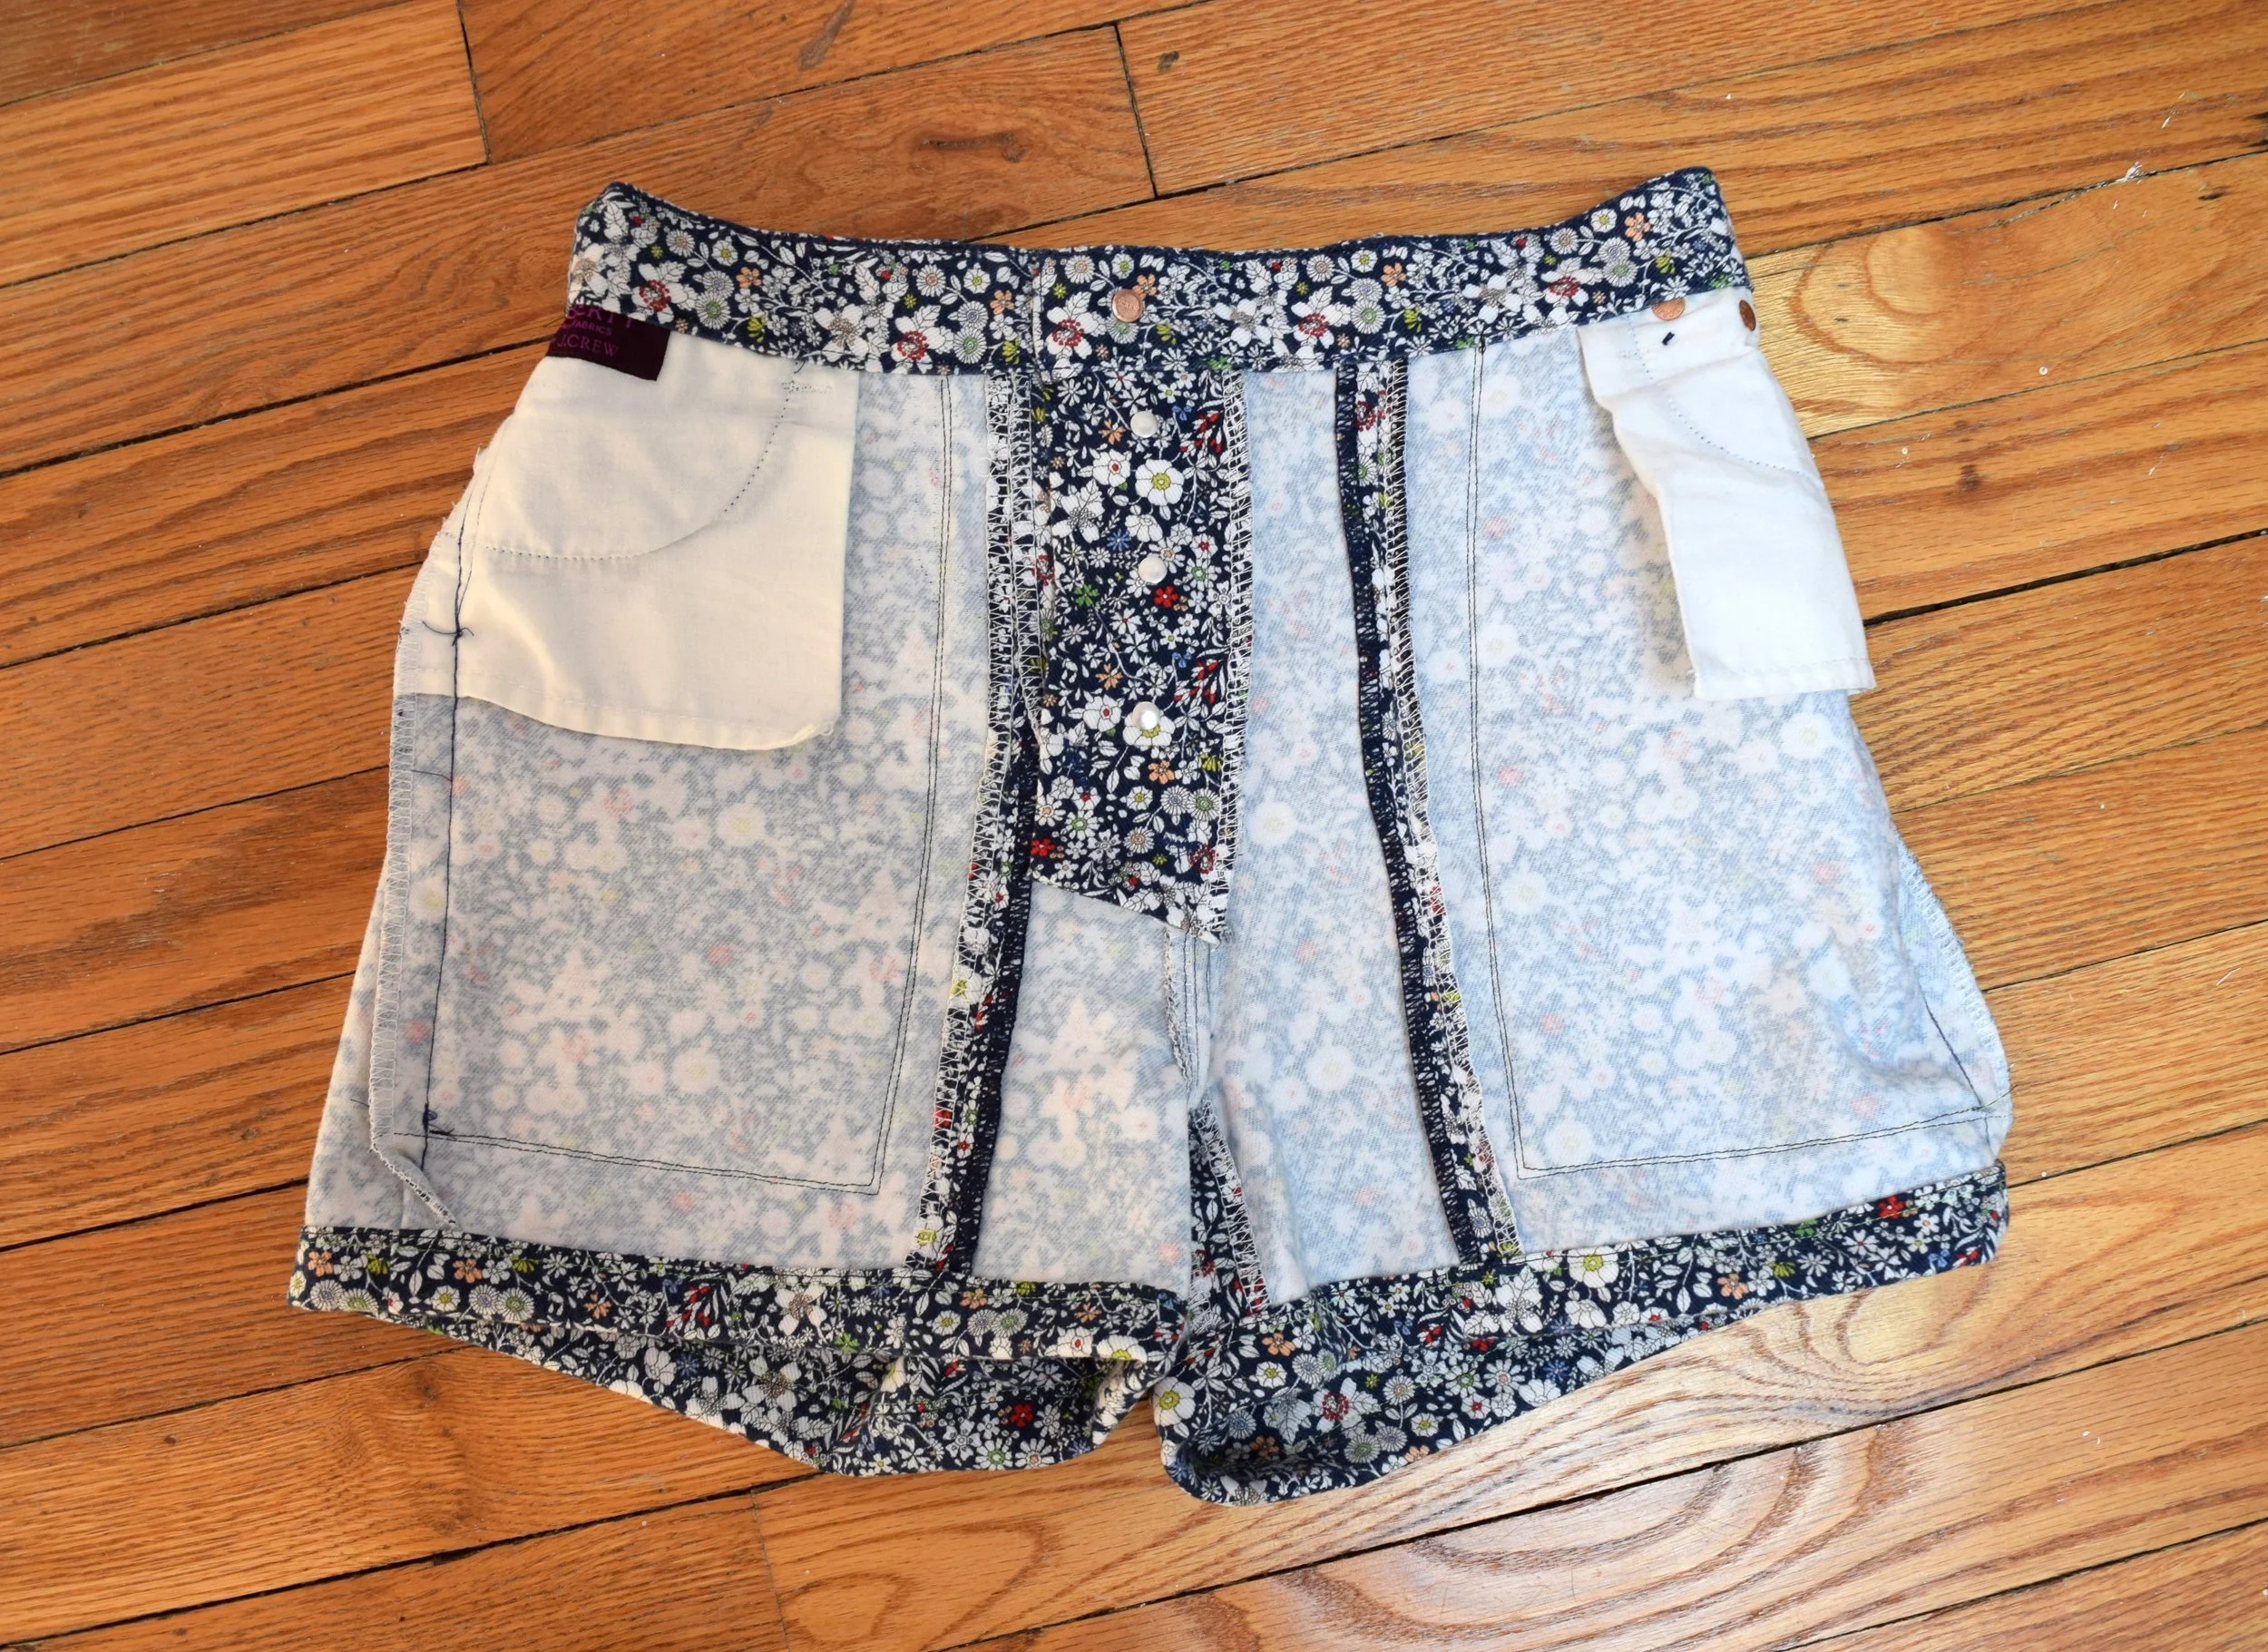
Since the pants were tight, I knew I would need to add fabric. I wanted the front pockets to remain the same on the sides, so adding fabric to the crotch was the only option. To do this, I wanted to start off with a straight line, and cut the original crotch curve off.


This refashion was all about strategic cutting and mirroring. I really wanted to keep the details on the jeans; the side pockets, back pockets and rivets. I also wanted to leave the waistband as in tact as I could, since the buttonhole and belt loops were already made.
Here’s one tip I learned along the way: if you want to keep the back pockets from the original garment (without needing to remove them), use the “pocket markings” on the pattern to line up the pattern piece with your garment. This will make sure that the back pockets won't tilt in the process of making a new garment.


Realistically, this isn’t a refashion I will do often. I use this method of piecing in other refashions, but never quite to this extent. It worked well because the busy print doesn’t show all the added seam lines, but doing this on a solid or large print would definitely show.
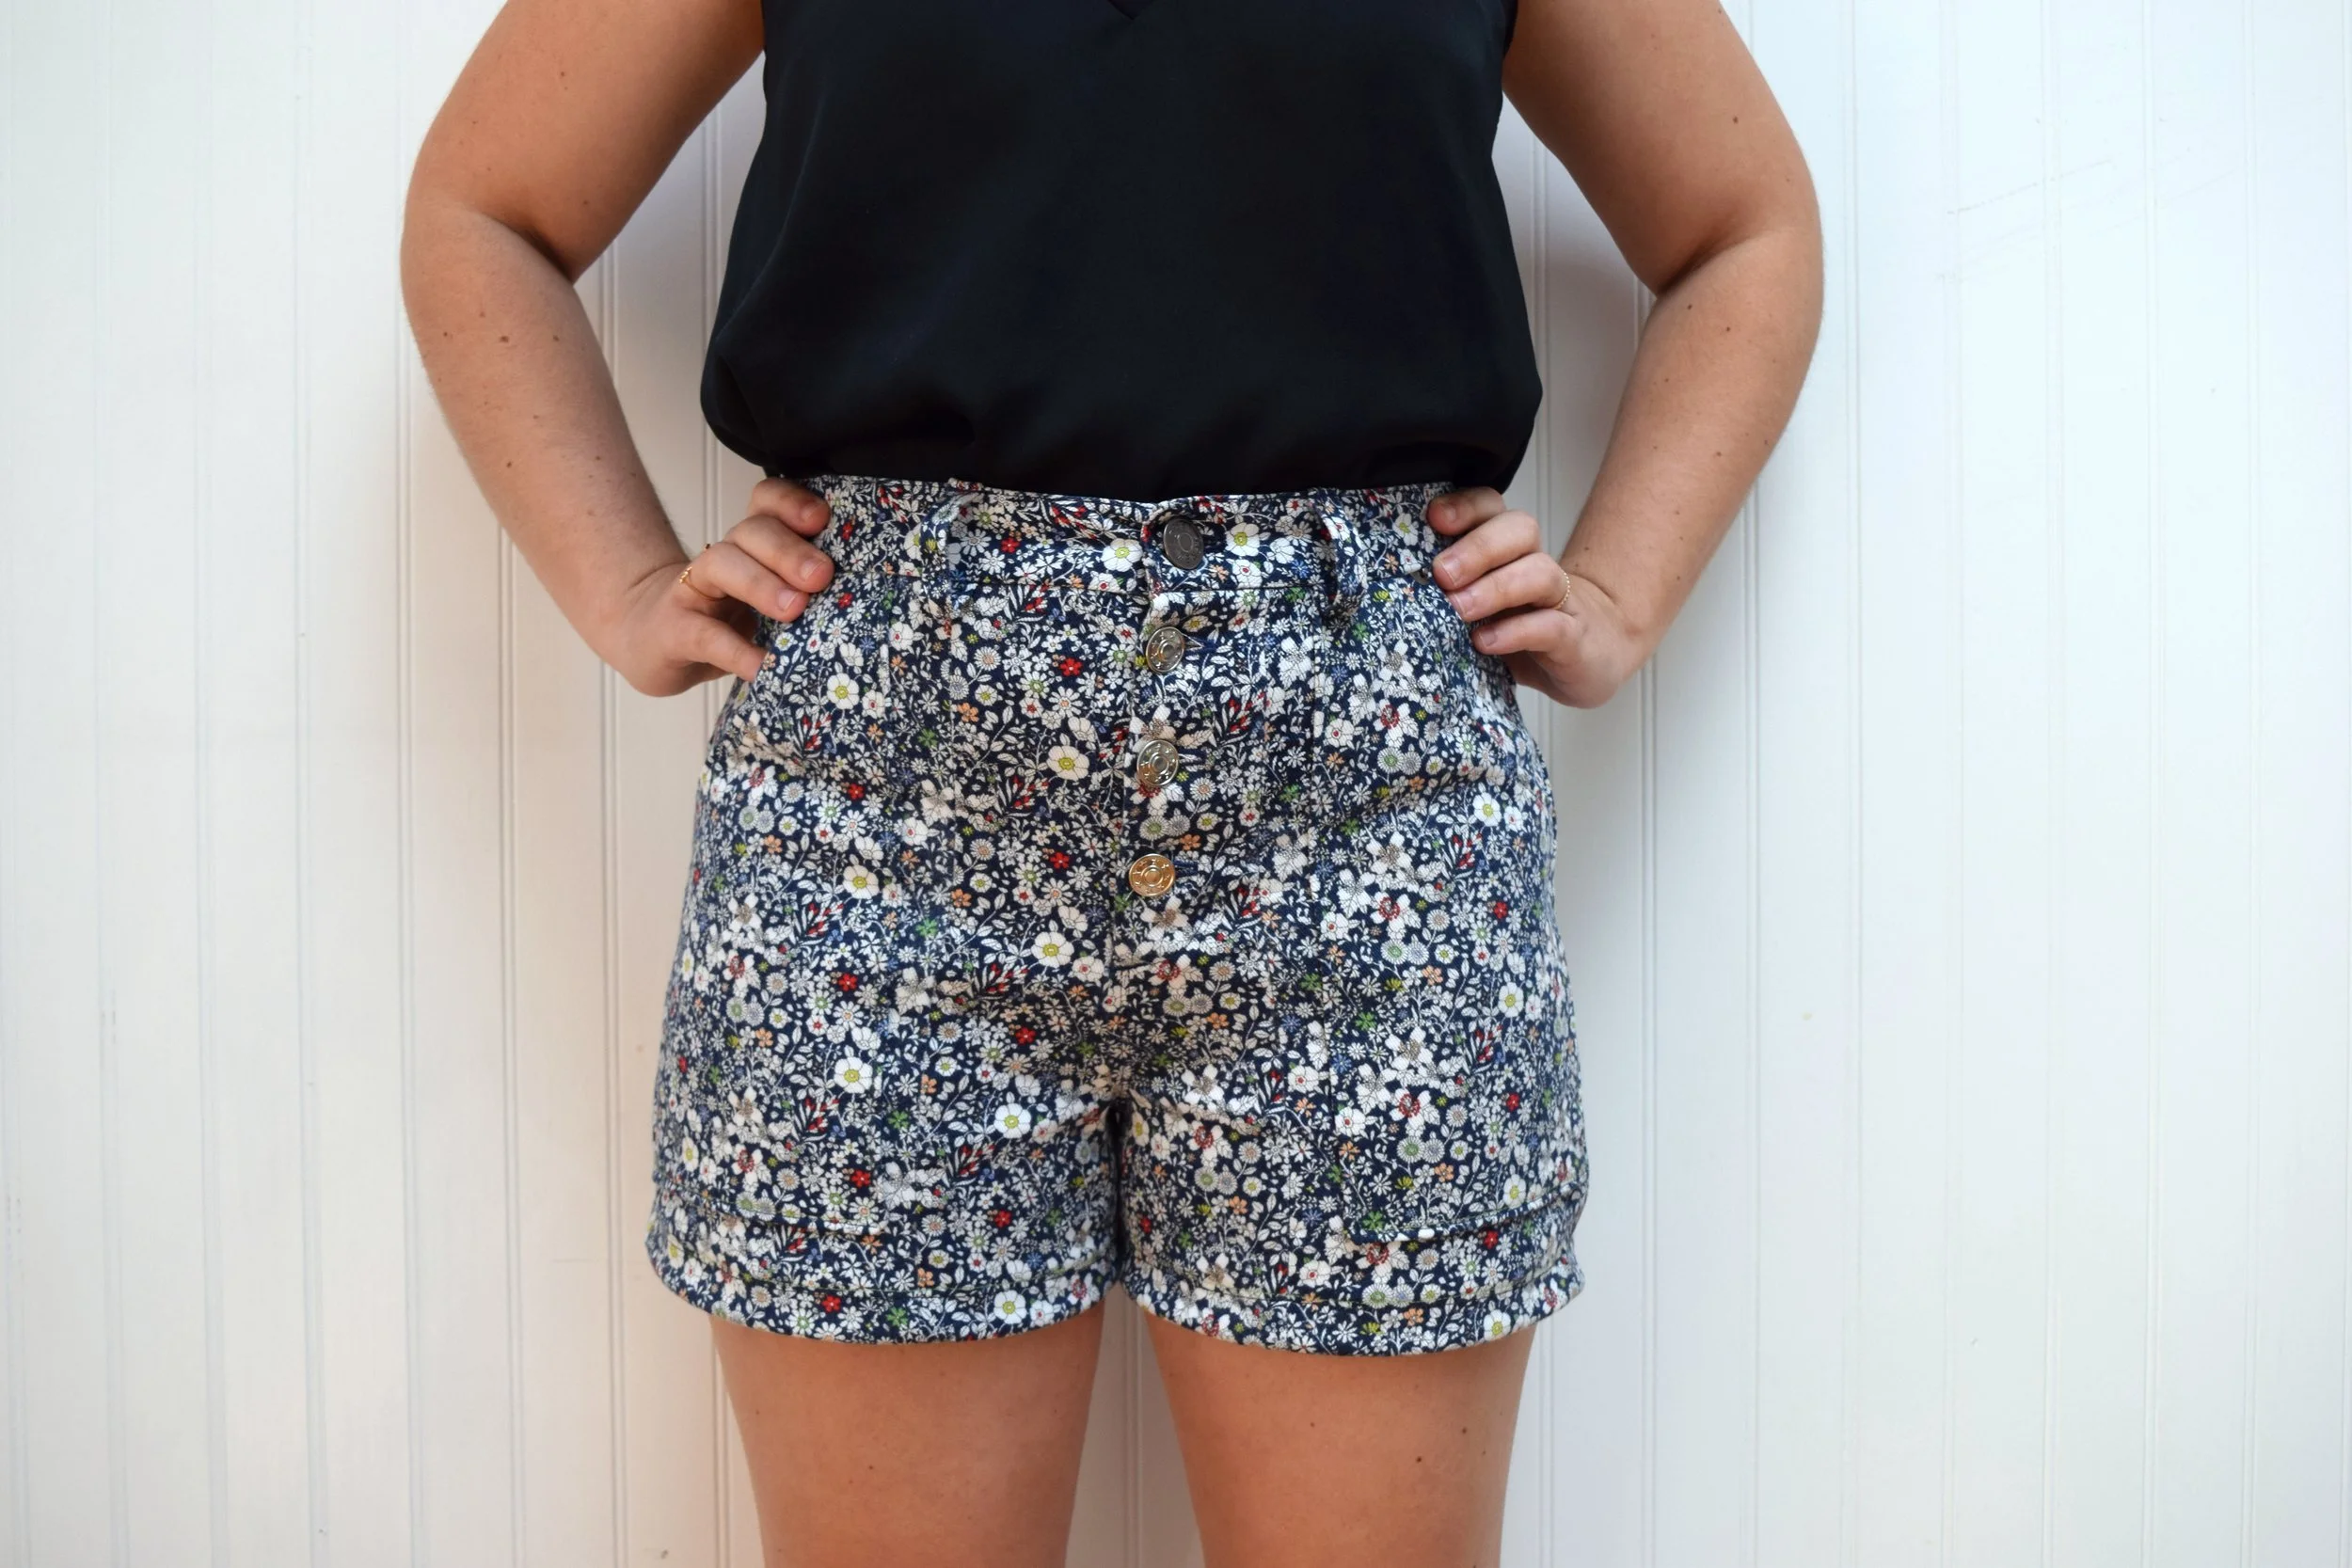


I really love these shorts, and love that I was able to save the pants. I absolutely love the prints from Liberty, but since I don’t want to buy fabric, it was a treasure being able to find something Liberty “in the wild”. This print is available, so if you wanted to re-create the look, you definitely don’t need to refashion some jeans! But I hope this post gave a little more in depth look on how to patch pieces together. I do wish some of the details were easier to see in pictures, like the pockets, so this refashion may not look like a lot of work at first glace, but they were definitely a labor of love!