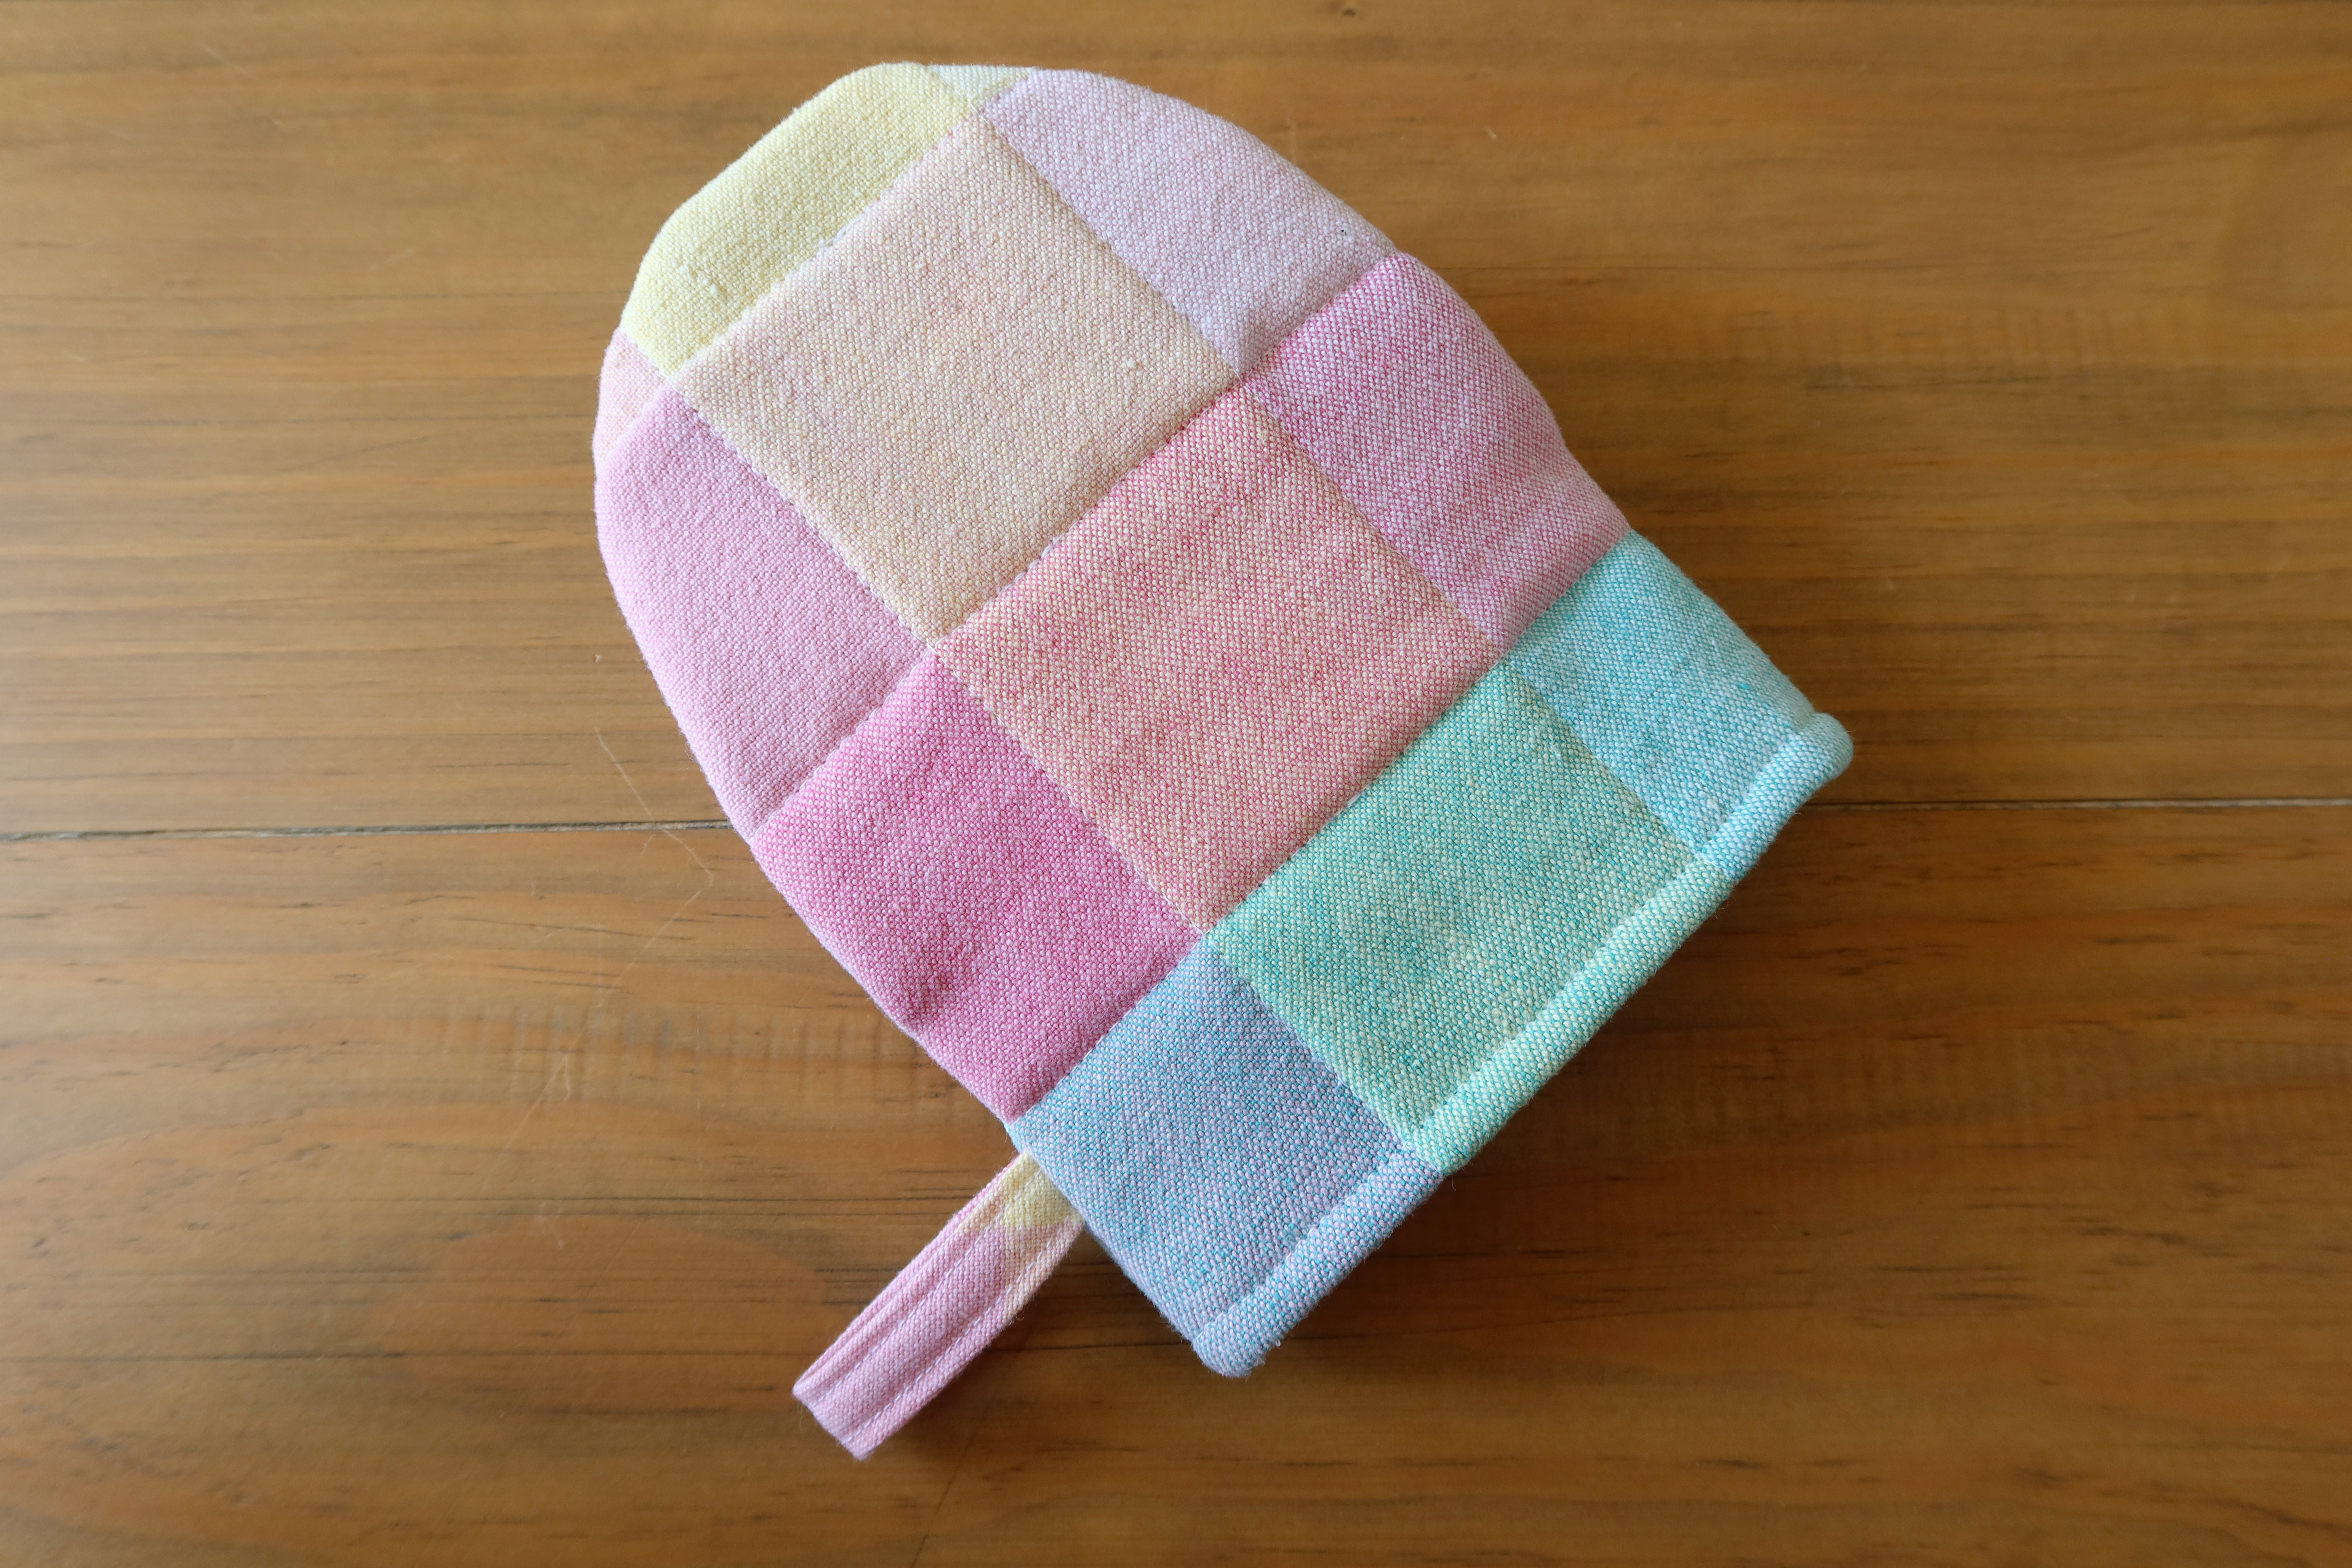
Looking for a quick handmade holiday gift? Look no further! This mini oven mitt is filled with handmade love and a great project that will only take a few hours to complete! Pair it with some homemade cookies, or the ingredients for your recipient to make their own!
Last year I fell in love with a mini oven mitt that I got, and I really wanted to make some more, in a fun pattern of course! So I set out to create my own!
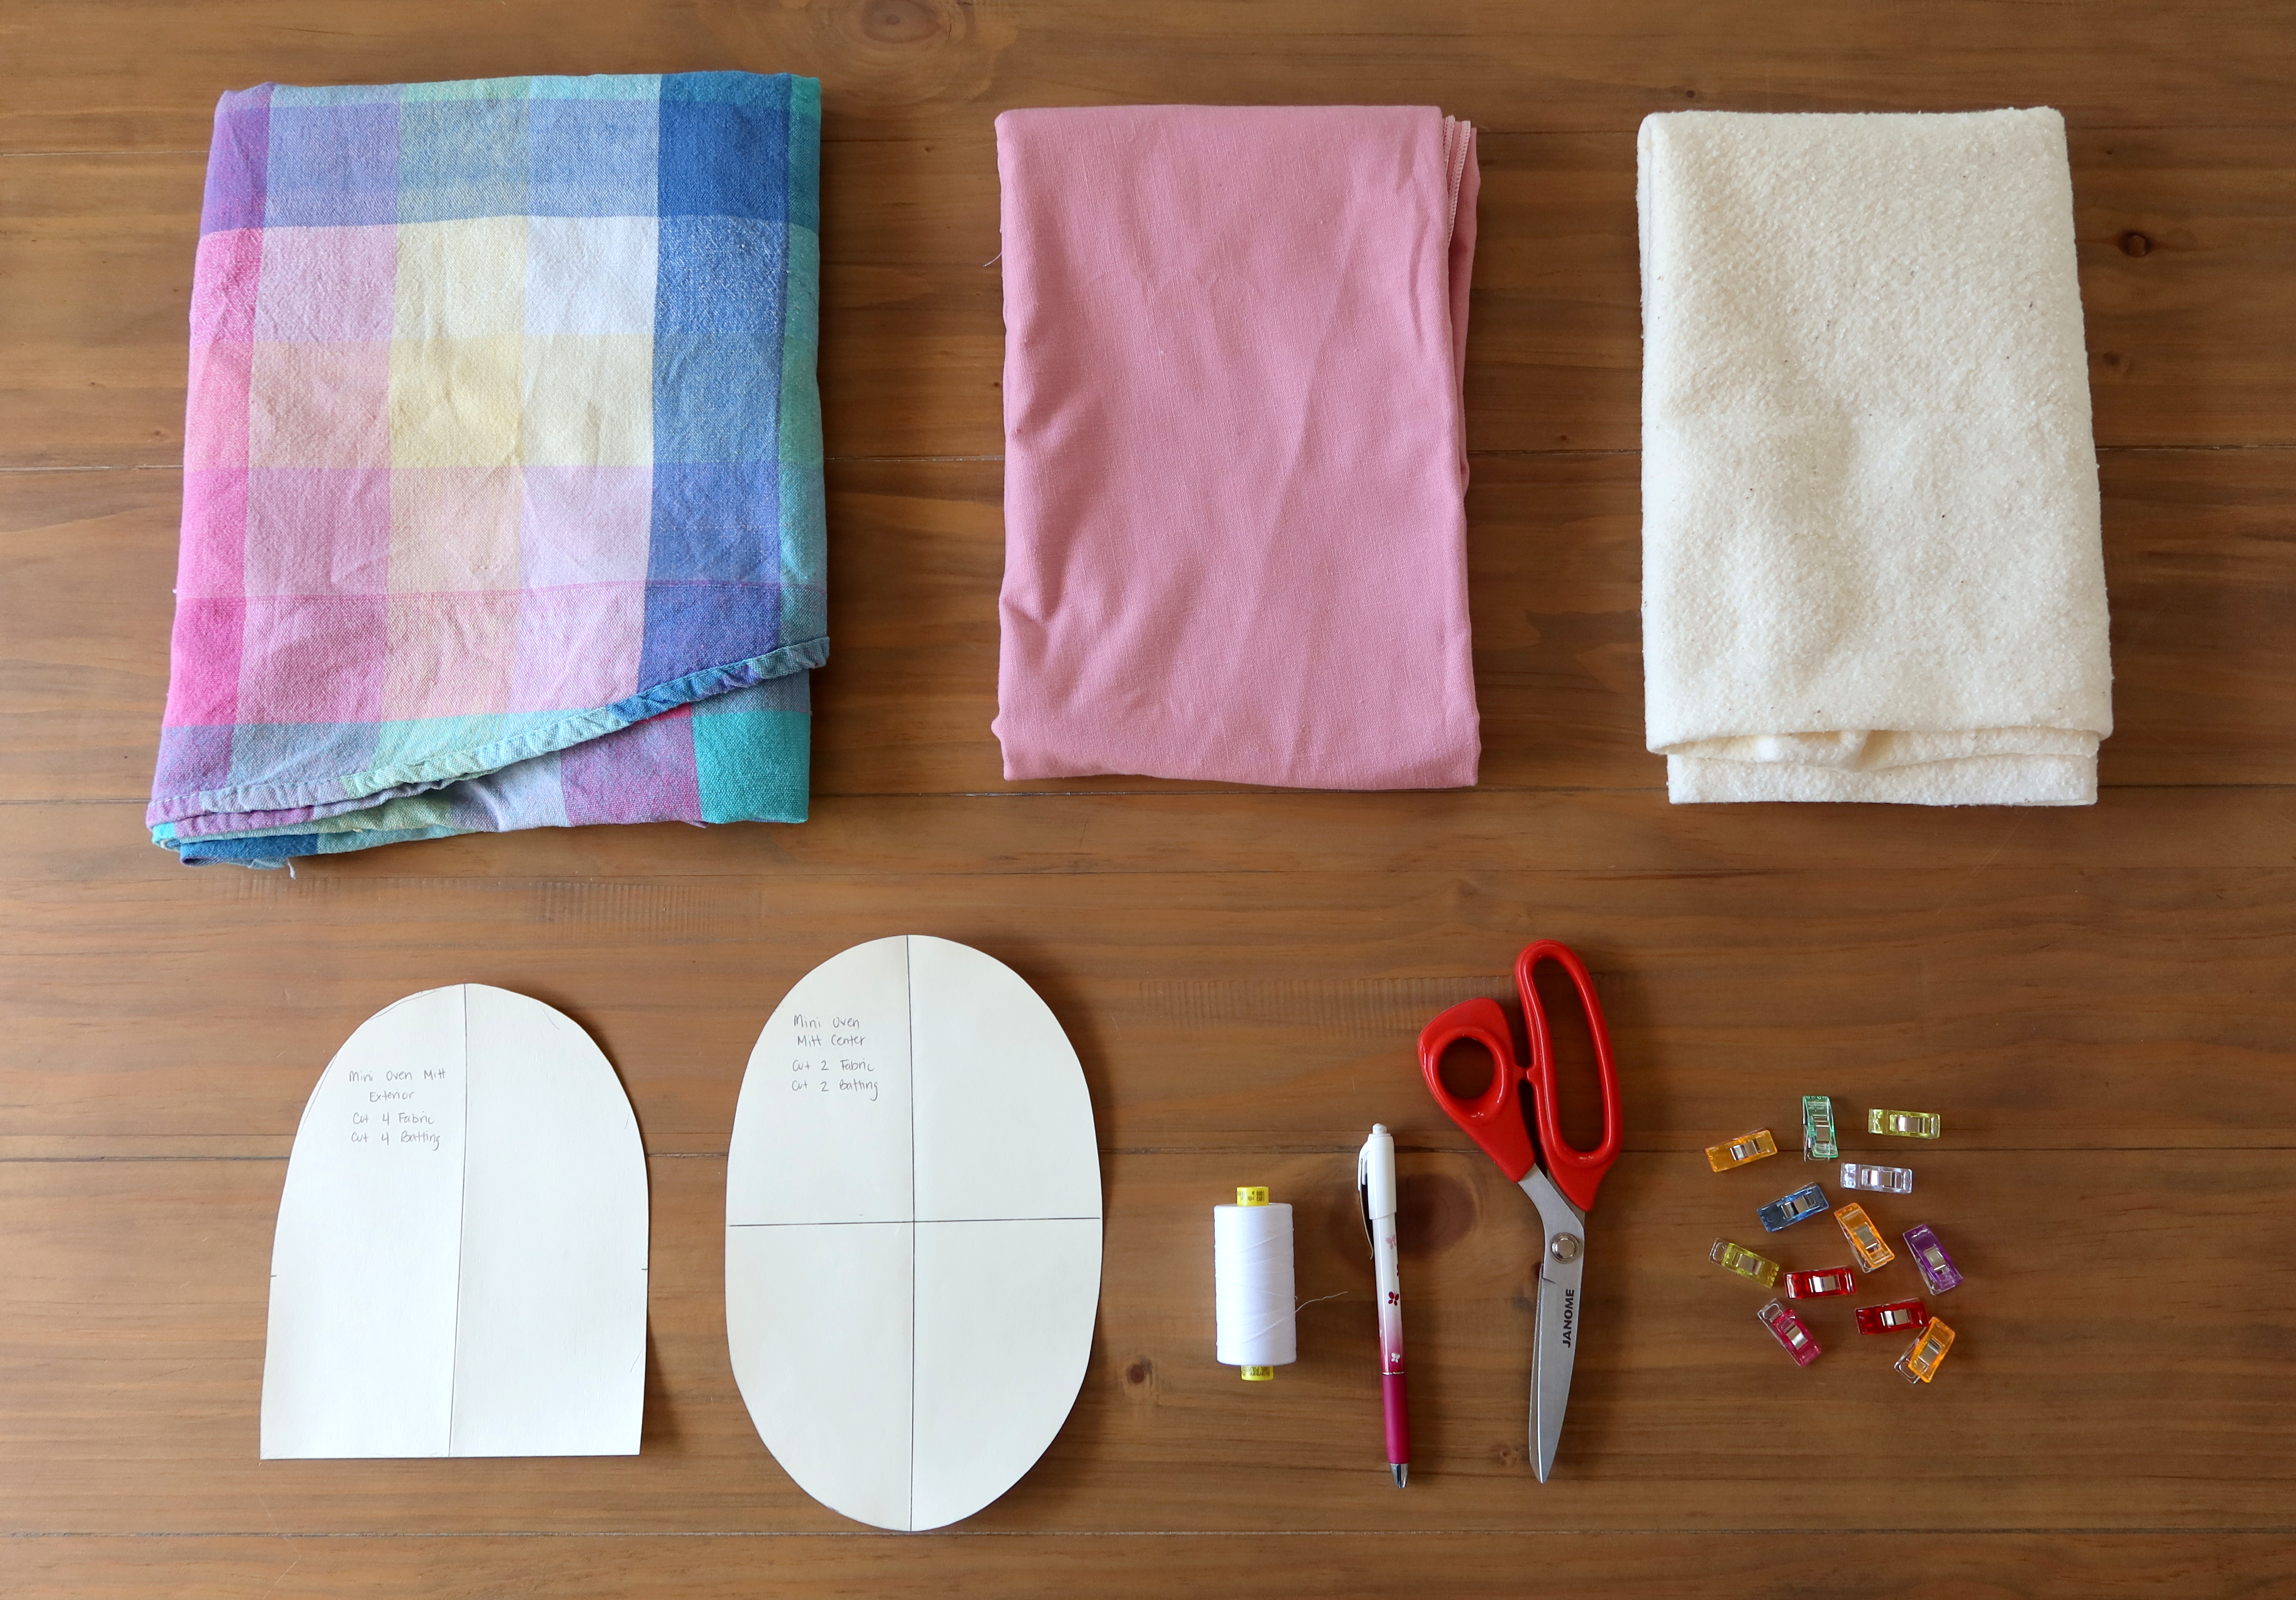
You will need: Exterior Fabric, lining fabric (I recommend both being 100% cotton or linen), batting, printed PDF pattern, along with general sewing supplies, serger optional.
Batting Note: I used Warm & Natural Cotton Batting to keep my oven mitts 100% cotton. These are for light heat use. There are many options for batting, including terry cloth, and old jeans! For more heat protection, you can use also use Insulated Batting!
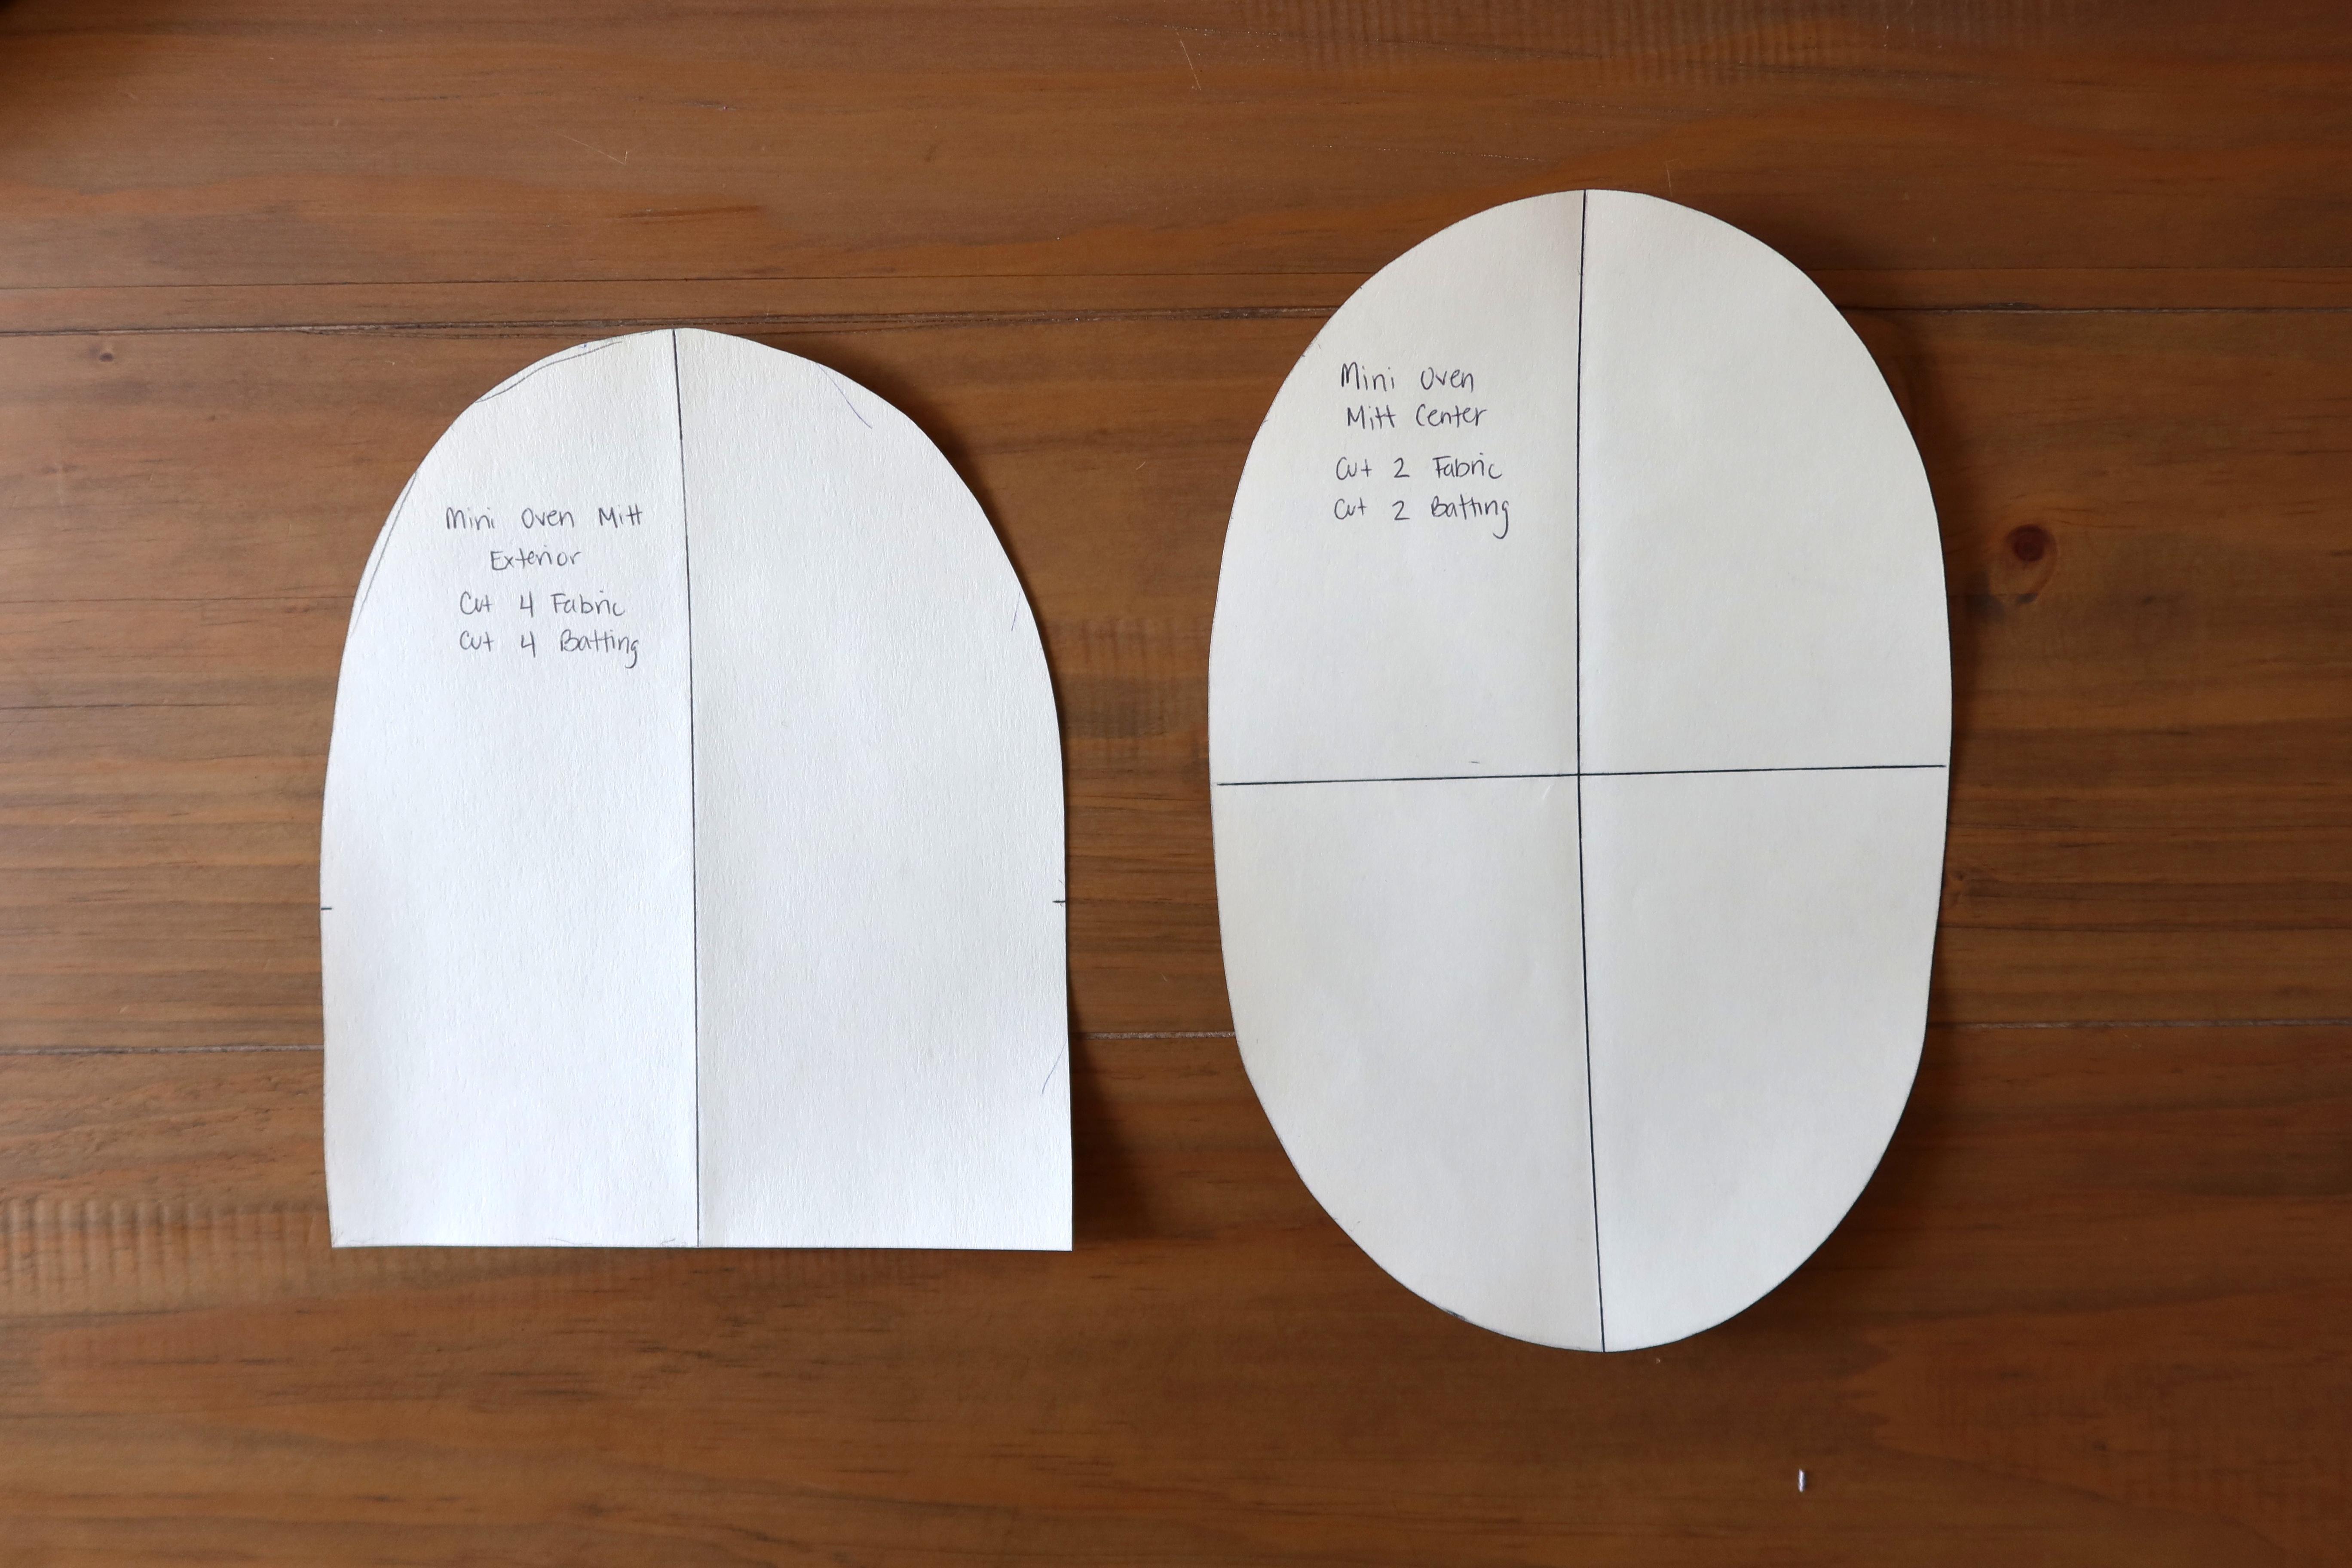
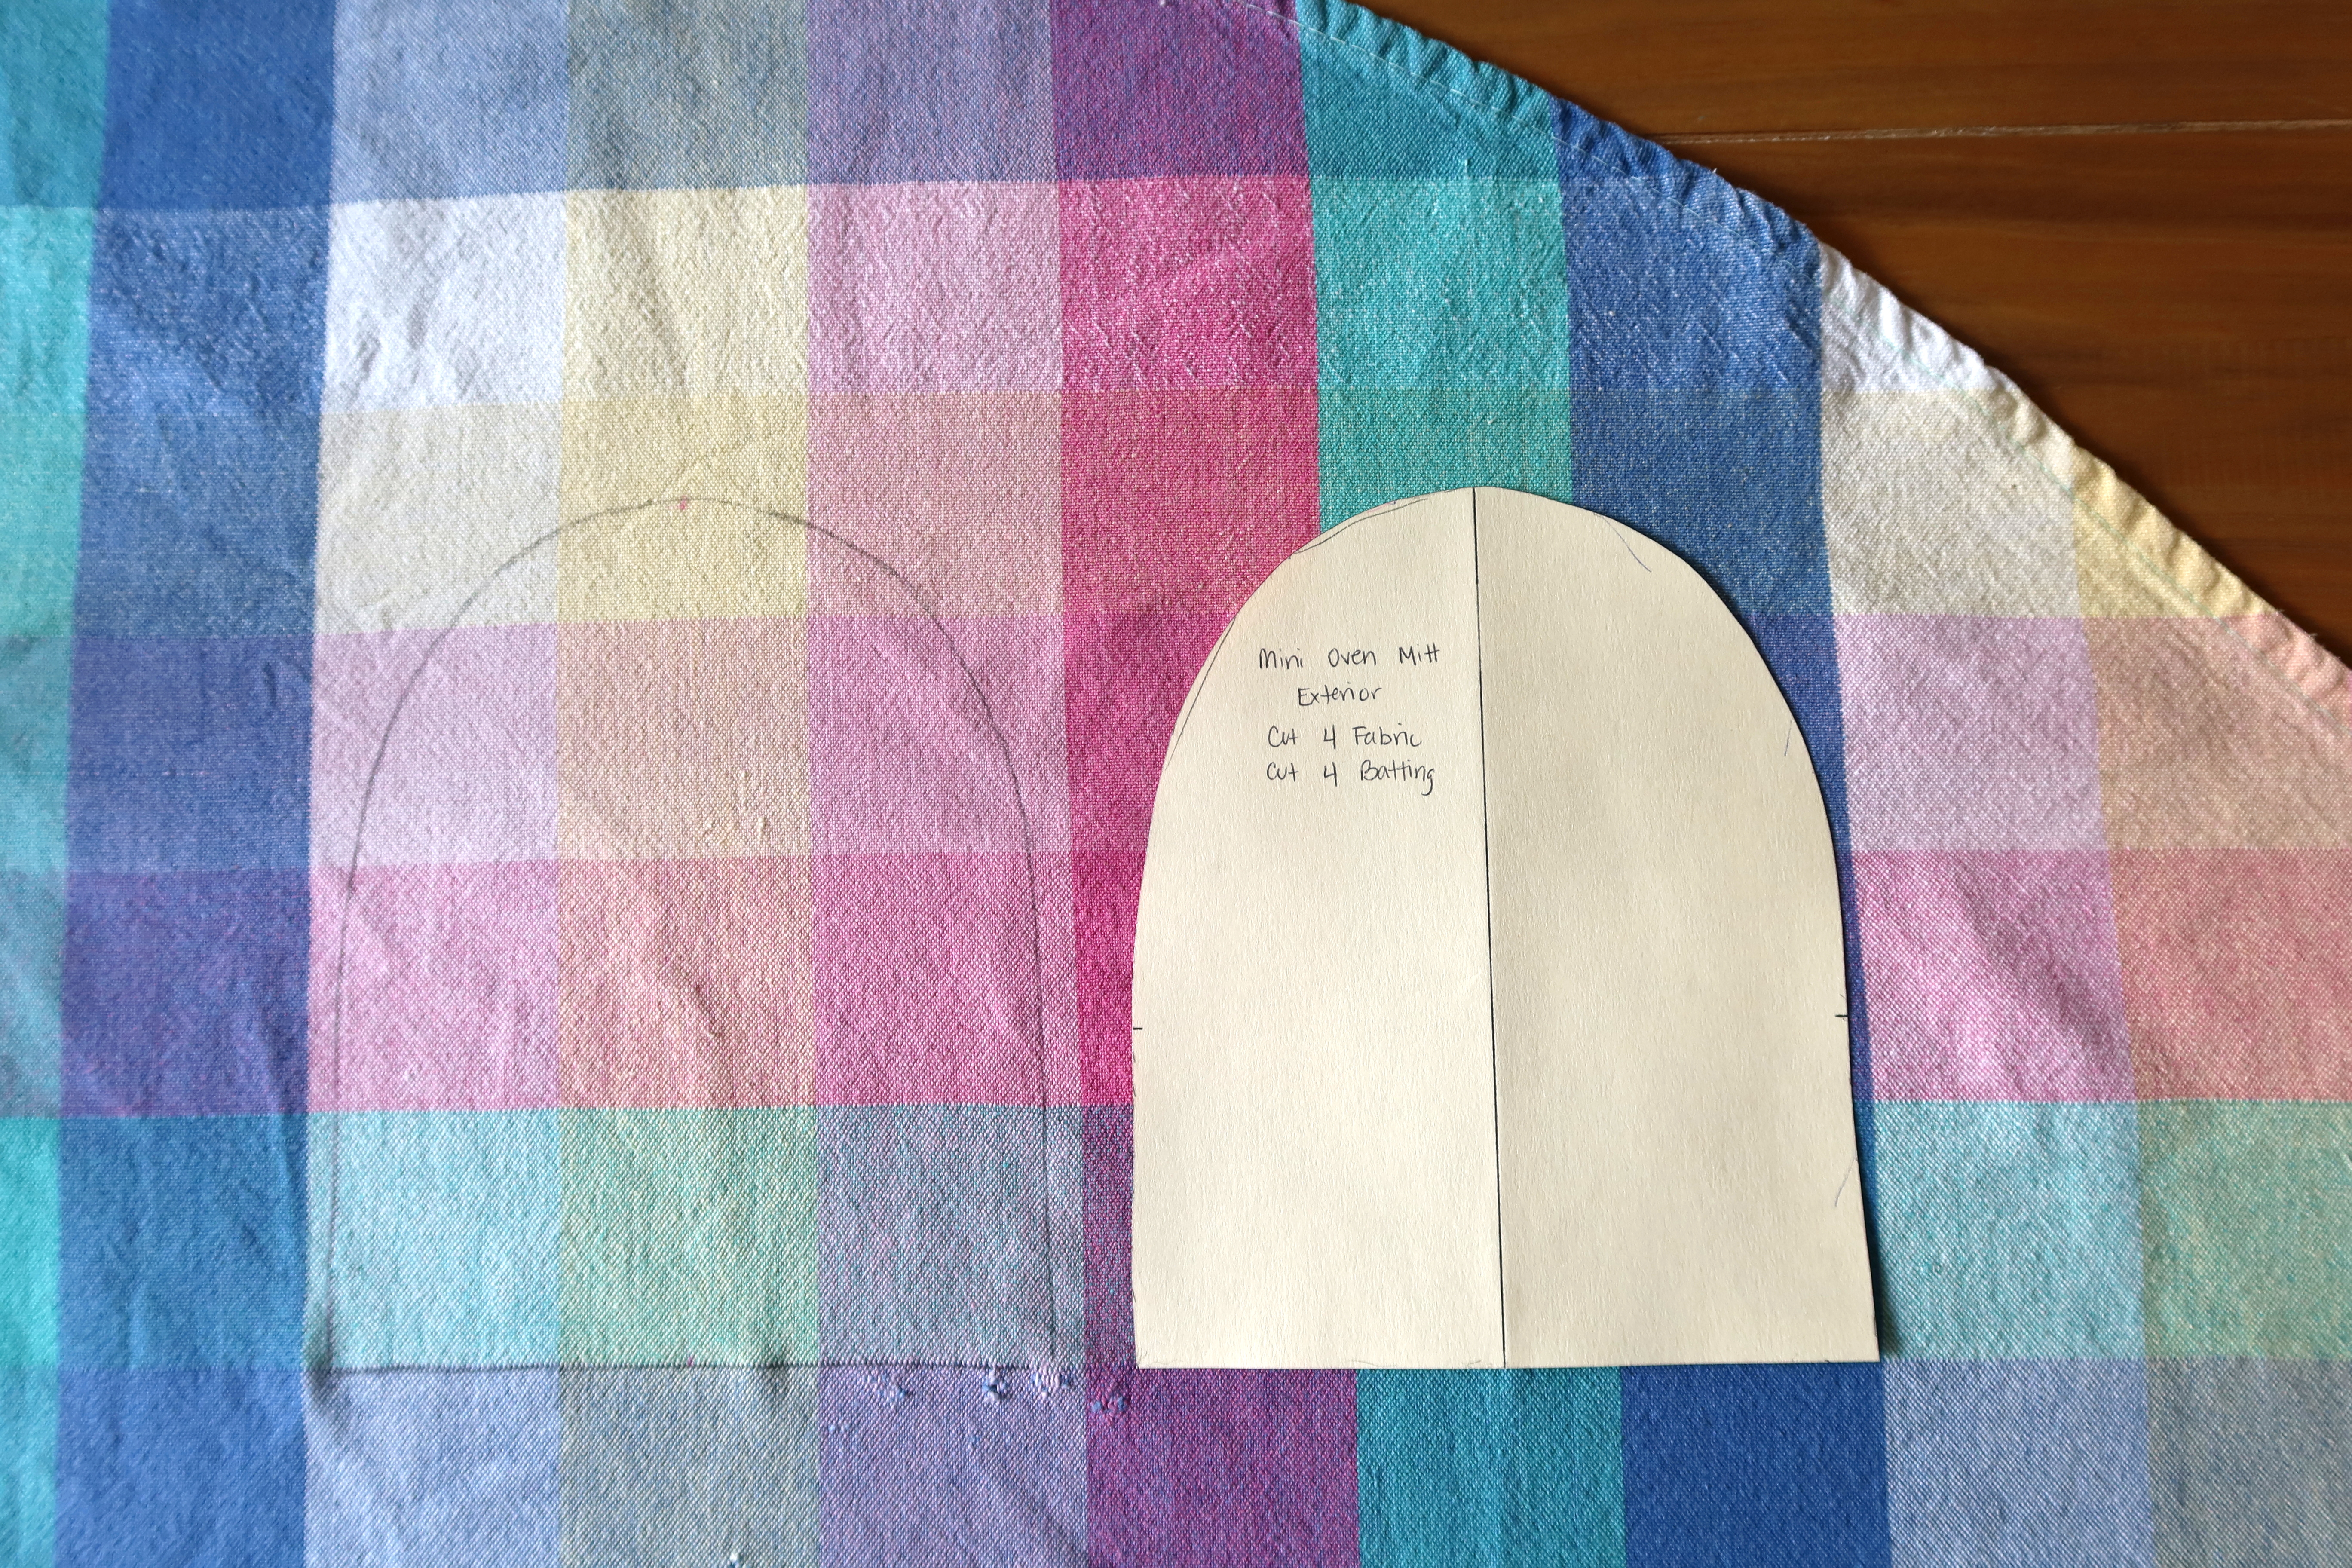
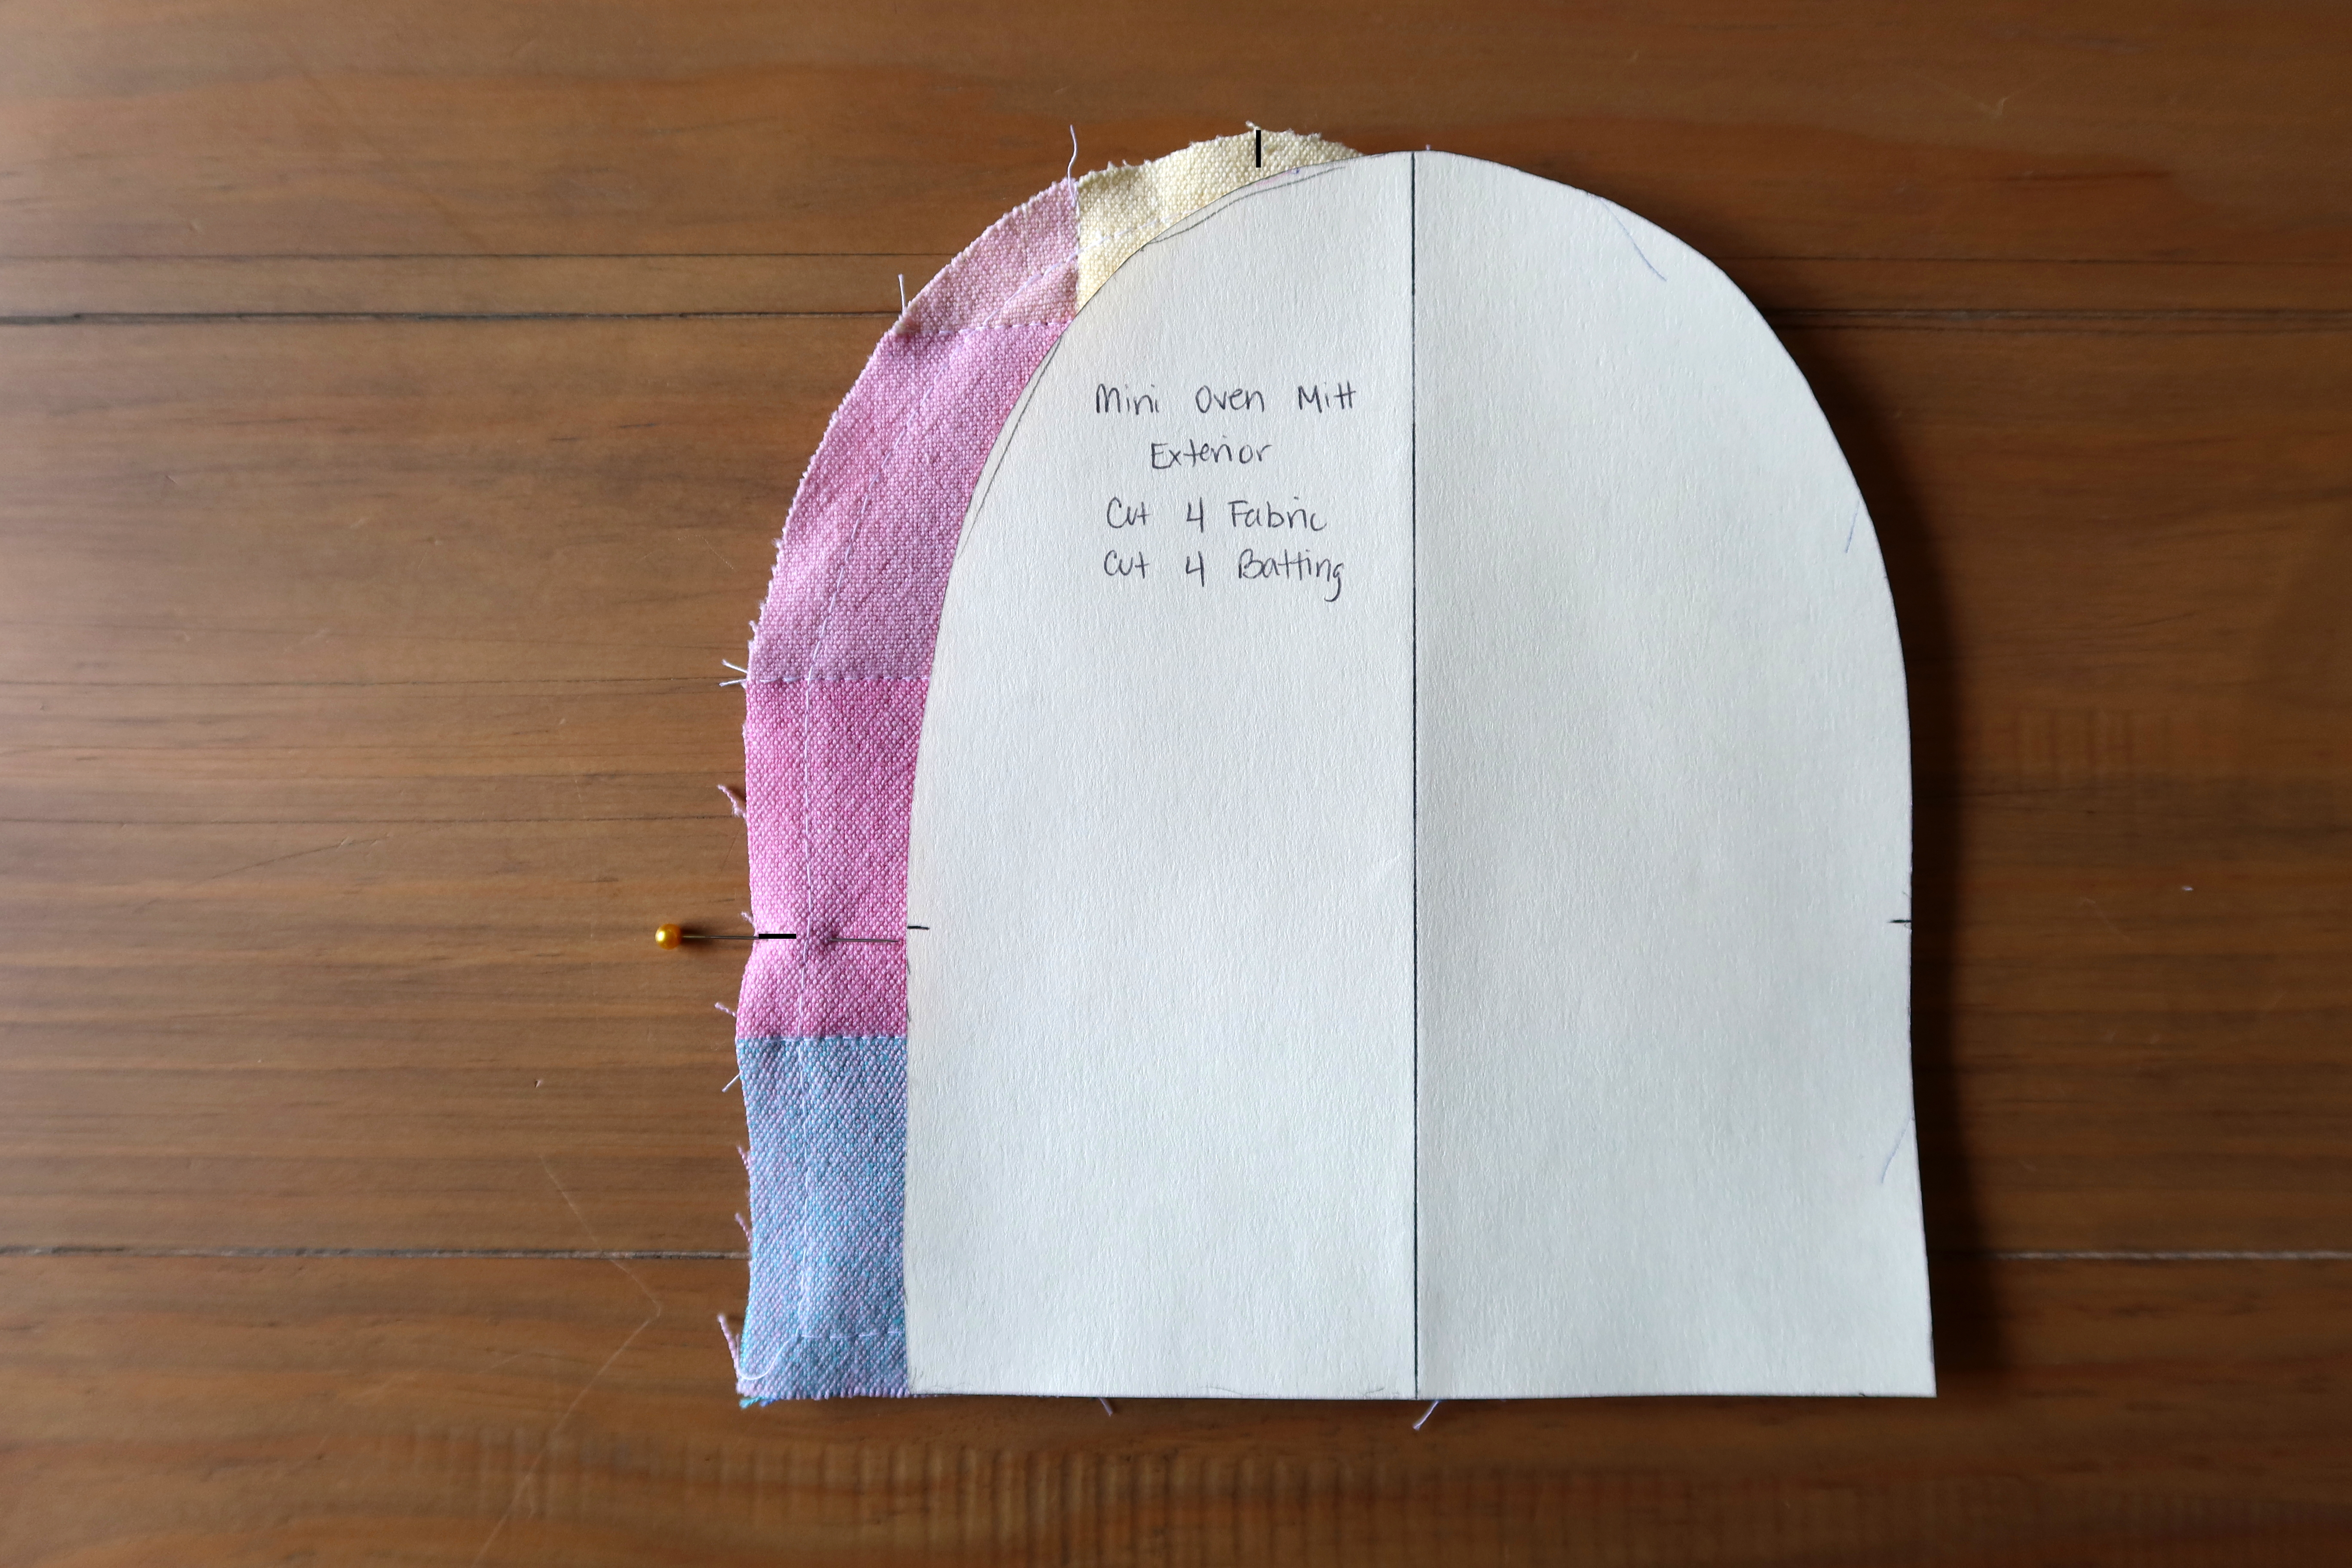
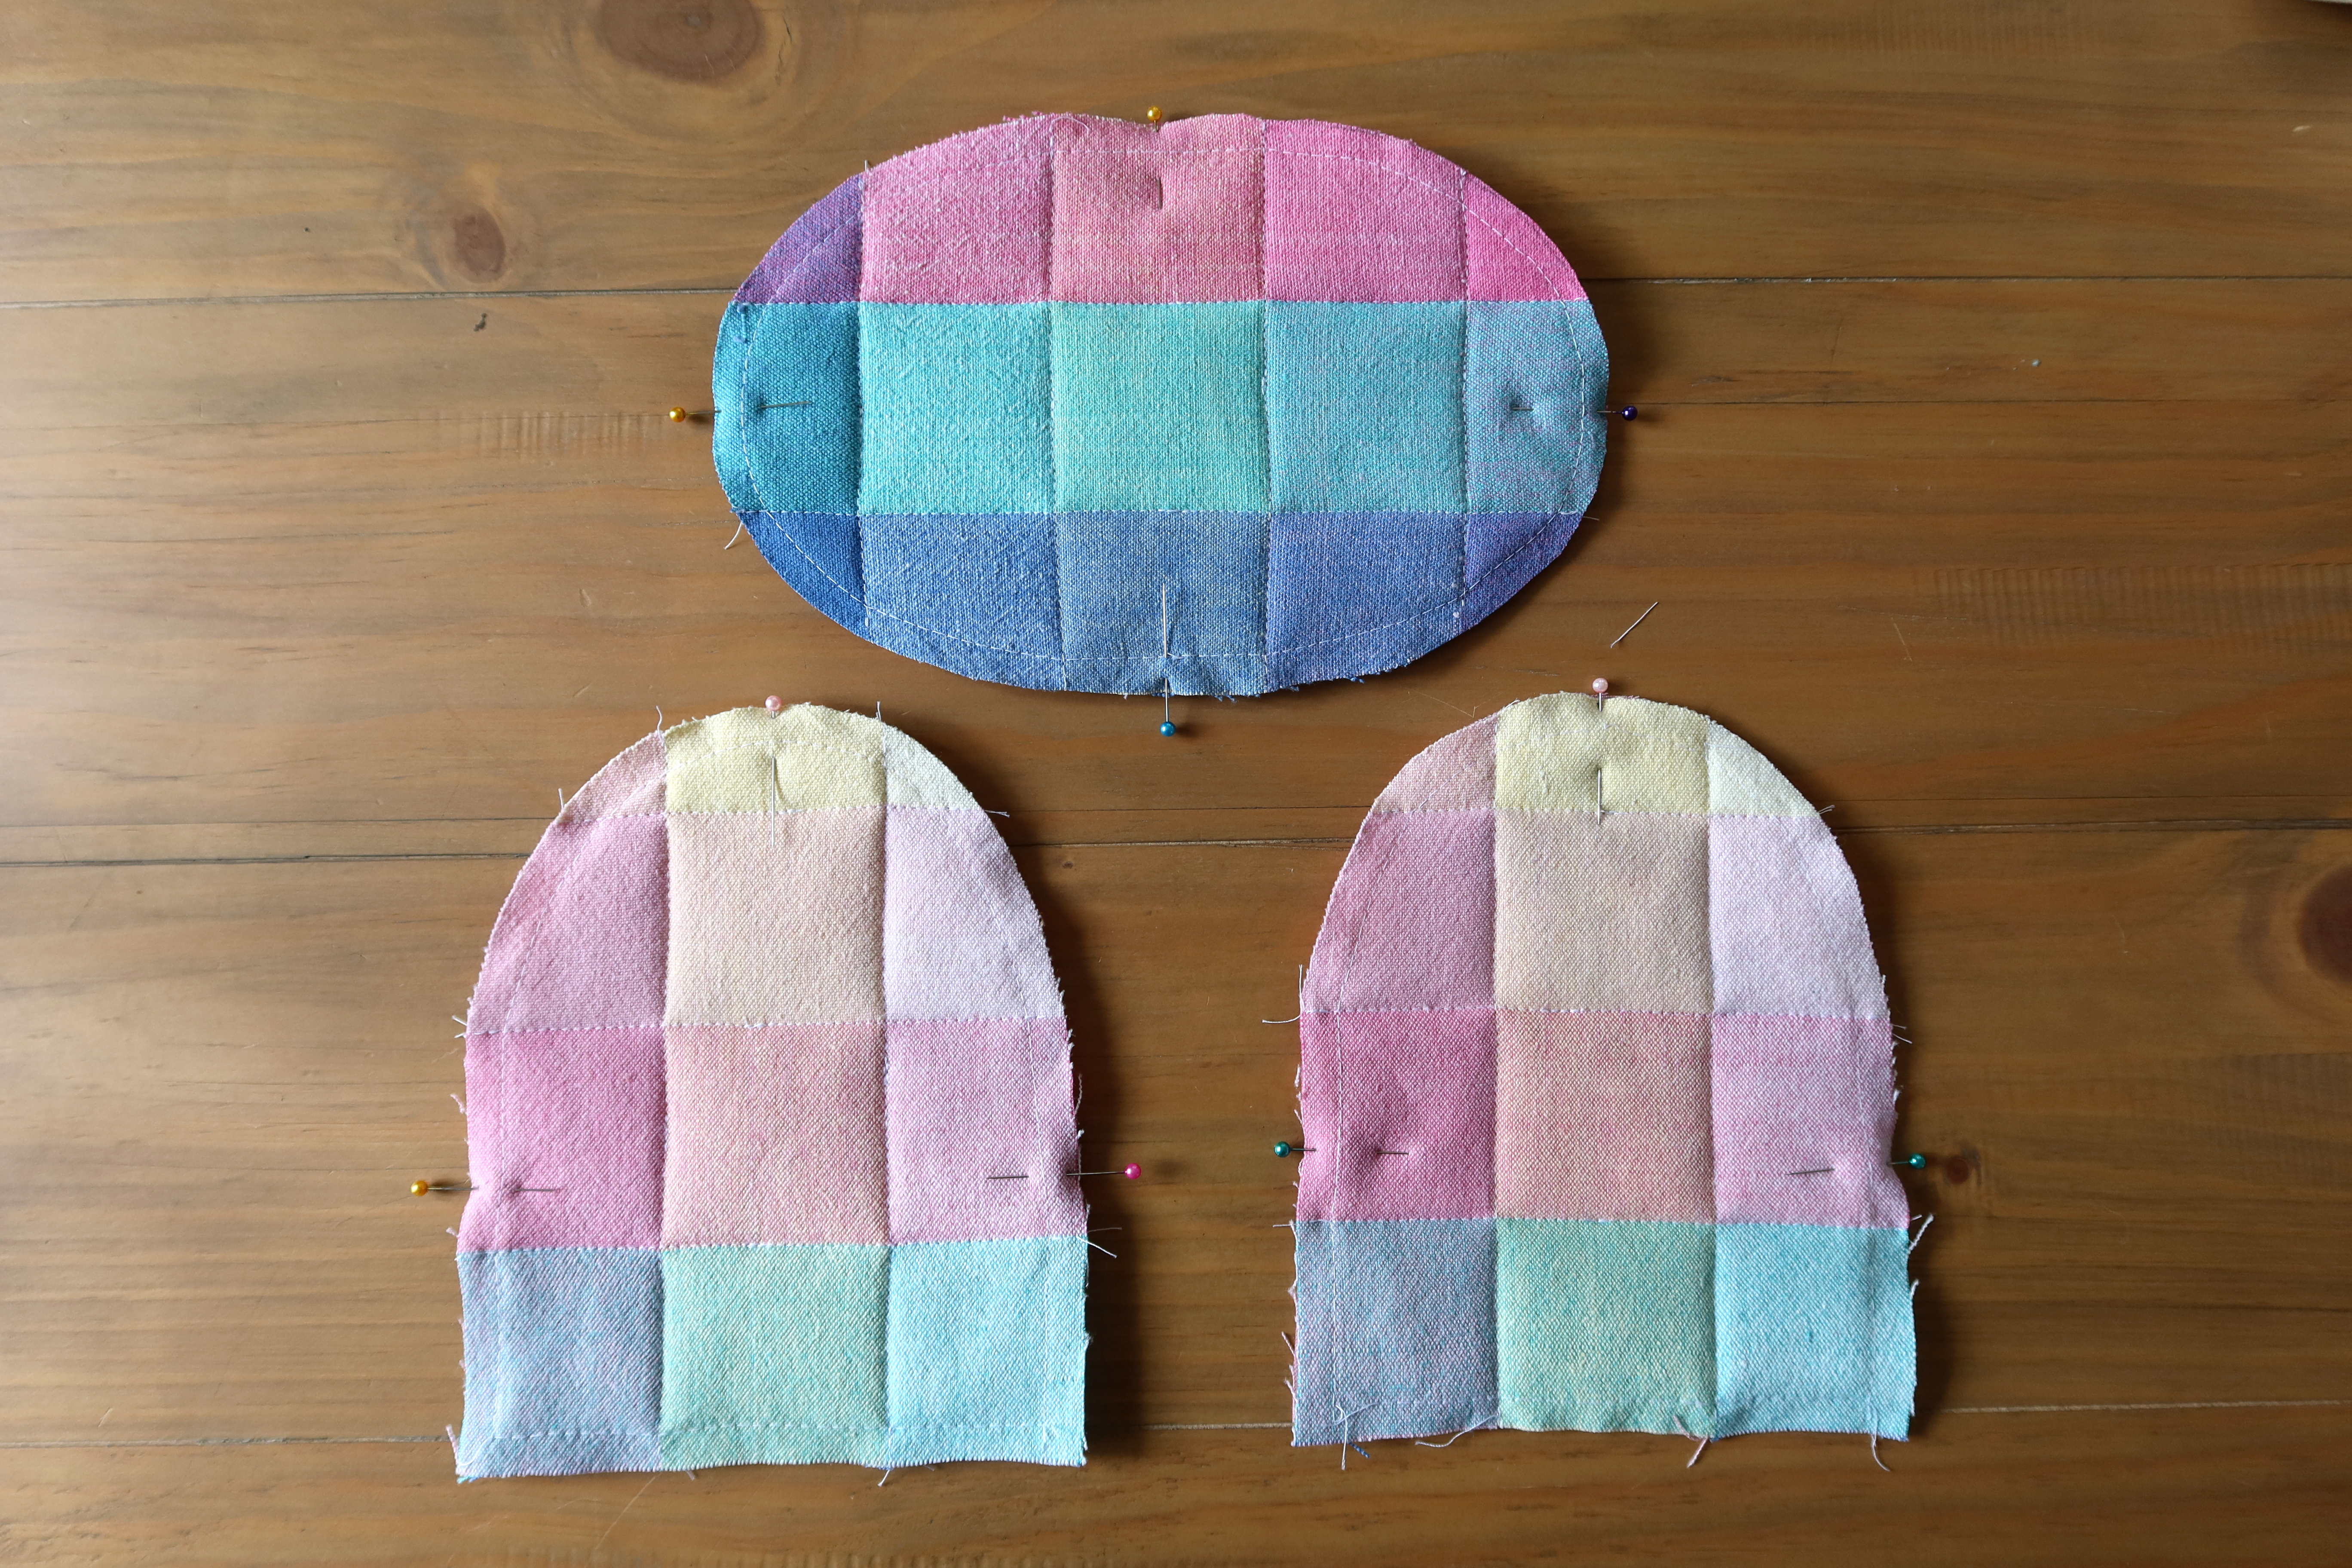
Print out the PDF pattern pieces. Print at 100% and measure the included 1” square to check pattern sizing. Cut out fabric pieces. If using patterned or striped fabric, cut two identical exterior pieces for matching sides. (TIP: I like to print or transfer my pattern pieces on cardstock to make it easier to trace out on fabric!)
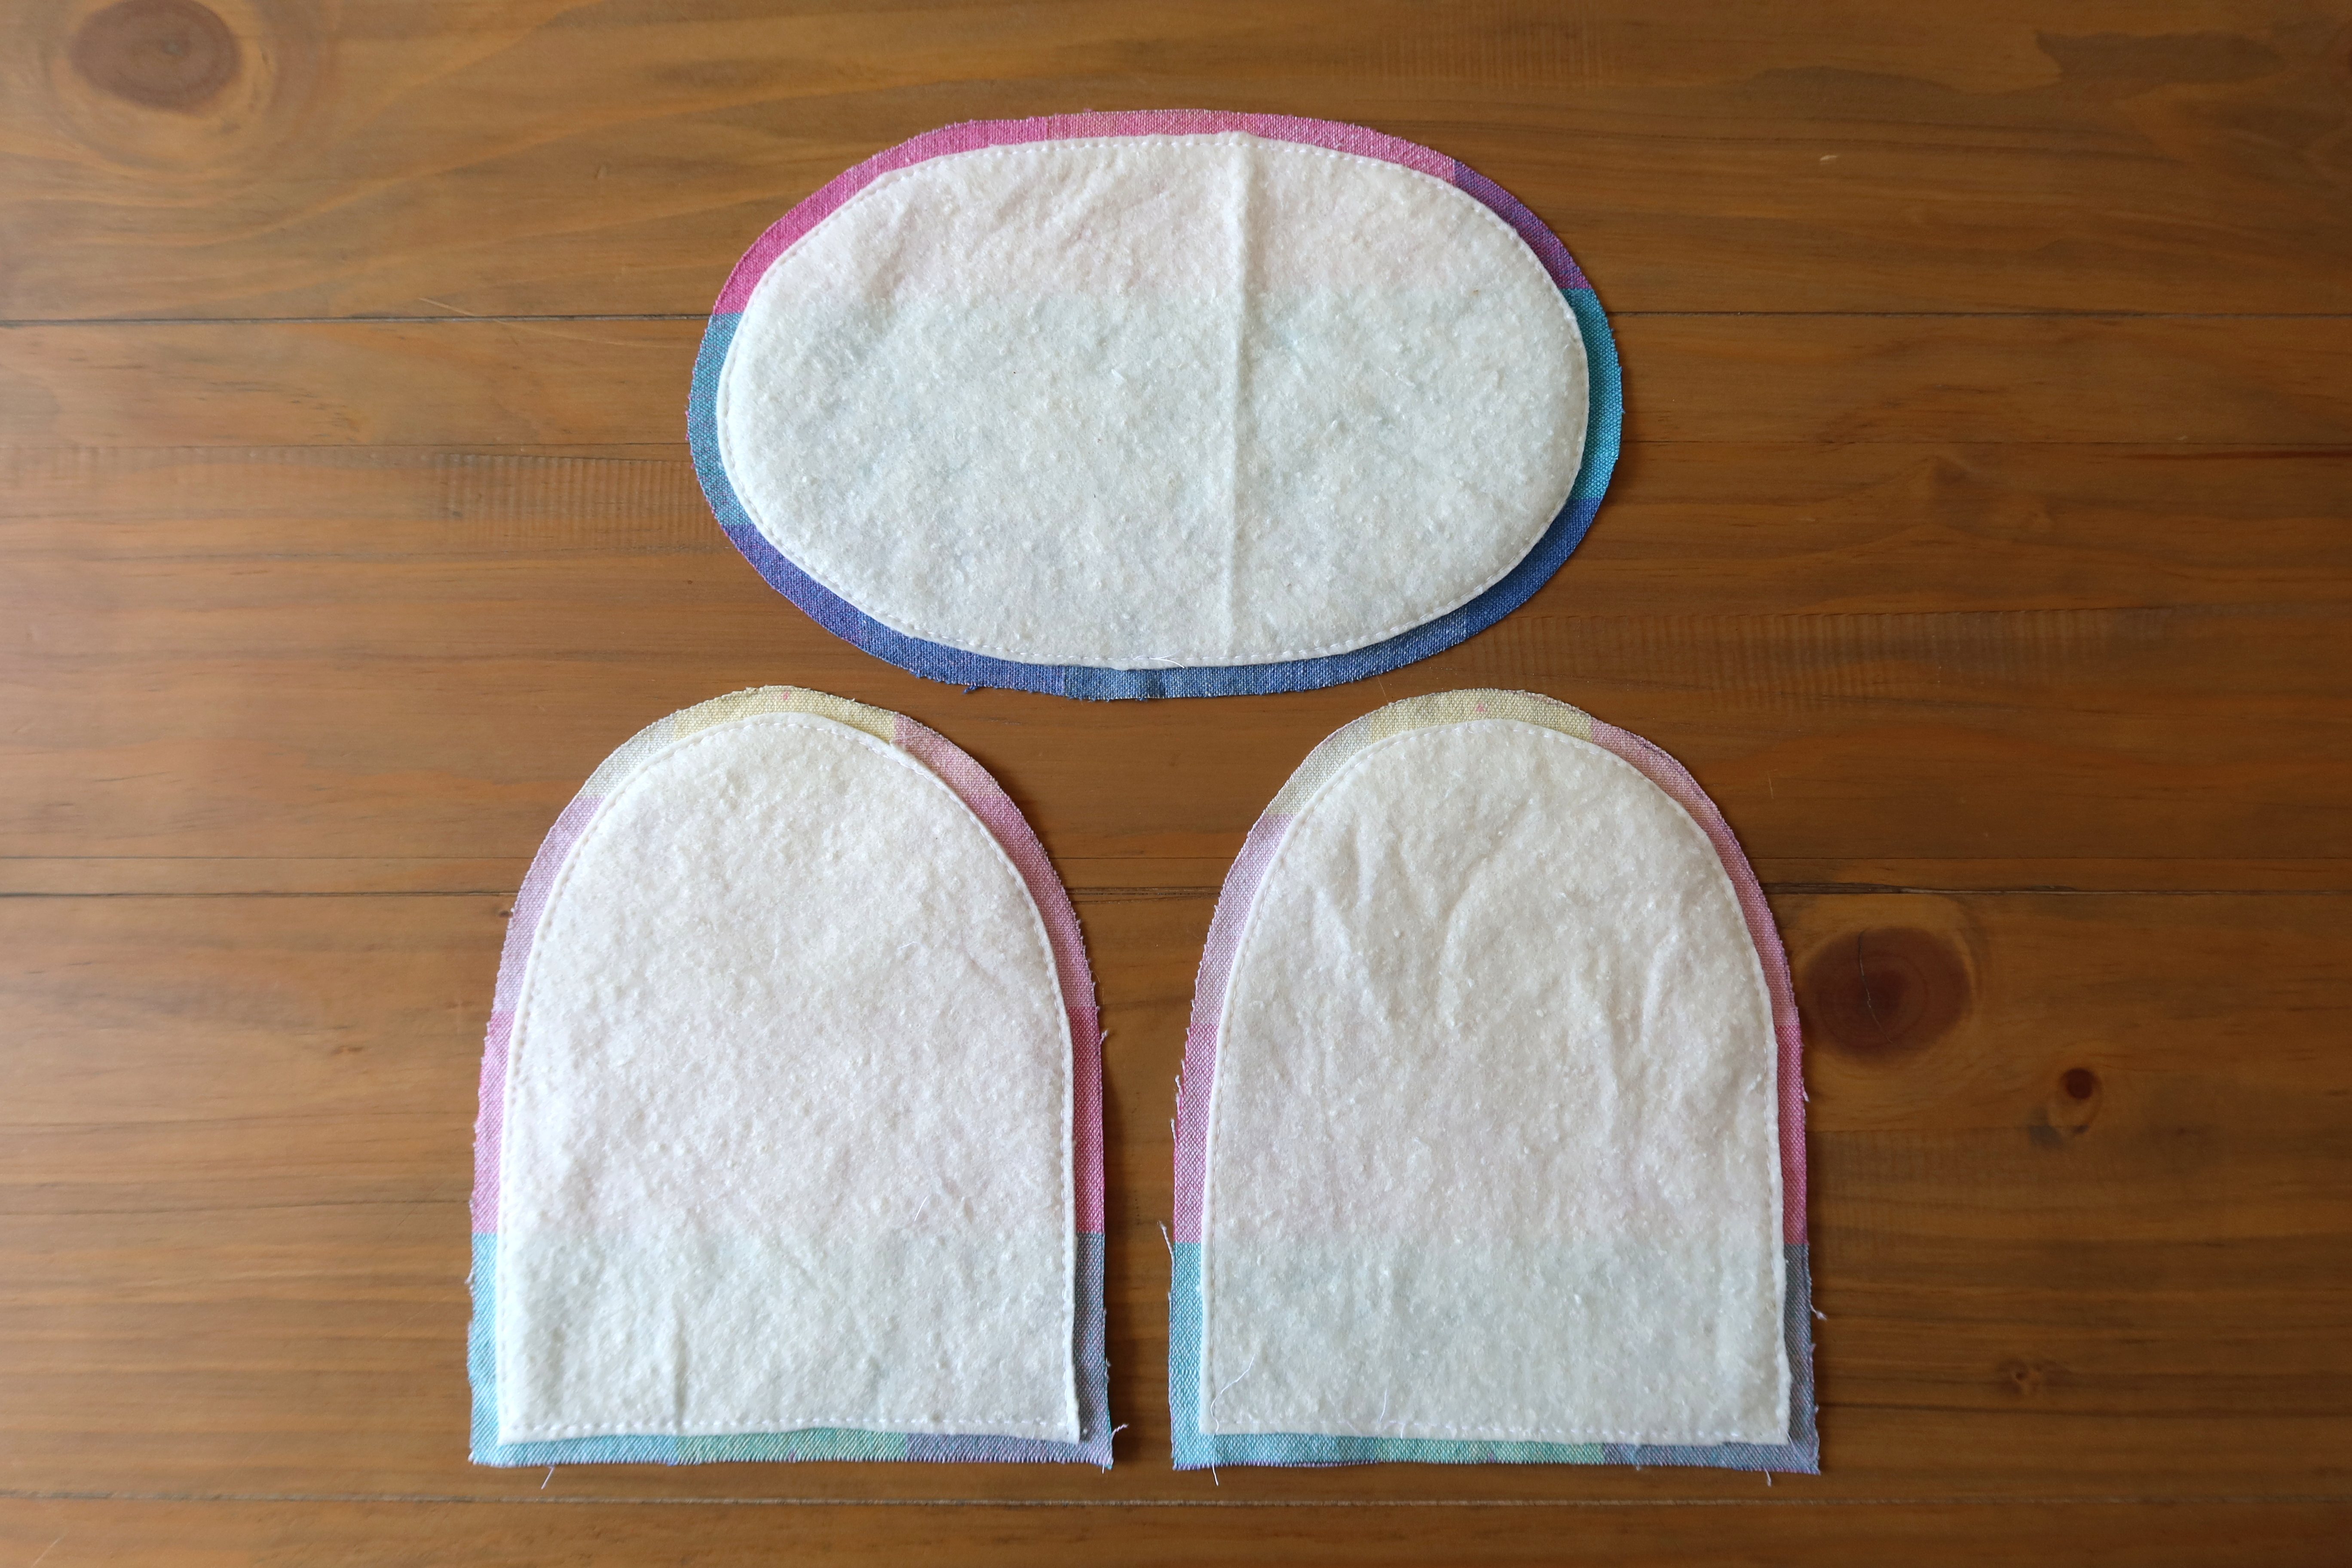
Cut batting with fabric pieces on top (I find this fits the pieces better than cutting from the pattern piece)
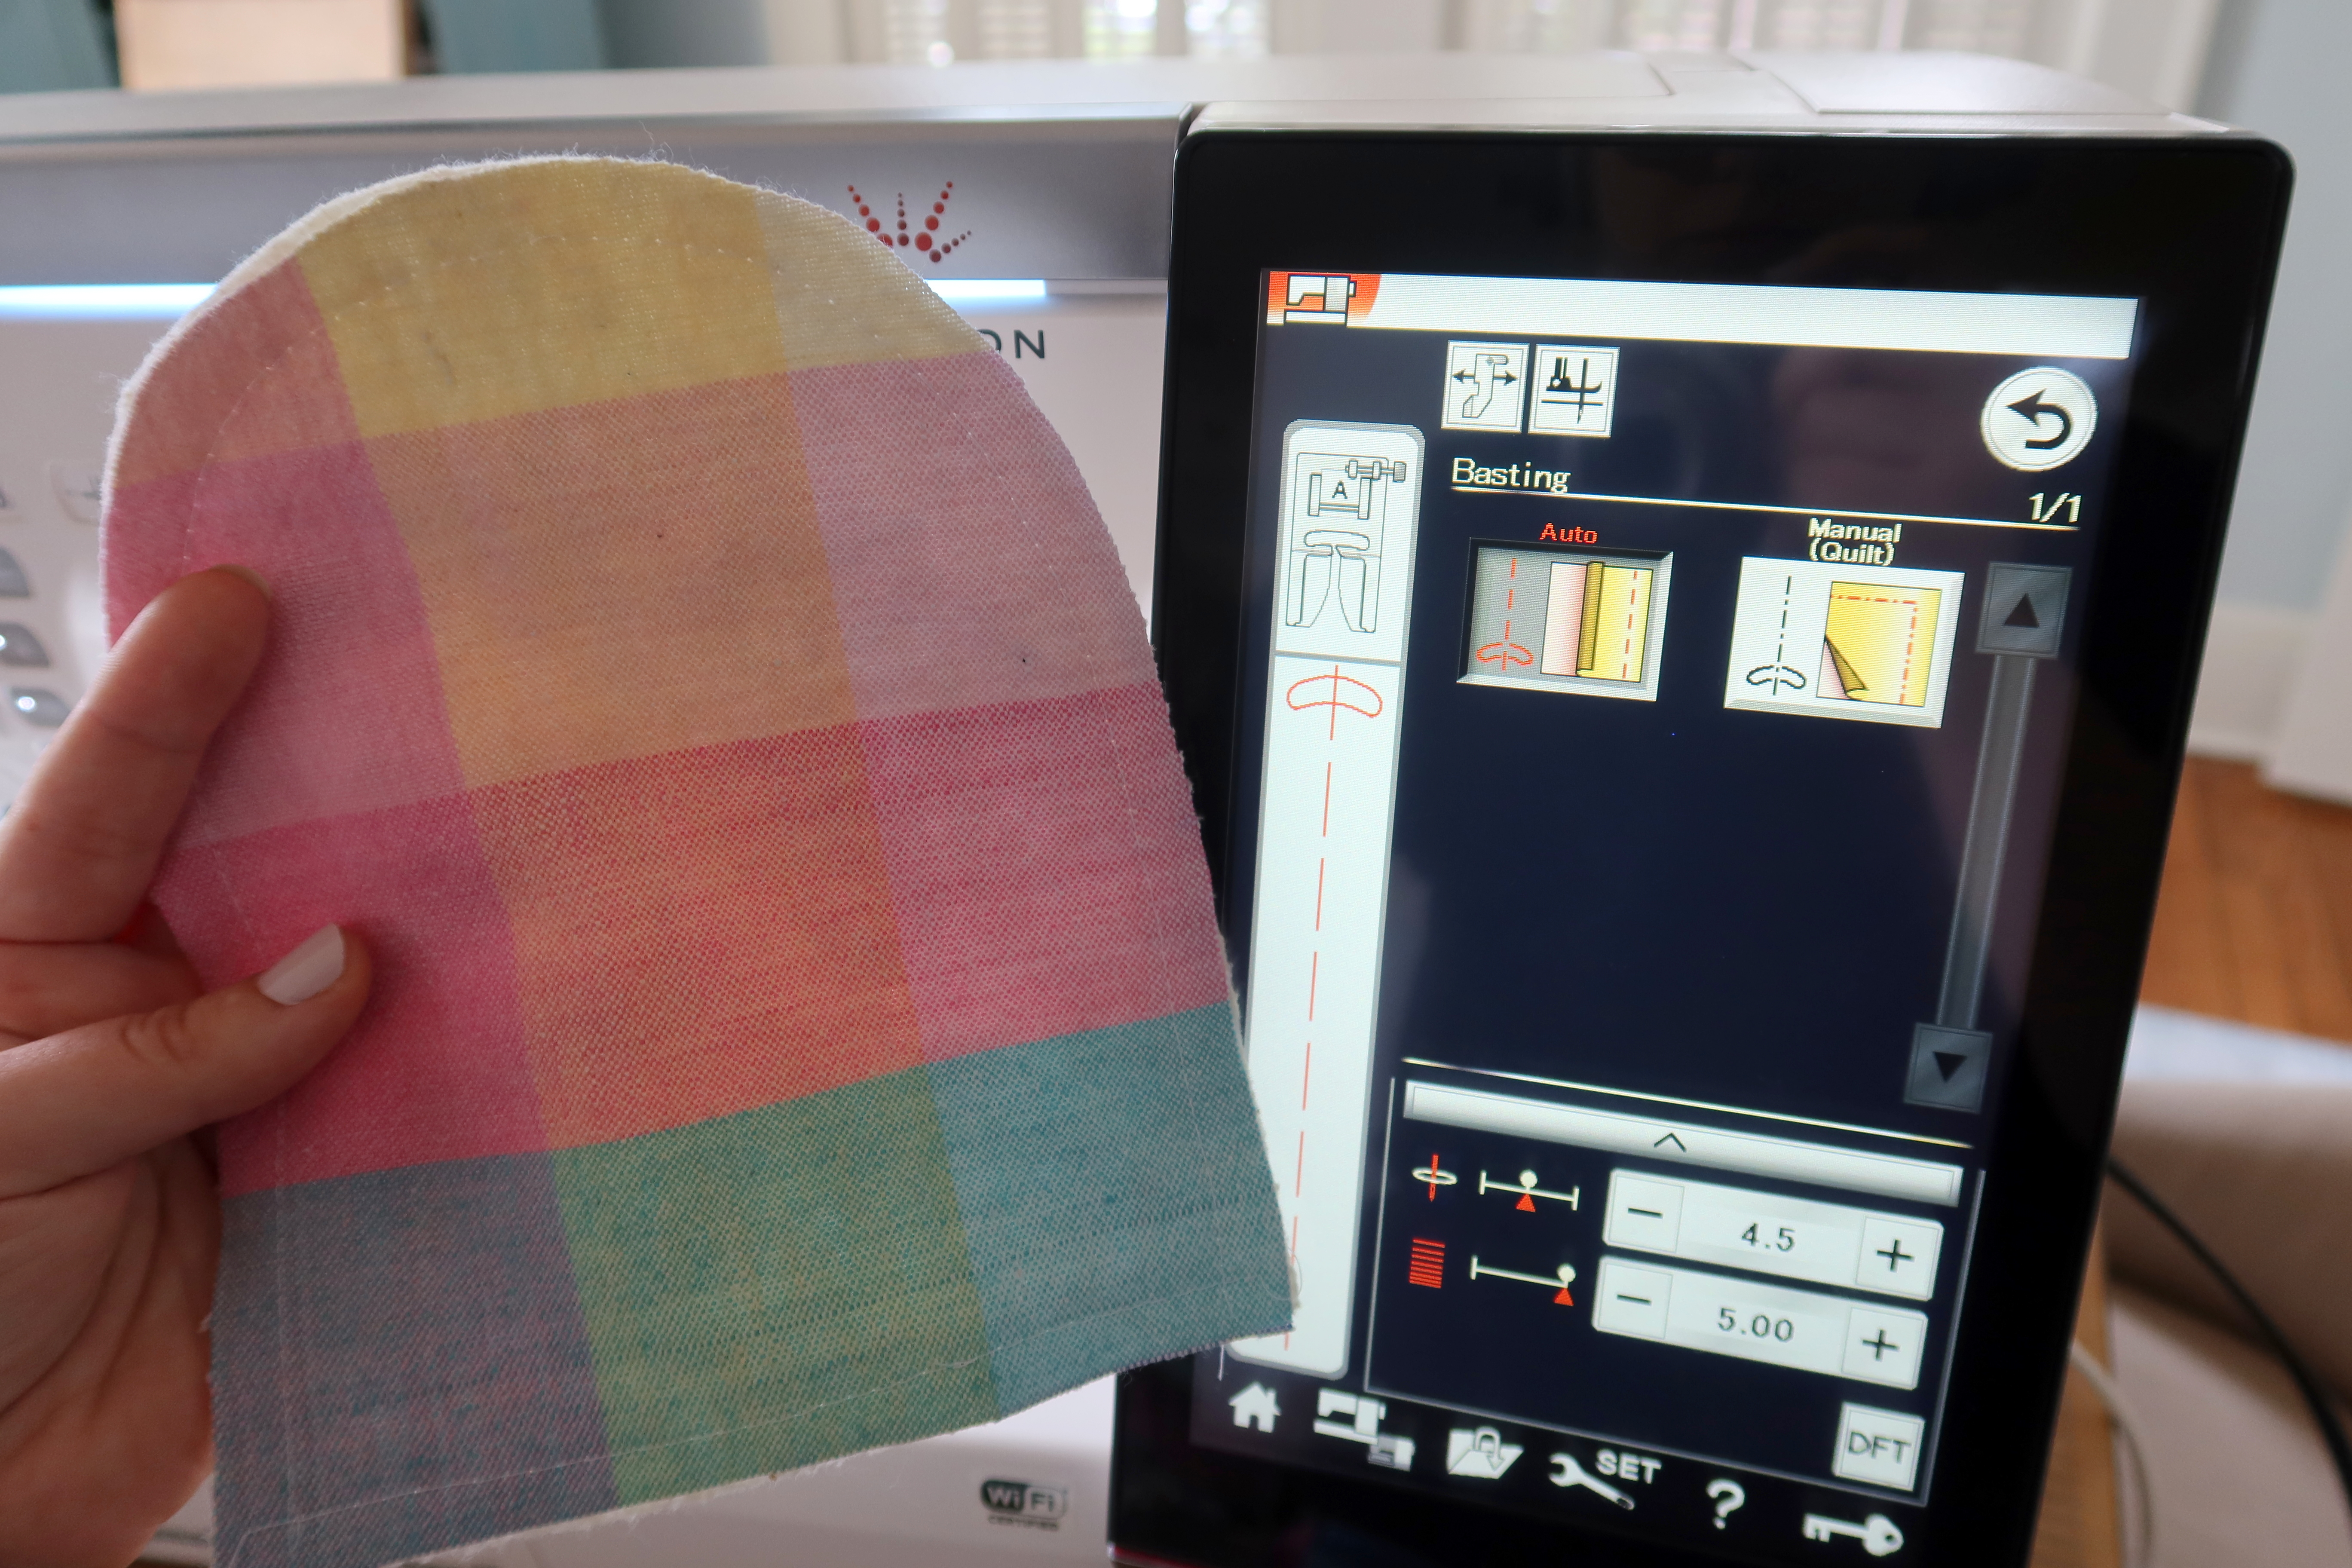
Baste each piece to batting at 3/8”.
Trim only batting on each piece, close but not through stitching. This will give the pot holder a better shape when turning right side out.
Pin exteriors main and lining, wrong sides together. Repeat for center pieces.
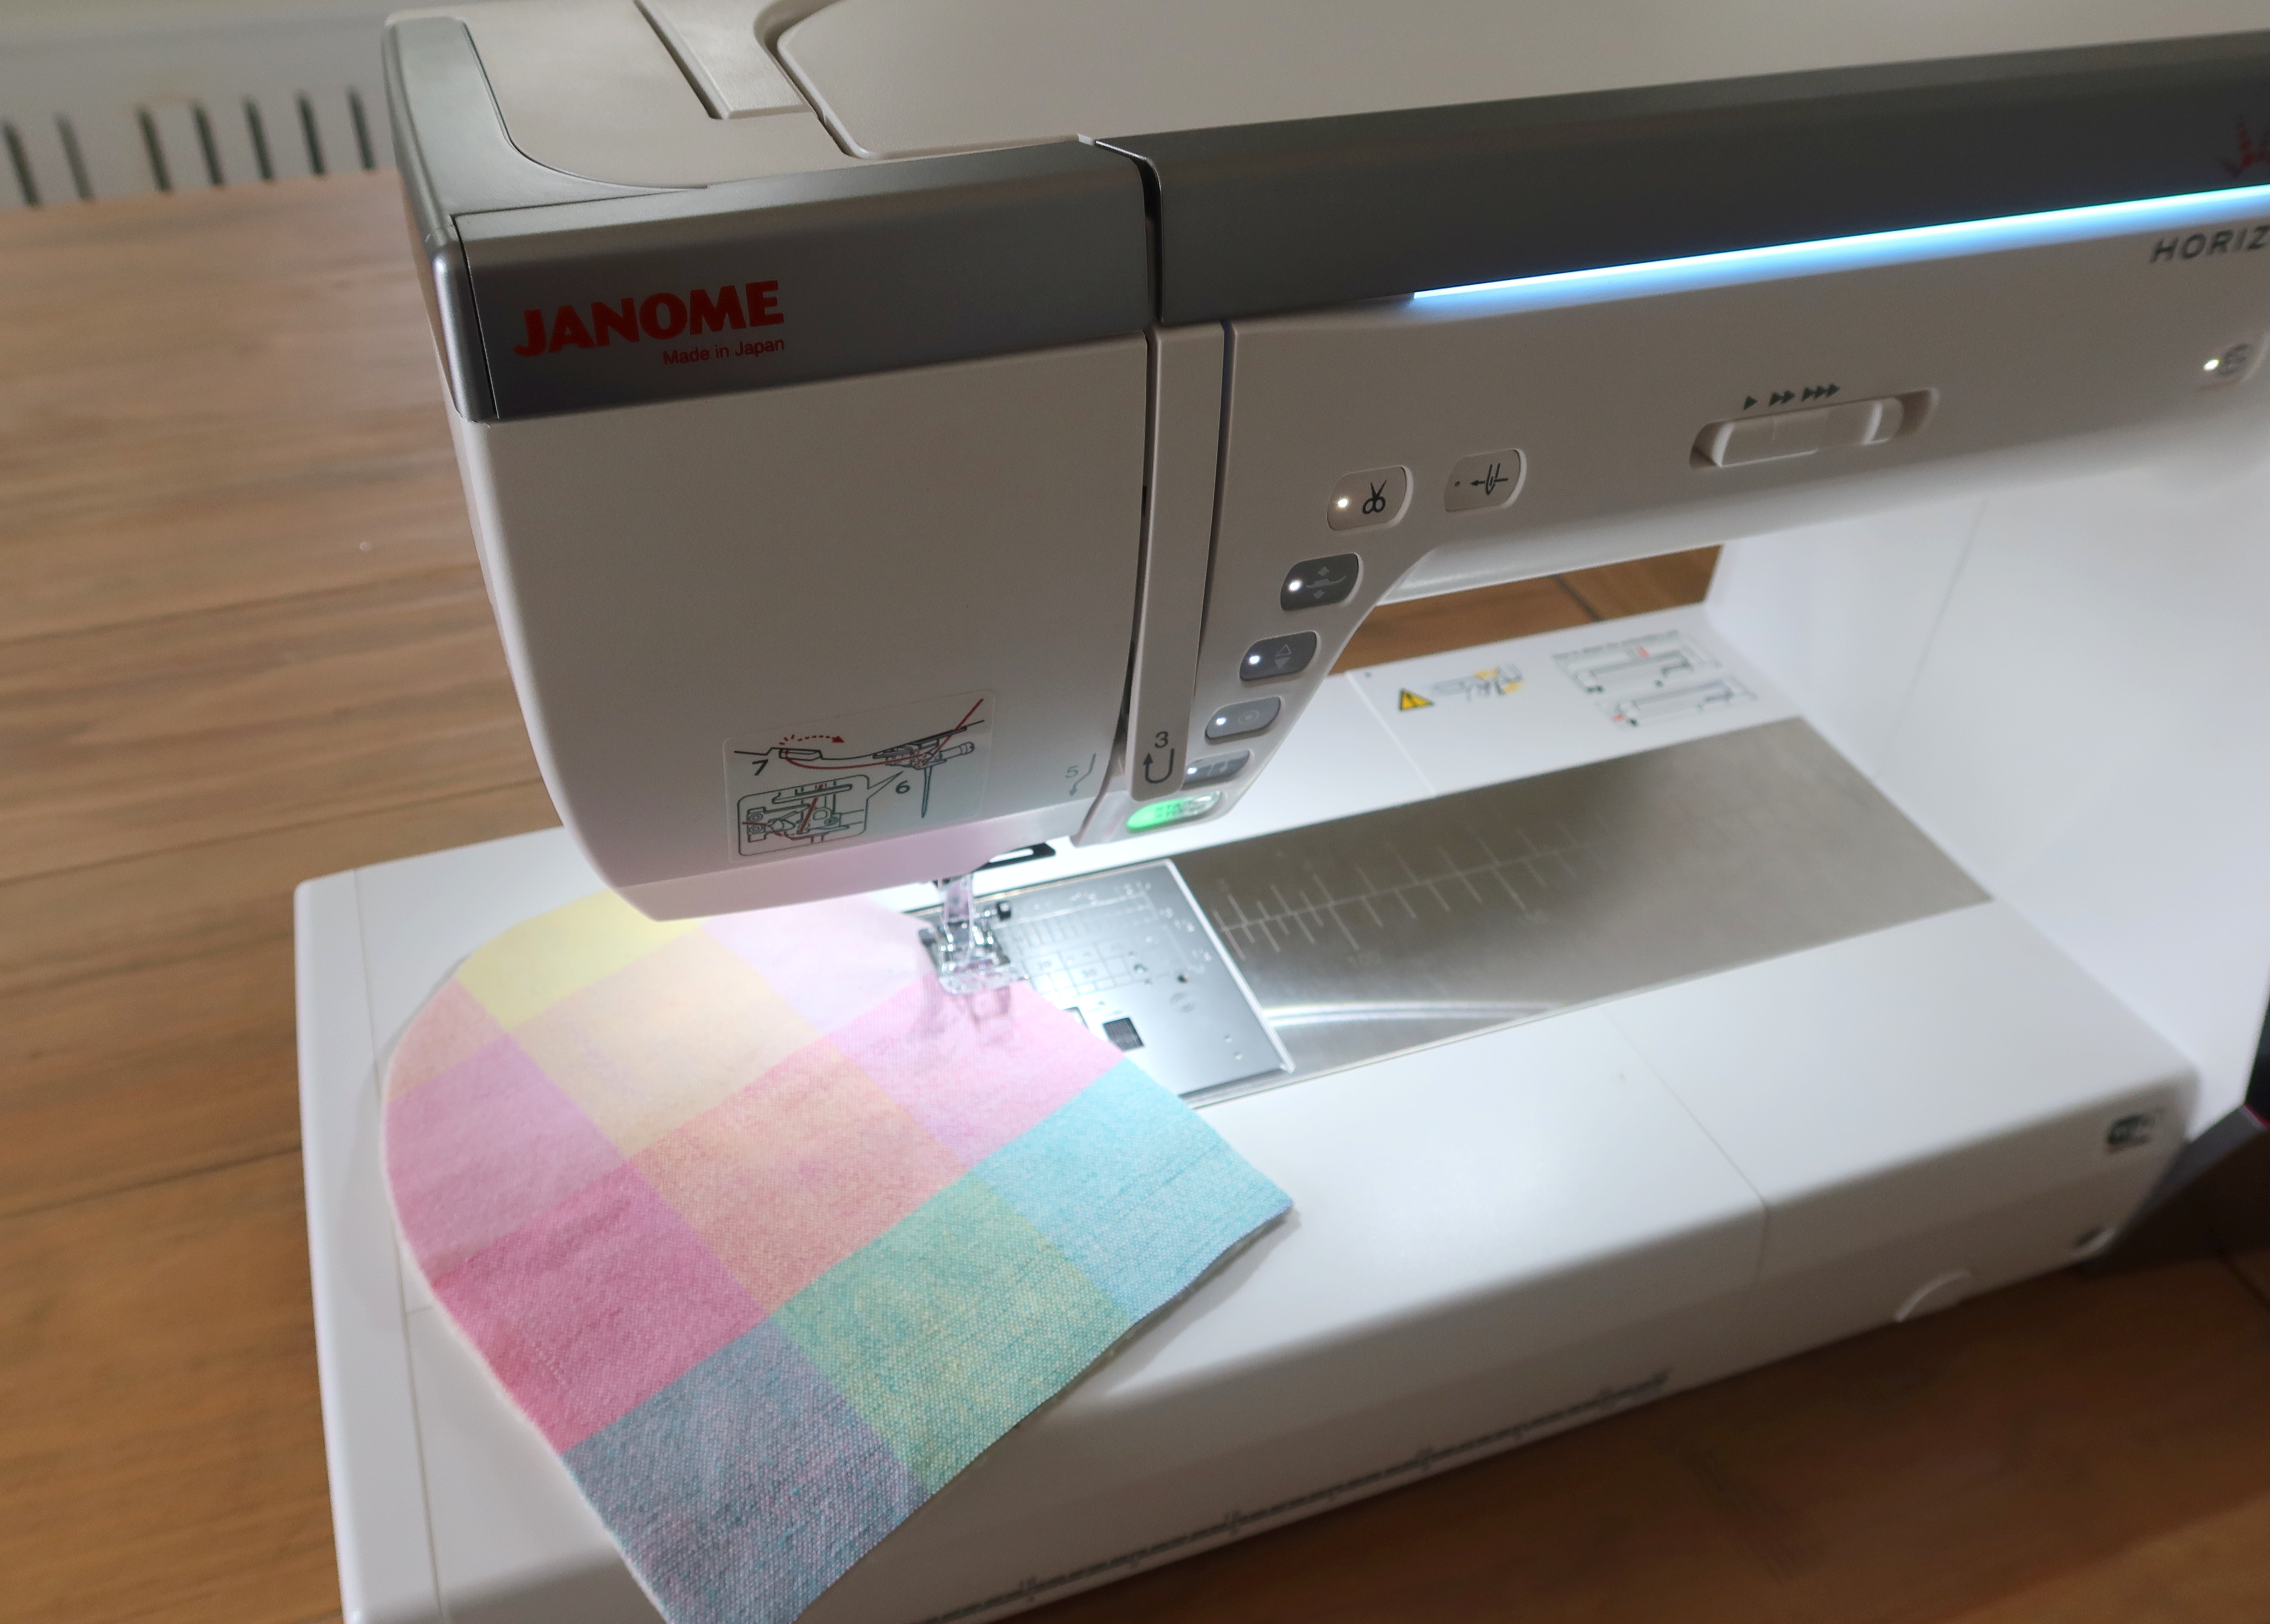
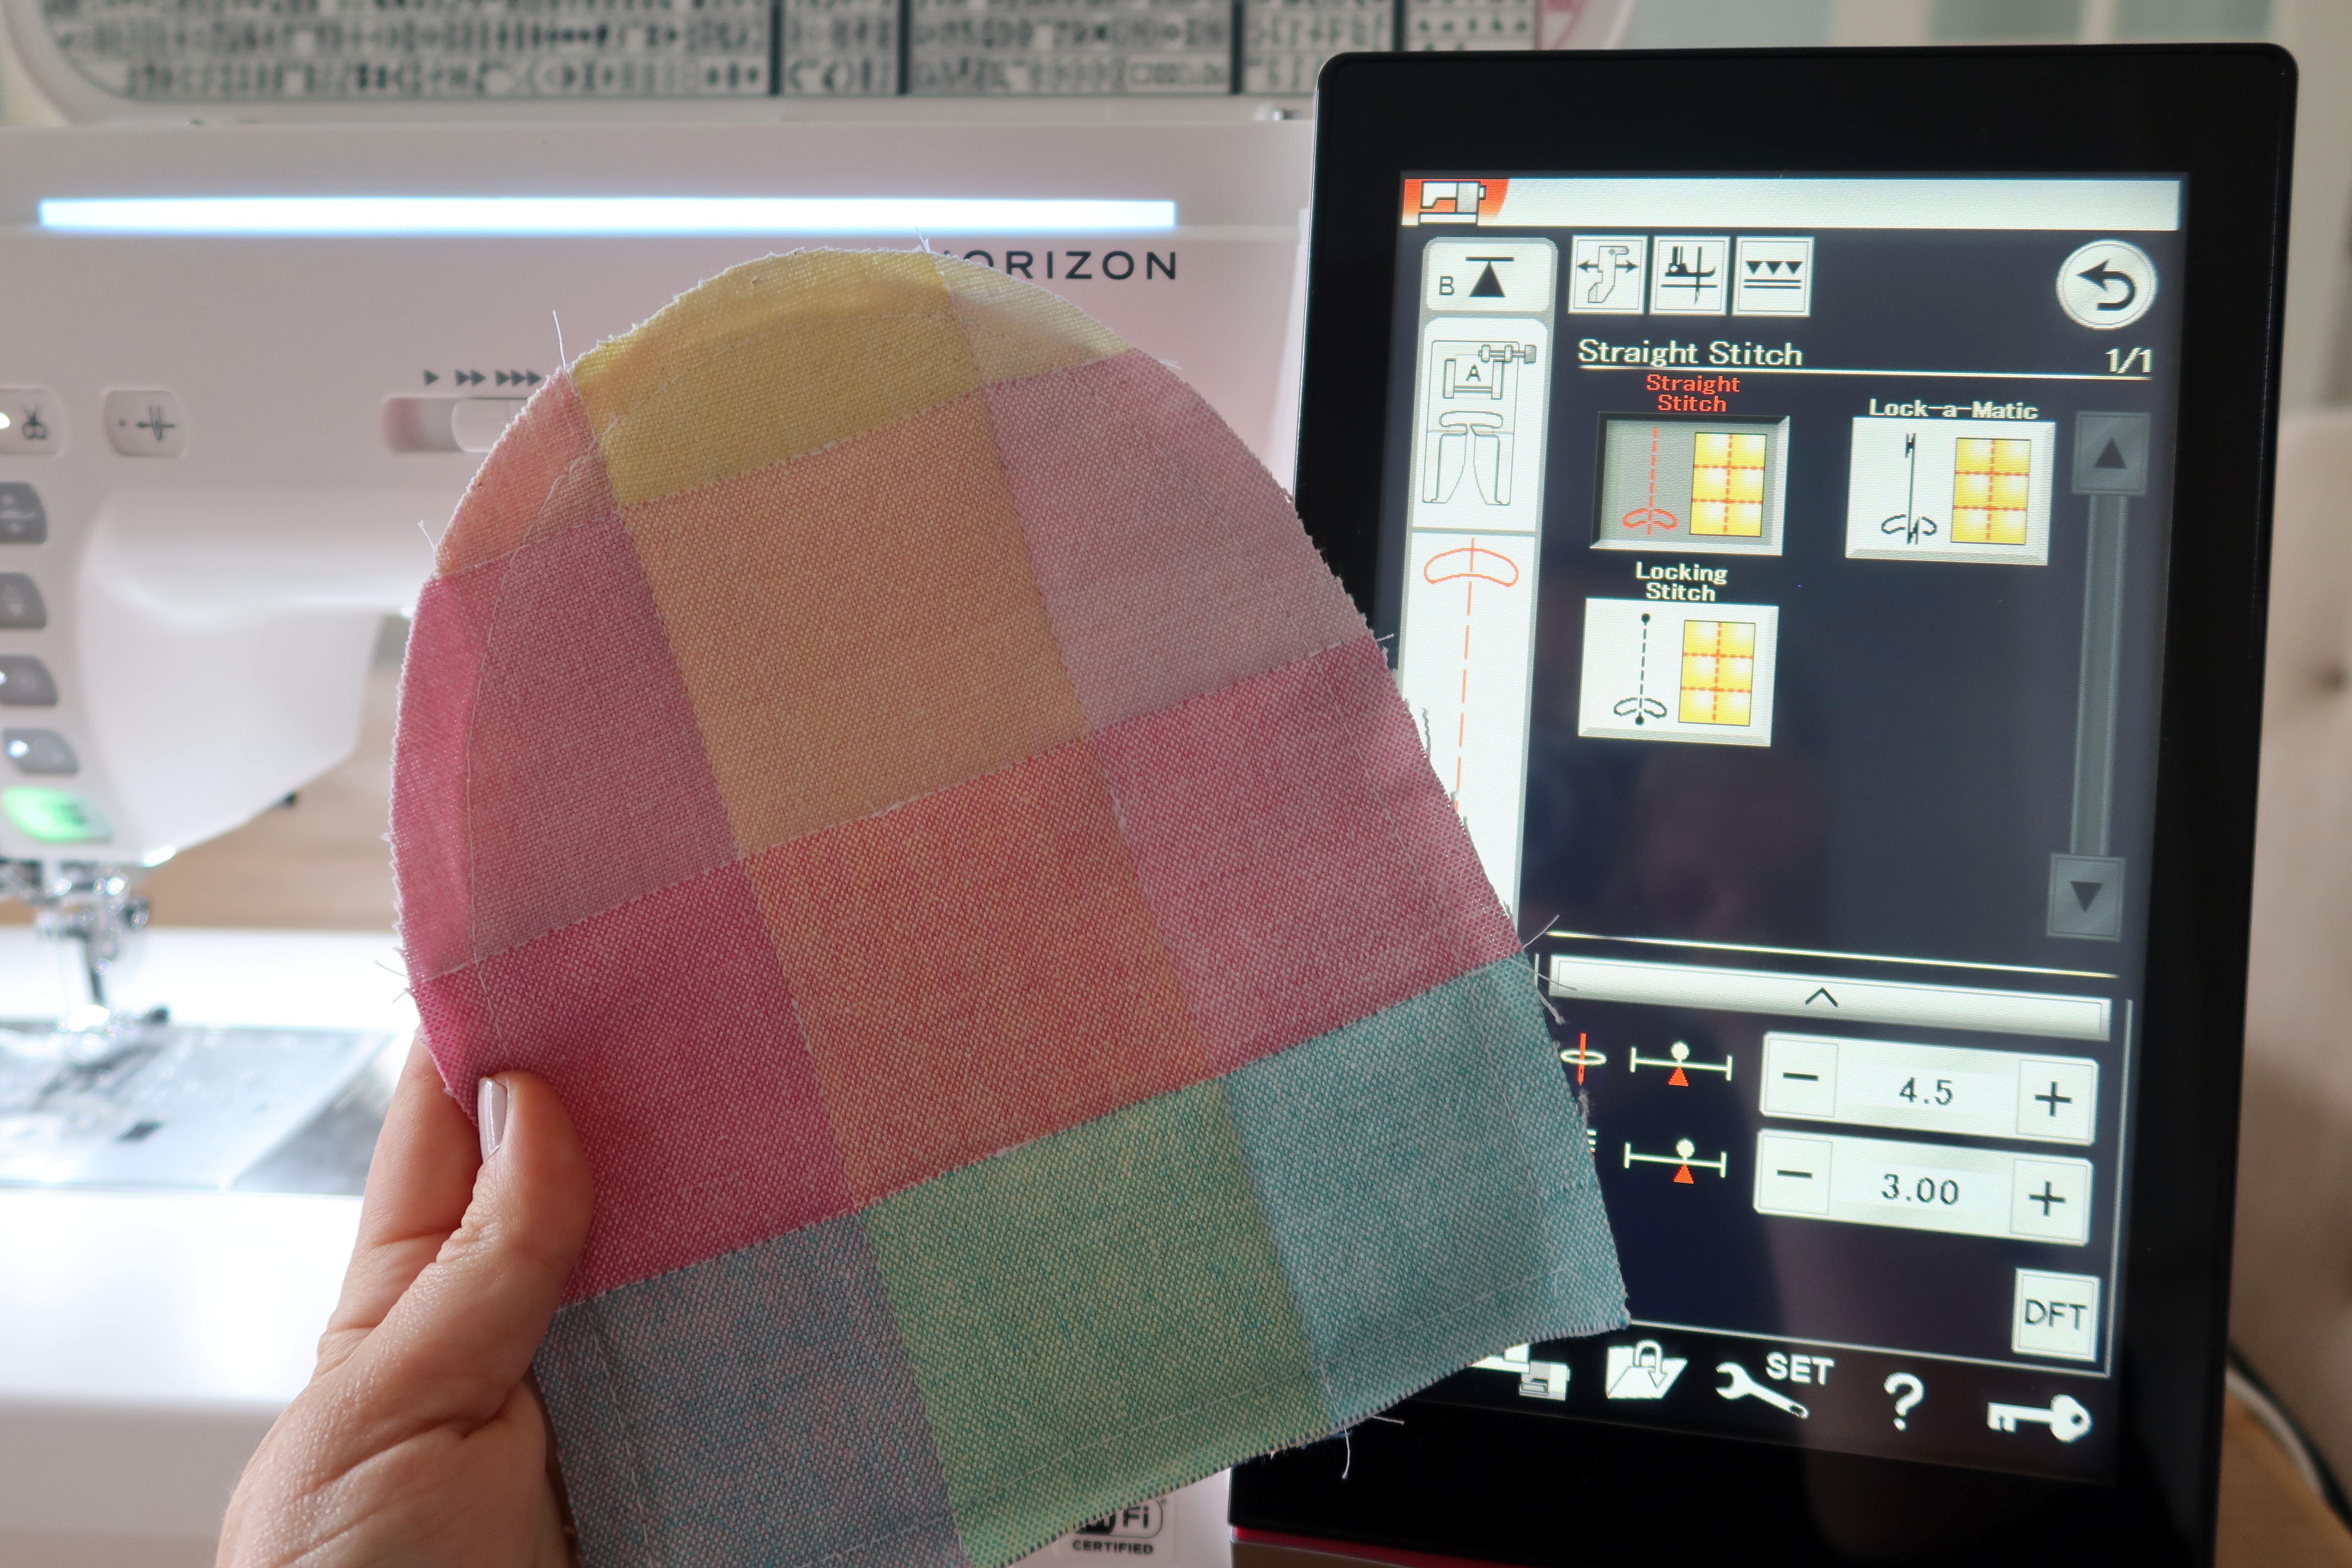
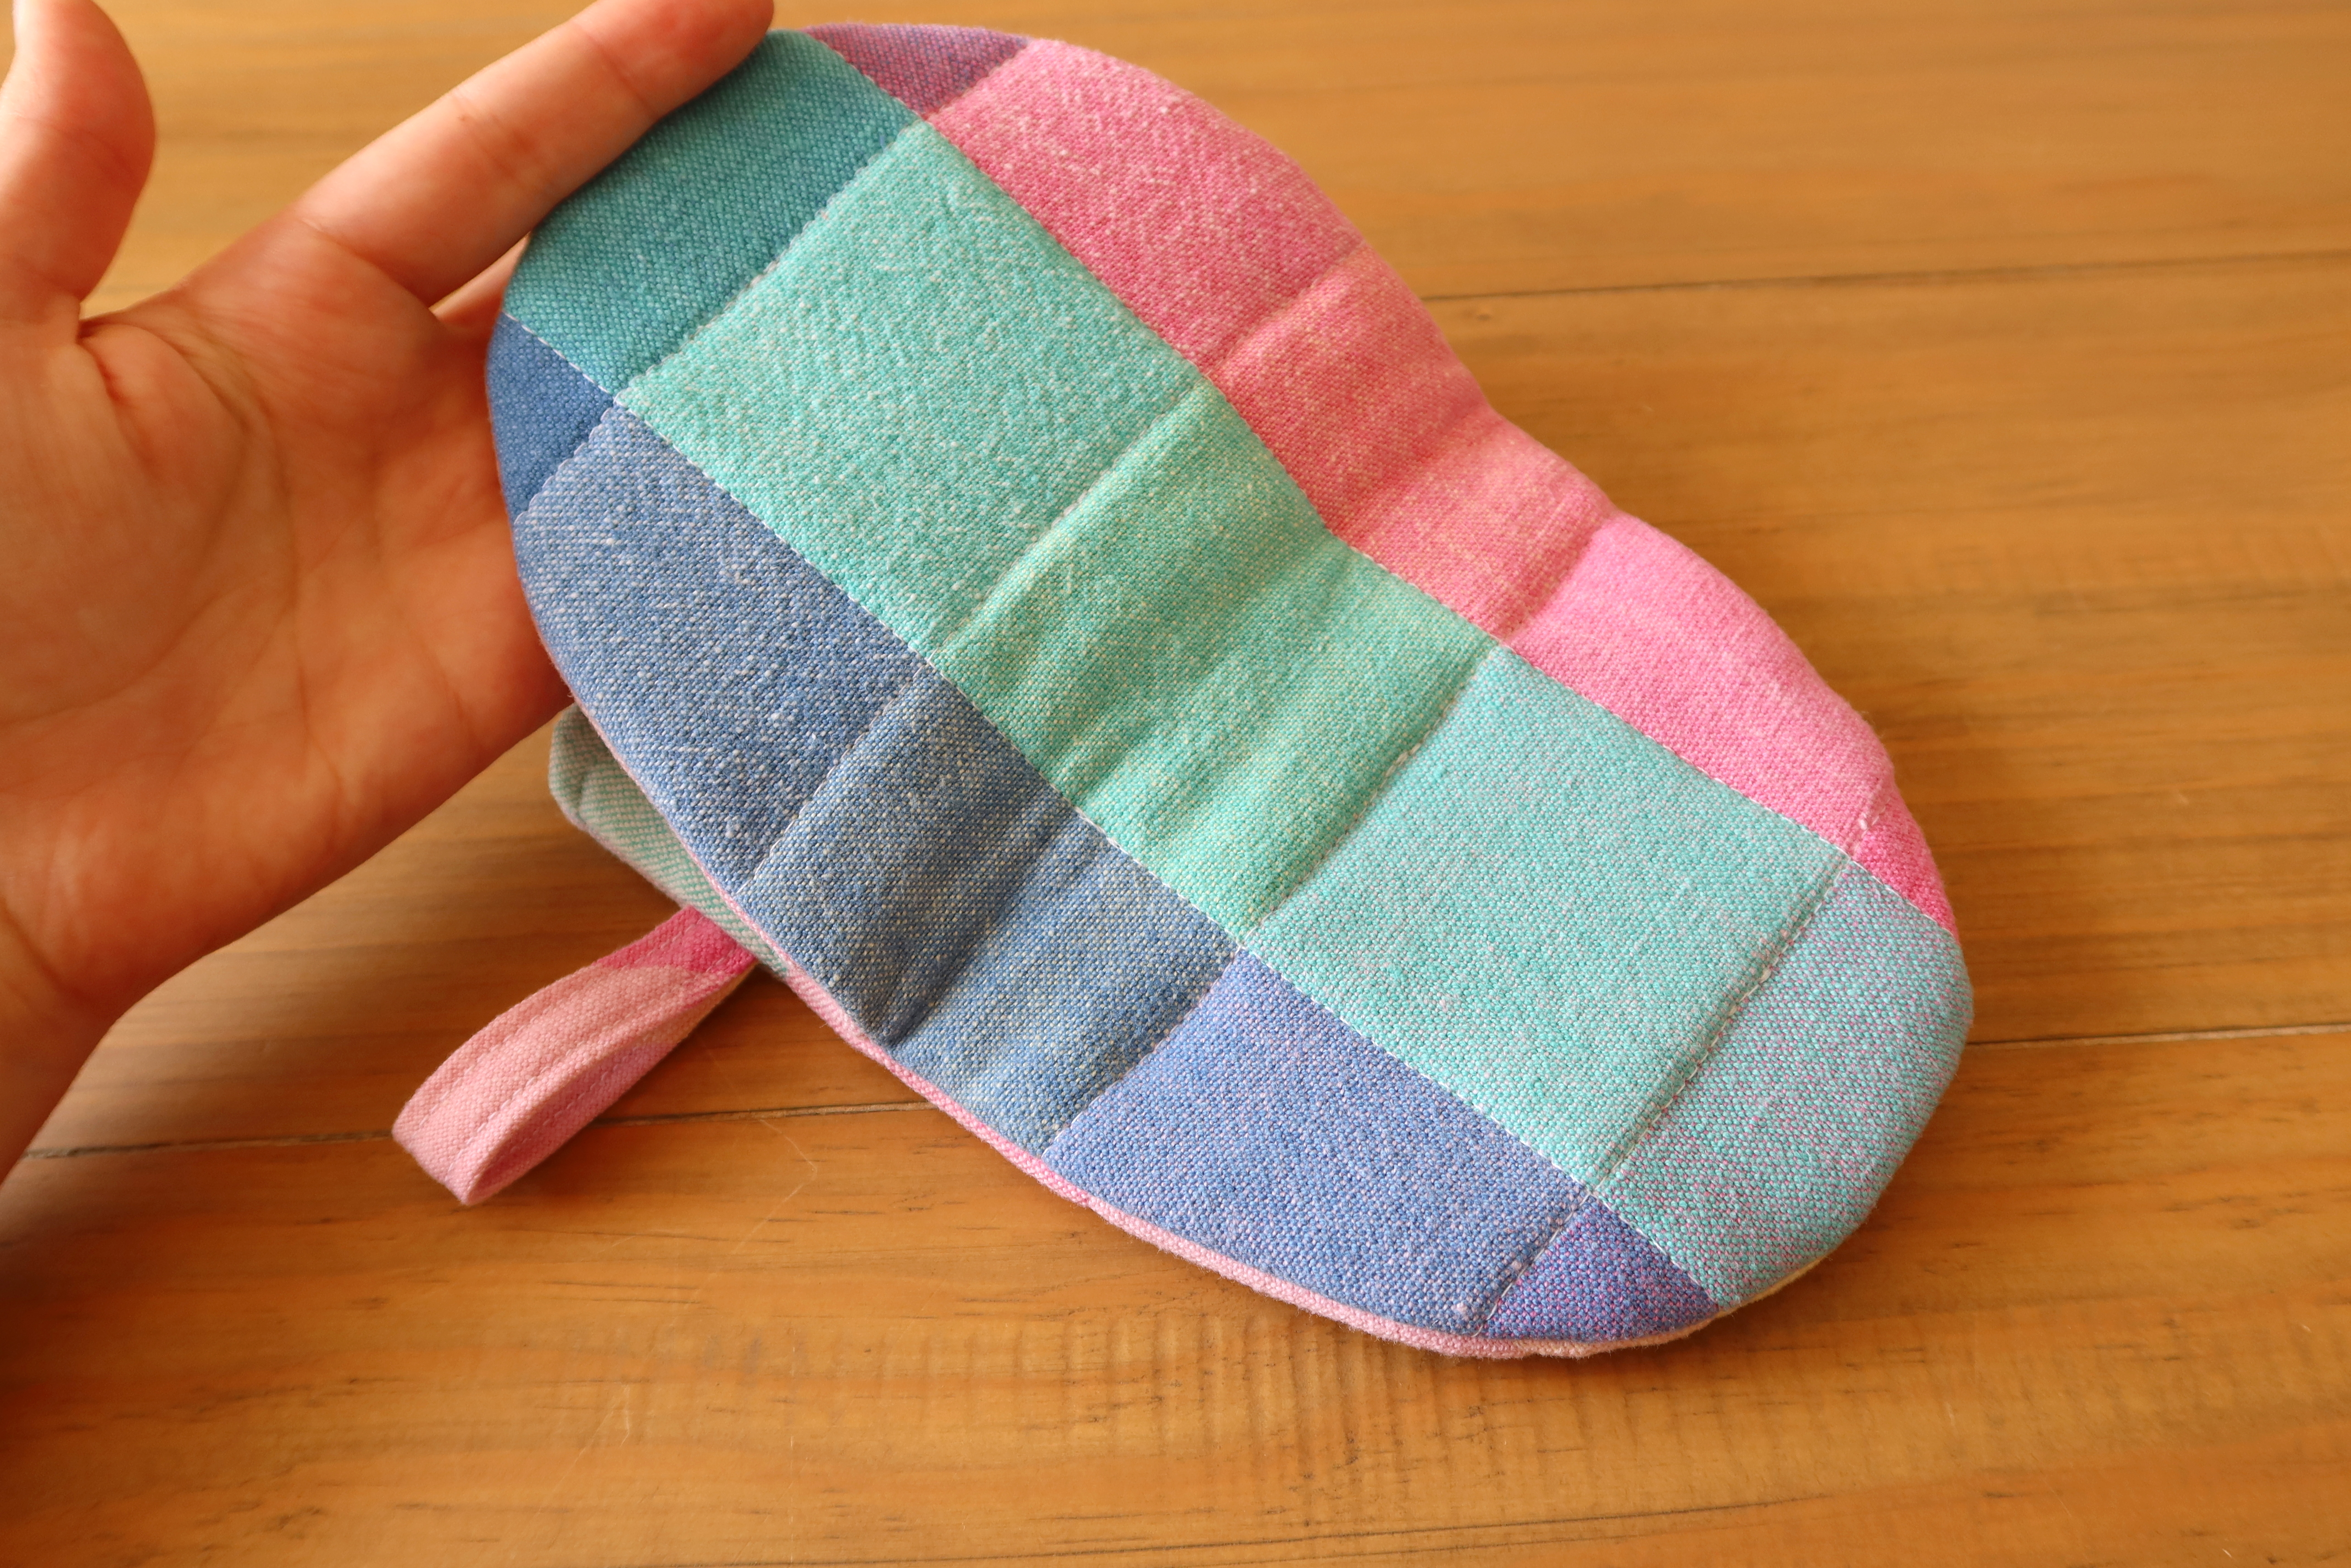
Quilt linings to main pieces on your machine. With the plaid design of my fabric, I followed the natural lines in the fabric. You can quilt in many styles; square, diagonal, etc. I started in the center of each piece, backstitched, and continued. After quilting each piece, if you notice your fabric has stretched, trim with pattern piece. (Optional: serge all raw edges. This can be done later, but it is much easier to serge now.)
TIP: Draw out your quilted design with a fabric marking tool and take your time quilting! Fabric can shift – but I find better results going slow and steady!
Using markings on pattern pieces, mark center points and side points. I use quilting pins at each point which is easier to see while sewing.
With mitt center piece right side up, lay one exterior mitt right side down matching top and side markings. (It’s ok if your lining doesn’t match up perfectly to your pieces, they will be hidden in the seam allowance.)
Stitch from side pin to side pin, reinforcing at each end. (3/8” seam allowance, following exterior fabric if lining isn’t perfectly matched)
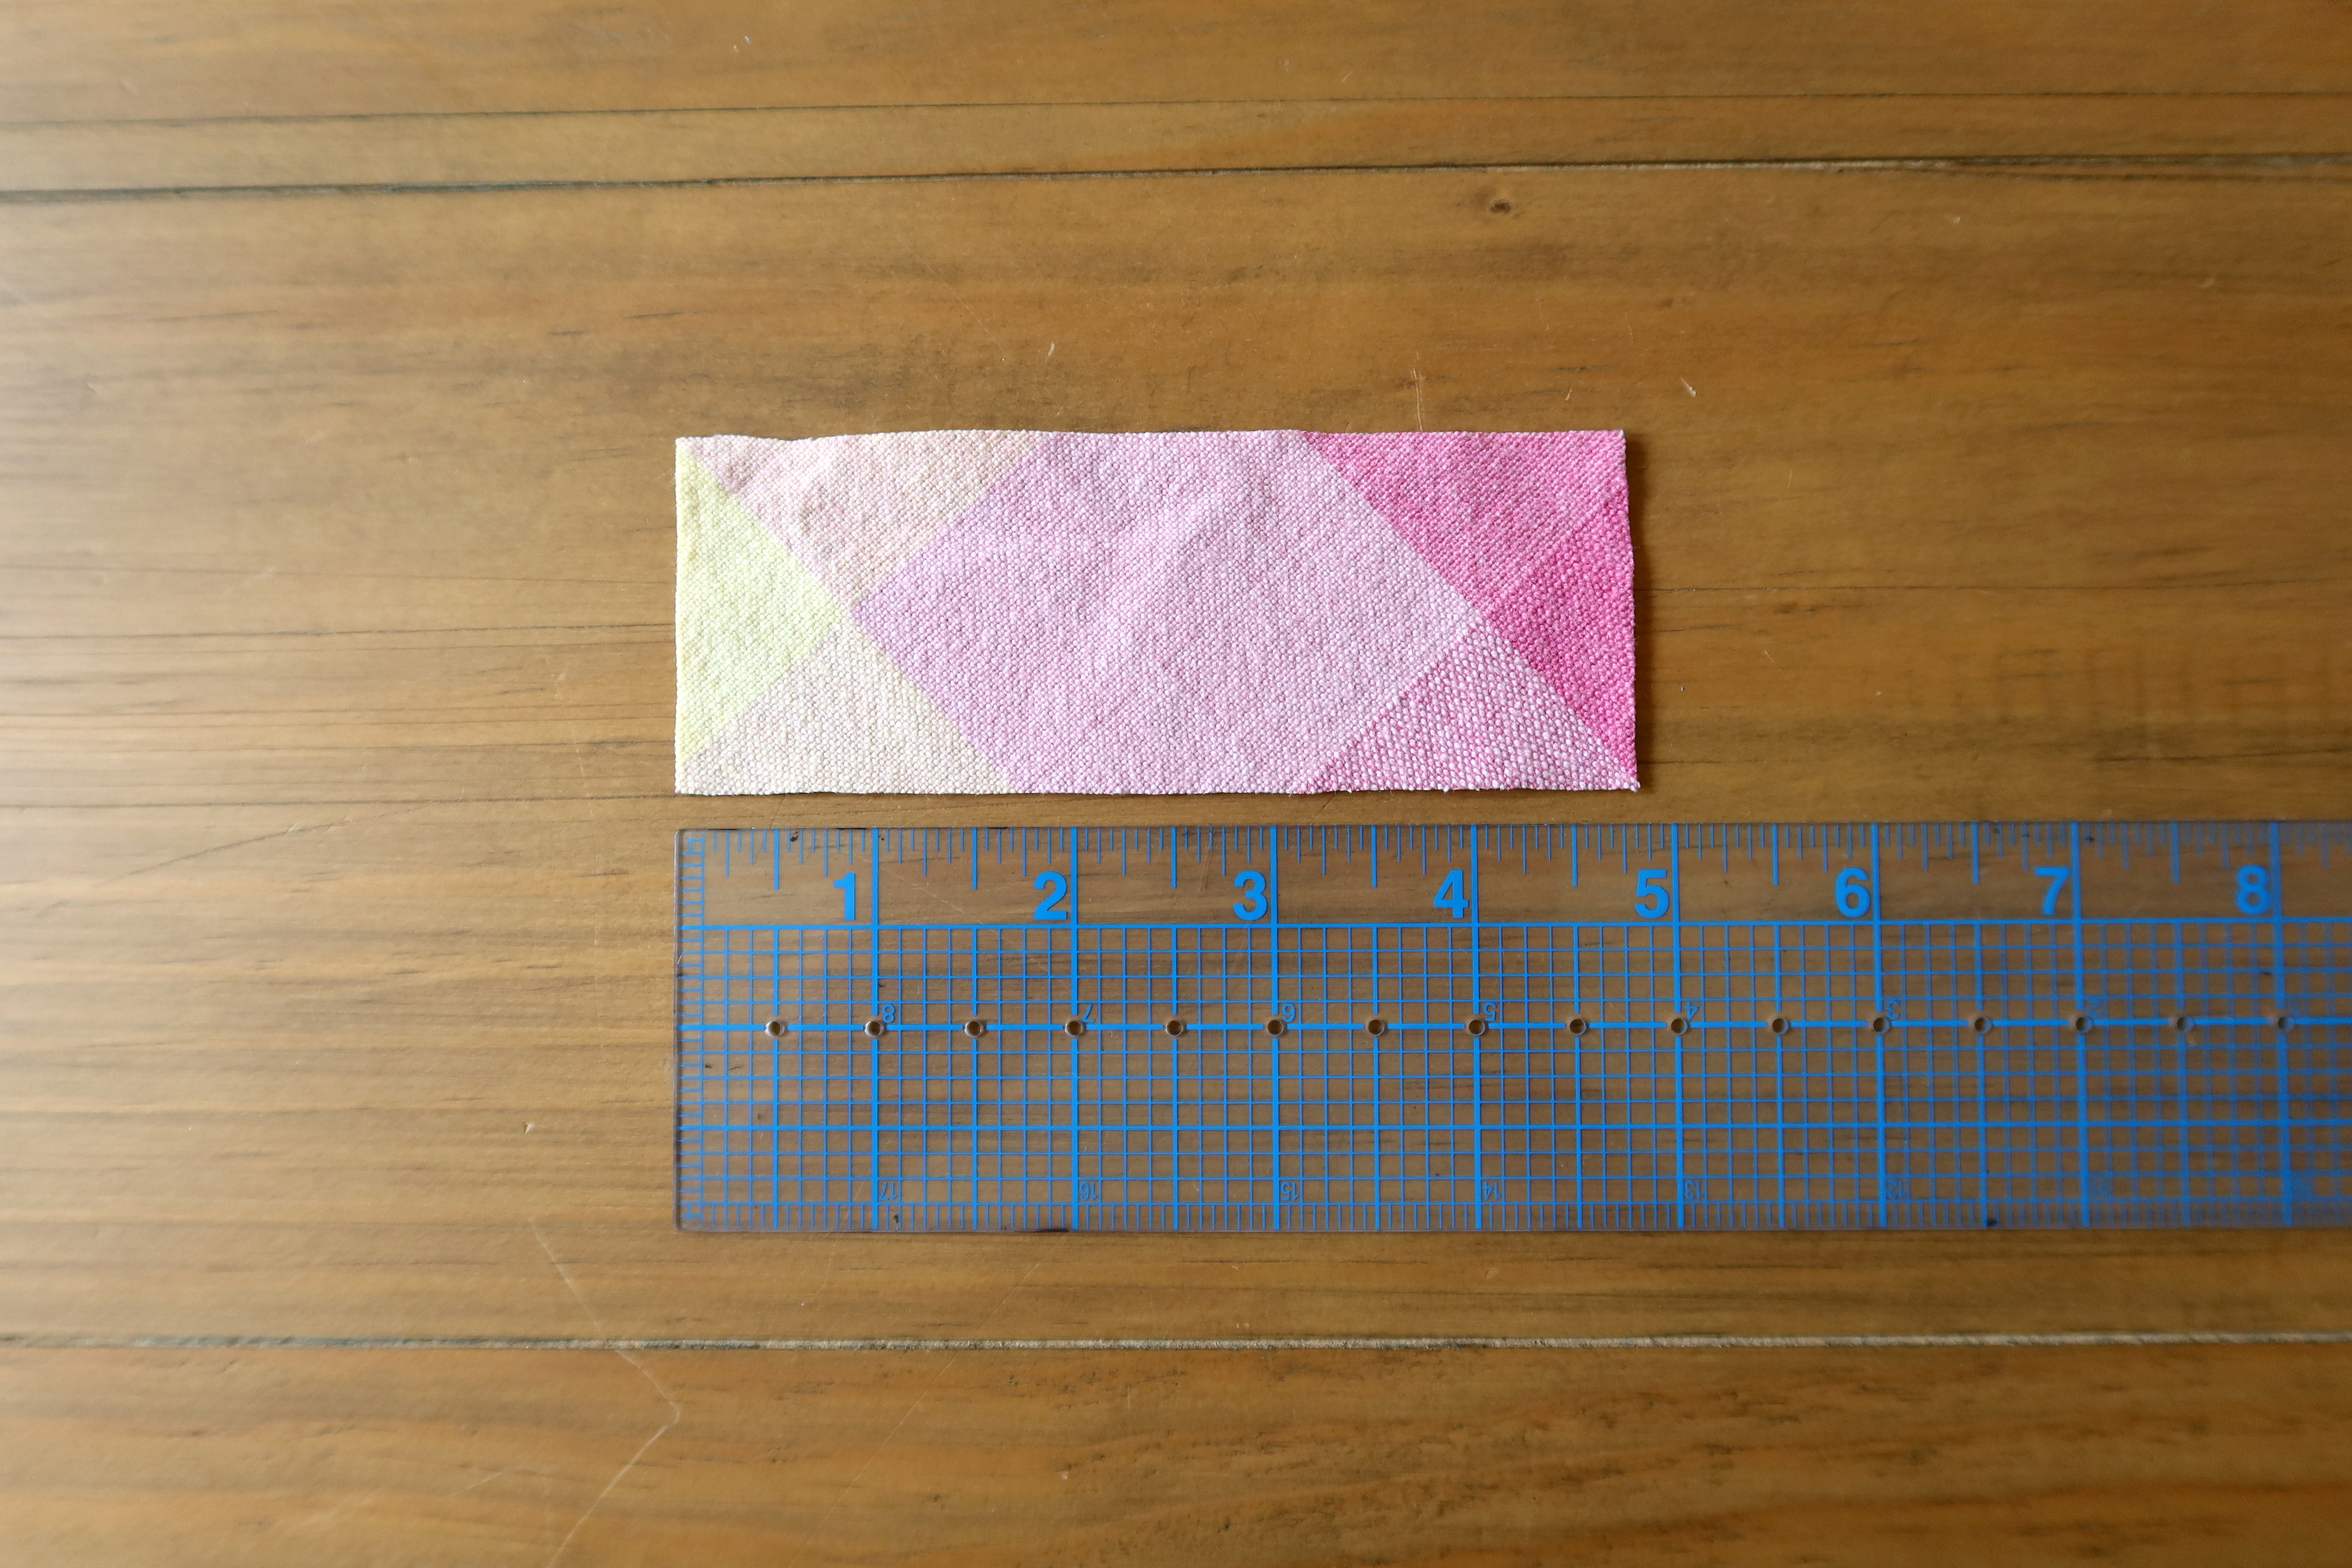
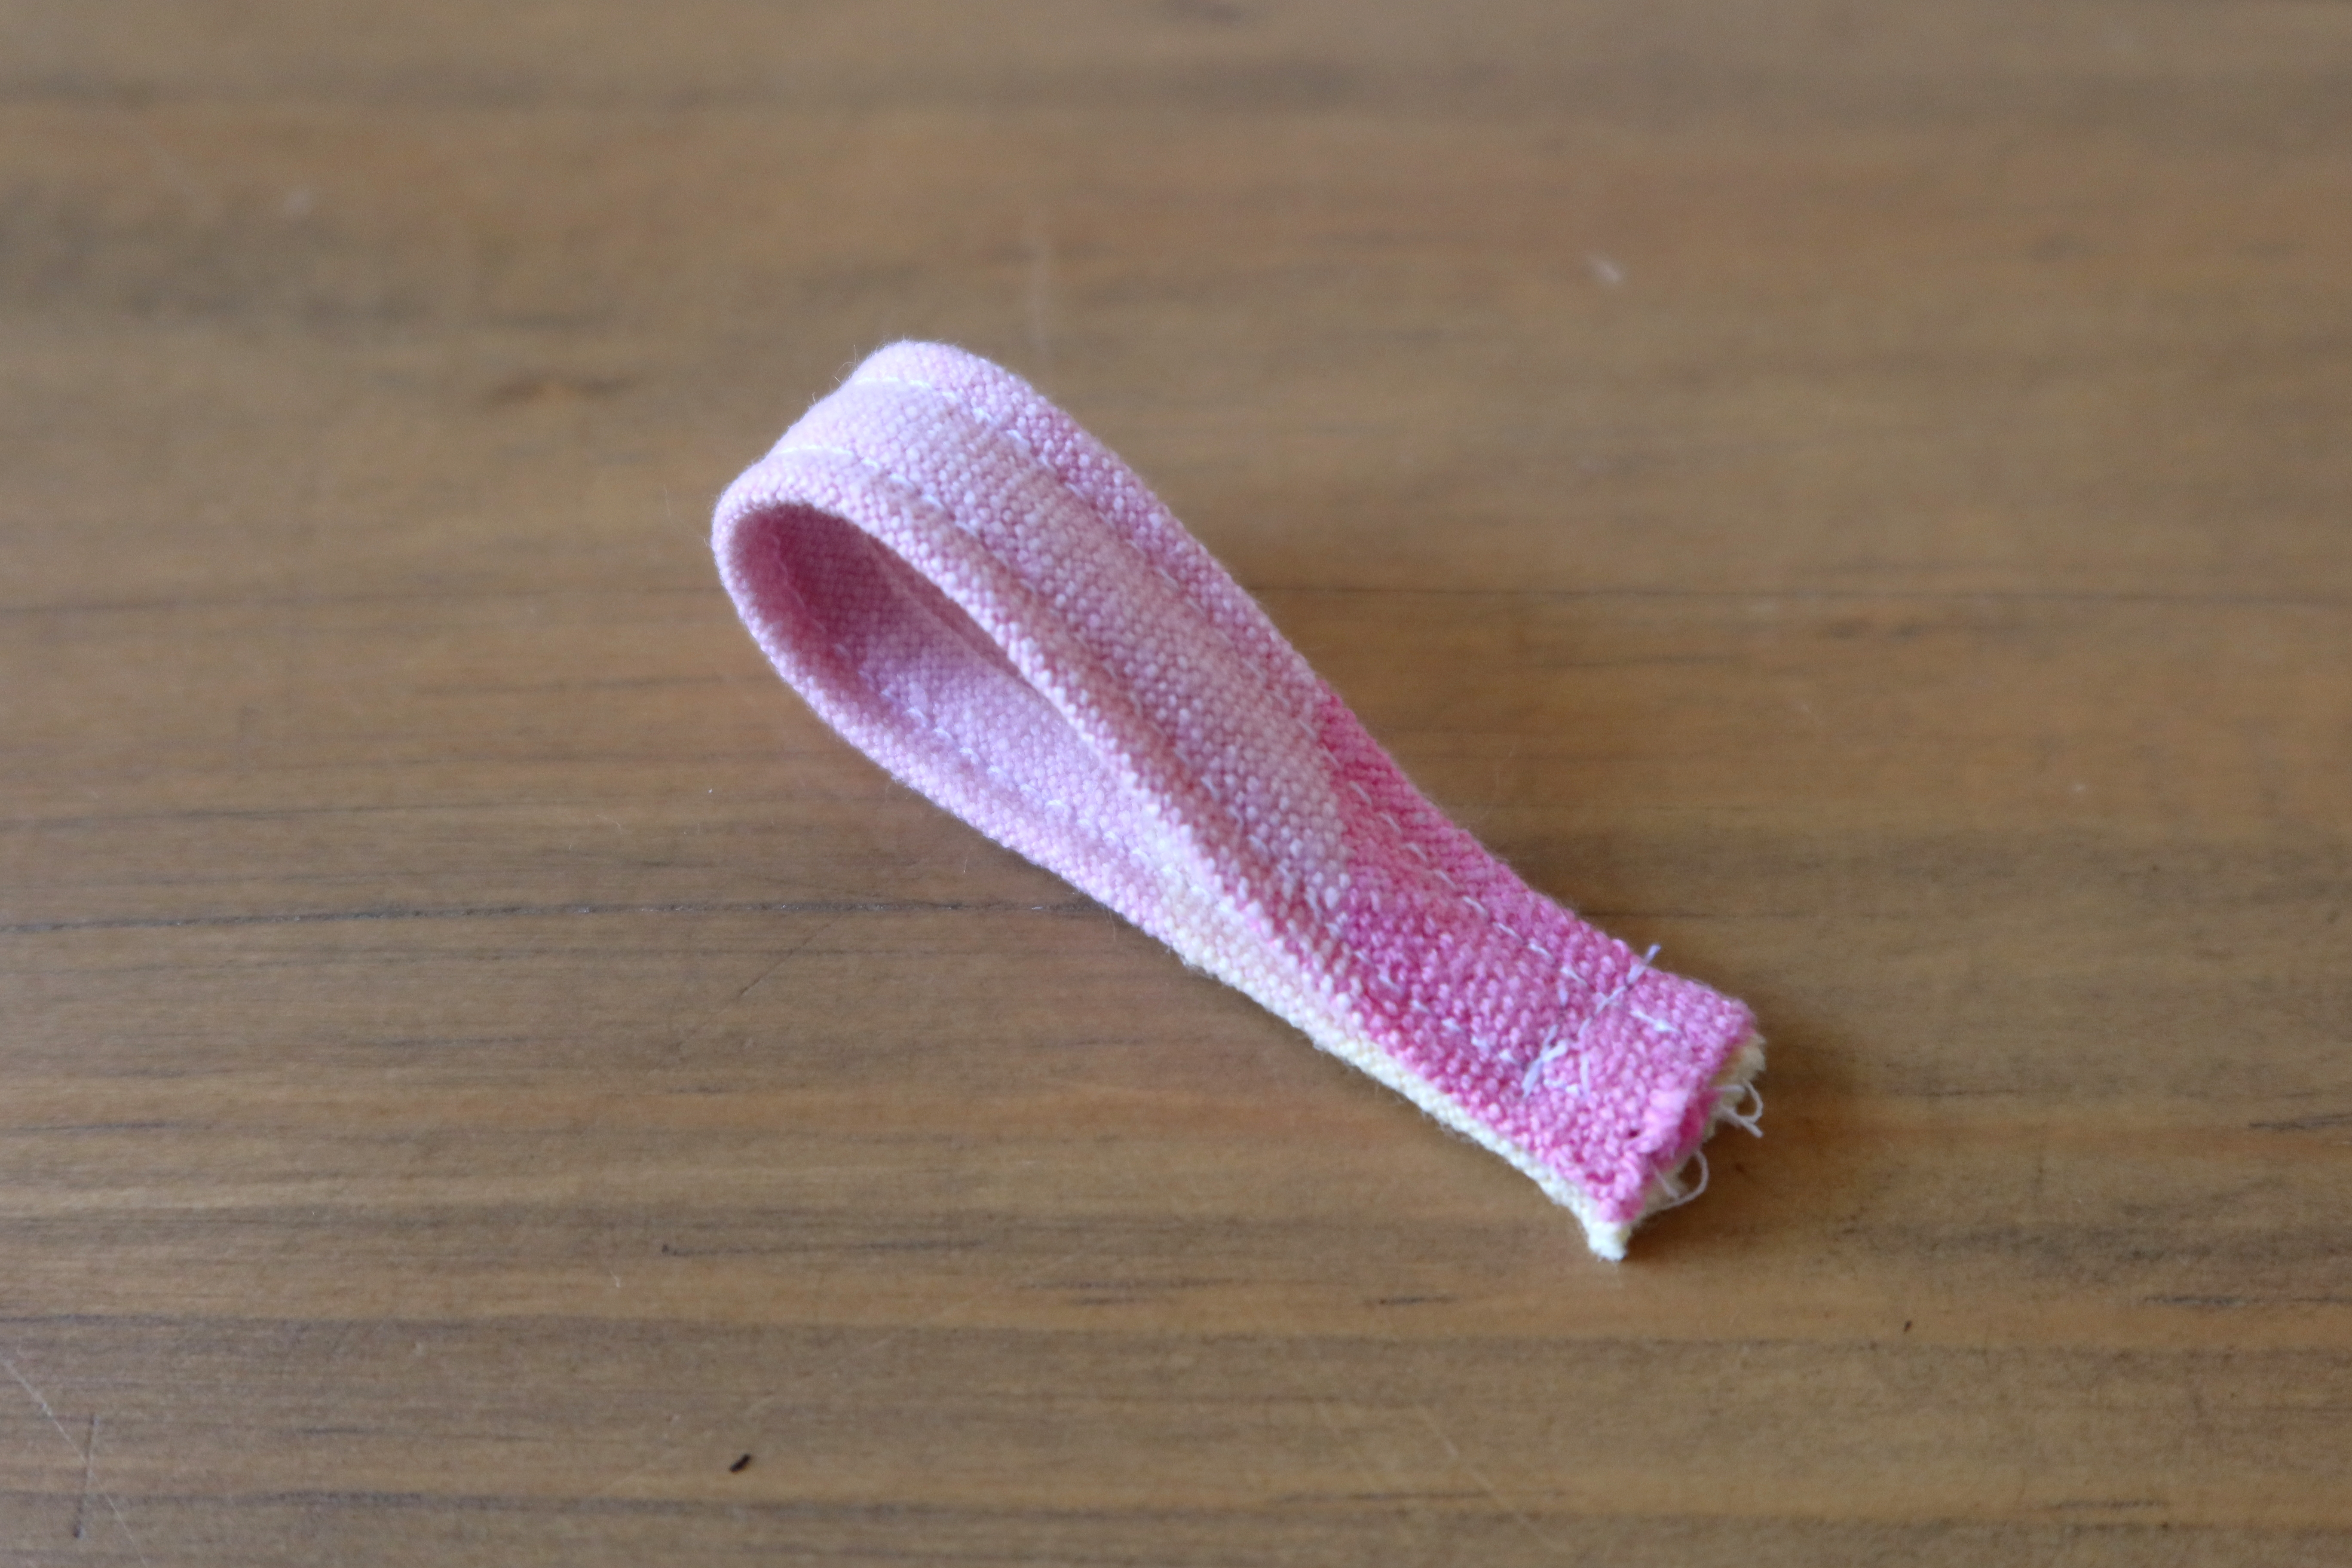
Next we are making a hanging loop! Cut fabric piece 4.75” x 1.75” for oven mitt side loop. Fold long sides, wrong sides together and stitch 3/8”. Trim seam allowance and turn piece right side out. Press seam so it lays in the center of the loop. Topstitch both sides, and fold short edges right sides together. Baste.
Mark 1.5” up from bottom of second mitt exterior. Pin loop and baste.
Moving back to the sewn center mitt, pin side with loop to mitt center, sewing pin to pin. Be sure to keep extra fabric from other side out of the way while sewing.
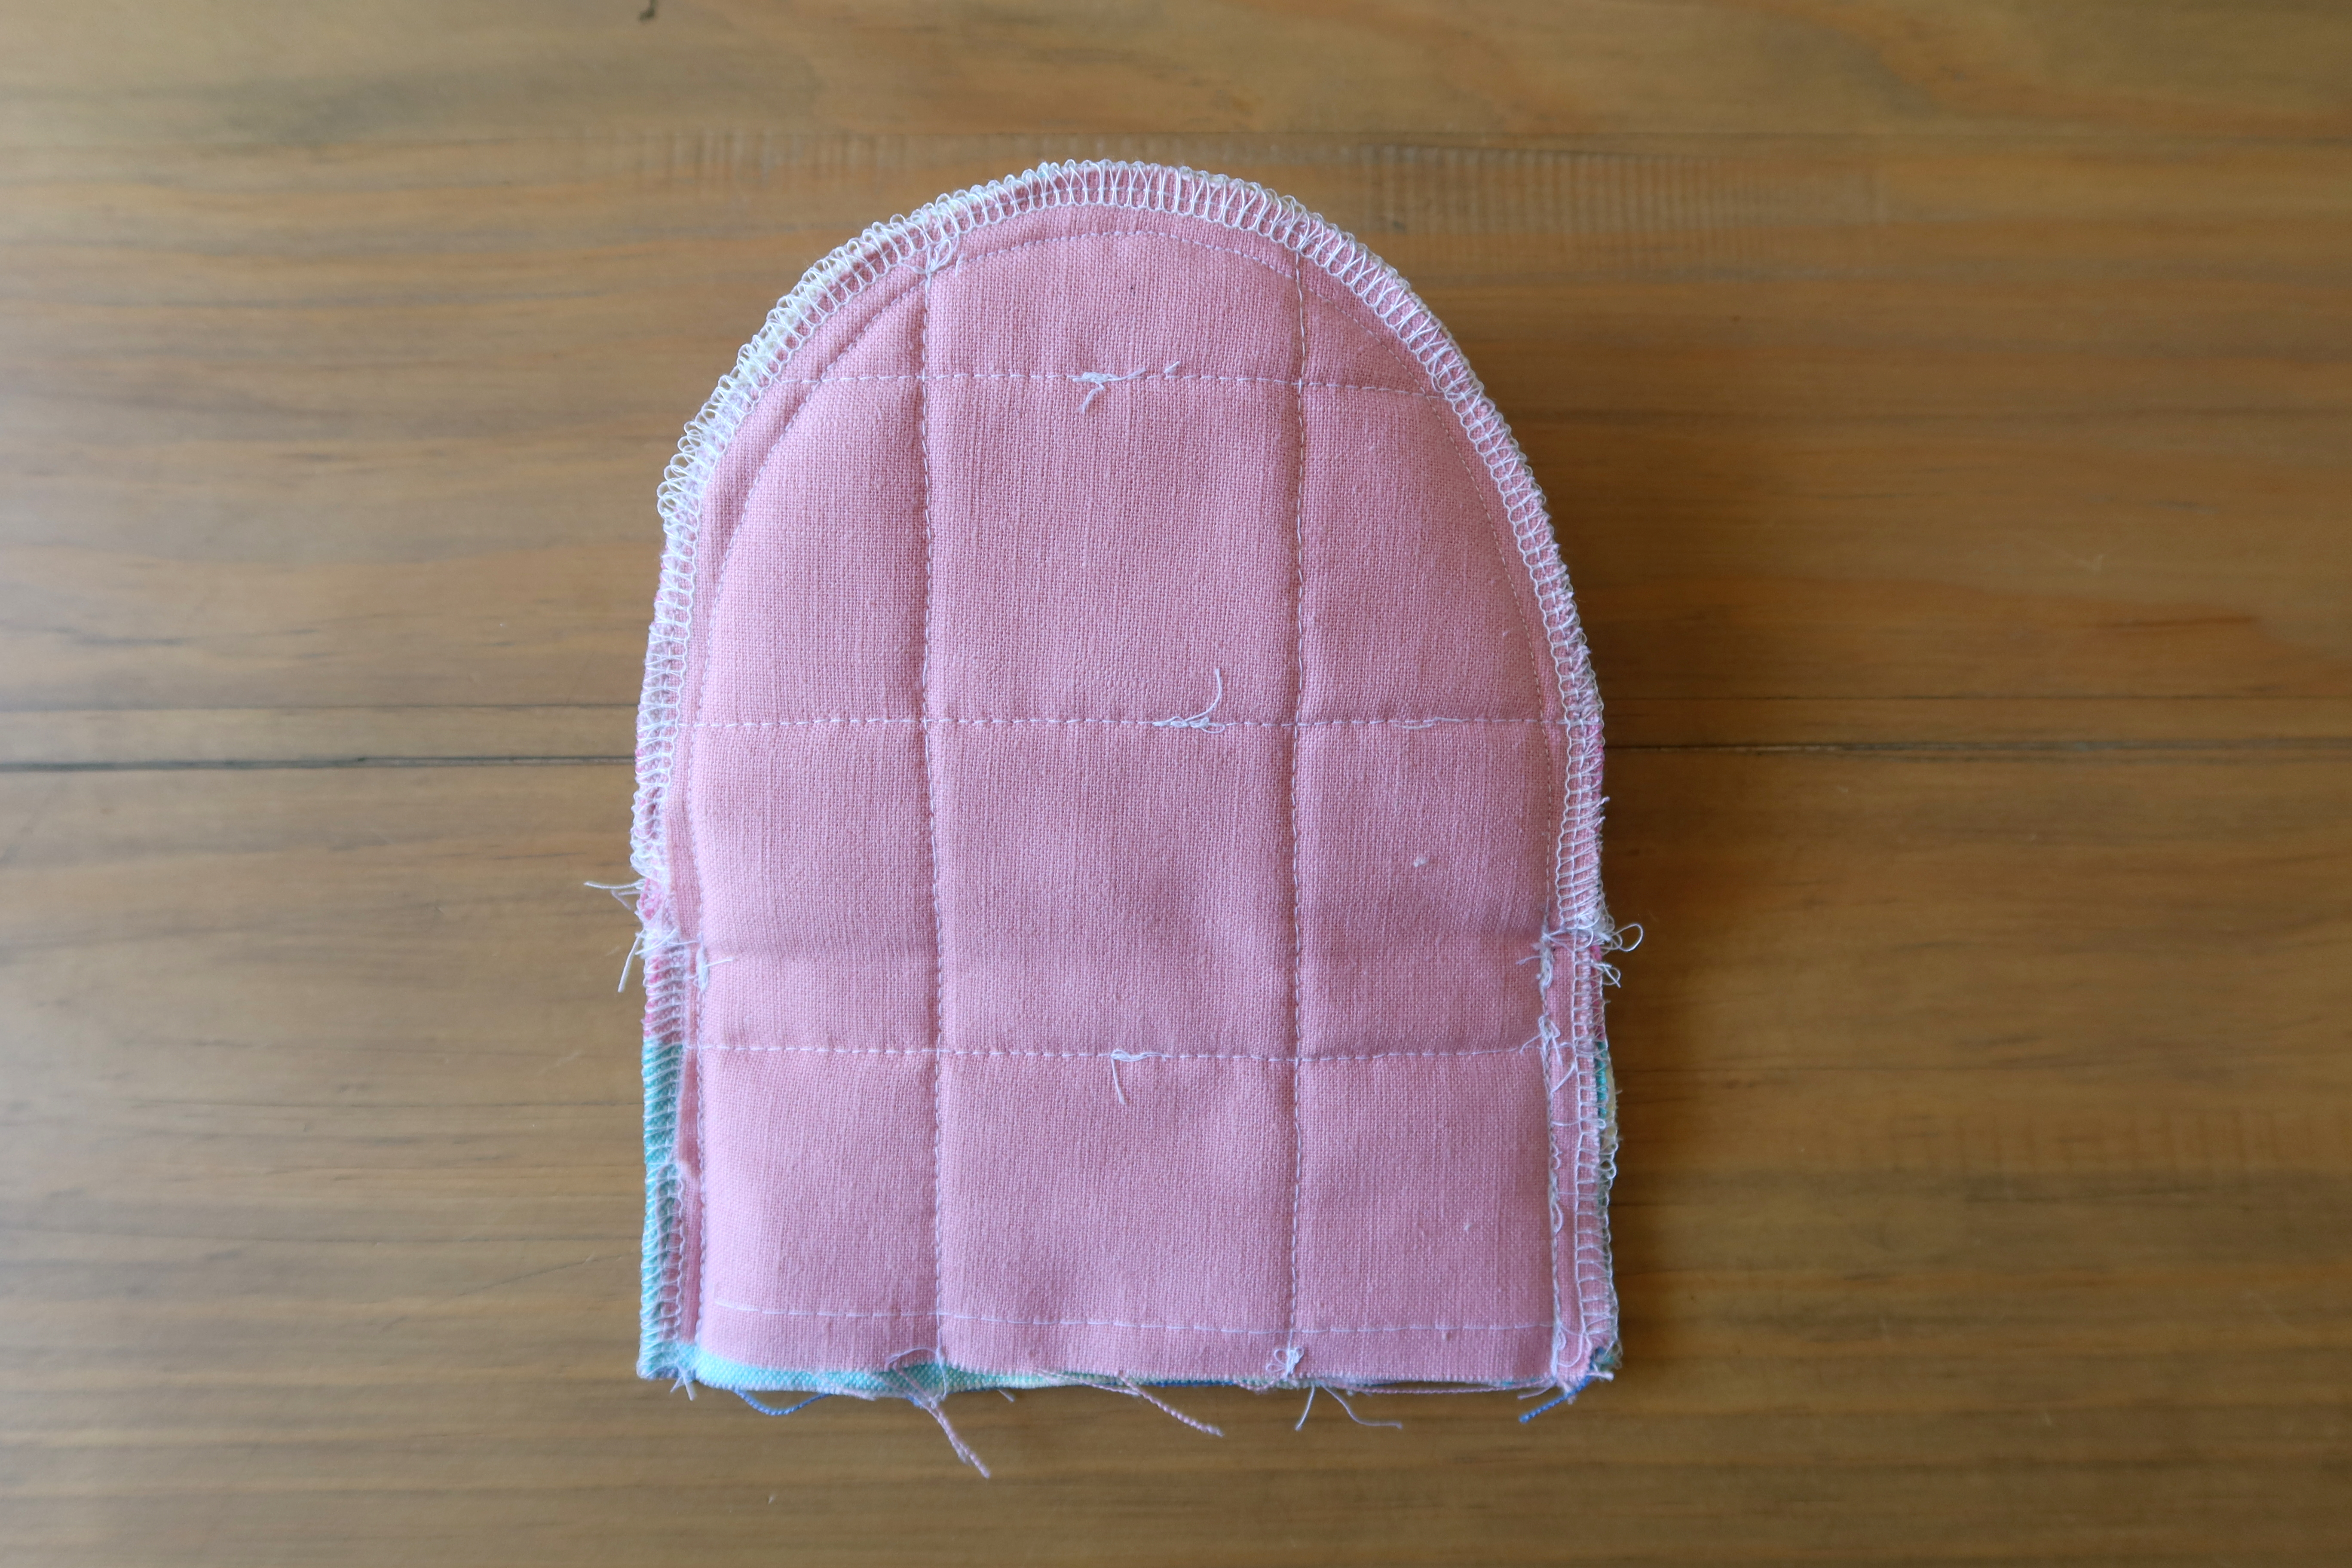
With center mitt folded wrong sides together, and the two exterior ends free, stitch exterior mitt right sides together from pins to end. Be sure your stitching line backs up directly to your other sewn line. If you didn’t serge edges before, you can also serge here. Serge or zig zag bottom edge.
Turn mitt right sides out. Following original basting, fold bottom edge up 3/8” to wrong side. Stitch at ¼” seam allowance.
Finish mitt by removing any visible basting stitches.
And if you are looking for an extra quick gift, check out these reusable produce bags I made with the rest of my tablecloth!
Hello there- just a quick but important post today! It’s been a moment since I last posted and not for a lack of projects, but more a lack of energy! I shared some news over on my Instagram a few months ago, but wanted to share here too. Drew and I are expecting a baby girl in March 2023! The time has been going so fast, and it’s been a bit harder to stay on top of everything – like updating the blog – but I wanted to share even if it’s a bit later than planned!
I’ve been going through all the tests, scans, and doctors appointments, which can be very overwhelming, but I’m so happy Drew has been by my side for everything. We’ve been putting together the nursery, building a registry and trying to prepare ourselves (which is much easier said than done!). I’m thankful to be feeling well and doing much better than during the first trimester and over the past few weeks it’s been really exciting to feel baby kicks but not so exciting to be growing out of all my clothes!
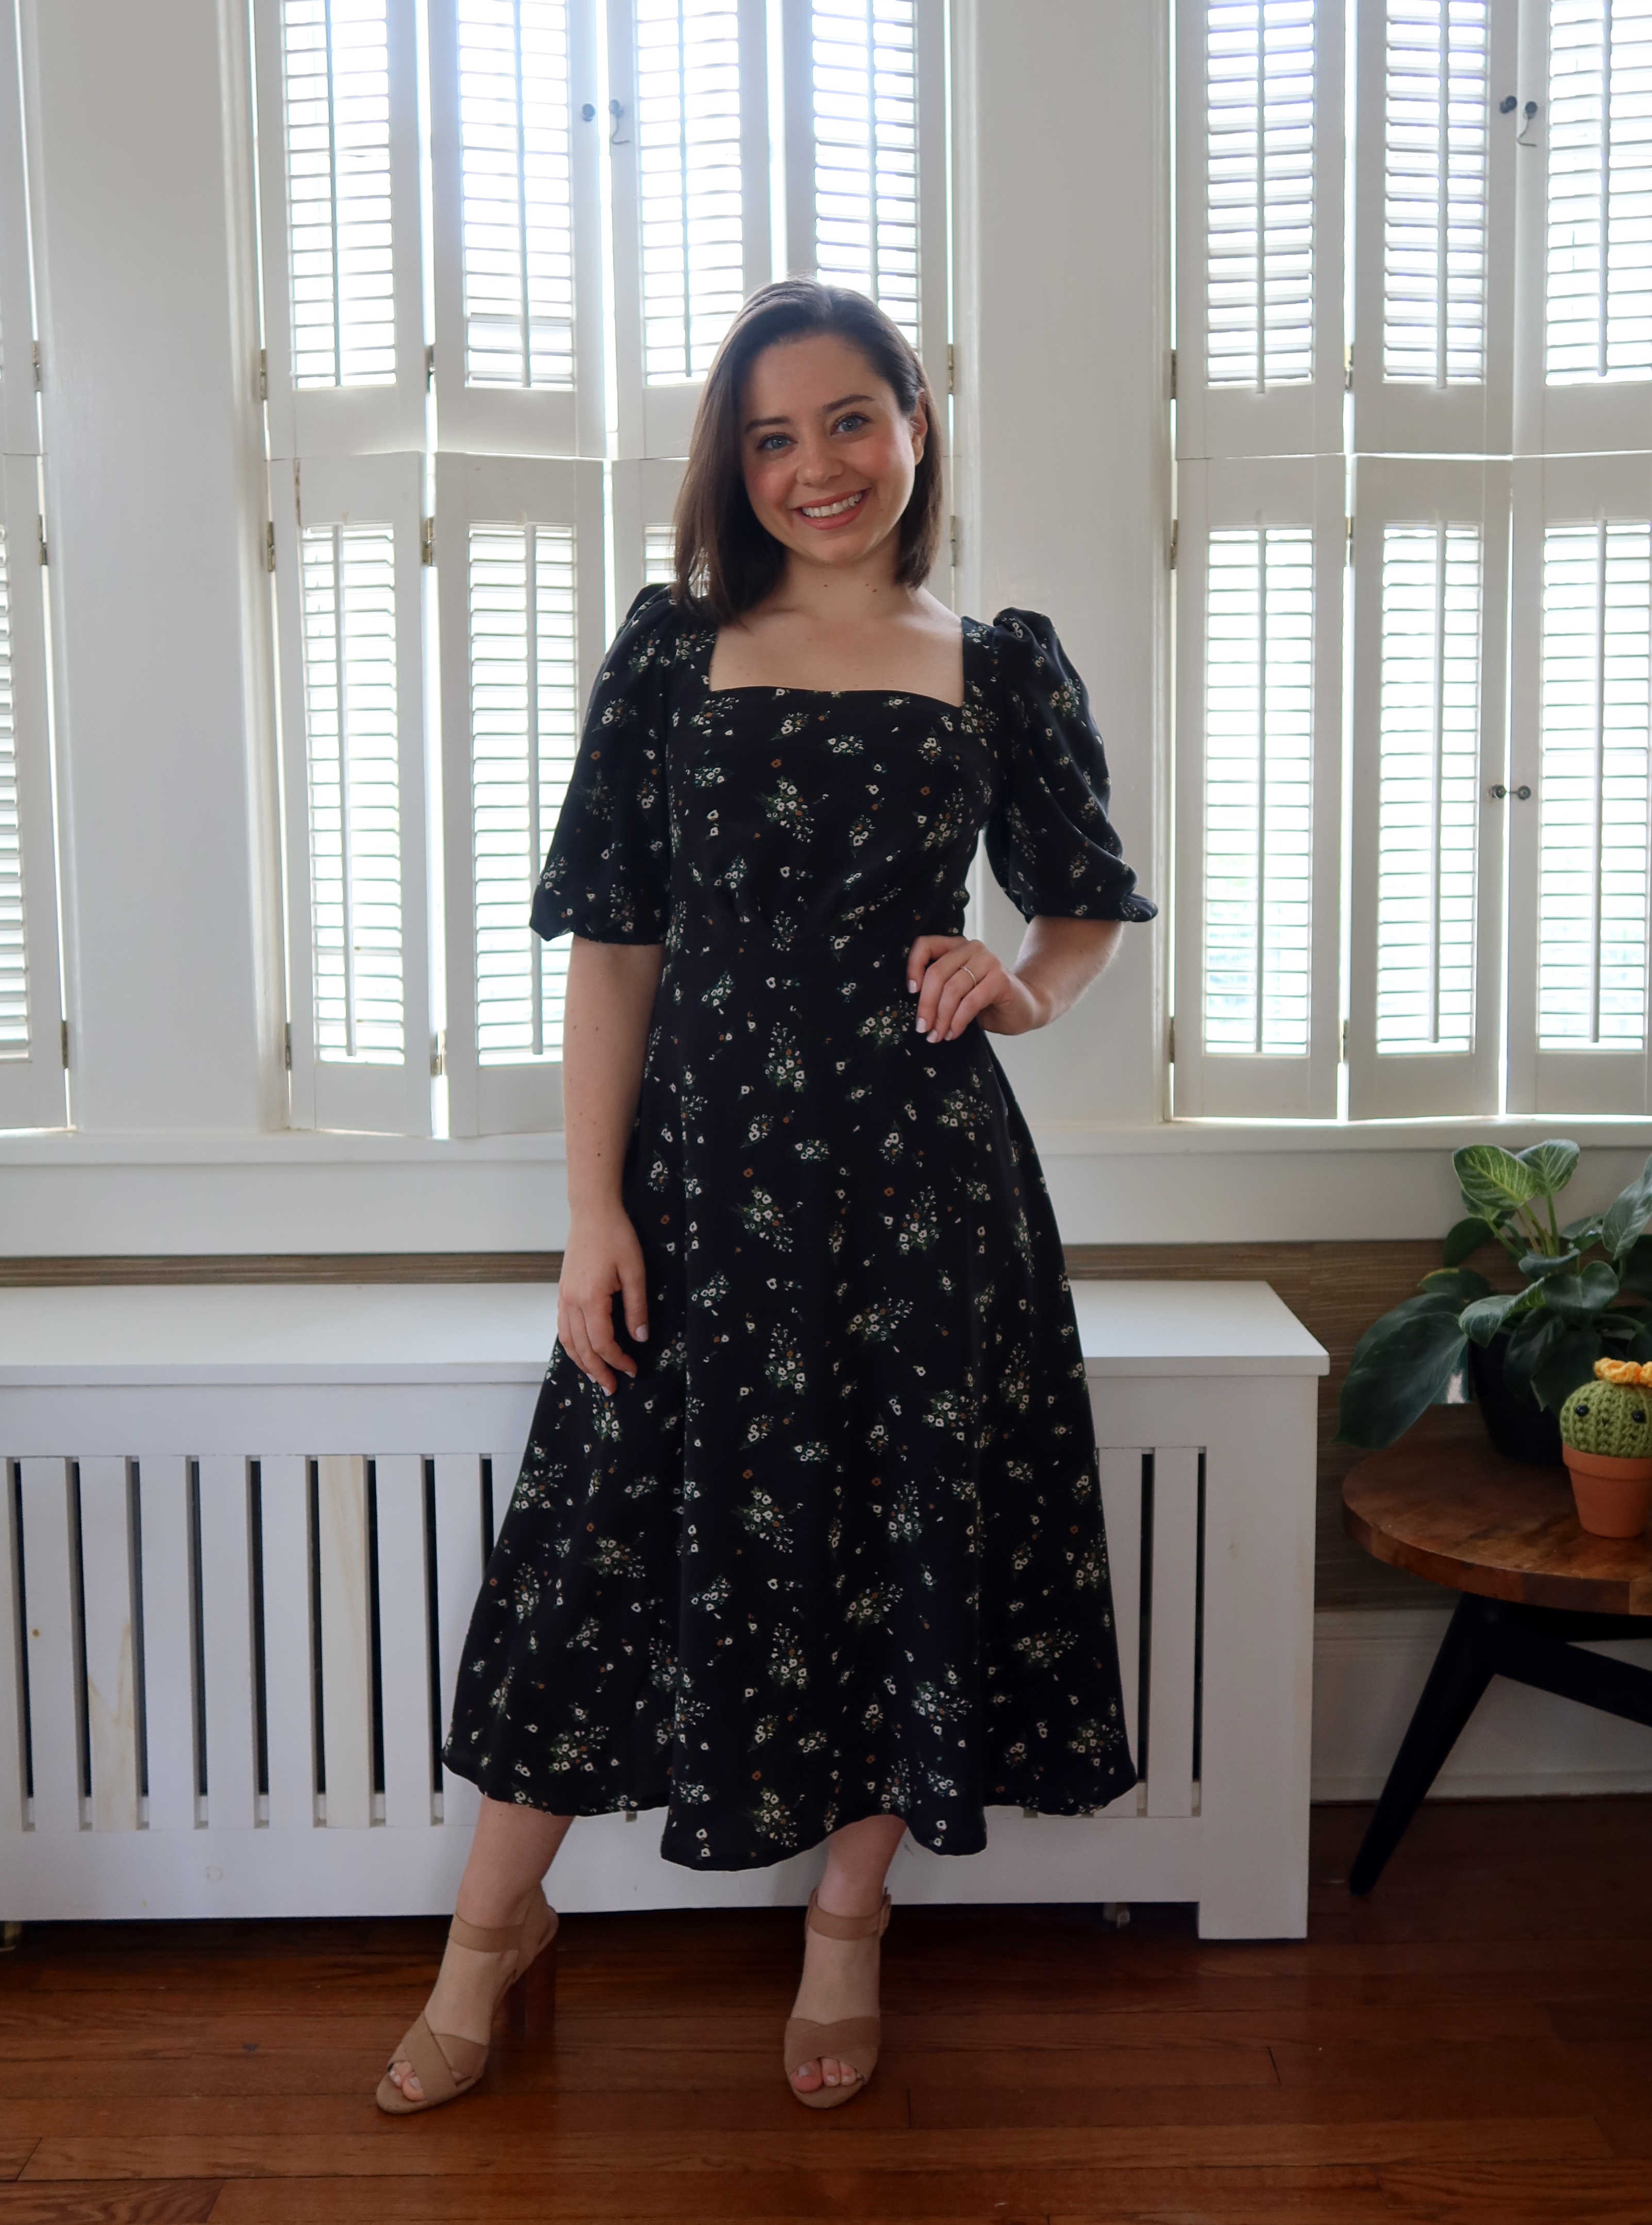
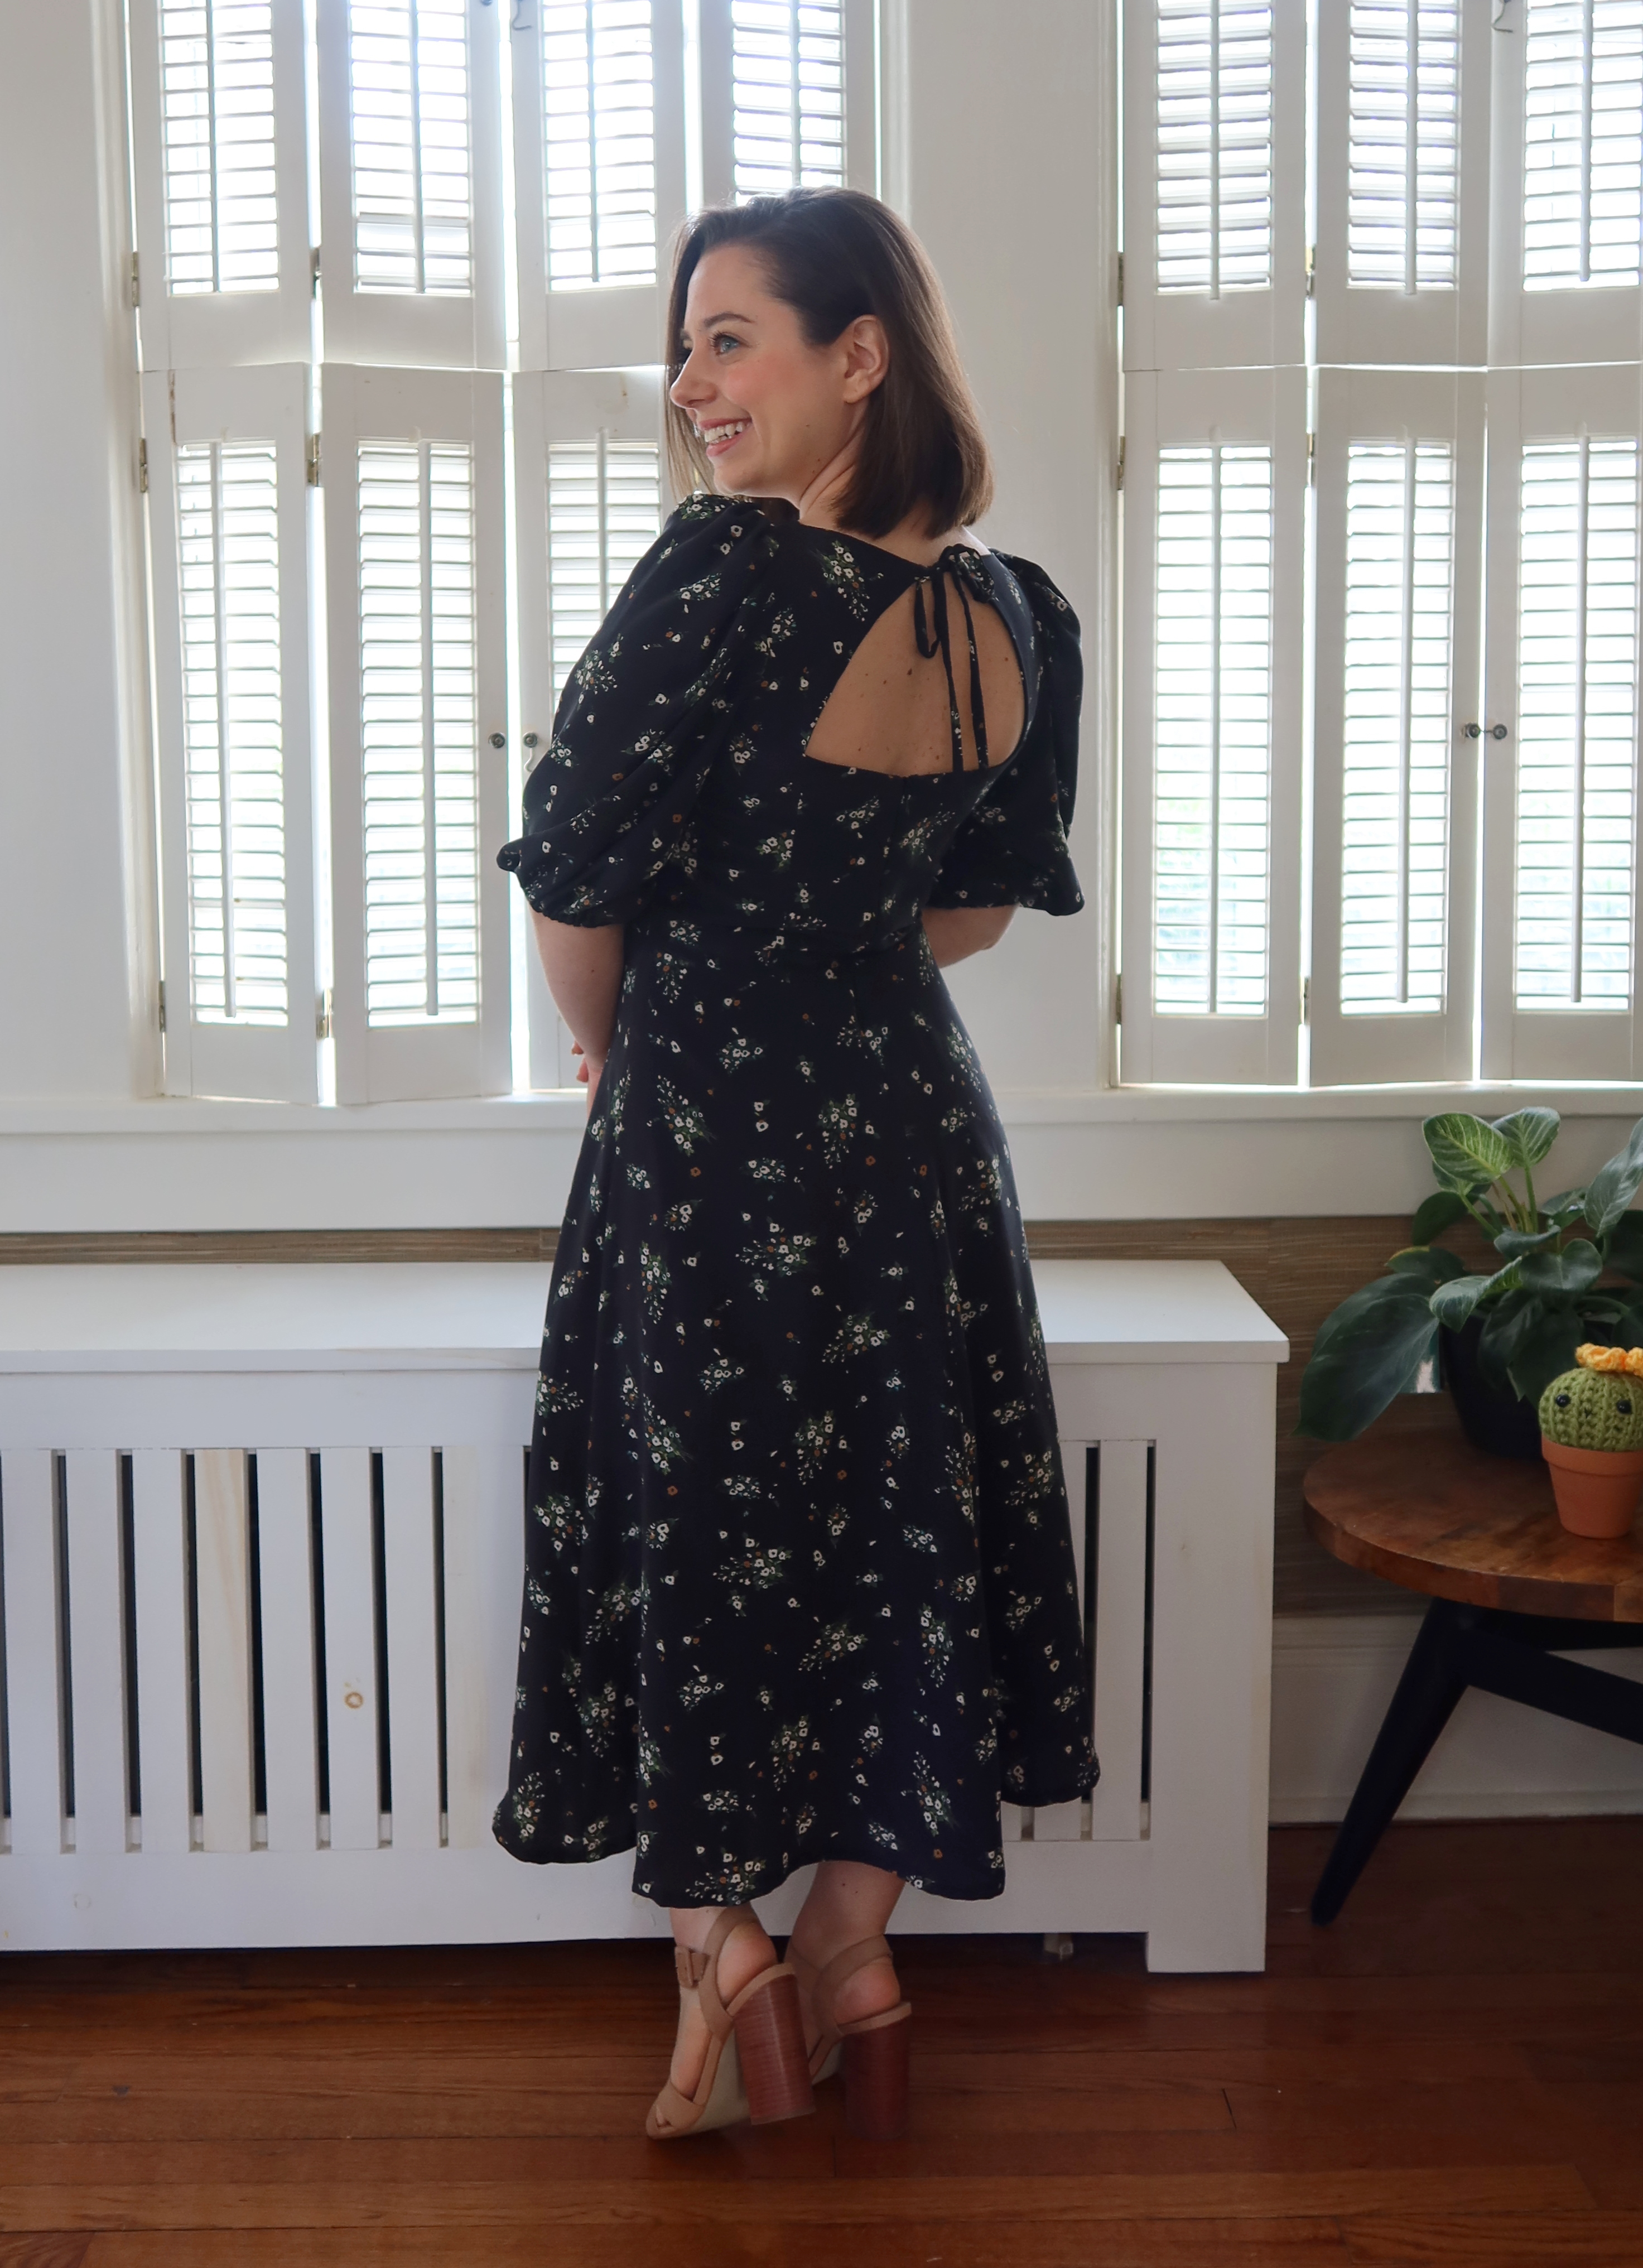
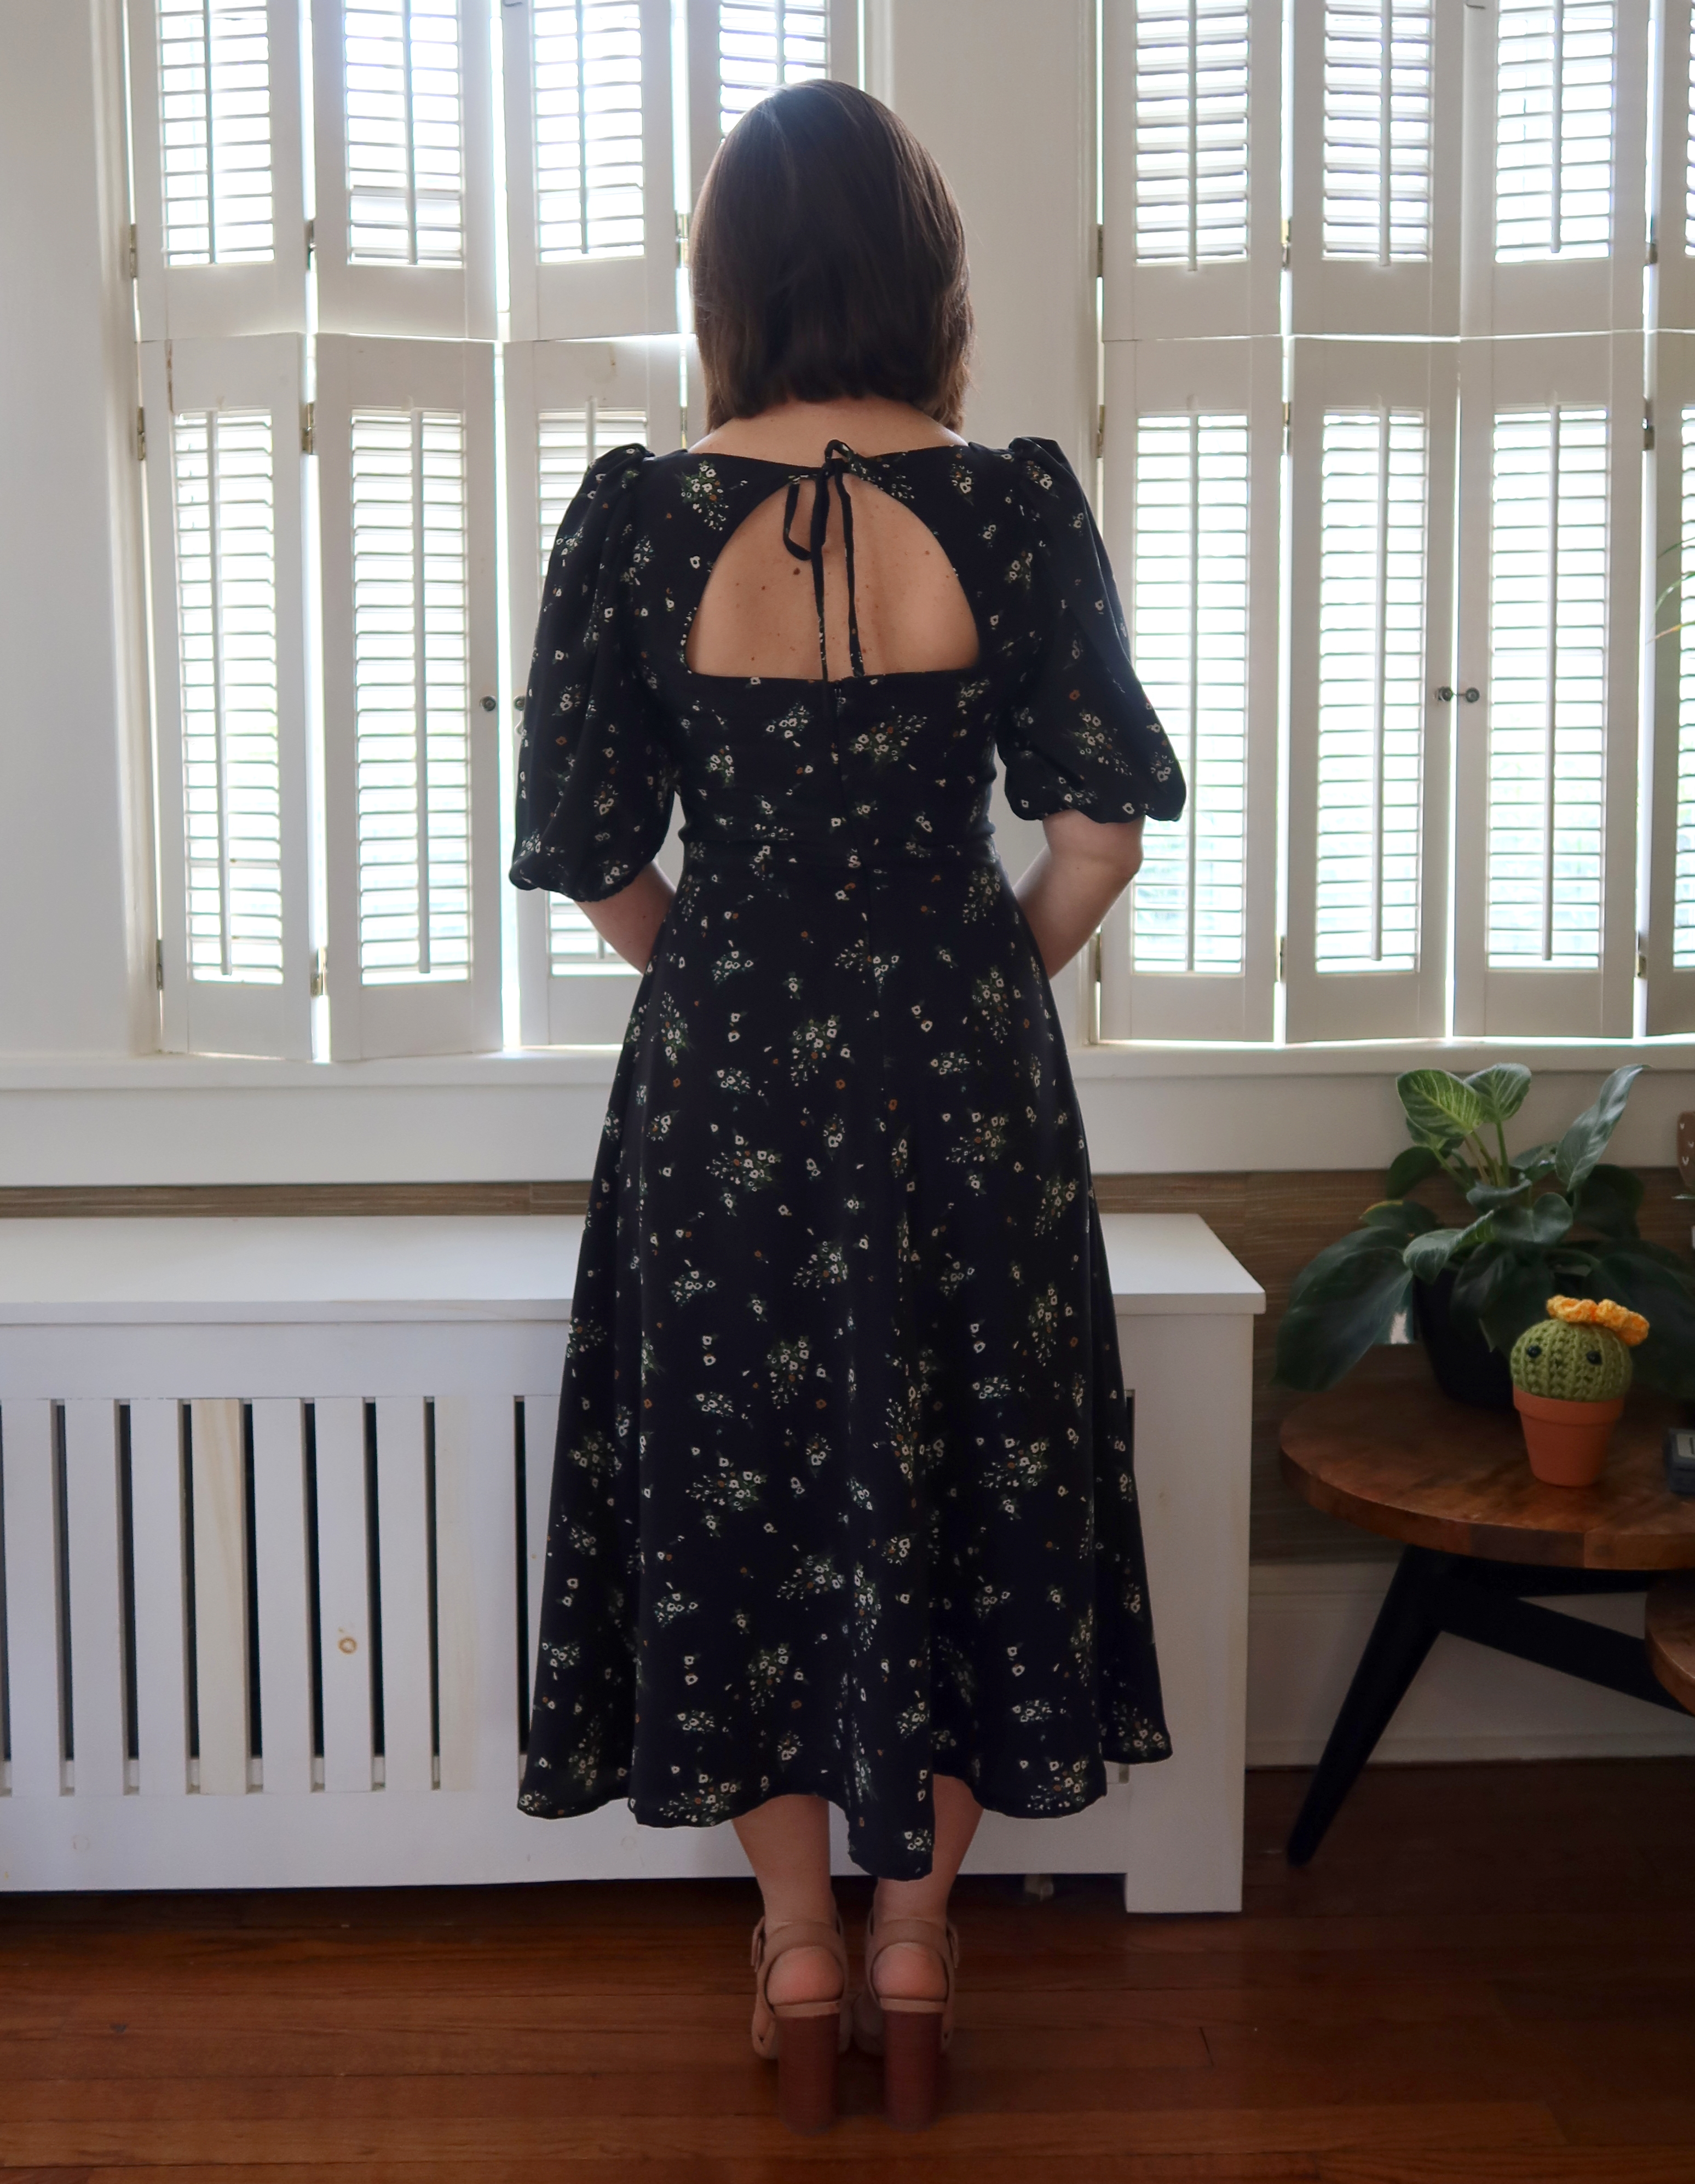
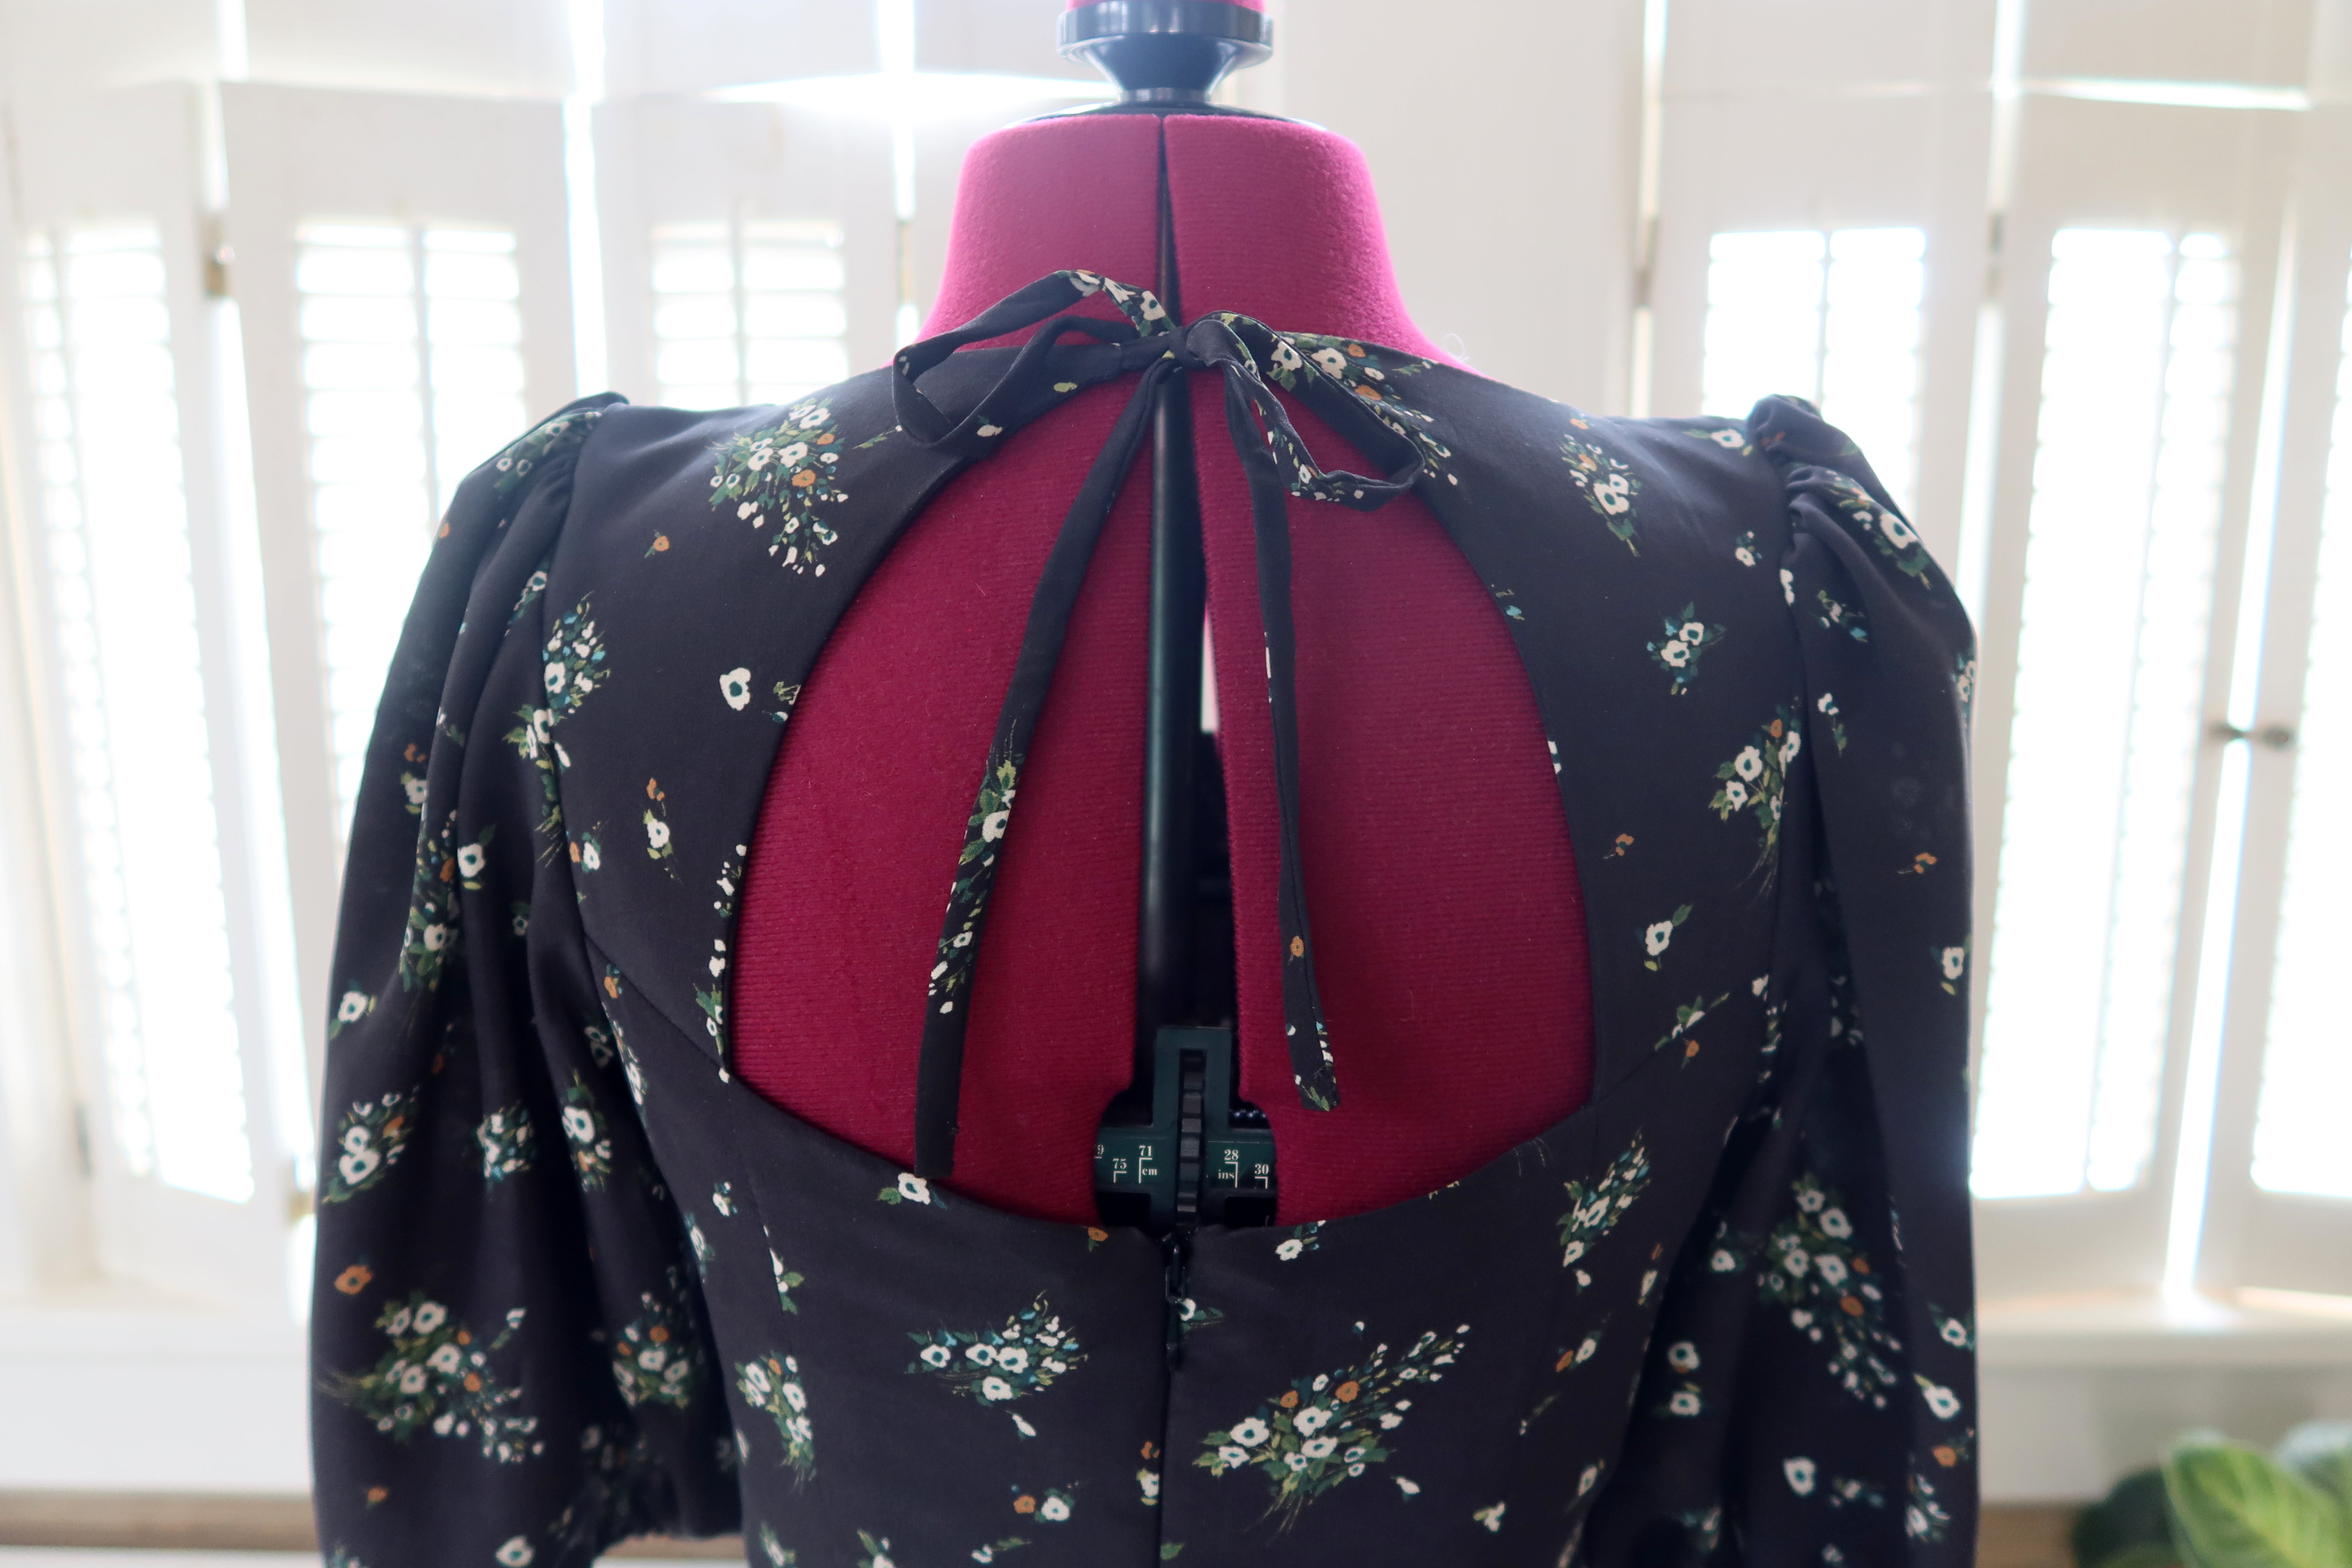
I absolutely love this dress pattern! I wanted a drop waist design and something a little oversized so it could grow with me. I also added back ties, which I forgot to photograph! It is a shorter dress, so if you are taller you may want to consider adding a tier or making the tiers longer. But for my short legs, the length was perfect!
The fabric I bought was from Core Fabric Store (they also stock deadstock and eco-friendly fabrics!). I used Sandwashed Textured Tencel in Moss. It’s a beautiful, light fabric and I love the color.
I’m excited to share the news to those who might not have seen it on Insta, and I’m really excited to sew lots of baby things! I have a few plans for clothes including using up a bunch of my scraps for tiny outfits! I’m also working on finishing up some past projects that I would like done before I don’t get as much time in my studio!
It’s Fashion Revolution Week! Since 2015 I’ve been talking about this week – and encouraging others to join in the fight. Fashion Revolution started in response to the deadly Rana Plaza Factory collapse in 2013, killing 1,138 and injuring many. This week encourages people to ask where their clothes came from, who made them, and challenge fashion industry standards to be better both ethically and ecologically.
Being a maker in the Fashion Revolution has given me a different perspective. I’ve been able to create a small bubble, surrounding myself with like minded makers and stories of sustainability, rather than the negative effects of the fast fashion industry. My fight has been focused on encouraging sustainability, and letting others fight the bigger picture, and larger corporations. But this past year I’ve been deep diving back into the fashion industry, introducing myself to new resources and reading materials and realizing that there’s only so much audience I can reach in my bubble.
I consider myself a quiet activist, which is kind of an oxymoron. I don’t like to push too hard that my way of thinking is right, and I don’t believe in shaming people for the choices they make. I prefer to take a gentle approach to inspiration and education, but that doesn’t really work when facing CEO’s of fashion brands. I’m not sure where this new calling will take me, and I’m certainly not giving up my normal eco-sewing content, but right now I’m focusing on re-educating myself and researching better ways to be involved, all which I hope to share in the near future. I get a lot of joy and feelings of purpose when sharing informational posts, and always hope that they reach more people who can benefit from the content.
If you would like more insight to my sustainability journey, and more about my connection to Fashion Revolution, you can read about it in this post from two years ago.
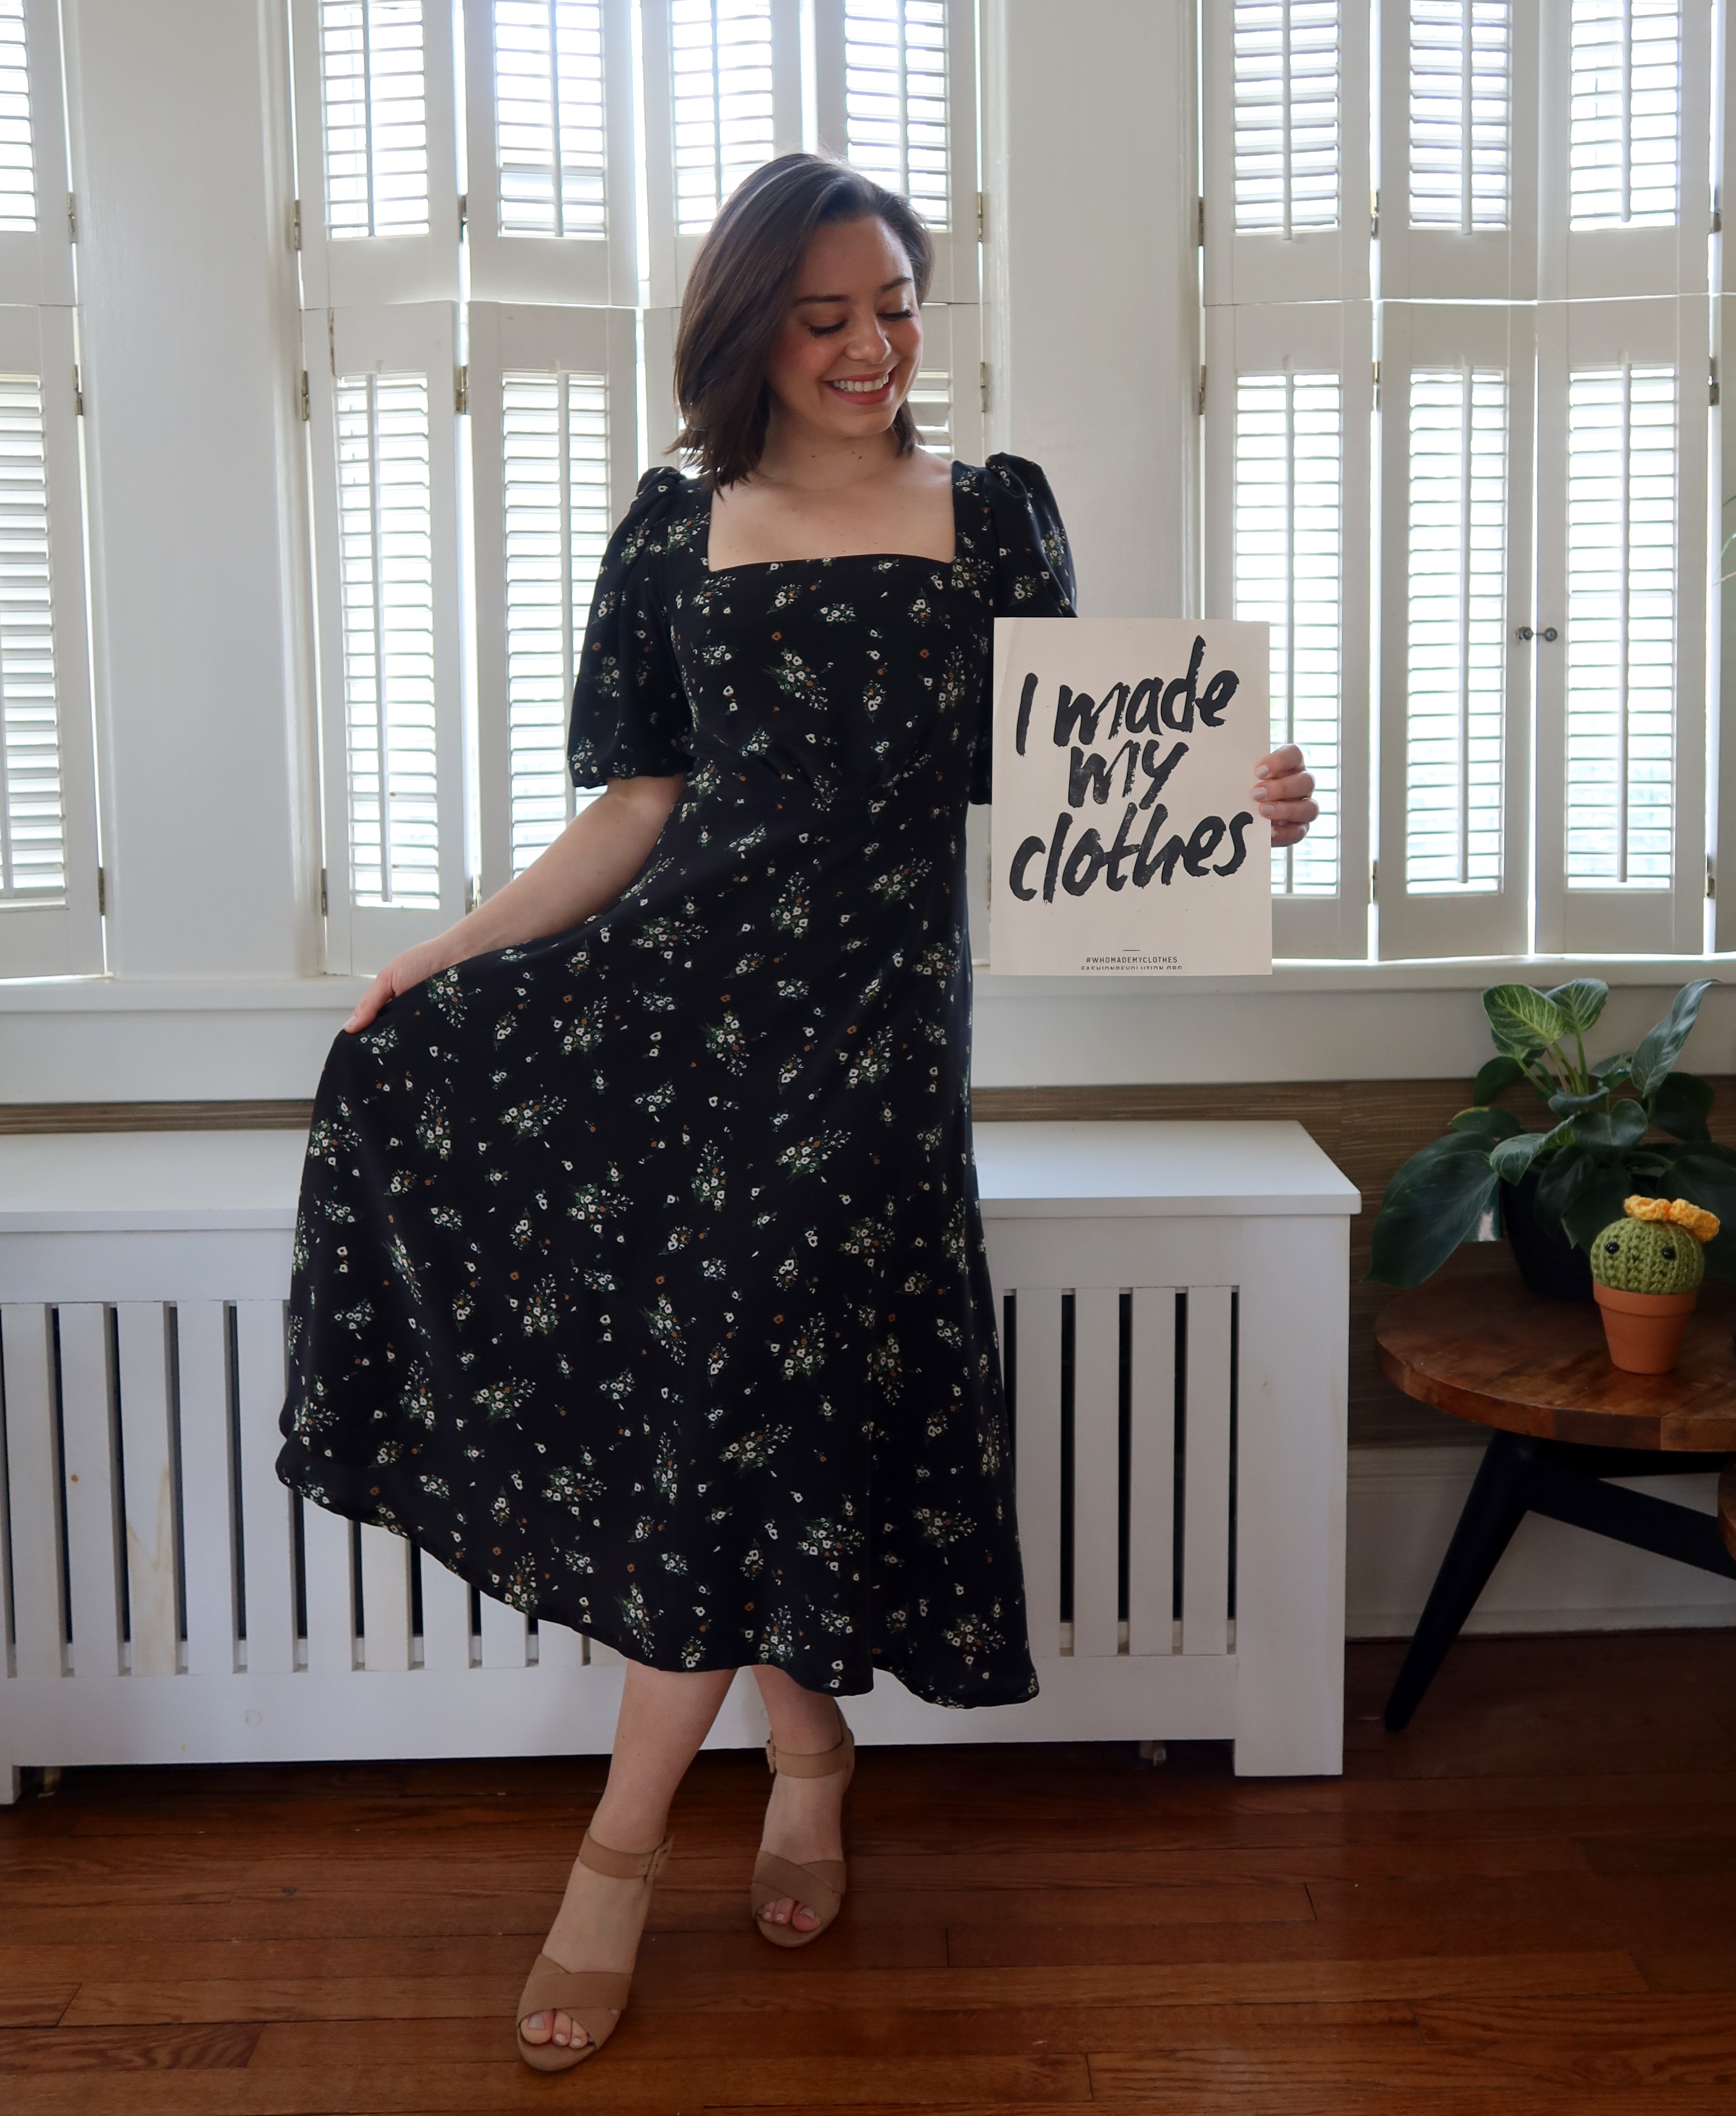
Along with this post about Fashion Revolution, I also wanted to share my latest handmade garment. While this garment is me in my handmade and eco focused “bubble”, it also encompasses many of the practices I’ve been working towards in my own wardrobe. And to be honest, there’s nothing like a new sewing project to bring in an audience!
I’ve had an itch to sew another garment, specifically a formal-ish dress. I had a wedding coming up, and another event on the way, and a dress pattern that’s been on my make list since it’s release. I fell in love with Pauline from Closet Core Patterns when it came out. Pauline is a really beautiful pattern and comes with several options to help build your dream dress, with many of the current trending styles, including puff sleeves and tiered skirt.
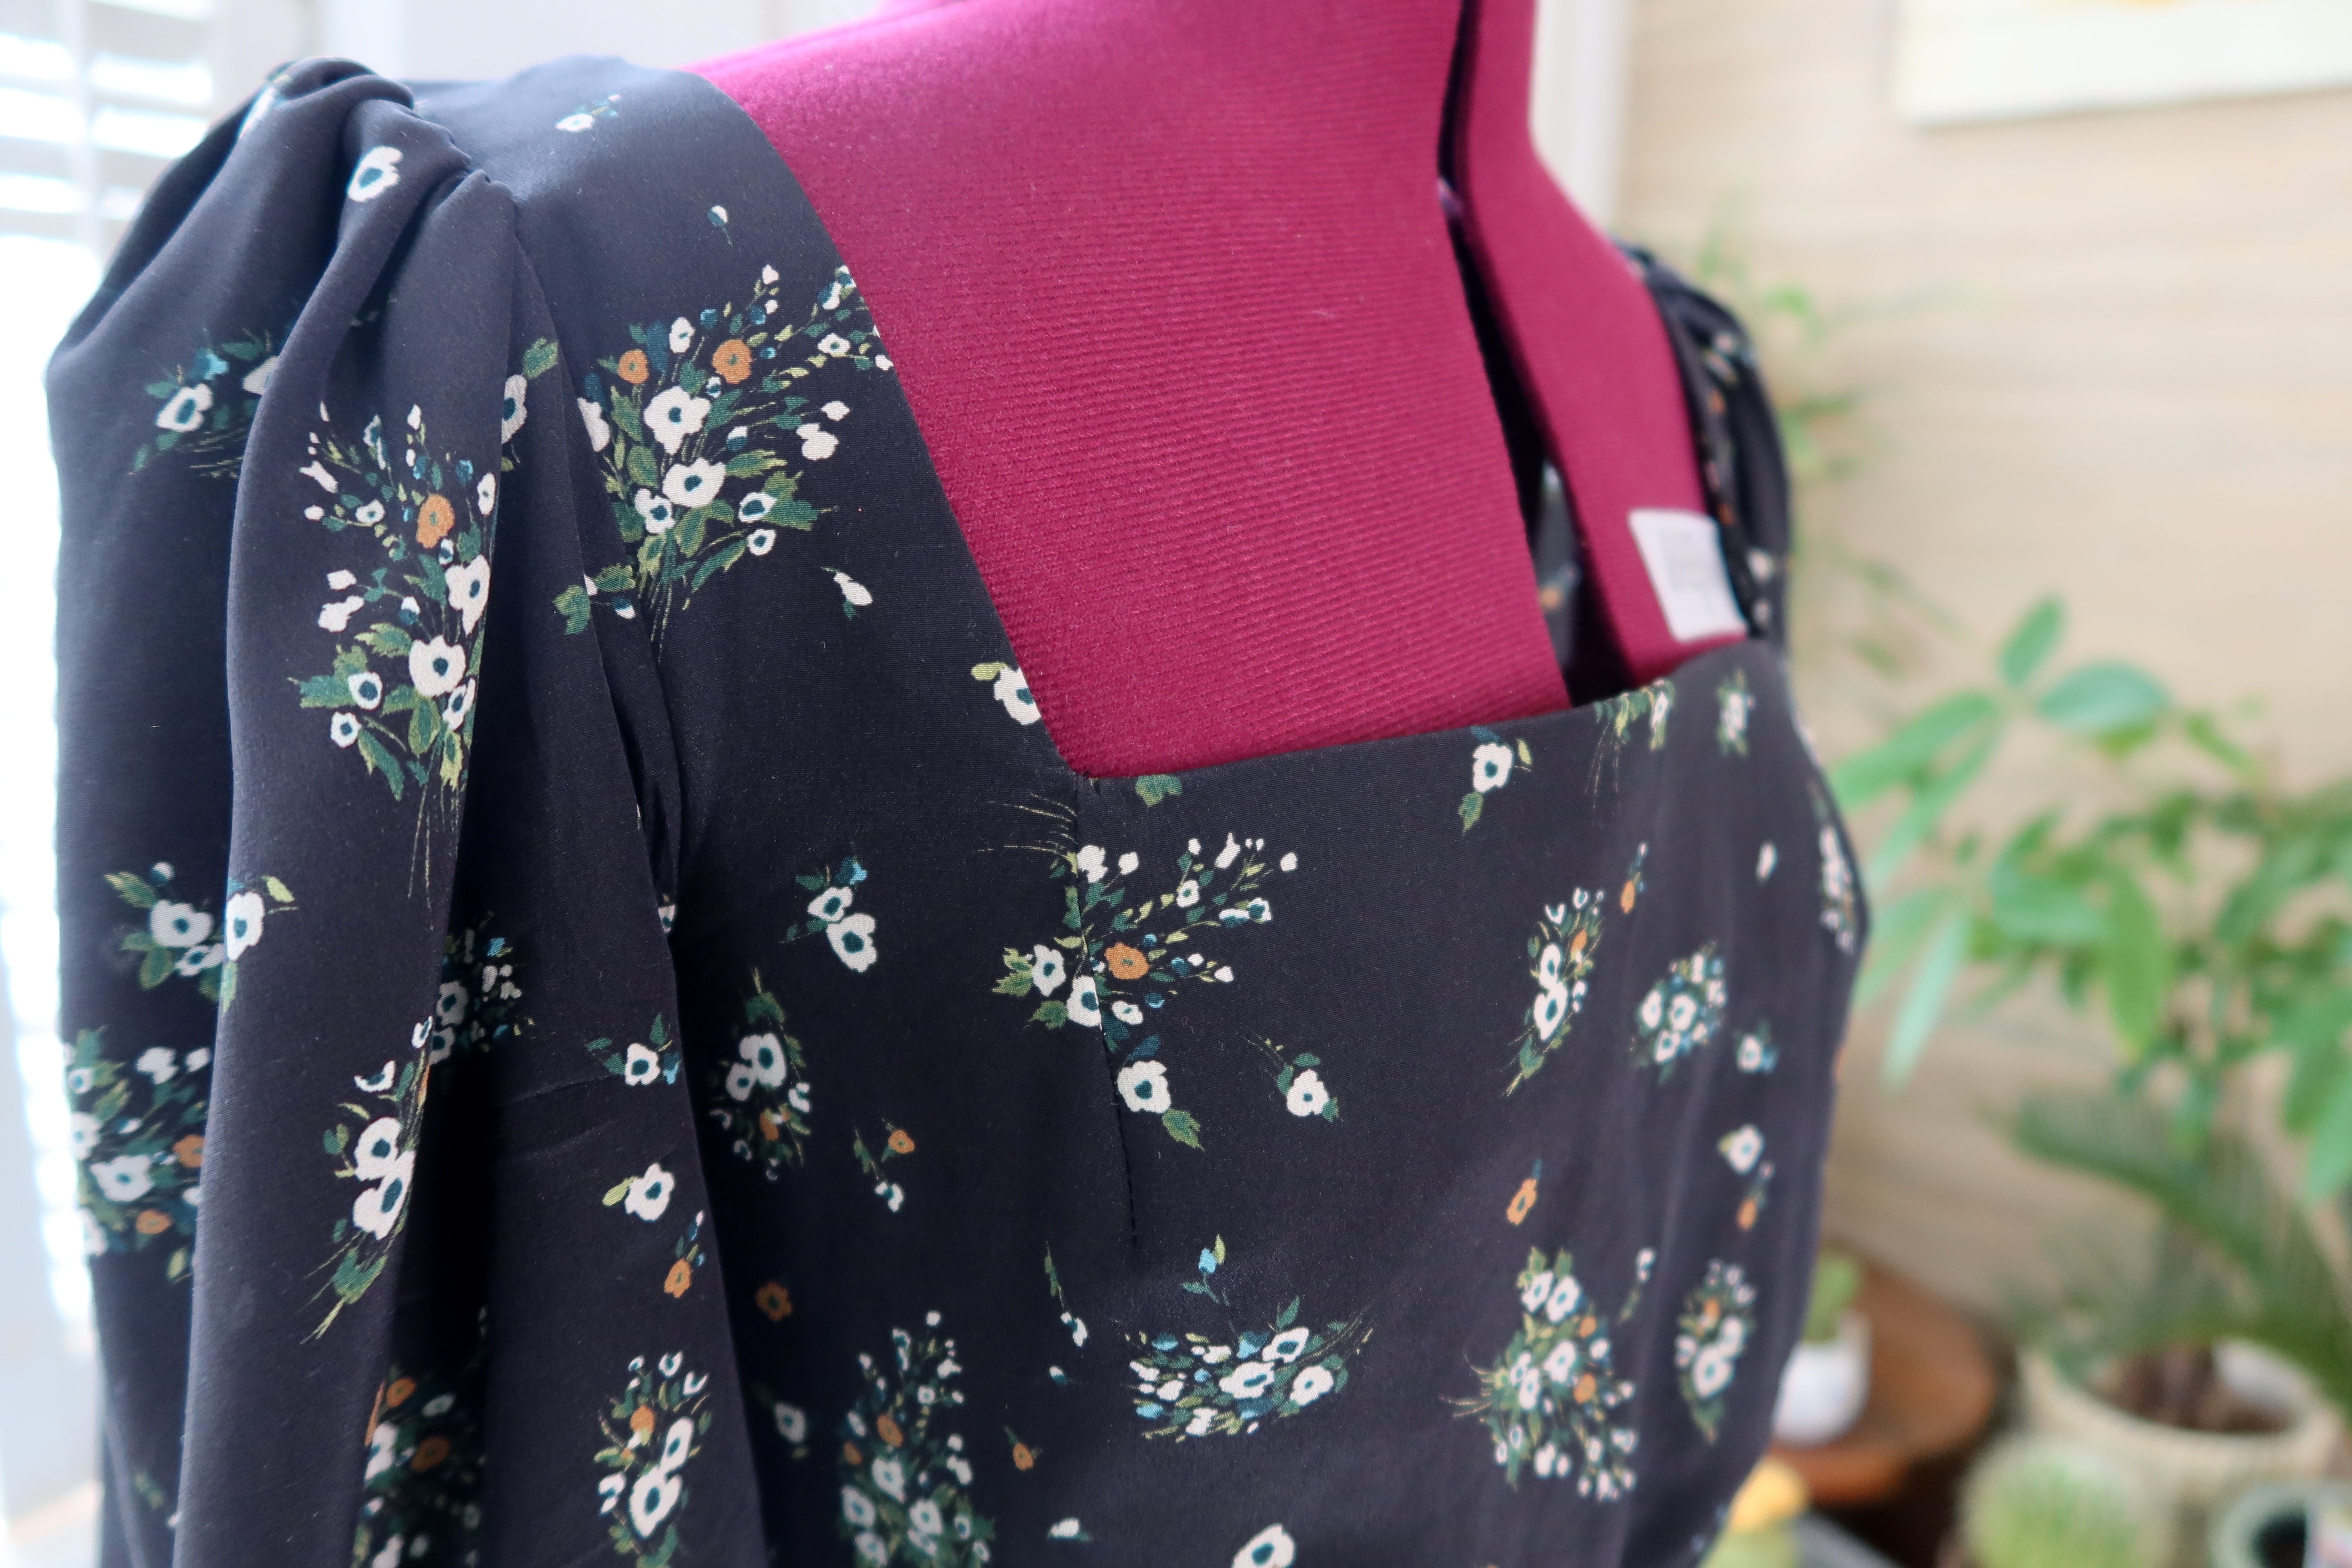
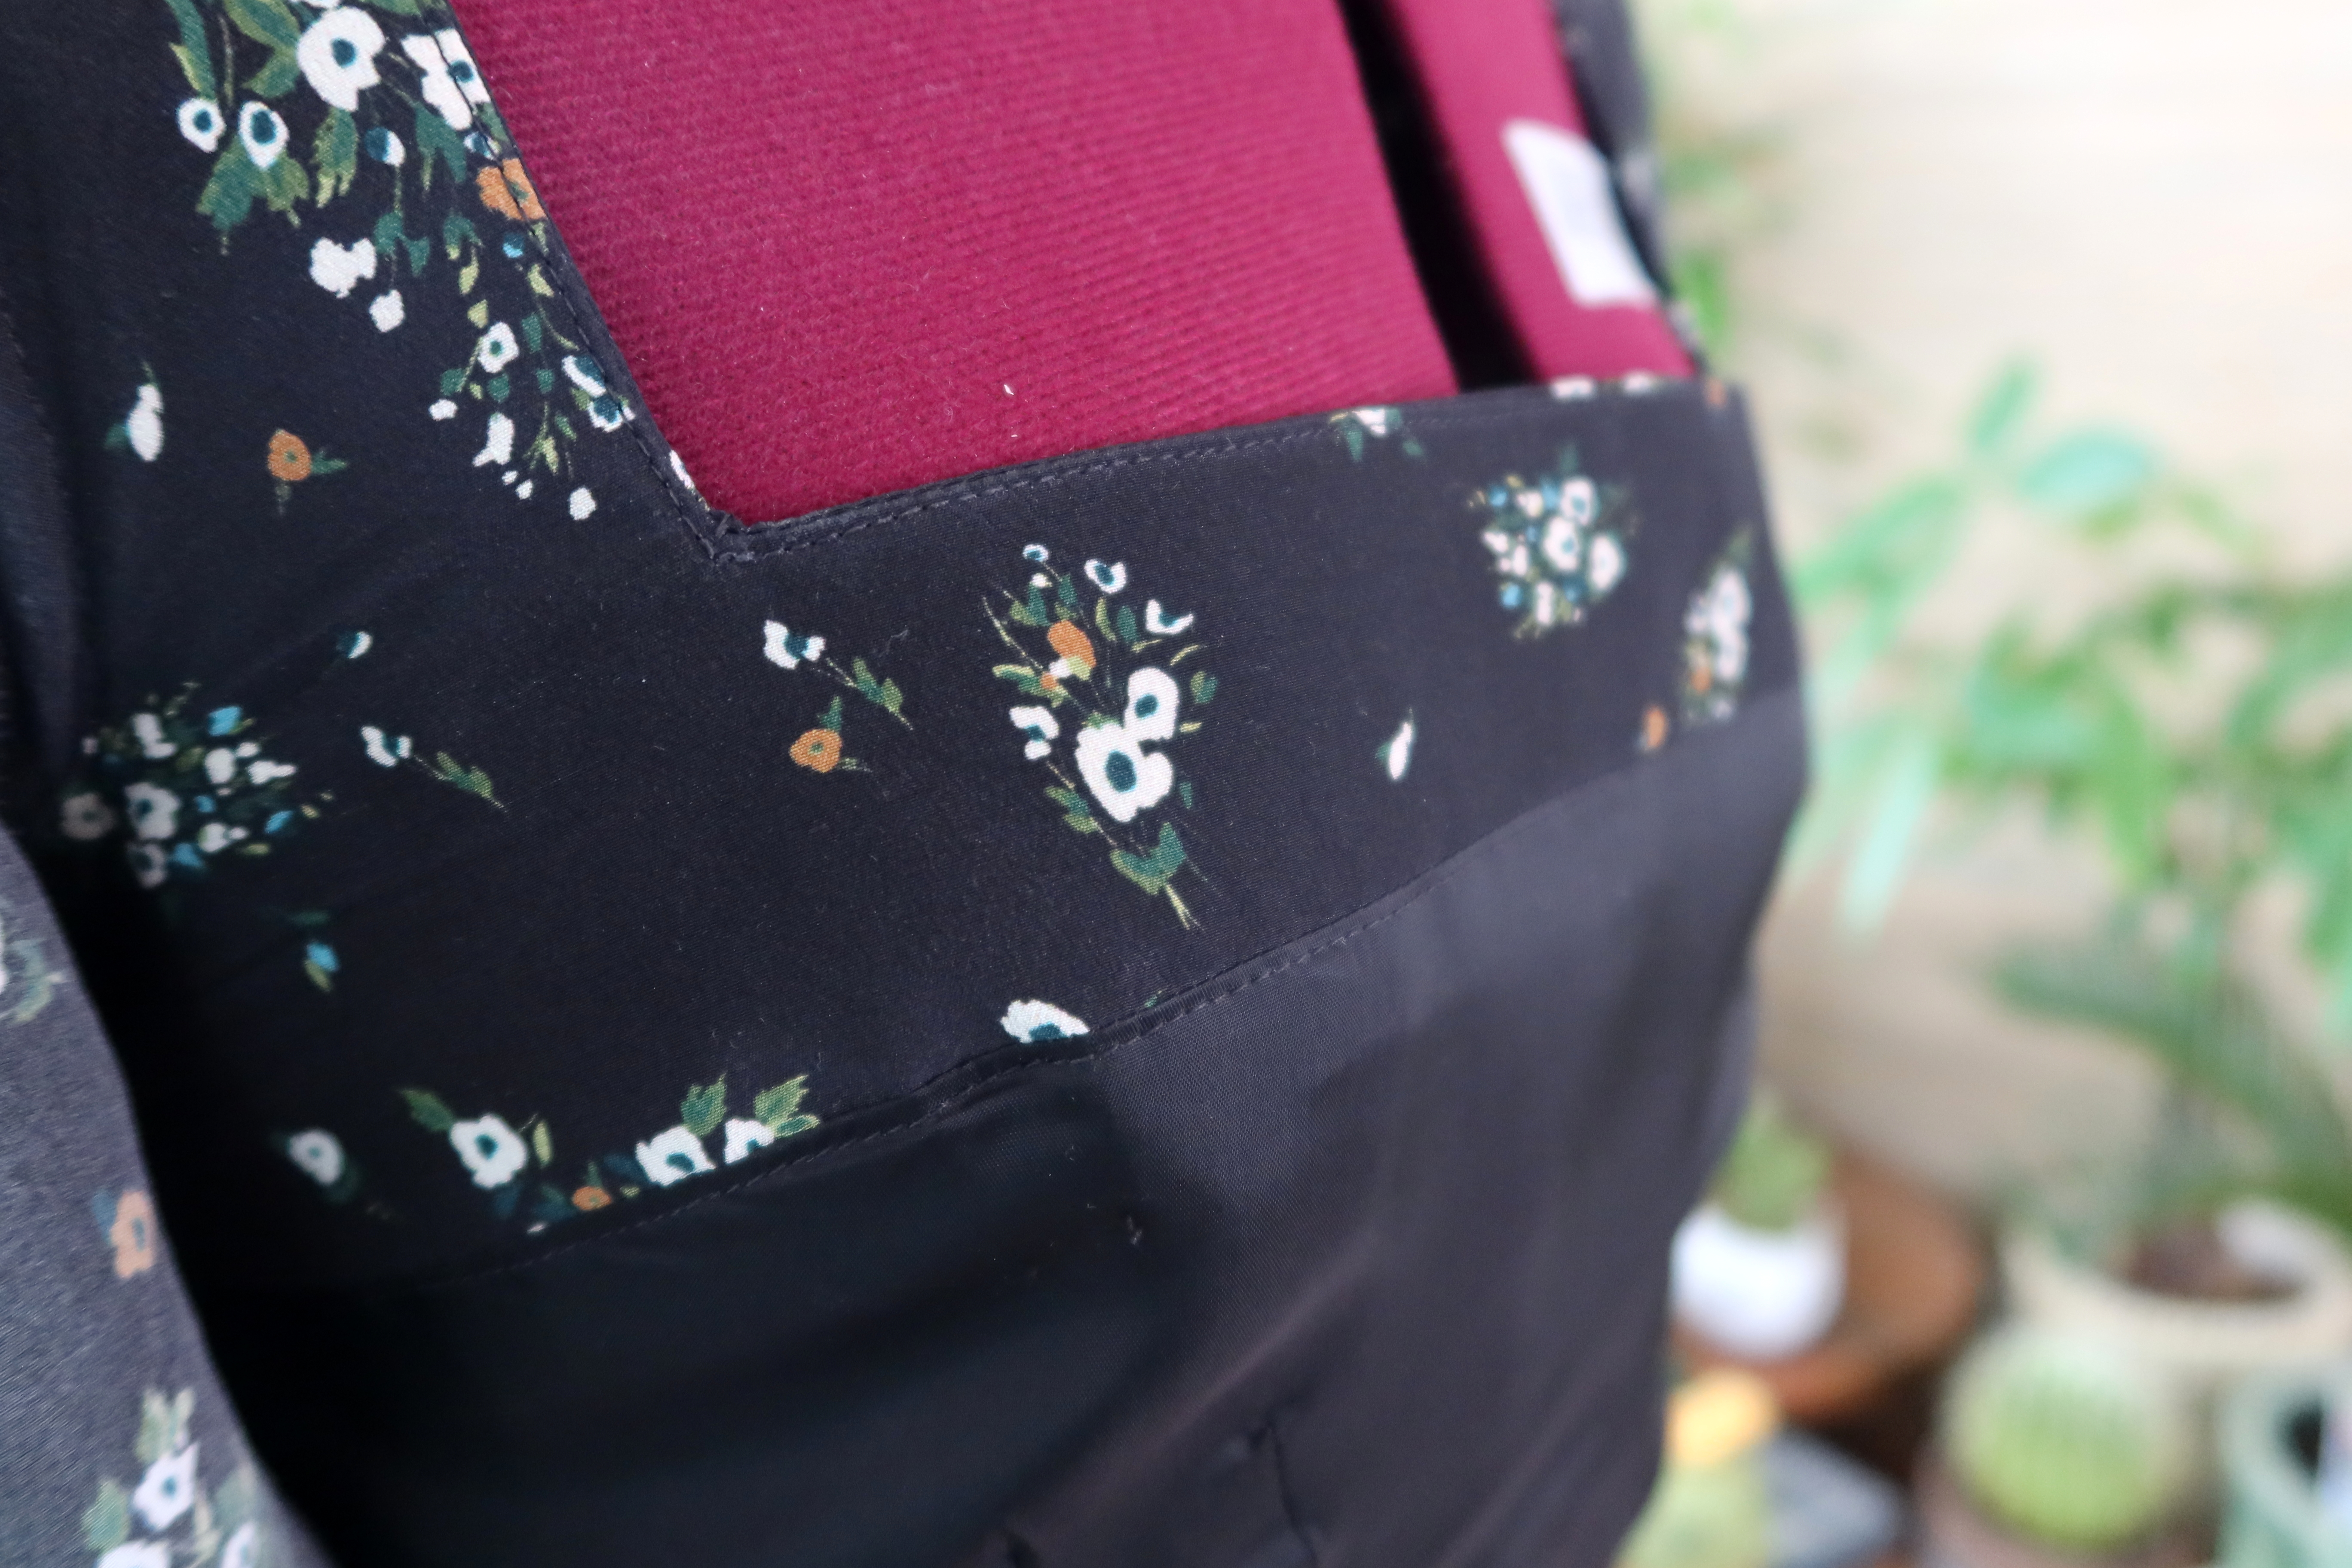
Part of my sustainable sewing journey is being aware of the material I make with, and I was happy to find this stunning black floral fabric (currently sold out!) from Stonemountain & Daughter Fabric. It’s designer deadstock silk, which hits a few sustainability points for me; deadstock and a natural fiber – also shopping/supporting a small business! It was more expensive than I normally spend on fabric, so I wanted to be sure I put in all the effort I could into this garment.
I fit almost perfectly into the 6 on Pauline’s size chart, and cut my toile in that size. (Side note, my toile was made from a pair of my retired bed sheets!) I made View B, with the shorter puff sleeve and tier skirt, but didn’t like how the skirt looked on me. It felt a bit too trendy to become a dress I would wear for years to come. I was also a bit surprised when the bodice came out too big, but didn’t account for my measurements when wearing the correct undergarments. (I have a shapewear bodysuit that I wear under all my formal wear). I cut my final dress in a size 4.
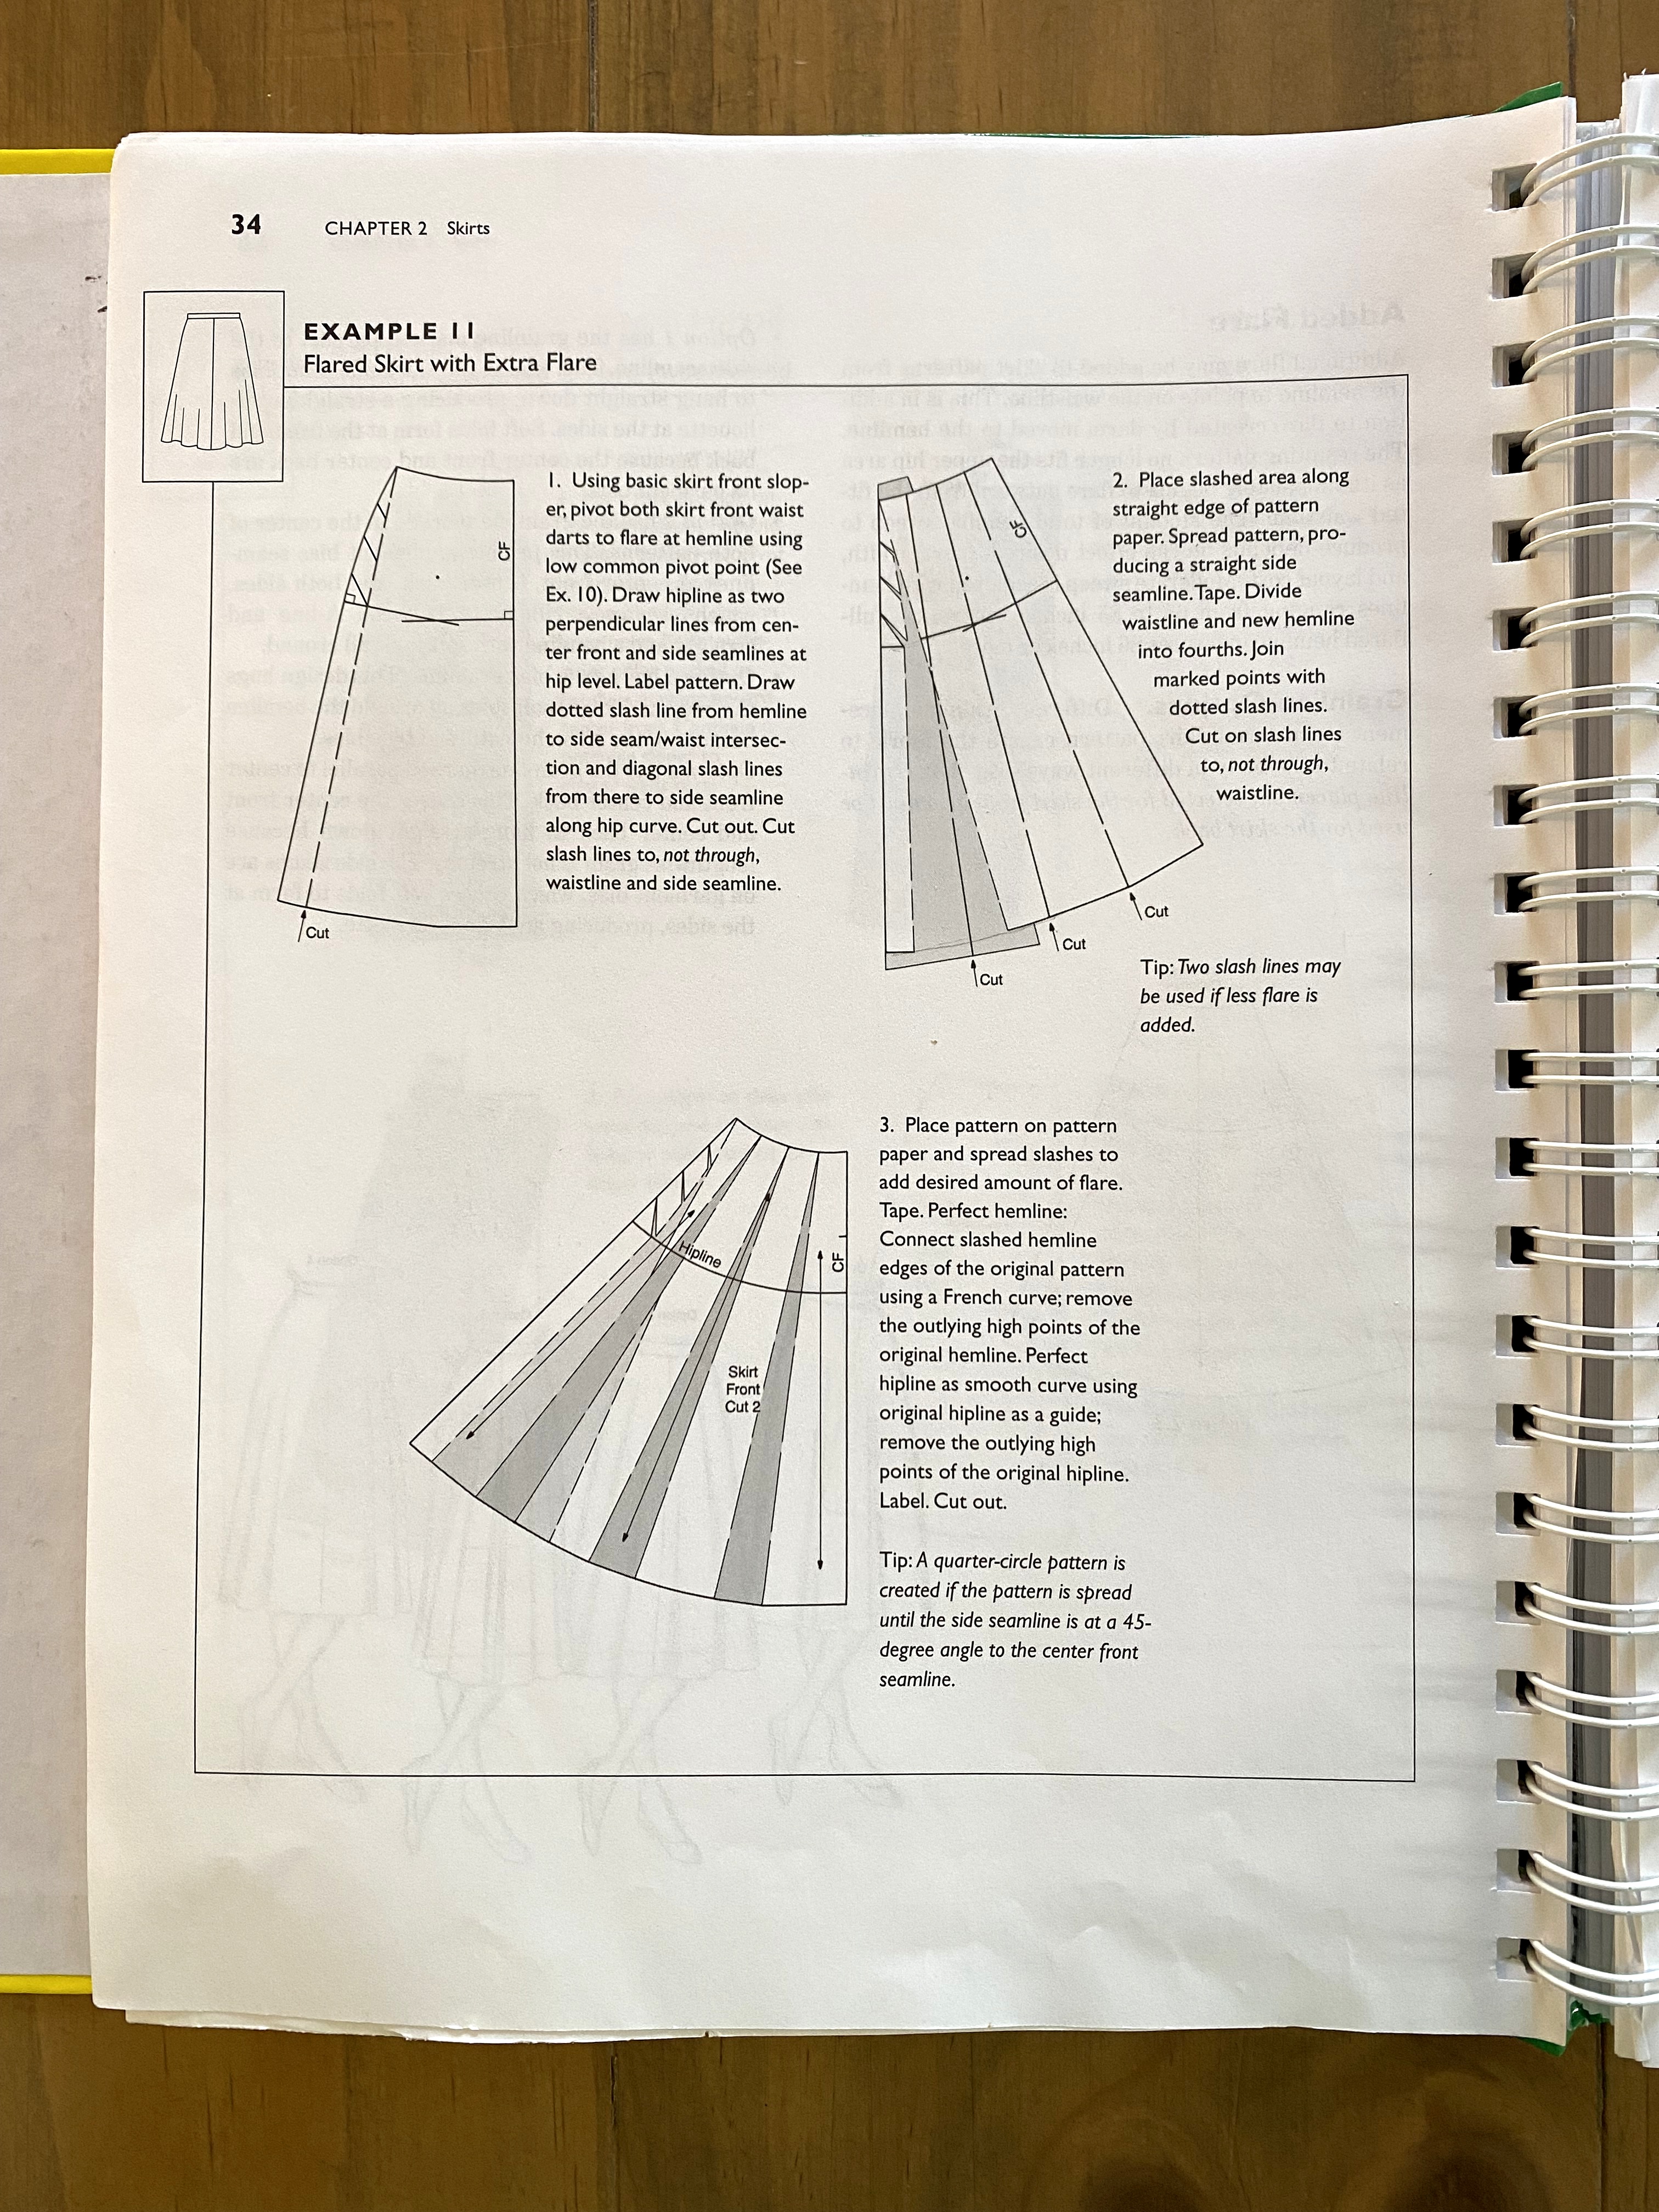
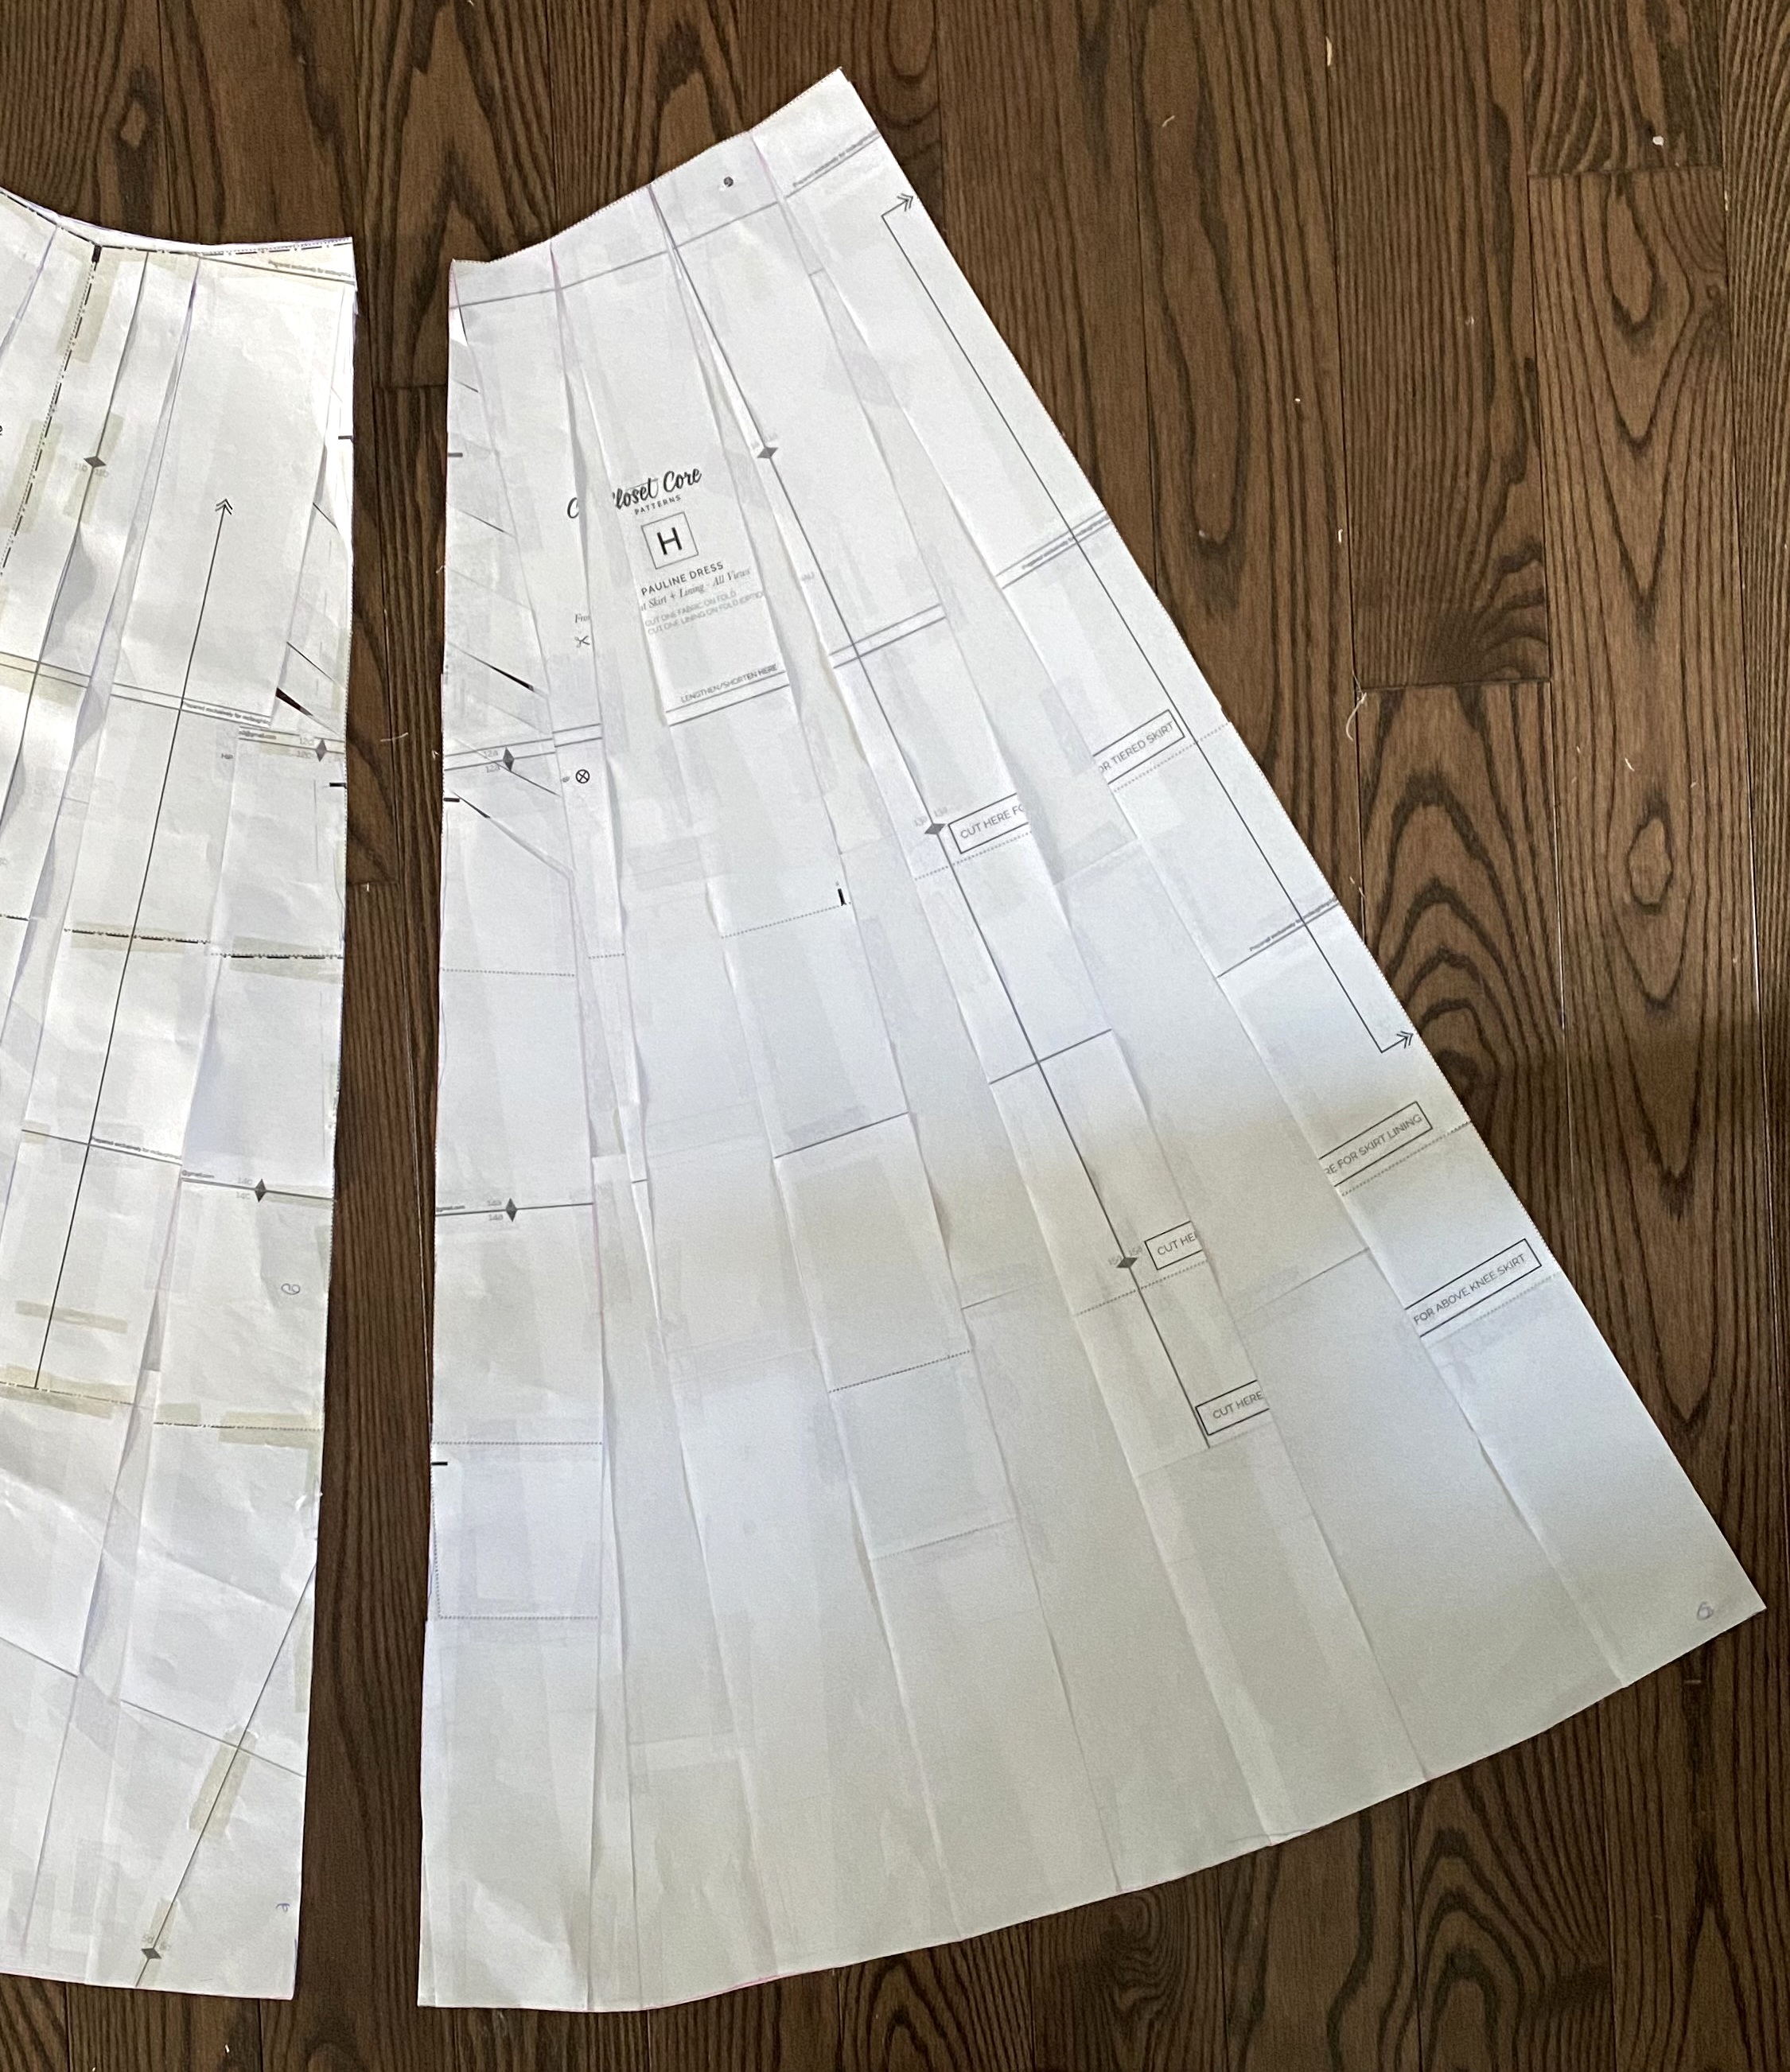
I decided to change the skirt to an flare with some added flare and made new pattern pieces out of the provided skirt pattern. Here’s what I did:
I used my college book, Principles of Flat Pattern Design by Nora M. MacDonald, 3rd Edition (which, at the time of writing this, is available used from $5-$30 online!), and the original View B skirt pattern. I first extended the skirt pattern by 9.5″ in length, then slashed and spread the pattern – as shown in the book and my final pattern pieces. I repeated this for the back pattern pieces. As explained in the book, for the skirt to fall evenly, the slashes need to be evenly distributed throughout the pattern piece, not just added to the side seams. I also converted the curved waist to straight lines. Because I made this from silk, I didn’t add pockets due to bulk, and having the straight side seams laid the skirt better on my body.
The rest of the dress came together, although I did have a few trouble spots with the bodice. The neckline took a few tries to get my seams just right, and I did re-stitch the bust darts a few times. Years ago, I would have left my improper stitching the first time, because I was more focused on quick sewing, but I’m now taking extra time to fix mistakes. I used to think this was a form of perfectionism, and maybe it is a bit, but I prefer to think of it as quailty control, and ensuring proper fit/construction.
I lined the dress with lining fabric from Stonemountain & Daughter. (I used Bemberg Rayon, but Stonemountain also offers Deadstock Silk Lining, which I didn’t see at the time of shoppping – progress over perfection, Trish!) To line the skirt, I cut the bottom off my revised skirt pattern pieces. (Sorry I forgot to iron the skirt lining, I didn’t think I would take photos, but you can tell this dress was well worn!)
I absolutely love my dress! I am so proud of it, and it’s a really beautiful addition to my wardrobe. I wore it to my friend’s wedding a few weeks ago, and forgot to take photos until we were all sweaty from dancing the night away. But, the dress held up beautifully all night long, through lots of dancing, some sitting and even some sprinkles of rain! I’ll be wearing it again in a few weeks so maybe I’ll be able to get an event photo then!
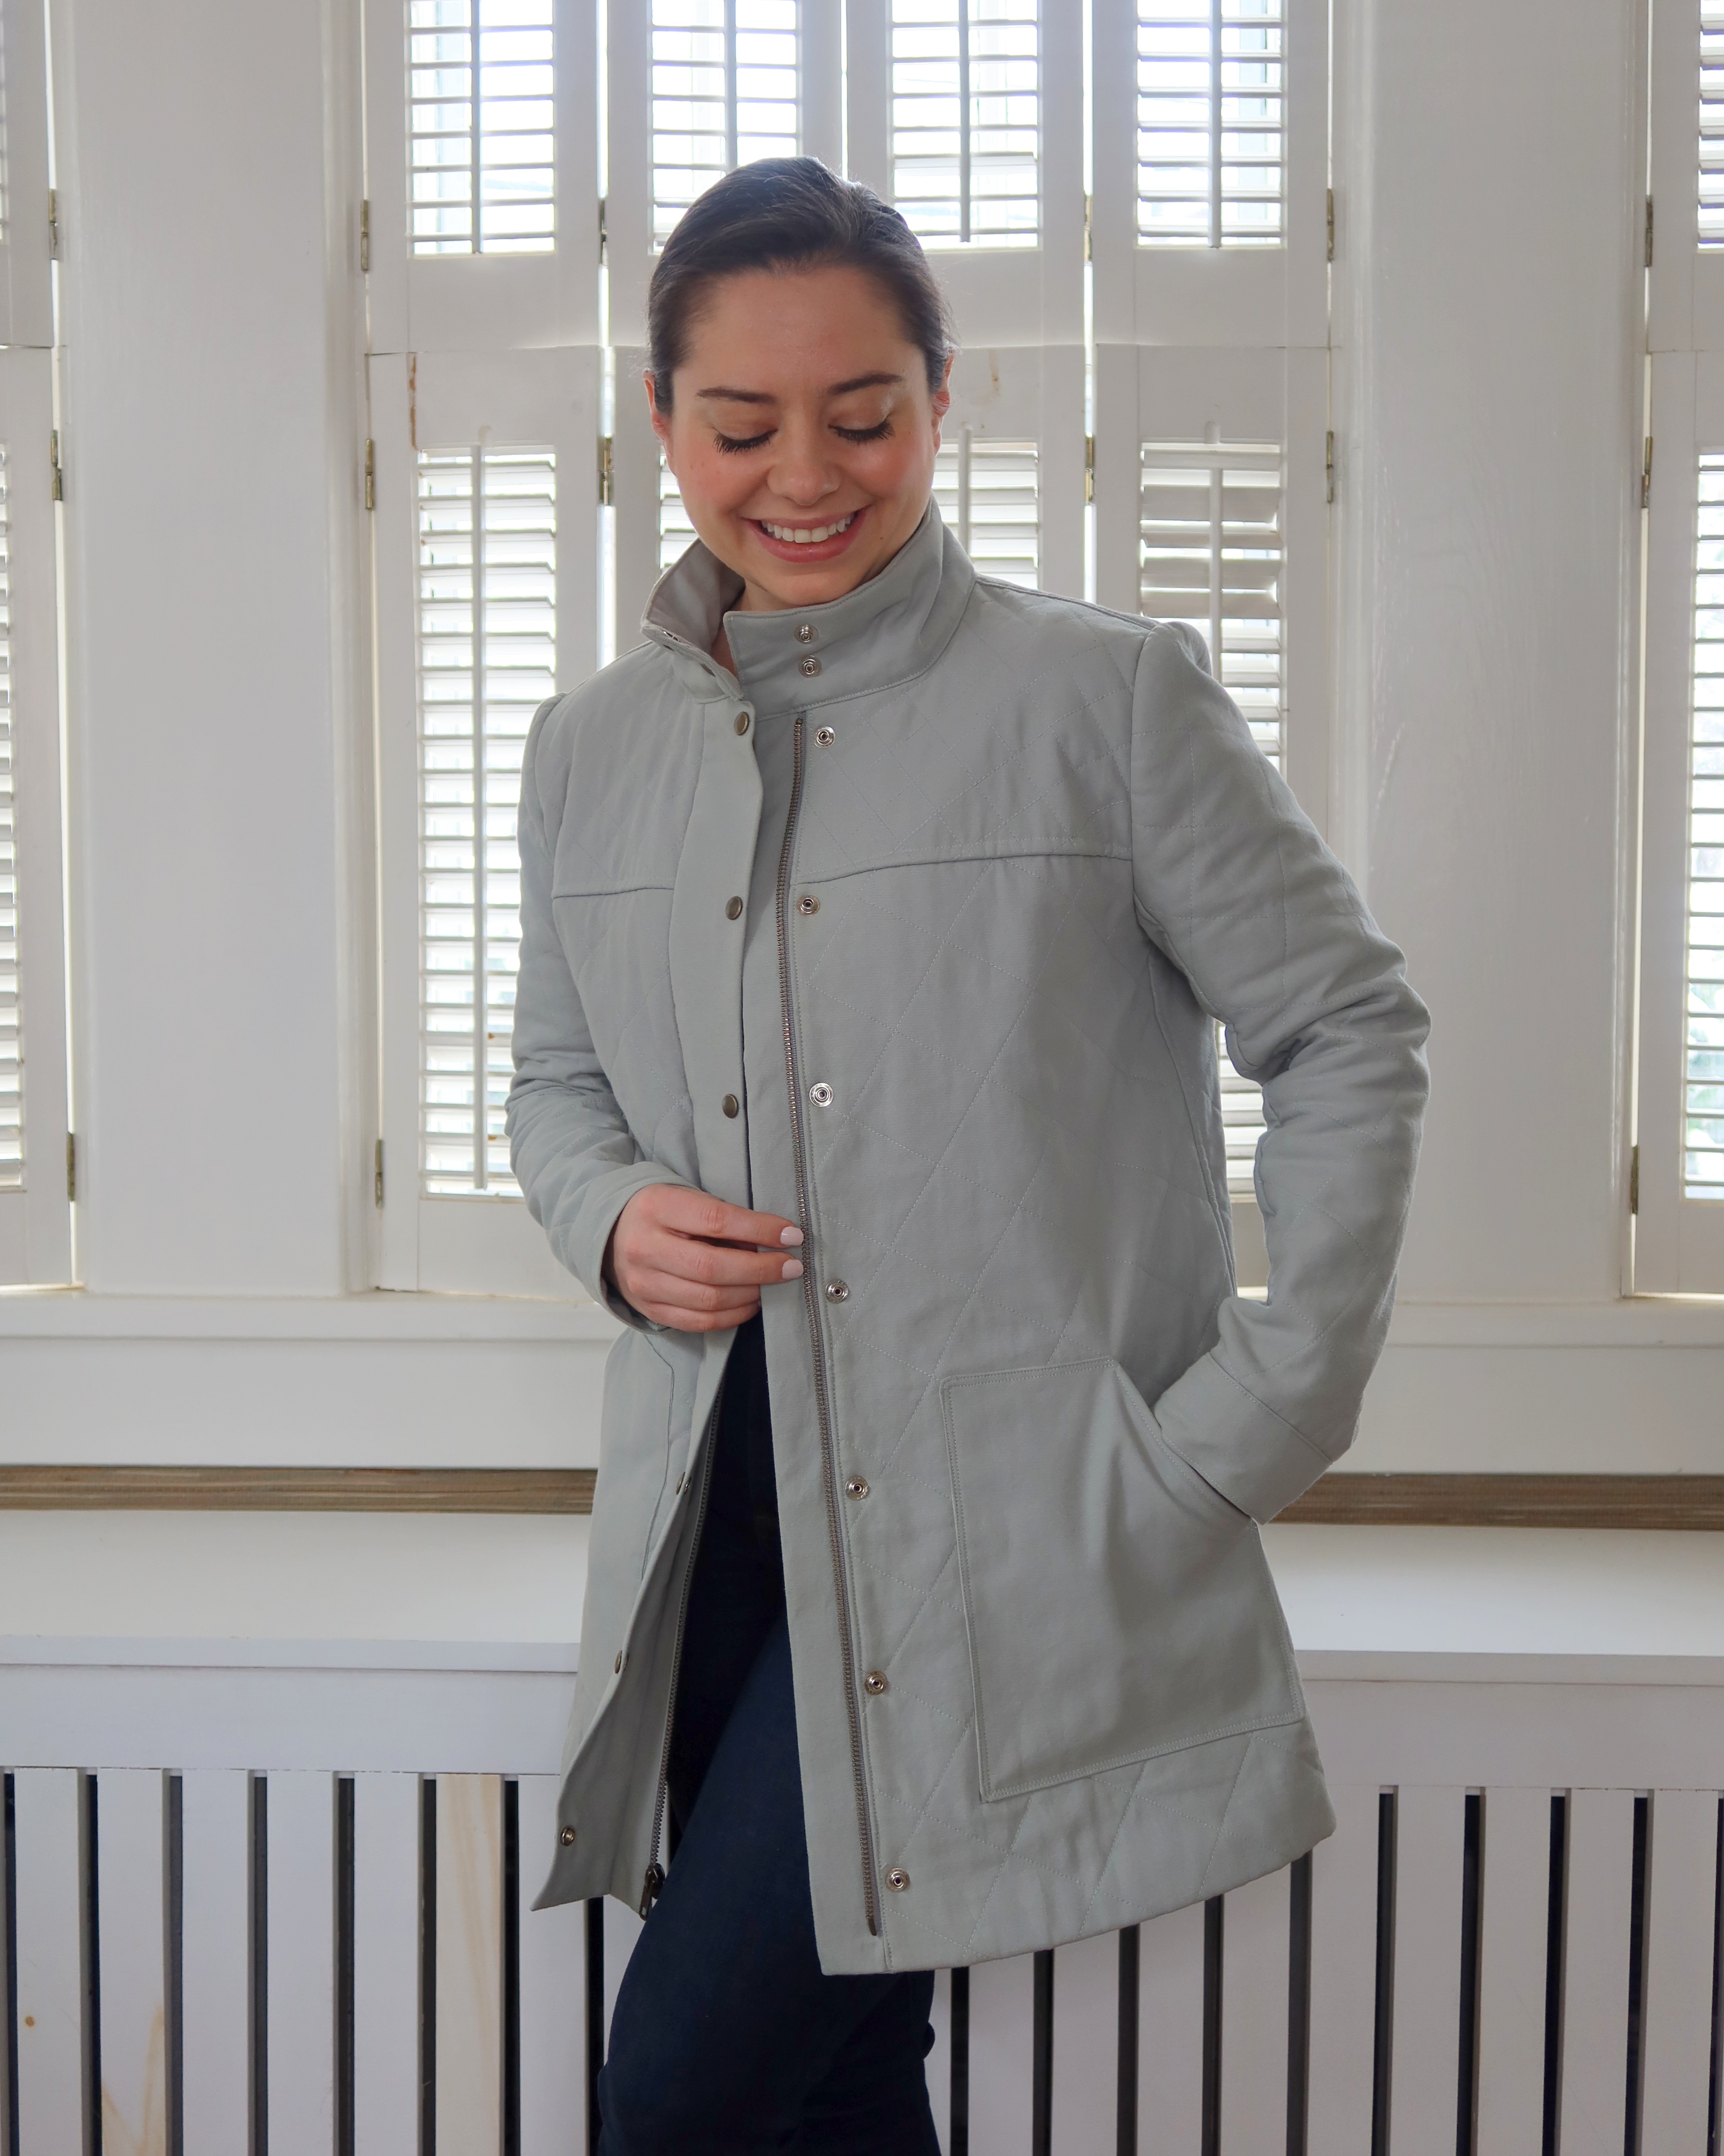
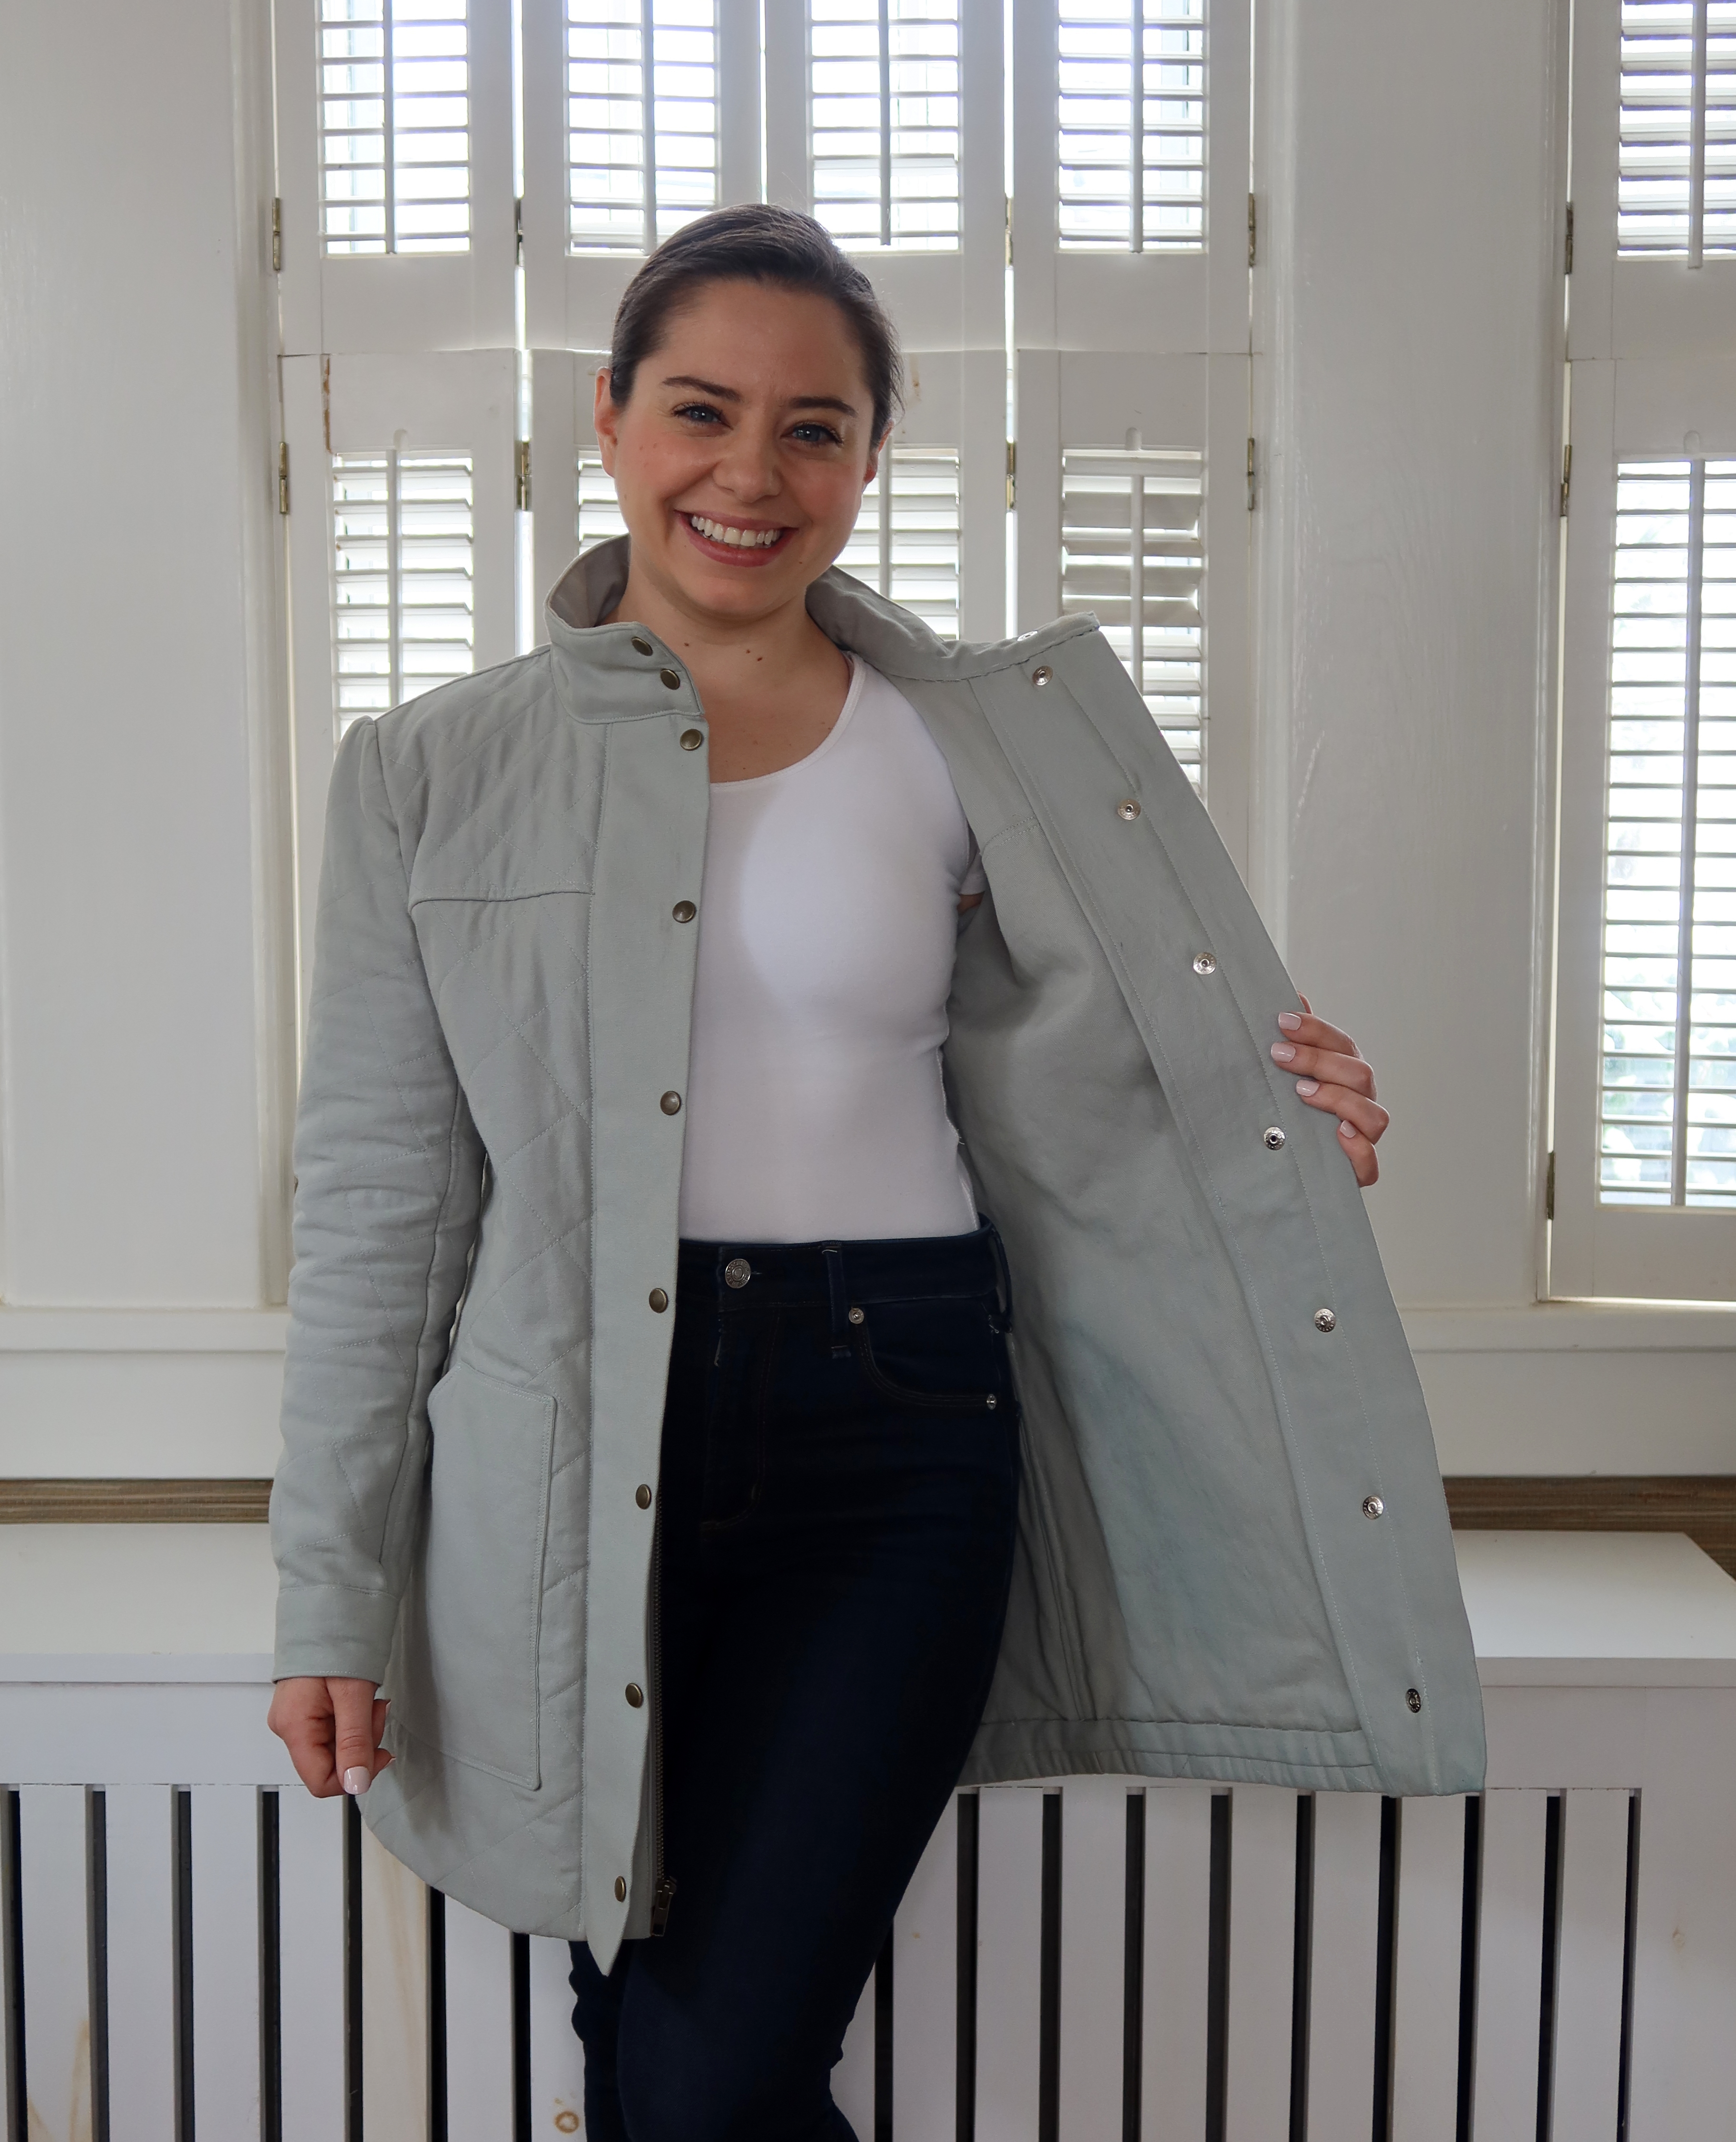
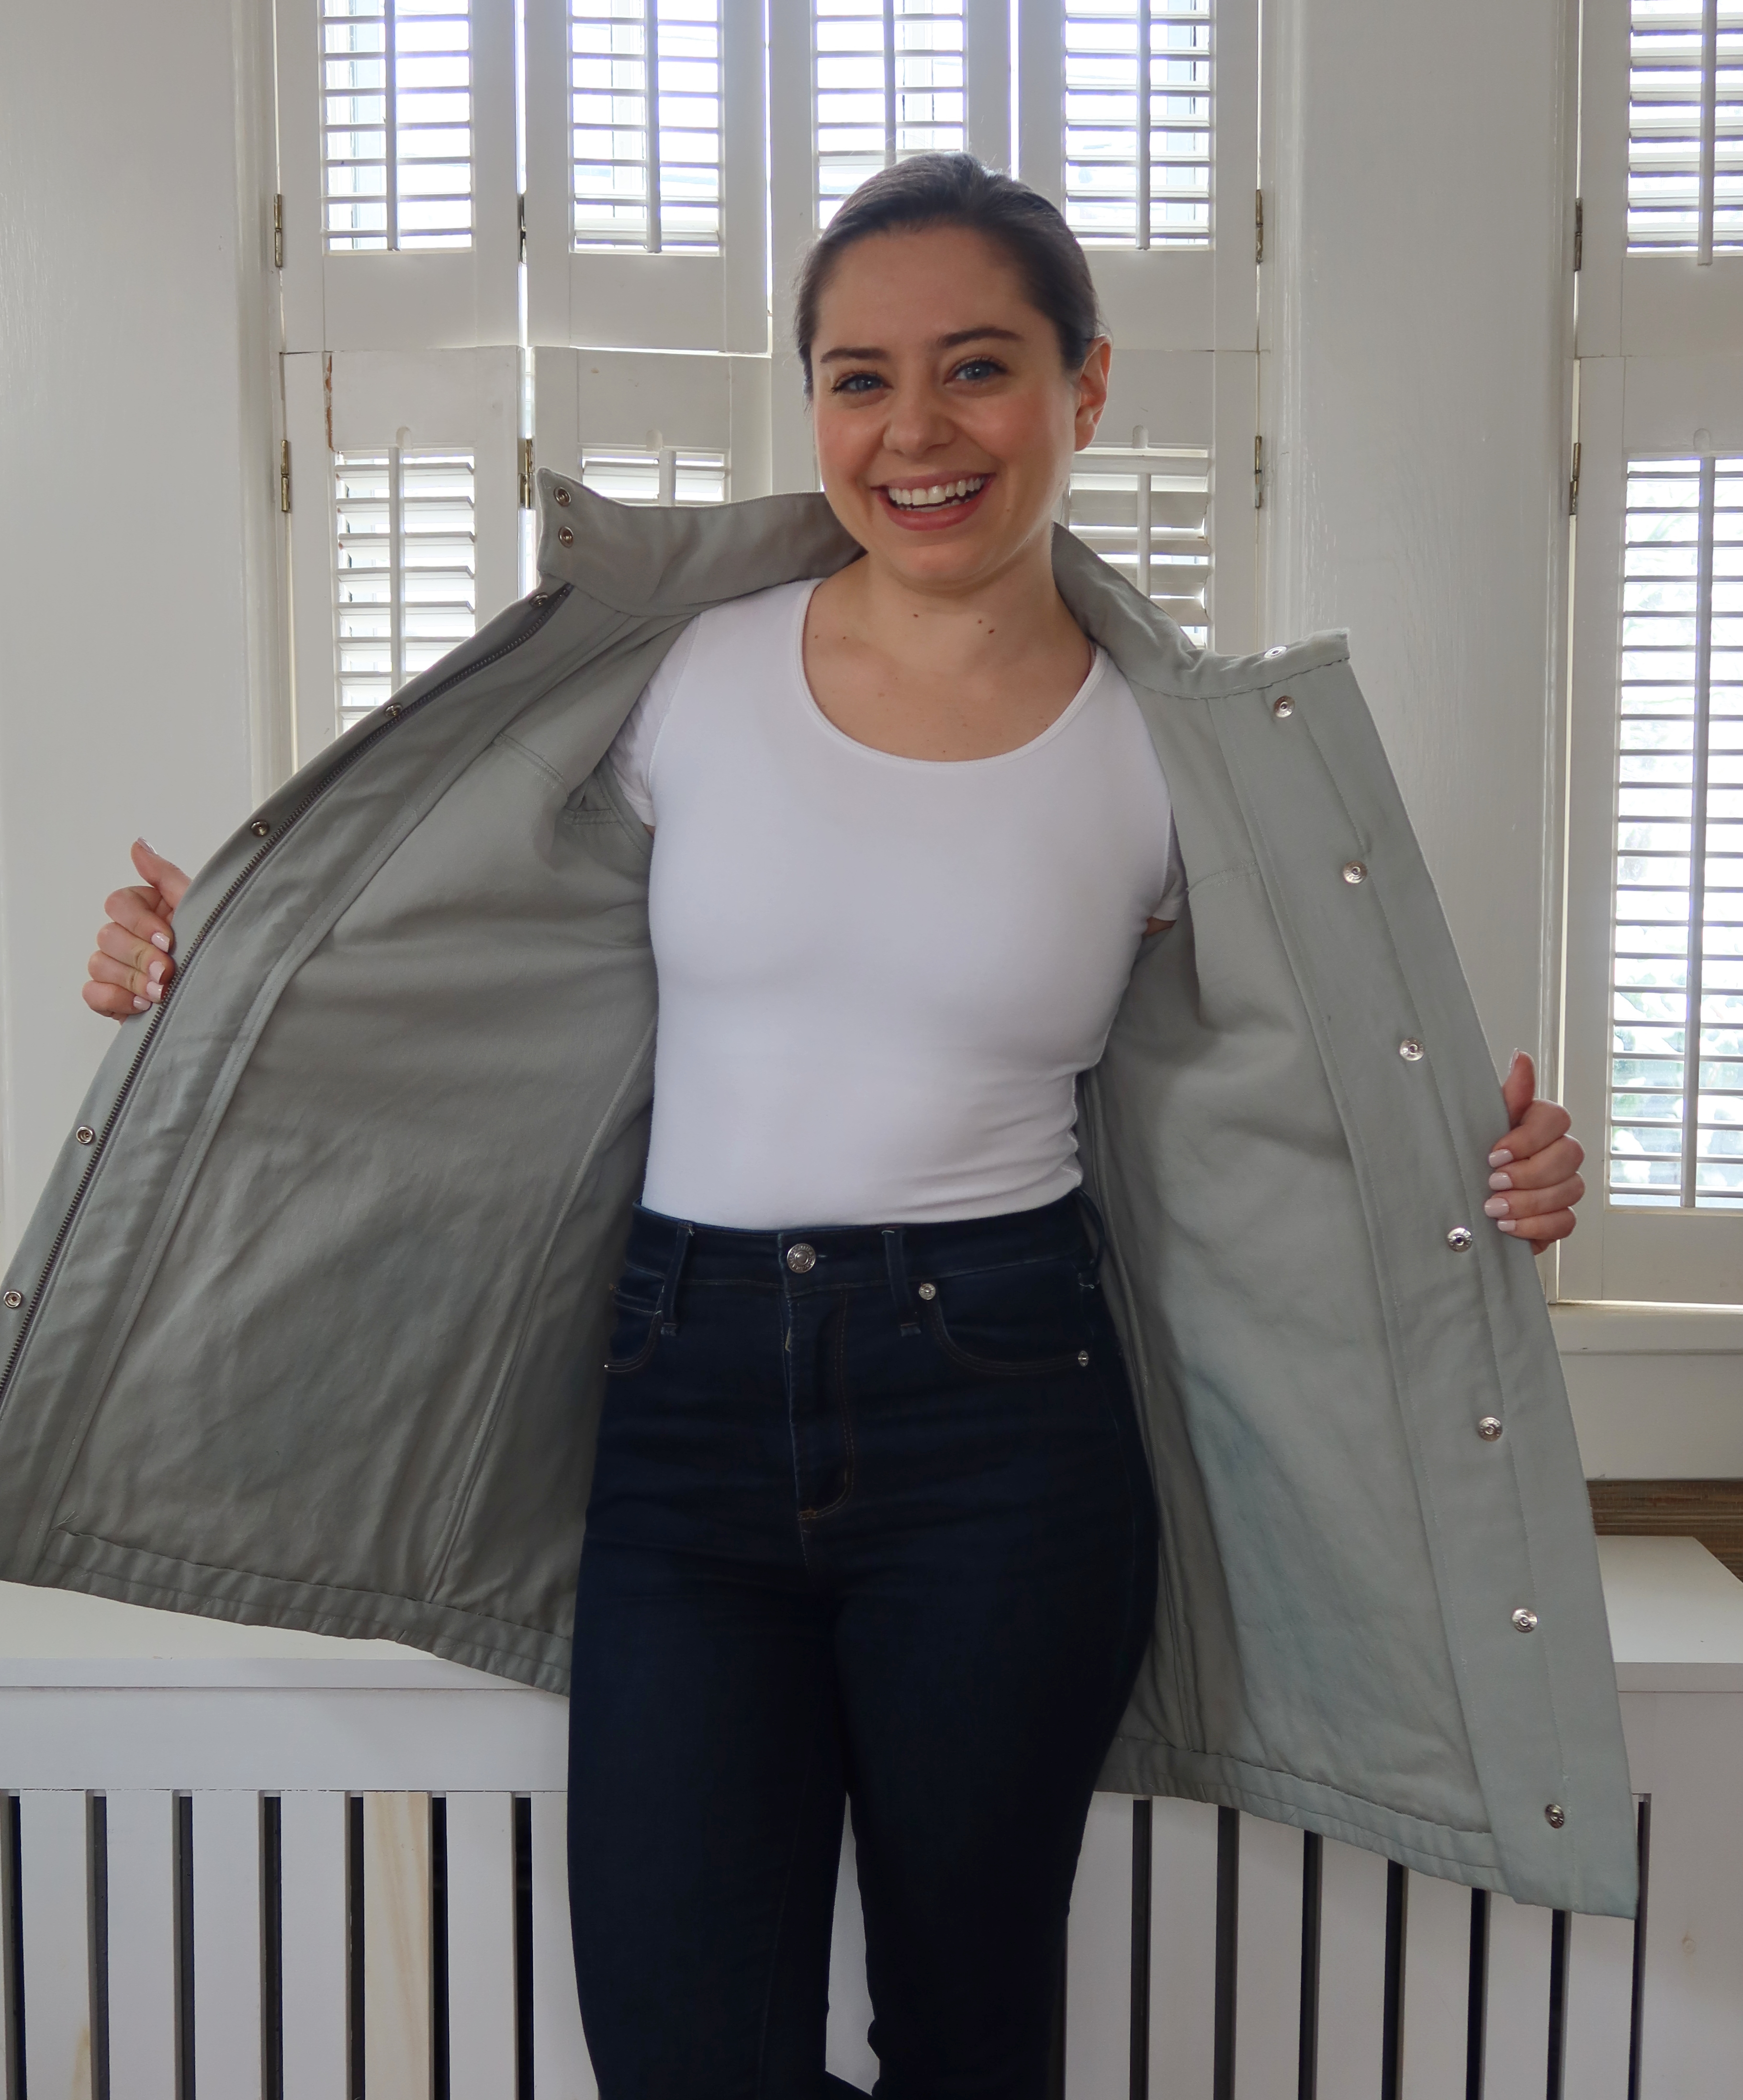
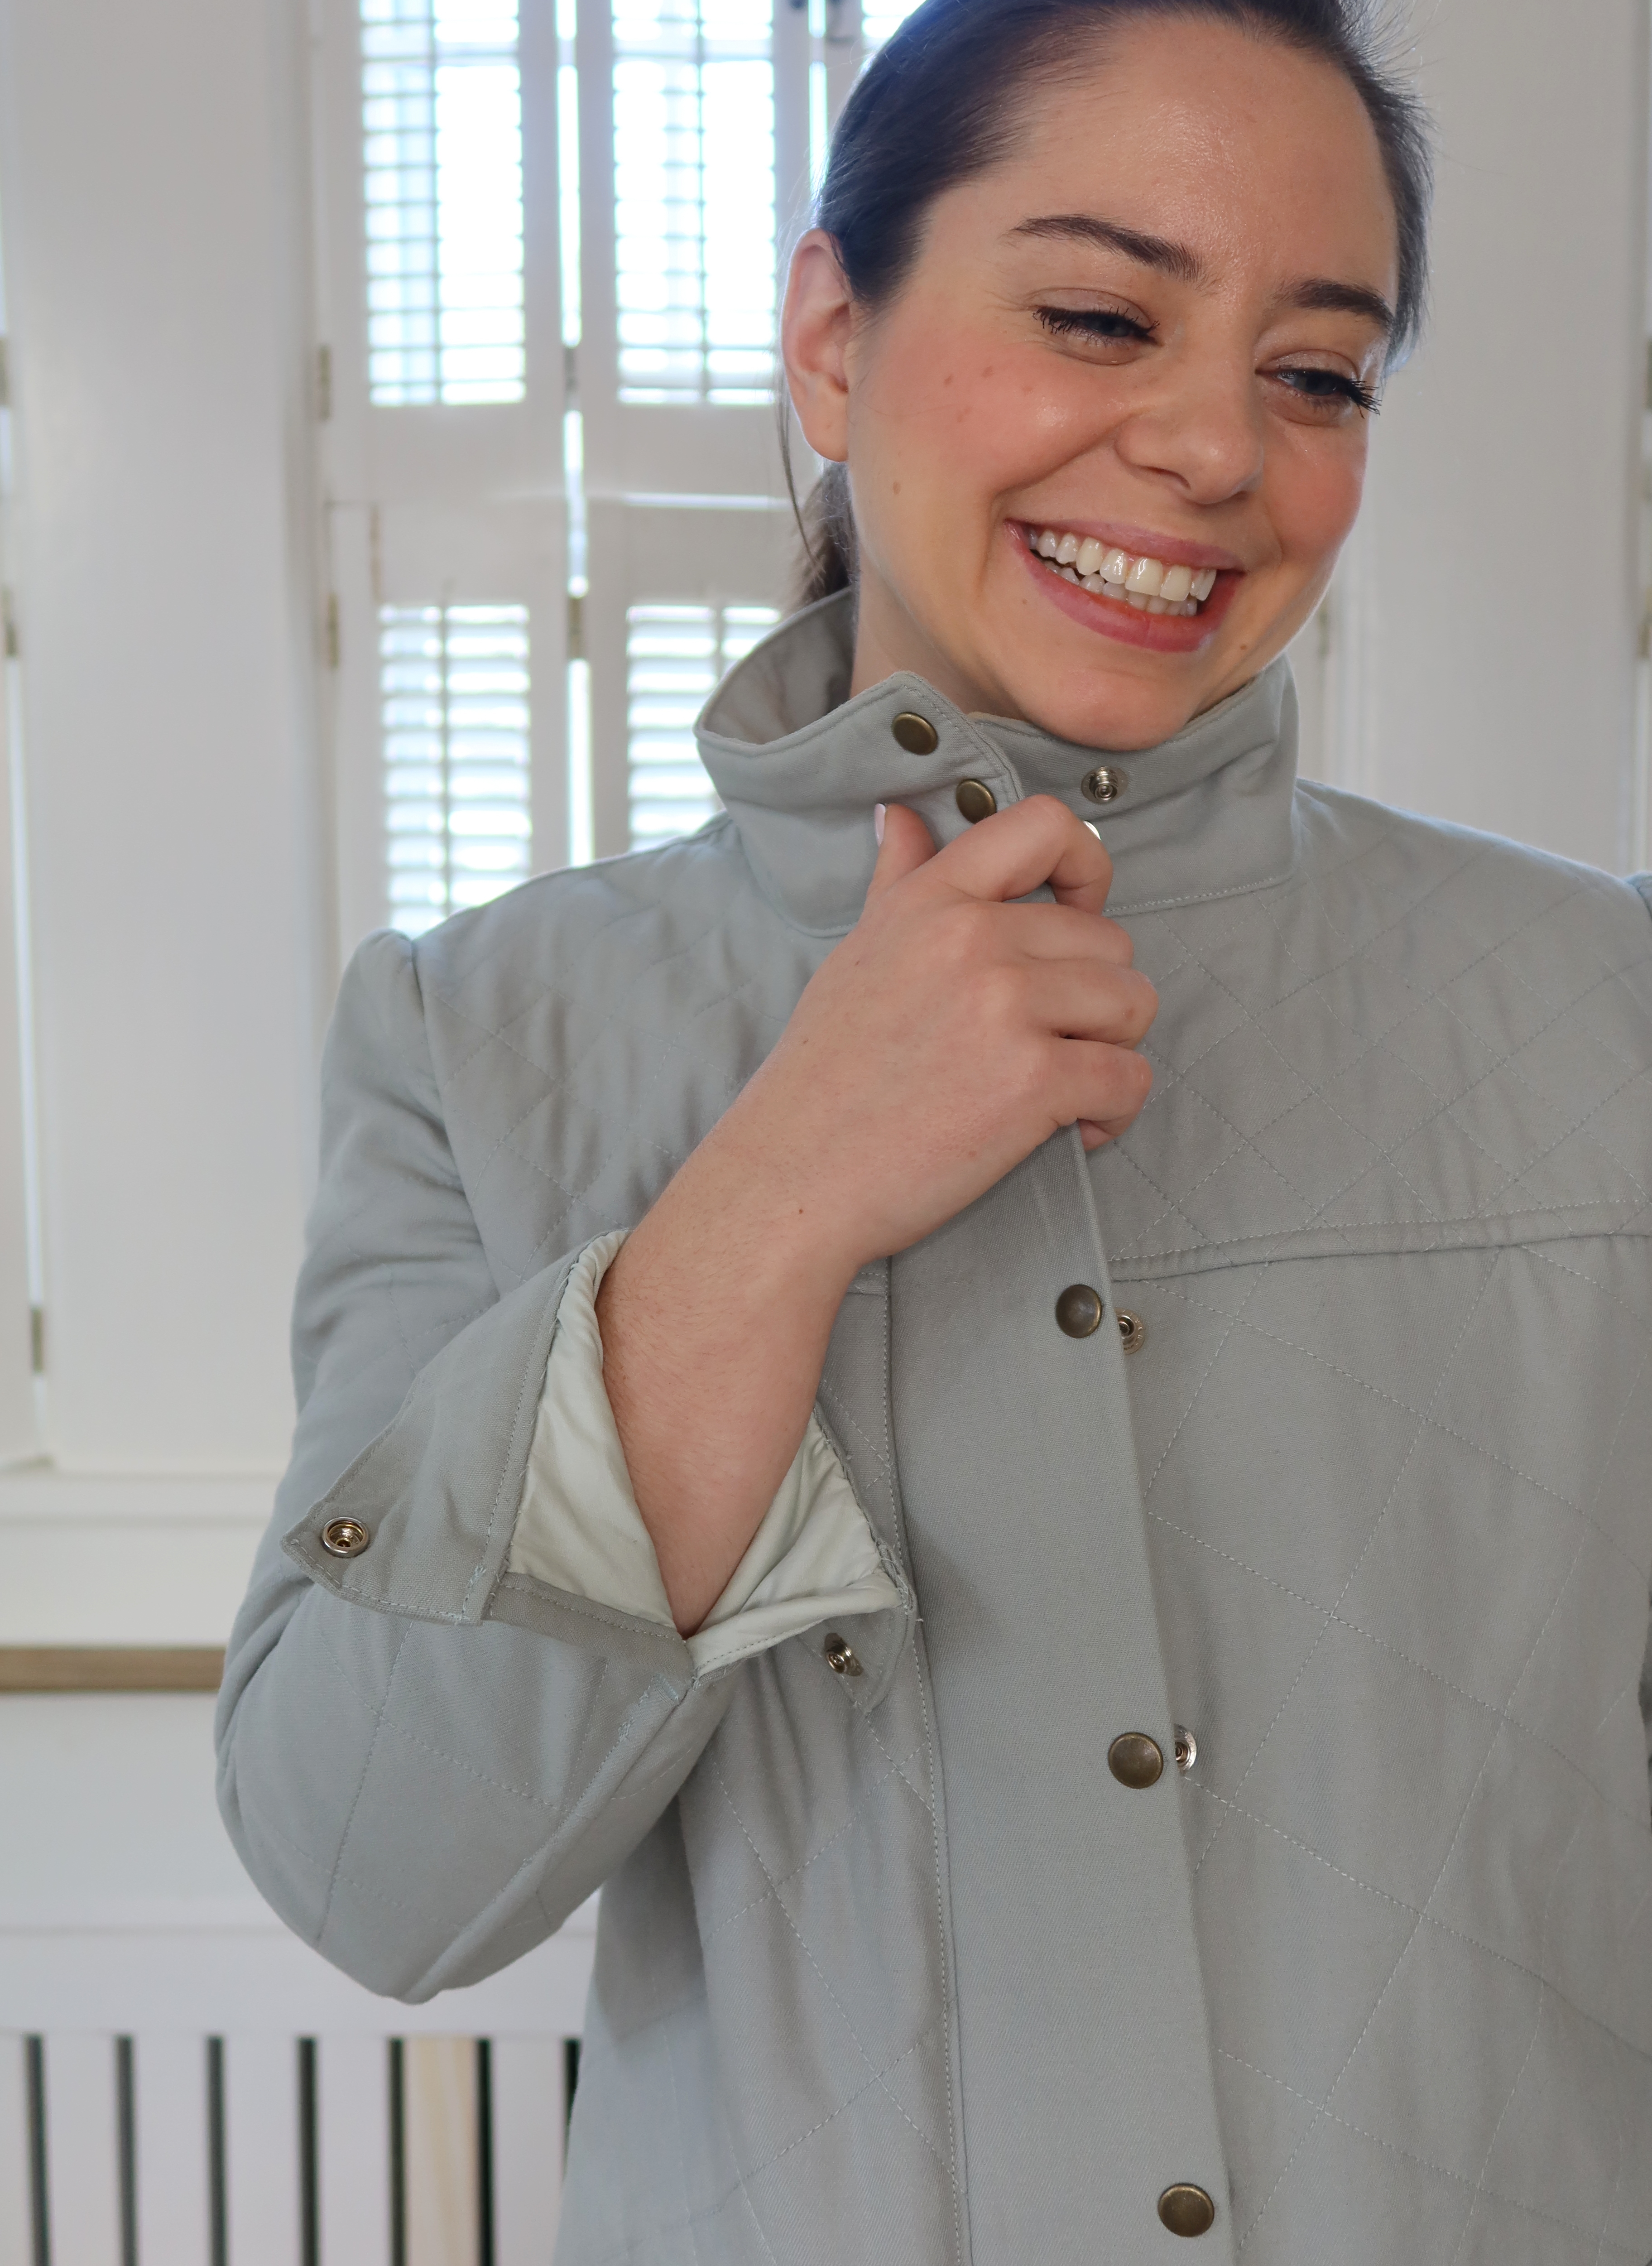
You may have seen this jacket on my instagram a few months ago, but I finally took some photos of it and wanted to share the details from this make!
Back in March I saw a tiktok of a woman wearing a blue quilted jacket with a bomber jacket neckline, and closed with both snaps and a zipper. One day, while in line at Target, I spotted a jacket that looked very similar to what I had been looking for, and sure enough it was the jacket! (Original jacket no longer on Target’s website, but I found a photo of it here) I really wanted to make an ever-so-popular quilted jacket, but I didn’t want to make a jacket from an actual quilt and this inspiration piece was exactly what I was looking for to get started on my own version.
I found the perfect secondhand fabric from A Thrifty Notion, a Sage Cotton Twill, and bought three yards. I had been looking at bomber jacket patterns but couldn’t find anything with the closure details I wanted. The only pattern I knew of (and made before) with the snaps and zipper close was the Kelly Anorak from Closet Core Patterns. Using this pattern would mean I wouldn’t have the same neckline as the inspiration piece, but I was ok with that change.
I previously made View A (view it here), and have used the pattern pieces in several projects over the years. The Kelly Anorak has been one of my favorite patterns, and I really enjoy the sewing process because of the instructions and sew-a-longs that are online. For this version I went with View B, and made different pockets to get a similar look to the inspiration piece.
I measured at a size 4, but cut a size 6 to account for the extra material and batting. It fits perfectly but a little tight in the arms if I were to wear a thick sweater underneath. (Closet Core makes a lining expansion kit for the Kelly with a new sleeve pattern, for those interested).
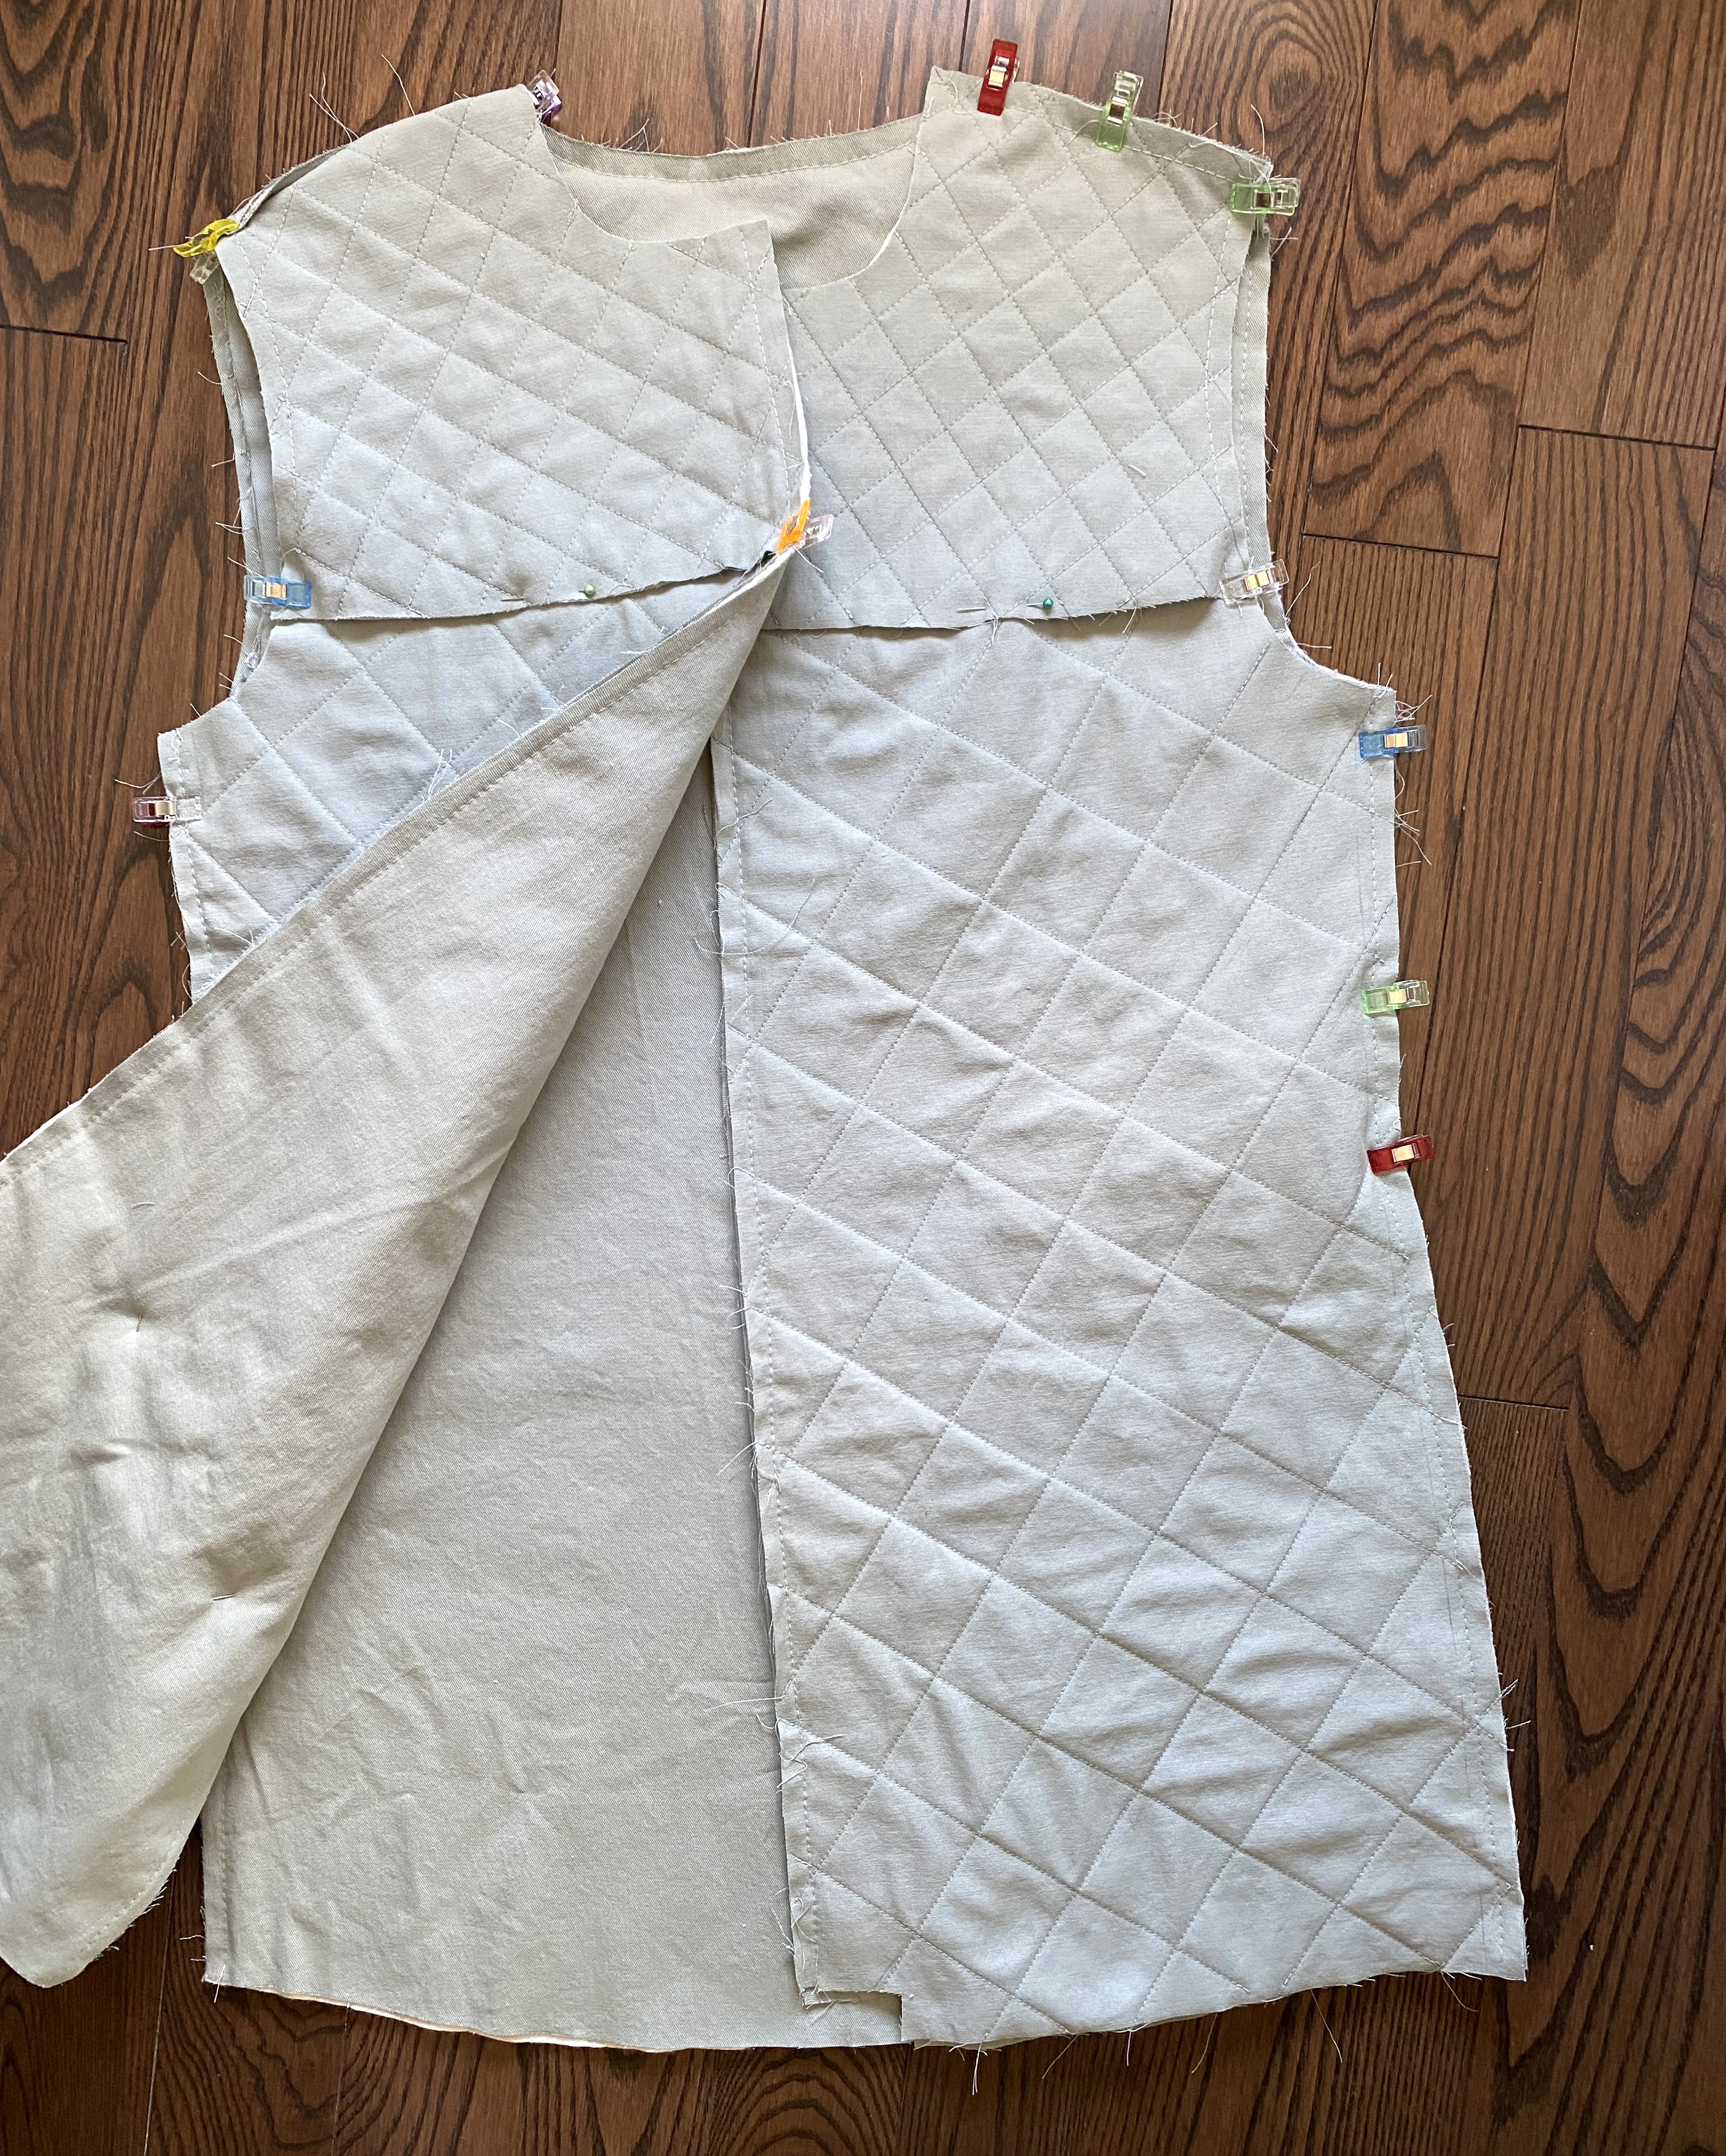
Going into this make, I knew I didn’t want a jacket with a seperate lining. The idea was to make the quilting on the front and have the interior look like a solid backing. It took much longer, and I removed and re-stitched basting stitches a few times, but I love the finished look.
The quilting was a very long process, and I spend a few days just stitching the body pieces of the jacket. I cut 2x the body and front facing pieces, as well as the sleeve pieces (more detail on this down below!) I cut 1x batting pieces for the body pieces, sleeves and front facings. Since the full back had batting, I didn’t think it was necessary to add more batting to the back facing. (I also added batting to the collar)
I marked the stitching on each piece with an erasable fabric pencil, and basted the batting pieces to each pattern piece. (Also, if you are looking for a fabric pencil, I’ve had the Sewline Mechanical Pencil for years and love it so much! You can get white, black, blue and pink lead.) I wanted to try to match the quilting lines as much as I could, so once one piece was marked out, I matched it up with the next piece to continue the lines. It didn’t work out perfectly, but I did create some pretty side seams.
After the quilting was stitched, I trimmed the batting seam allowances on each piece. This kept the bulk out of my seam finishing’s which helped during construction. Once the pieces were quilted, I basted the “lining” to each piece to create my final fabric. This took a lot of ironing, and a lot of patience at the sewing machine, but once the fabric was complete, the construction of the jacket was straightforward.
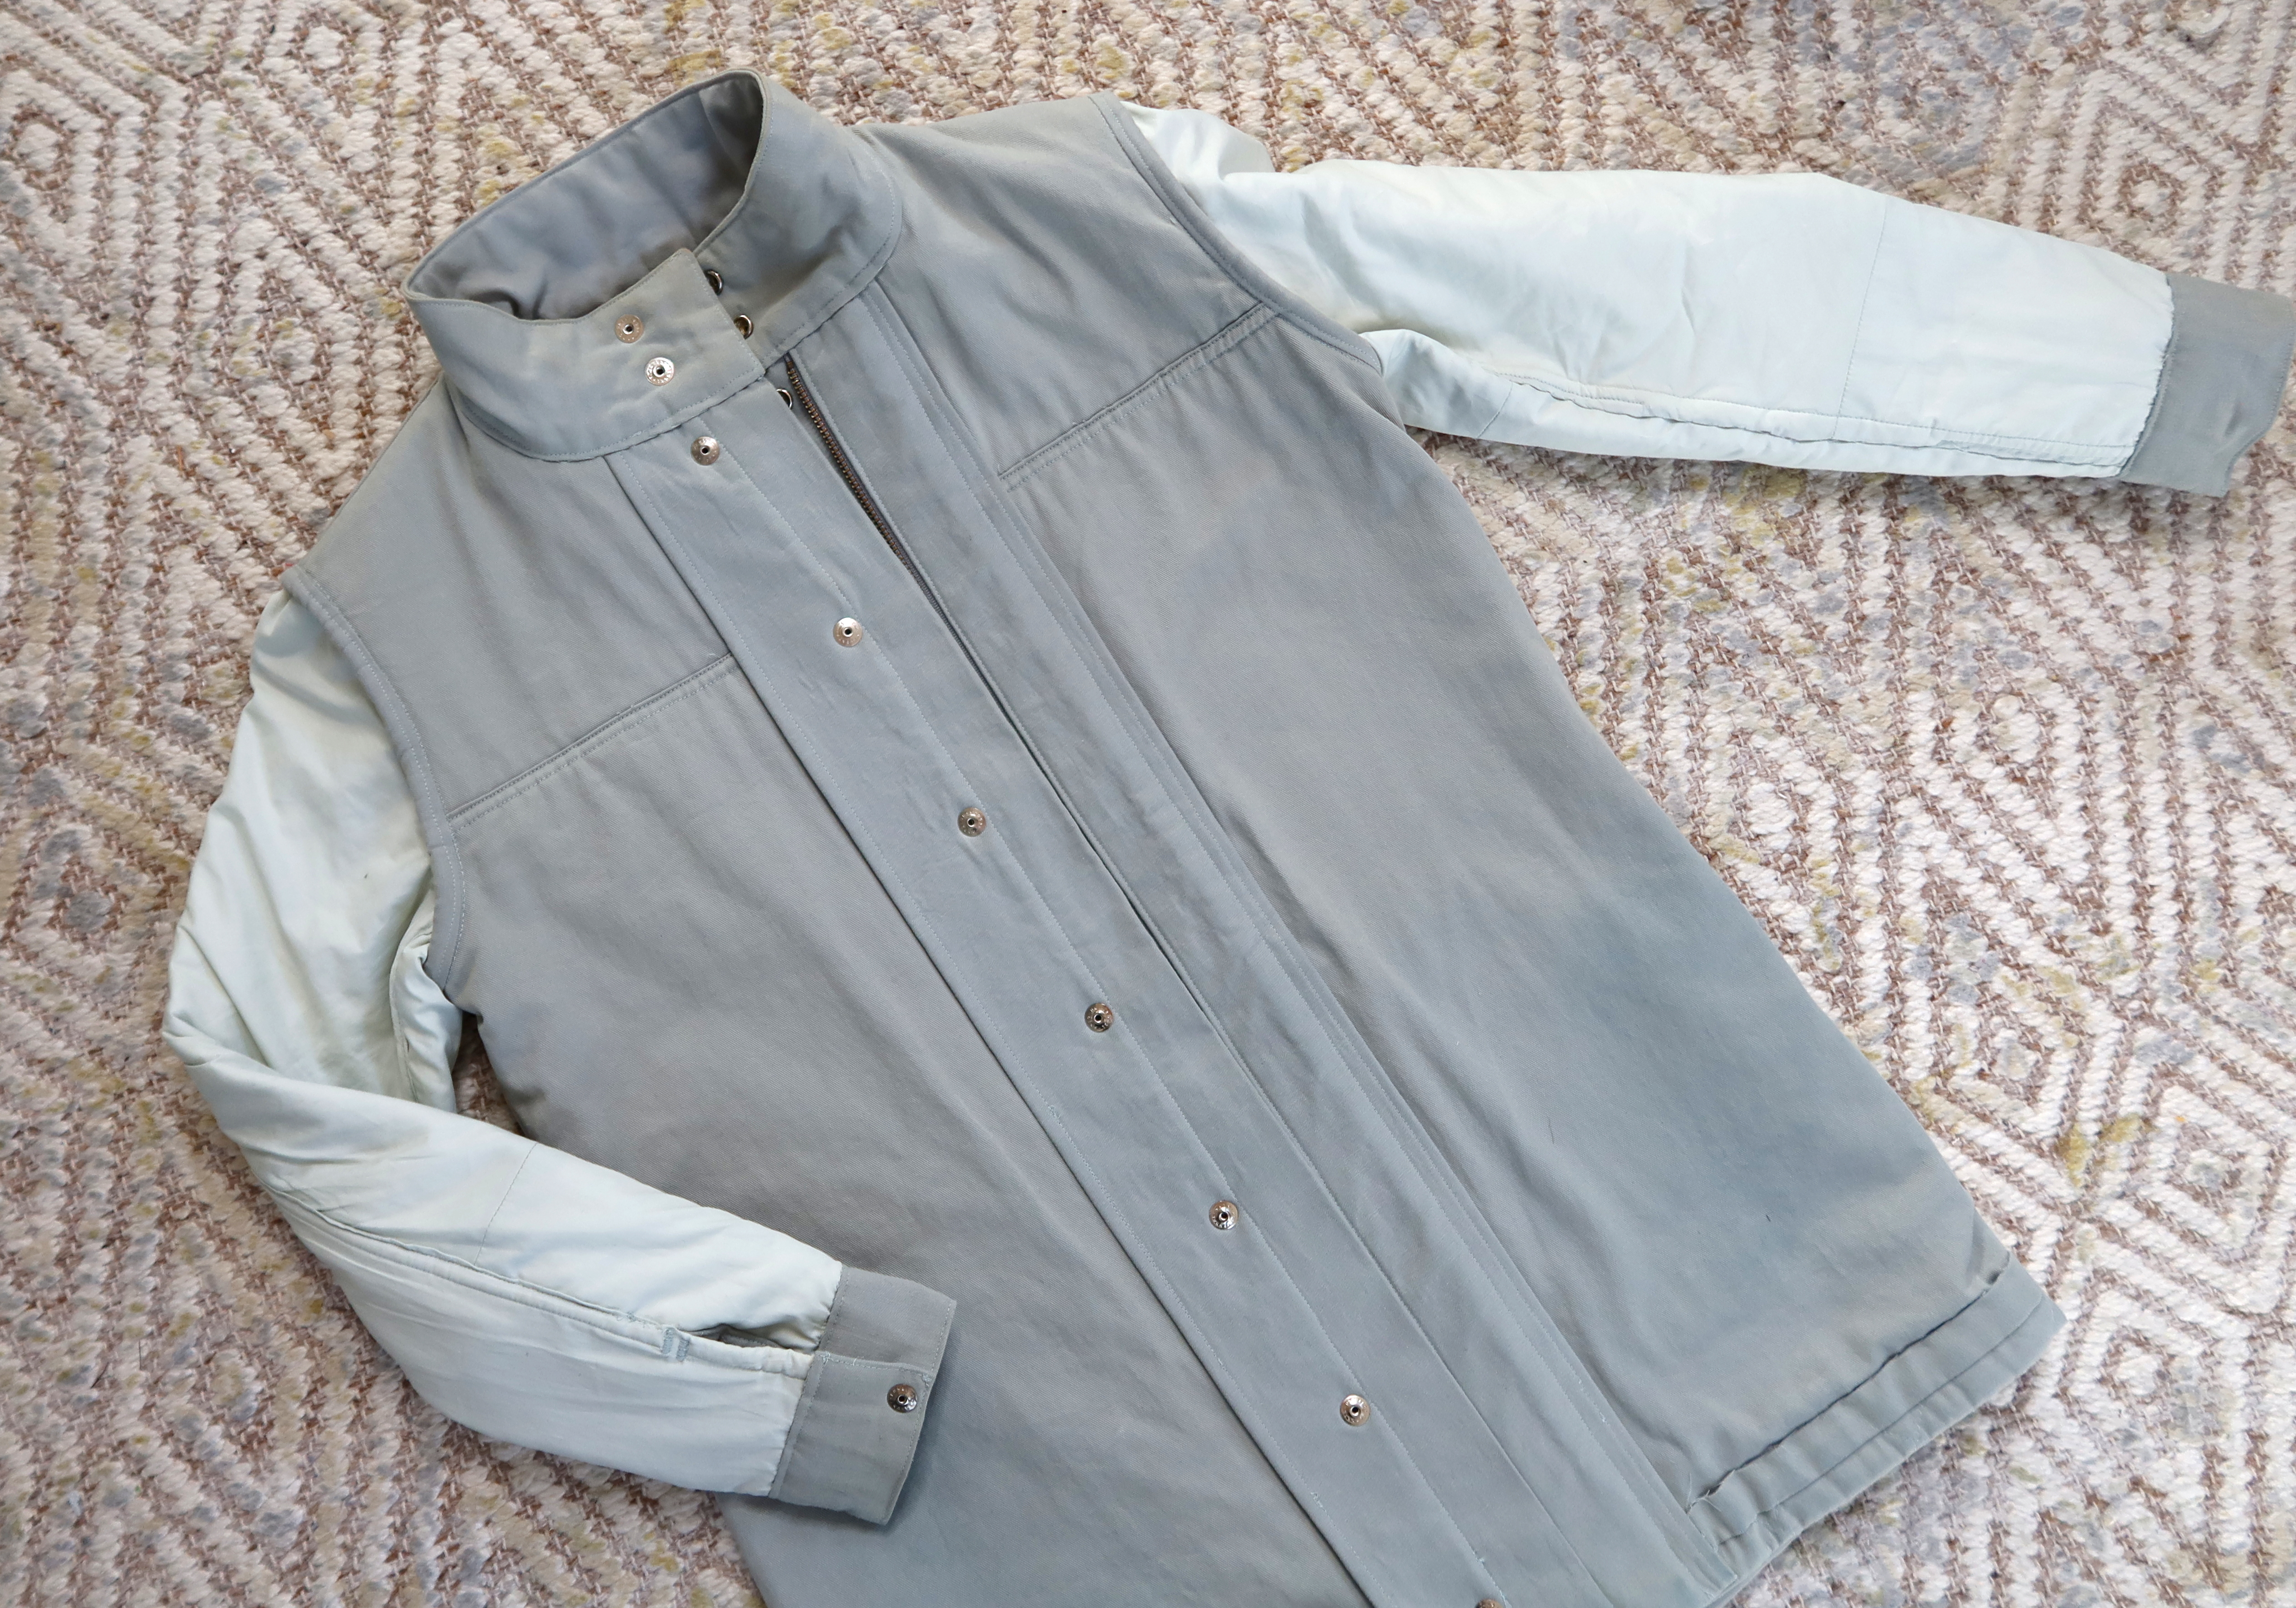
I didn’t have enough fabric for the sleeve “lining” and I didn’t want them to be too bulky so I took apart an old make for the extra material! I made this raincoat a few years ago but never wore it and moved it into my refashion pile. I had to do a little bit of “franken-stitching” to get the full sleeve piece, but the color and weight of the fabric was perfect for my sleeves!
I only made one size adjustment and that was in sleeve length. I didn’t think about it before cutting and quilting my sleeve, but before attaching the cuff, I realized the sleeve was just a bit too long. Since I already did the construction for my cuffs (out of order on the pattern instructions), and stitched the sleeve to the body, and finished the seam with bias binding, I wasn’t able to alter the length anywhere else but the hemline. Instead of a 5/8″ seam allowance, I sewed the cuff at 1 1/4″. It makes the sleeve extension shorter, but left the sleeve intact.
My hem was finished with binding and hand stitching. And the last step was adding the snaps, which I made Drew hammer because I was terrified of messing them up! Cutting holes in a completed garment is so scary!
I am so proud of this jacket! I’ve already worn it several times, and can’t wait to keep wearing it once the temperatures get back out of the freezing zone!
Happy New Year! Hope everyone had a wonderful holiday season!
I love going through my home after the holidays and cleaning up and clearing out. It’s a good time to go through areas of the house that feel overwhelming. It’s also a great time to go through your fabric stash and get rid of fabrics you won’t use! I mentioned previously that I did a fabric destash and was able to give away the fabric this past year. Getting rid of 15 years worth of fabrics that I knew I wouldn’t use was amazing, and my space (and mind) feels clearer knowing it’s out of my home and now with someone who can use and appreciate it all.
I was able to donate my fabric locally, and wanted to share some resources for sustainably destashing fabrics you may no longer want in your collection. While some of the options on this list may take a bit more time and effort, the goal with a sustainable destash is ensuring the fabric gets to a better home. While it can be convenient to drop fabrics off at any donation place, there may be a chance they don’t sell fabric, or they already have an excess amount. When I reached out locally, one shop told me they had plenty of fabric and it just wasn’t selling. I hope this list gives you some ideas, and helps you destash your fabric!
Sell Your Stash:
There are a few options if you are looking to sell your stash
Destash on Instagram: If you have an audience on Instagram, and want to sell through the app, setting up a destash account is a great option! Jordan (from Resliced by Jordan) has a great blog post of tips for setting up an Instagram destash.
Facebook Groups for Destashing: There are groups built around selling your fabric stash! I am part of a few, and have purchased a couple times through Facebook and the process has been successful. When selling through a Facebook group, there may be specific group rules you have to follow. Also keep in mind most groups require payment go through Paypal, so you will need an account to partake. A few of my favorite groups:
Etsy: If you have a lot to sell, and have some more time to sell it, etsy may be a great place to start. Fabrics are typically listed as supplies, making them ok to sell on etsy, and if your materials are vintage, they are very welcome on the site! Etsy is great if you want to set up more of an online shop, or if you will continually have a stash to sell through. This is the way I’ve been selling my extra fabric swatches.
Poshmark, Mercari, and Depop: all similar sites for selling secondhand items.
Donate Your Stash
A few tips before donating:
If you have a lot of fabric to donate, separate fabric by type. Place cotton, denim, vinyl, apparel fabrics and upholstery fabrics in seperate bags and label properly. (This works well with large quantities, that may already require multiple bags.)
Do you know specific fabric content for your donation? Consider pinning a little note with each fabric cut with the content. This isn’t necessary, but it will be very helpful to the receiver. (I recommend doing this with apparel/specialty fabrics)
Is the fabric in good condition for donation? If it’s been stored for years, does it need to be washed? Again, not a necessary step, but donating items in the best condition will ensure they will be used and/or sold.
Check with local spots to donate. When reaching out to people, I found it helpful to mention the types of fabrics I had, how many bags I would donate, and that it came from a smoke and pet free home. If there was interest, I made sure to have some quick photos of the fabrics, and specified there were yardage pieces, and larger usable scraps.
Reach out to local thrift stores/resell shops. Some chain thrift stores will take fabric, but I love seeking out smaller shops to support.
Ask Church Thrift Shops. If your local church has a thrift store, email them to see if they sell fabric, or if they can use the material for projects. They may know church members who are sewers, or have a connection.
Ask local schools that may have home economic classes or theatre programs. Preschools may be looking for arts and crafts supplies. Have a local College or University? They may have a sewing, fashion or costume program where the students can benefit from working with free fabrics. It may take some clicking around websites to find the right contact, but it’s an option to keep the fabric local.
Ask local sewing guilds. Google sewing guilds in your area and see if anyone is interested – especially if you have quilting cottons, Quilting Guilds could benefit!
Local Facebook Swap Groups. Does your town have a local “curb alert” or swap group? That may be a great spot to see if anyone local can use your materials. You can do a porch pick up, or set up a local drop off location. Check out your local Freecycle as well!
Donate to Retail Fabric Stores
So many sustainable fabric shops run on destashed fabrics. Check below for a local spot! (These resources are US based)
Ragfinery (WA, USA) : Fabric greater than 1ft. x 1ft. – limit 3 bags/boxes per donation
The Scrappy Elephant (VA, USA) : Only accepts fabric larger than a fat quarter – in store drop offs.
Scrap It Up (Ohio, USA) : Fabric donations: 40lbs or less, minimum size 1/4 yard, minimum 1 yard for upholstery & home dec fabric. Must make appointment.
Scraps KC (MO, USA) : Fabric donations: no small scraps, home dec samples or pieces under ½ yard.
Seattle Recreative (WA, USA) : Fabric Donations: fabric larger than 1/4 yard or fat quarter (no scraps, no clothing, no curtains / linens). Appointments required.
Swanson’s Fabrics (MA, USA): Fabric donations: “We cannot accept fabrics with strong odors, or clothing. Curtains are cool.”
There are a few sewing related organizations that look for fabric to make their donations.
Project Linus: Providing handmade blankets to children in need. Donate fabrics, or donate handmade blankets. (Contact your local chapter to see what is needed.)
Quilts of Valor: Handmade quilts for Service Members and Veterans touched by war. Accepts fabric donations- red/white/blue fabrics are most requested.
Sew Through Your Stash for a Good Cause
Did you get the itch to sew while destashing? There are several organizations that rely on handmade donations to give back to their communities, and communities abroad. Below are some wonderful organizations you can sew for with the extra fabrics in your stash.
Enchanted Makeovers: Sew specific items part of shelter transformations. Enchanted Makeovers has several projects and programs to get involved in.
Friends of Pine Ridge Reservation: Sew items for families on the Pine Ridge Reservation, Navajo Nation, the Havasupai Reservation and the Yurok Reservation.
Sew Powerful: Sew crossbody purses to keep girls in school all month long.
Hello November! I can’t believe we are just 2 months away from 2022. I don’t know where the year went, but like always, I start thinking of goals for the new year, and the goals I’ve accomplished this past year. Over the last few years, I’ve become obsessed with organizing! When “Tidying Up” came out on Netflix, I fell in love with Marie Kondo and her methods. I was very inspired by the idea of items “Sparking Joy” and bought her books. I went through the entire process two years ago, and our house has felt clearer, and much easier to maintain since then. I am not a minimalist – and Marie’s methods aren’t about minimalism, but the mental process of “letting things go” has truly been life changing.
After organizing the main living spaces of our home, next was my sewing space – which felt like a whole different challenge, and this year’s focus was on my studio! With sewing, there’s a lot of “stuff”; tools, fabrics, machines, little accessories etc, which can easily take over a space, and it can be hard to keep it clean and organized. I’ve been slowly decluttering, re-arranging and organizing every inch of my sewing room.
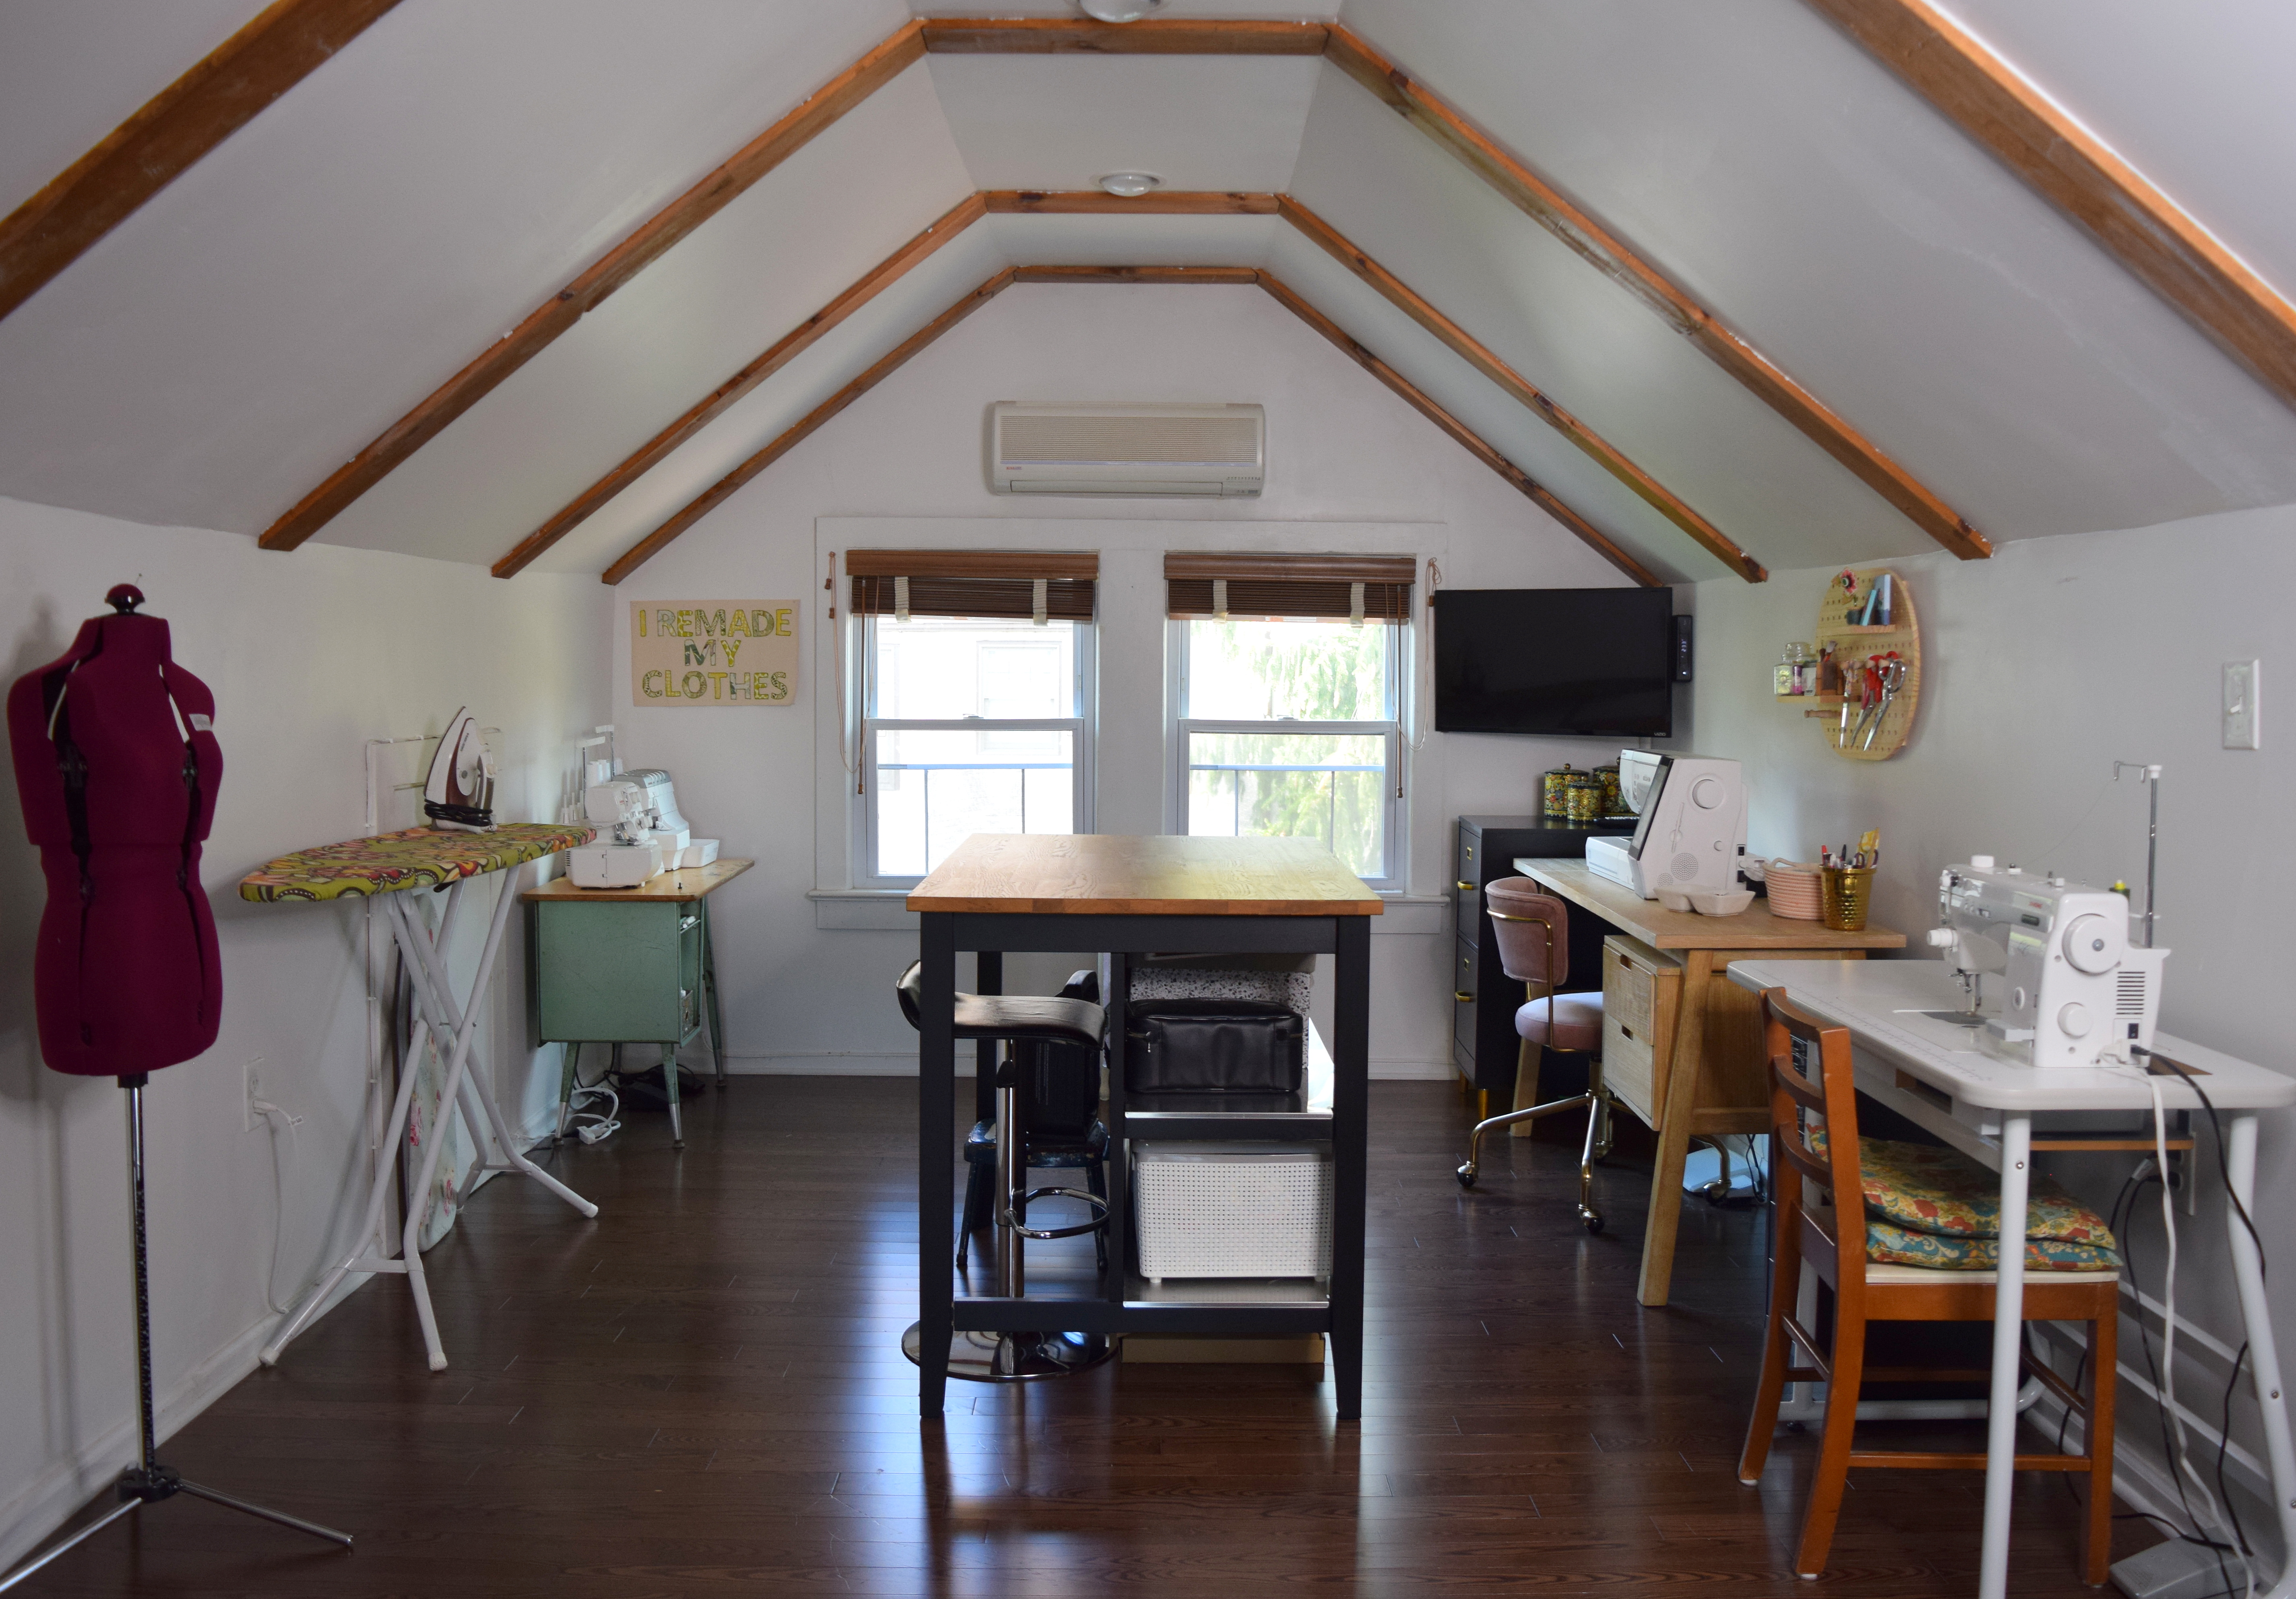
I wanted my studio in the attic so I would be seperate from our living space, but somewhere I would get more light than in a basement studio. We were so fortunate to find our home and I am so, so lucky to have such an amazing space. A few years ago I shared some of the work we had done to the attic, including tearing down a wall, ripping up carpet, putting down wood pre-fab flooring and painting the walls. I’ve added new furniture over the past year to better fit in my space and I feel like I’m in a place where I can show it! After getting organized, I now clean my studio almost every day – I clean up after my day’s work, and I clean during projects. I’ve realized that taking a 5-10 minute break to reset my space clears my mind so much, and I get less frustrated during the sewing process. And starting the day in a clear, inviting space is an incredible feeling!
After 16 years and 4 sewing spaces, I’ve finally found systems that work for me and I wanted to share them! I love looking at other makers work spaces, and getting inspired by how others create – so I hope you find this post inspiring!
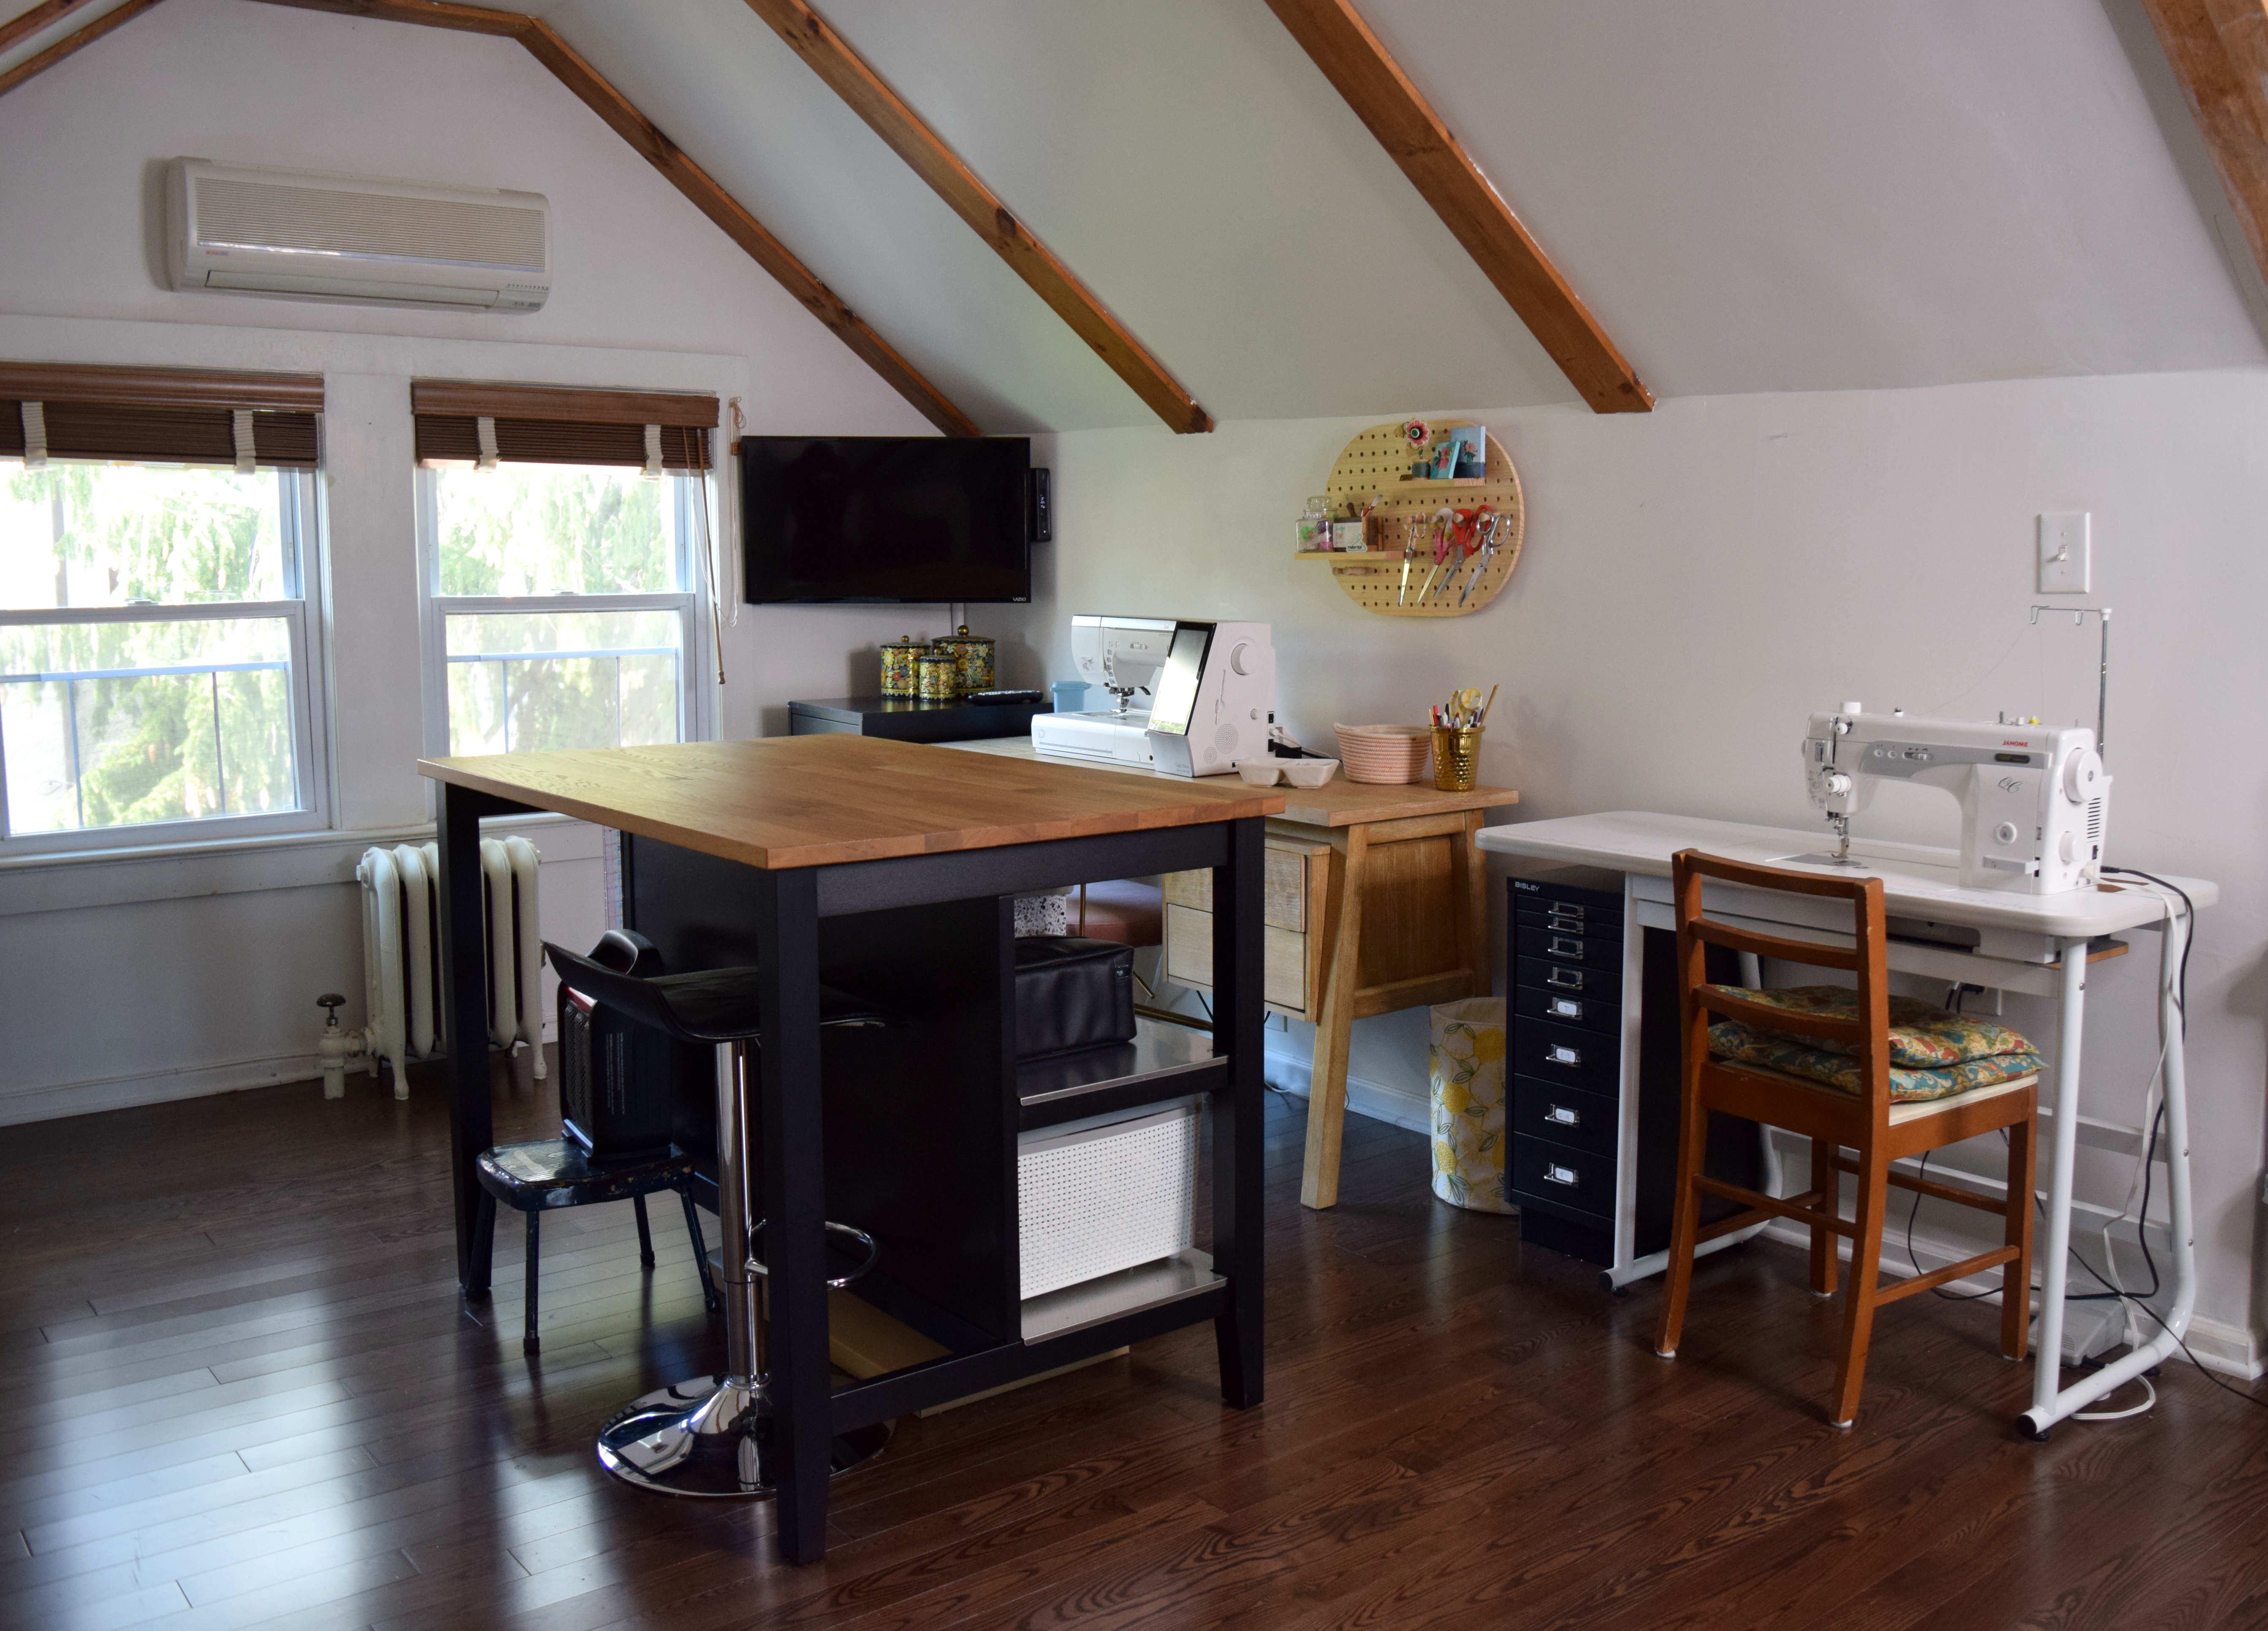
My main area consists of three sewing tables, an island, ironing board, and a filing cabinet and drawer cabinet.
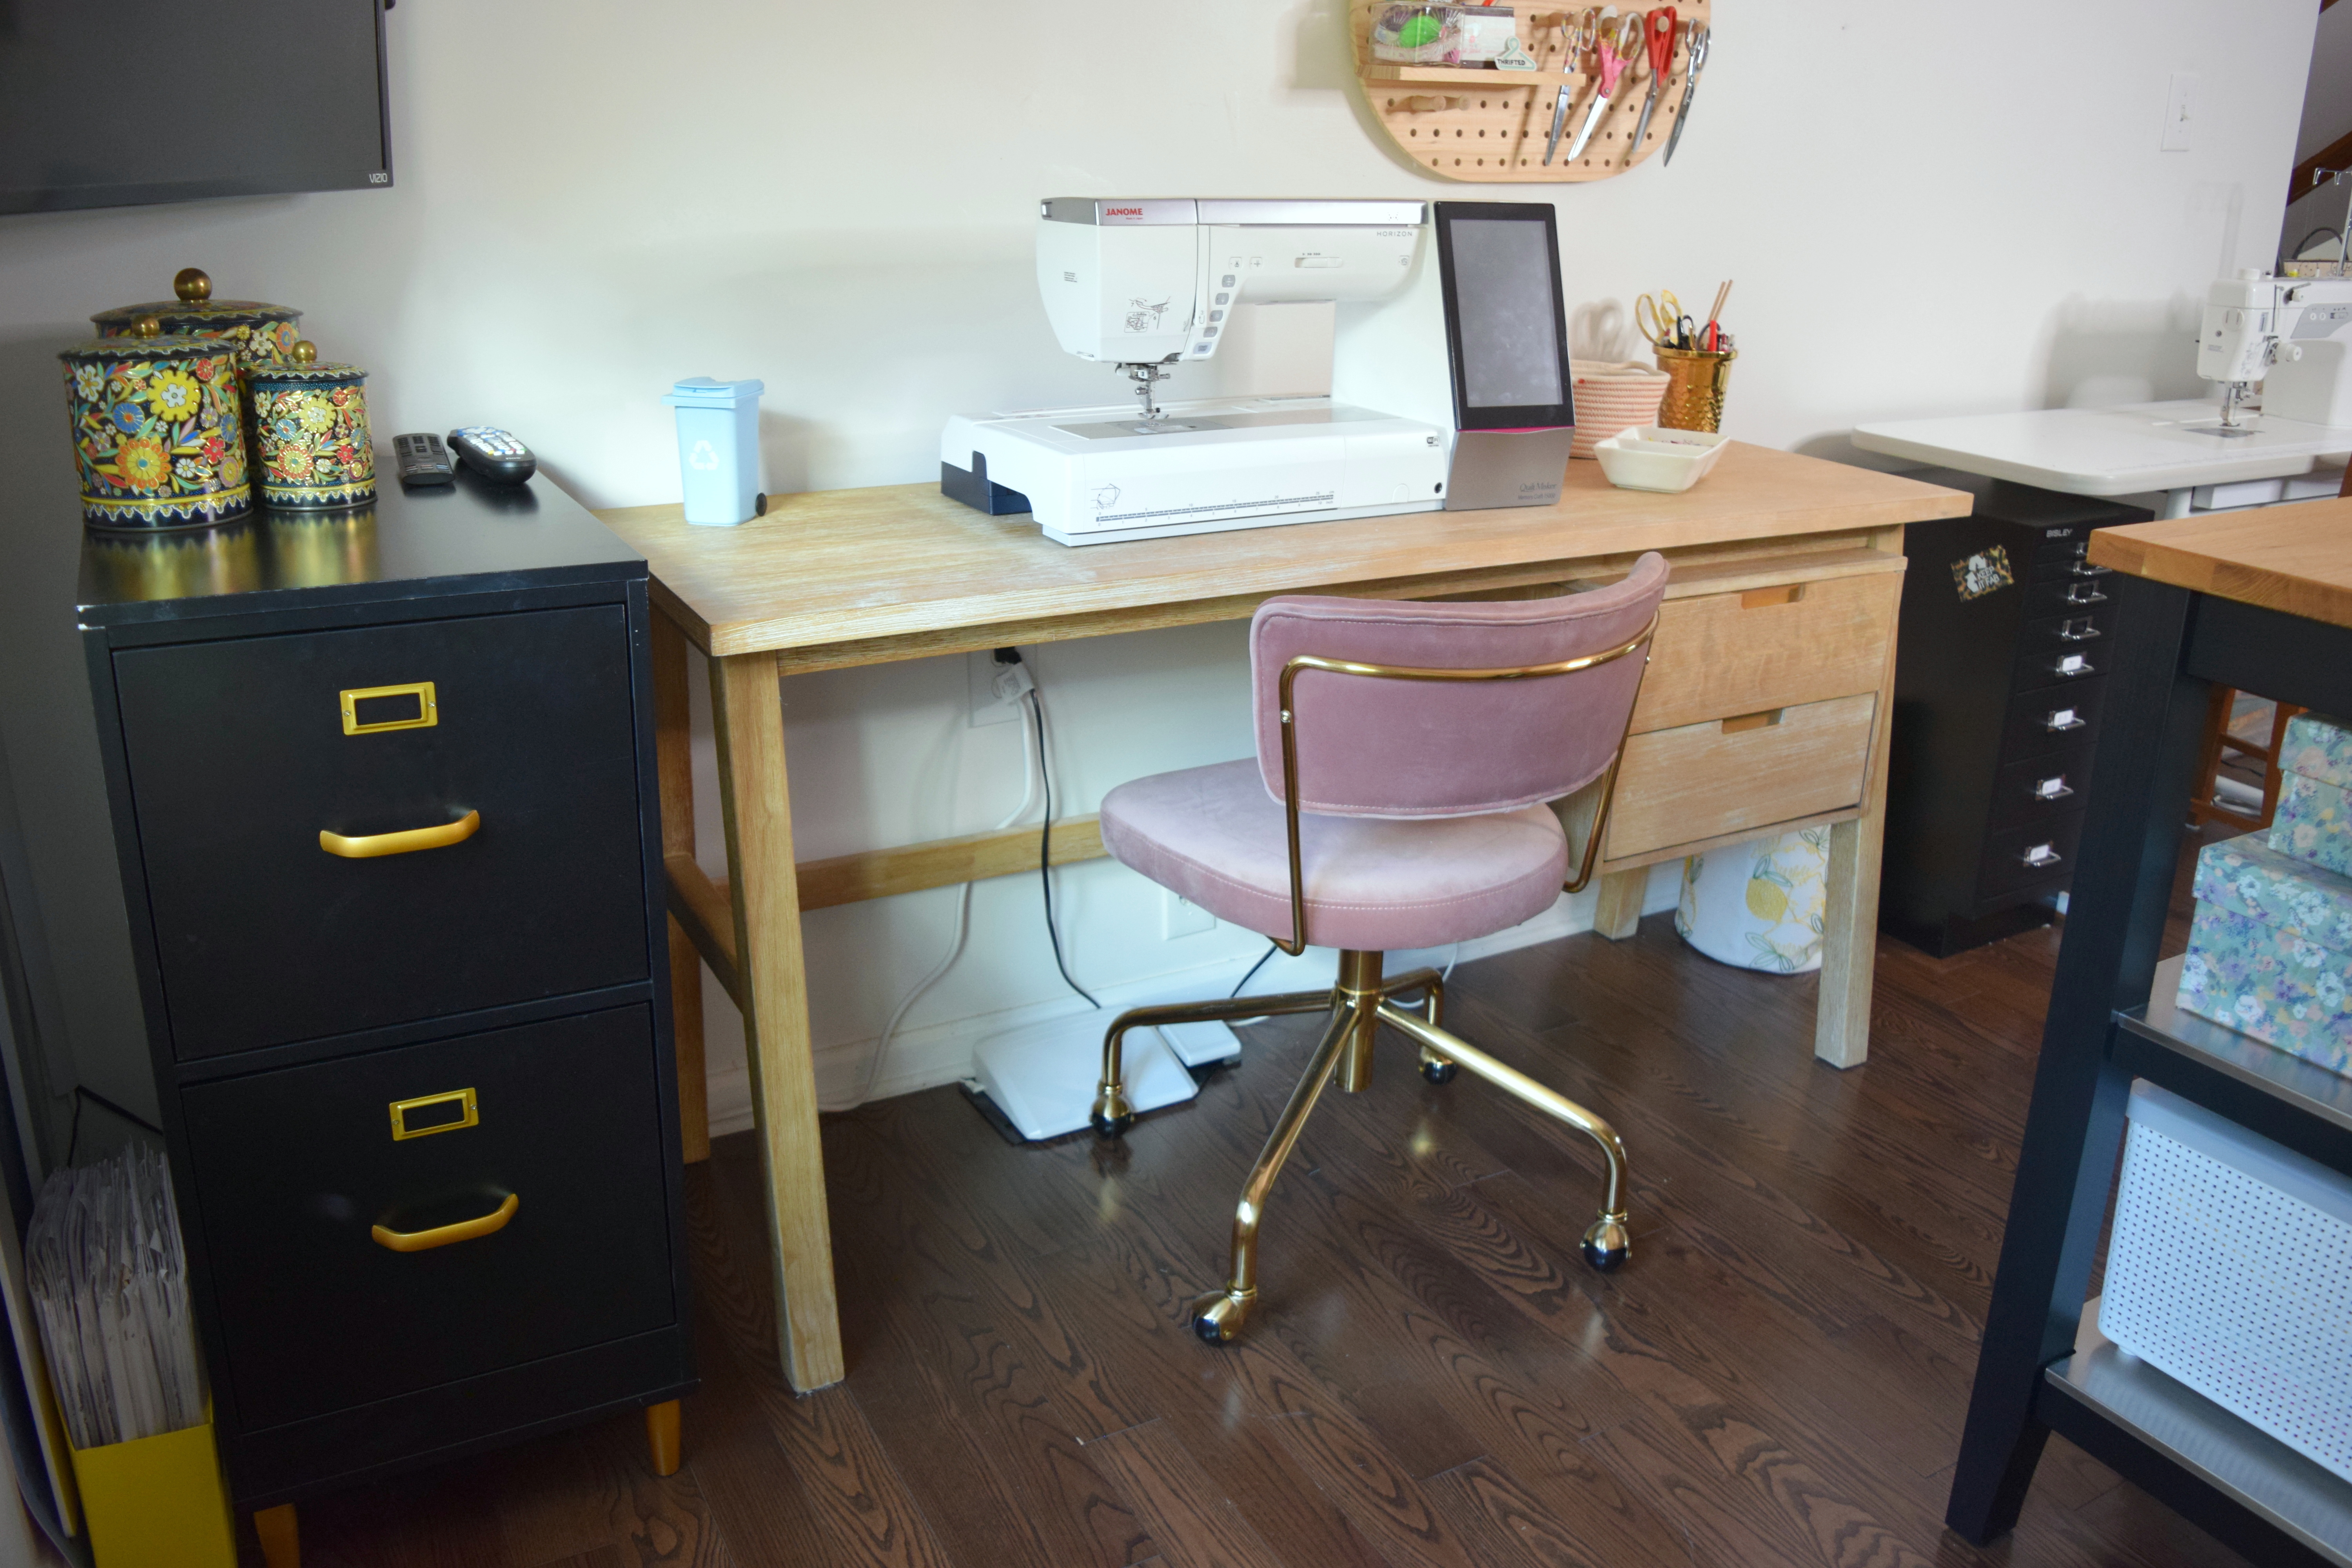
My filing cabinet holds documents and my bag patterns on top, and on bottom are my PDF patterns. I also have three beautiful thrifted canisters on top of my cabinet that are currently empty.
How I organize PDF patterns:
I use flat bottom file folders, and label each a different garment type; tops, bottoms, dresses, outerwear, etc. Within each folder is a clear document holder with the PDF pattern and instruction sheet. To make it a bit easier, each clear folder has the pattern written on the side. I bought a box of these sheet protectors back in college and have been re-using them since!
My sewing desk is from World Market (sold out, but they have other great styles!) and I really love the length and minimal drawers. I don’t like having a lot of drawer space in desks because that allows me to just throw stuff in there and not keep it clean. My drawers hold my thread and bobbins on top, pattern weights and wax paper (to copy patterns), and larger tools on bottom. The top of my desk has a small basket for scraps of projects I’m currently working on, and pencil cup with extra scissors, pliers, and marking tools (pens/pencils). I also keep a small “recycling bin” for old needles.
Above my desk is my ‘everyday tools’ organization. I love peg boards, but didn’t need something really big. This small organizer is perfect. It holds my scissors, seam rippers, snips and tape measures. I also decorate it with artwork and trinkets that I really love.
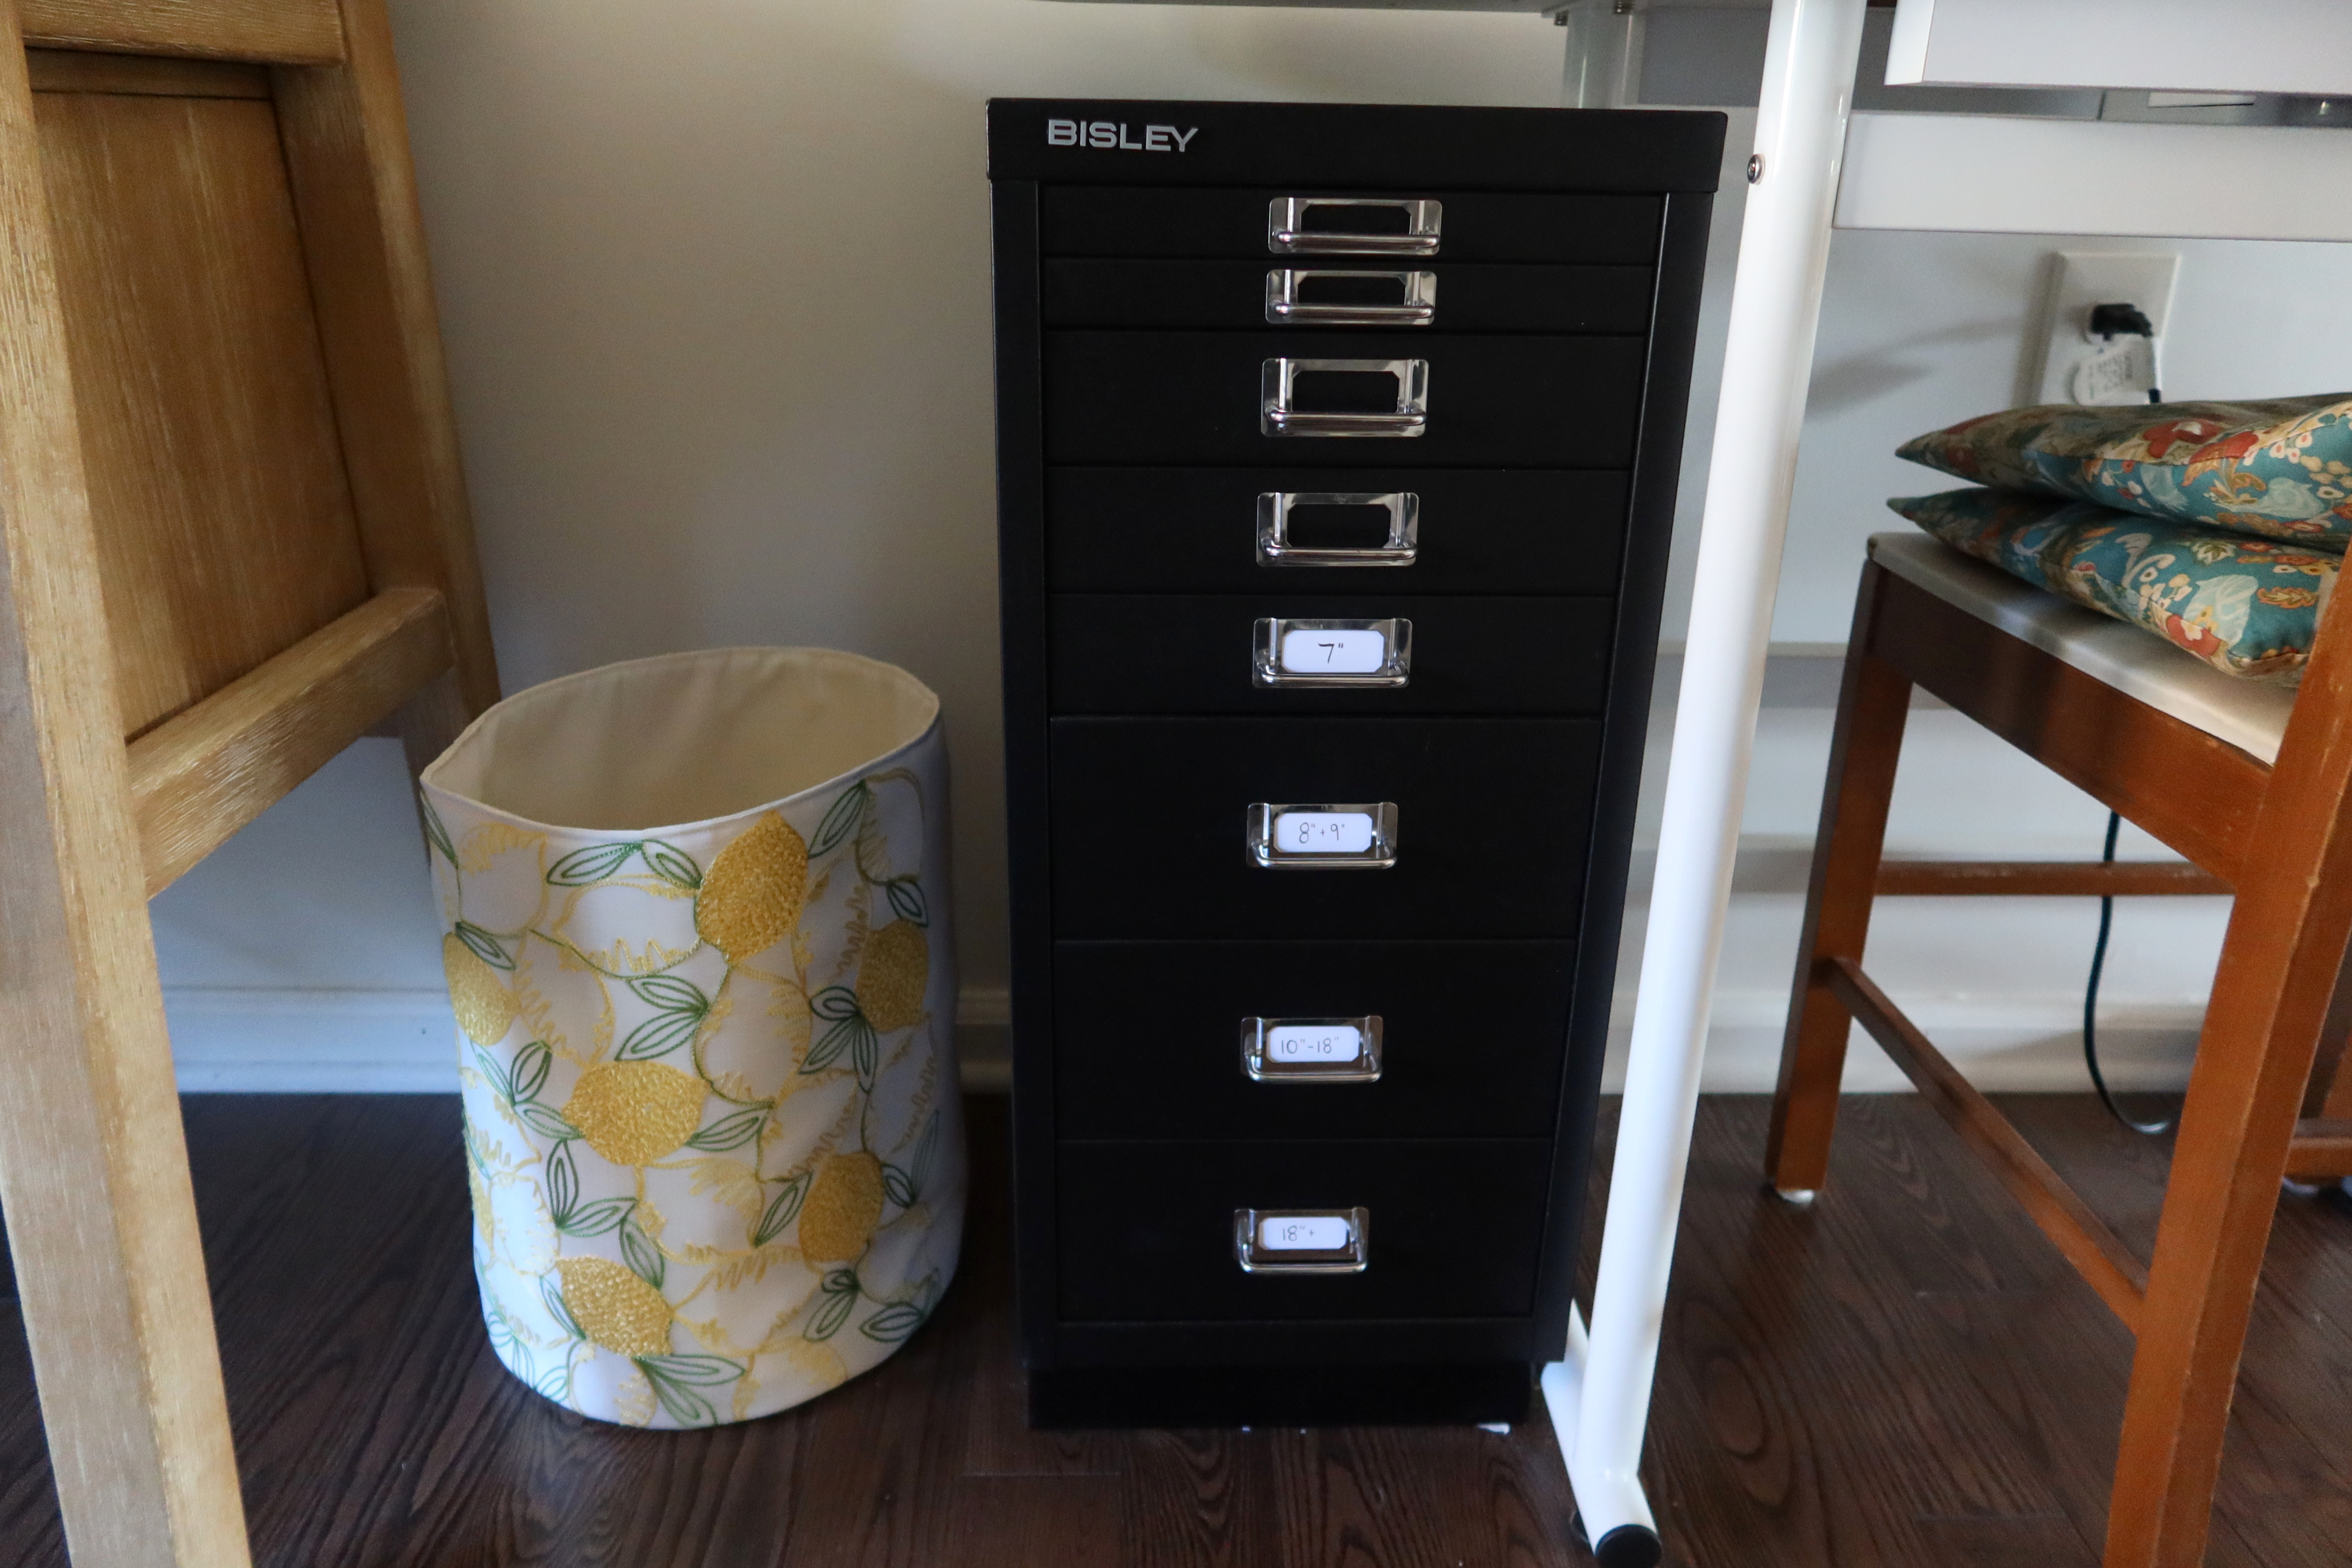
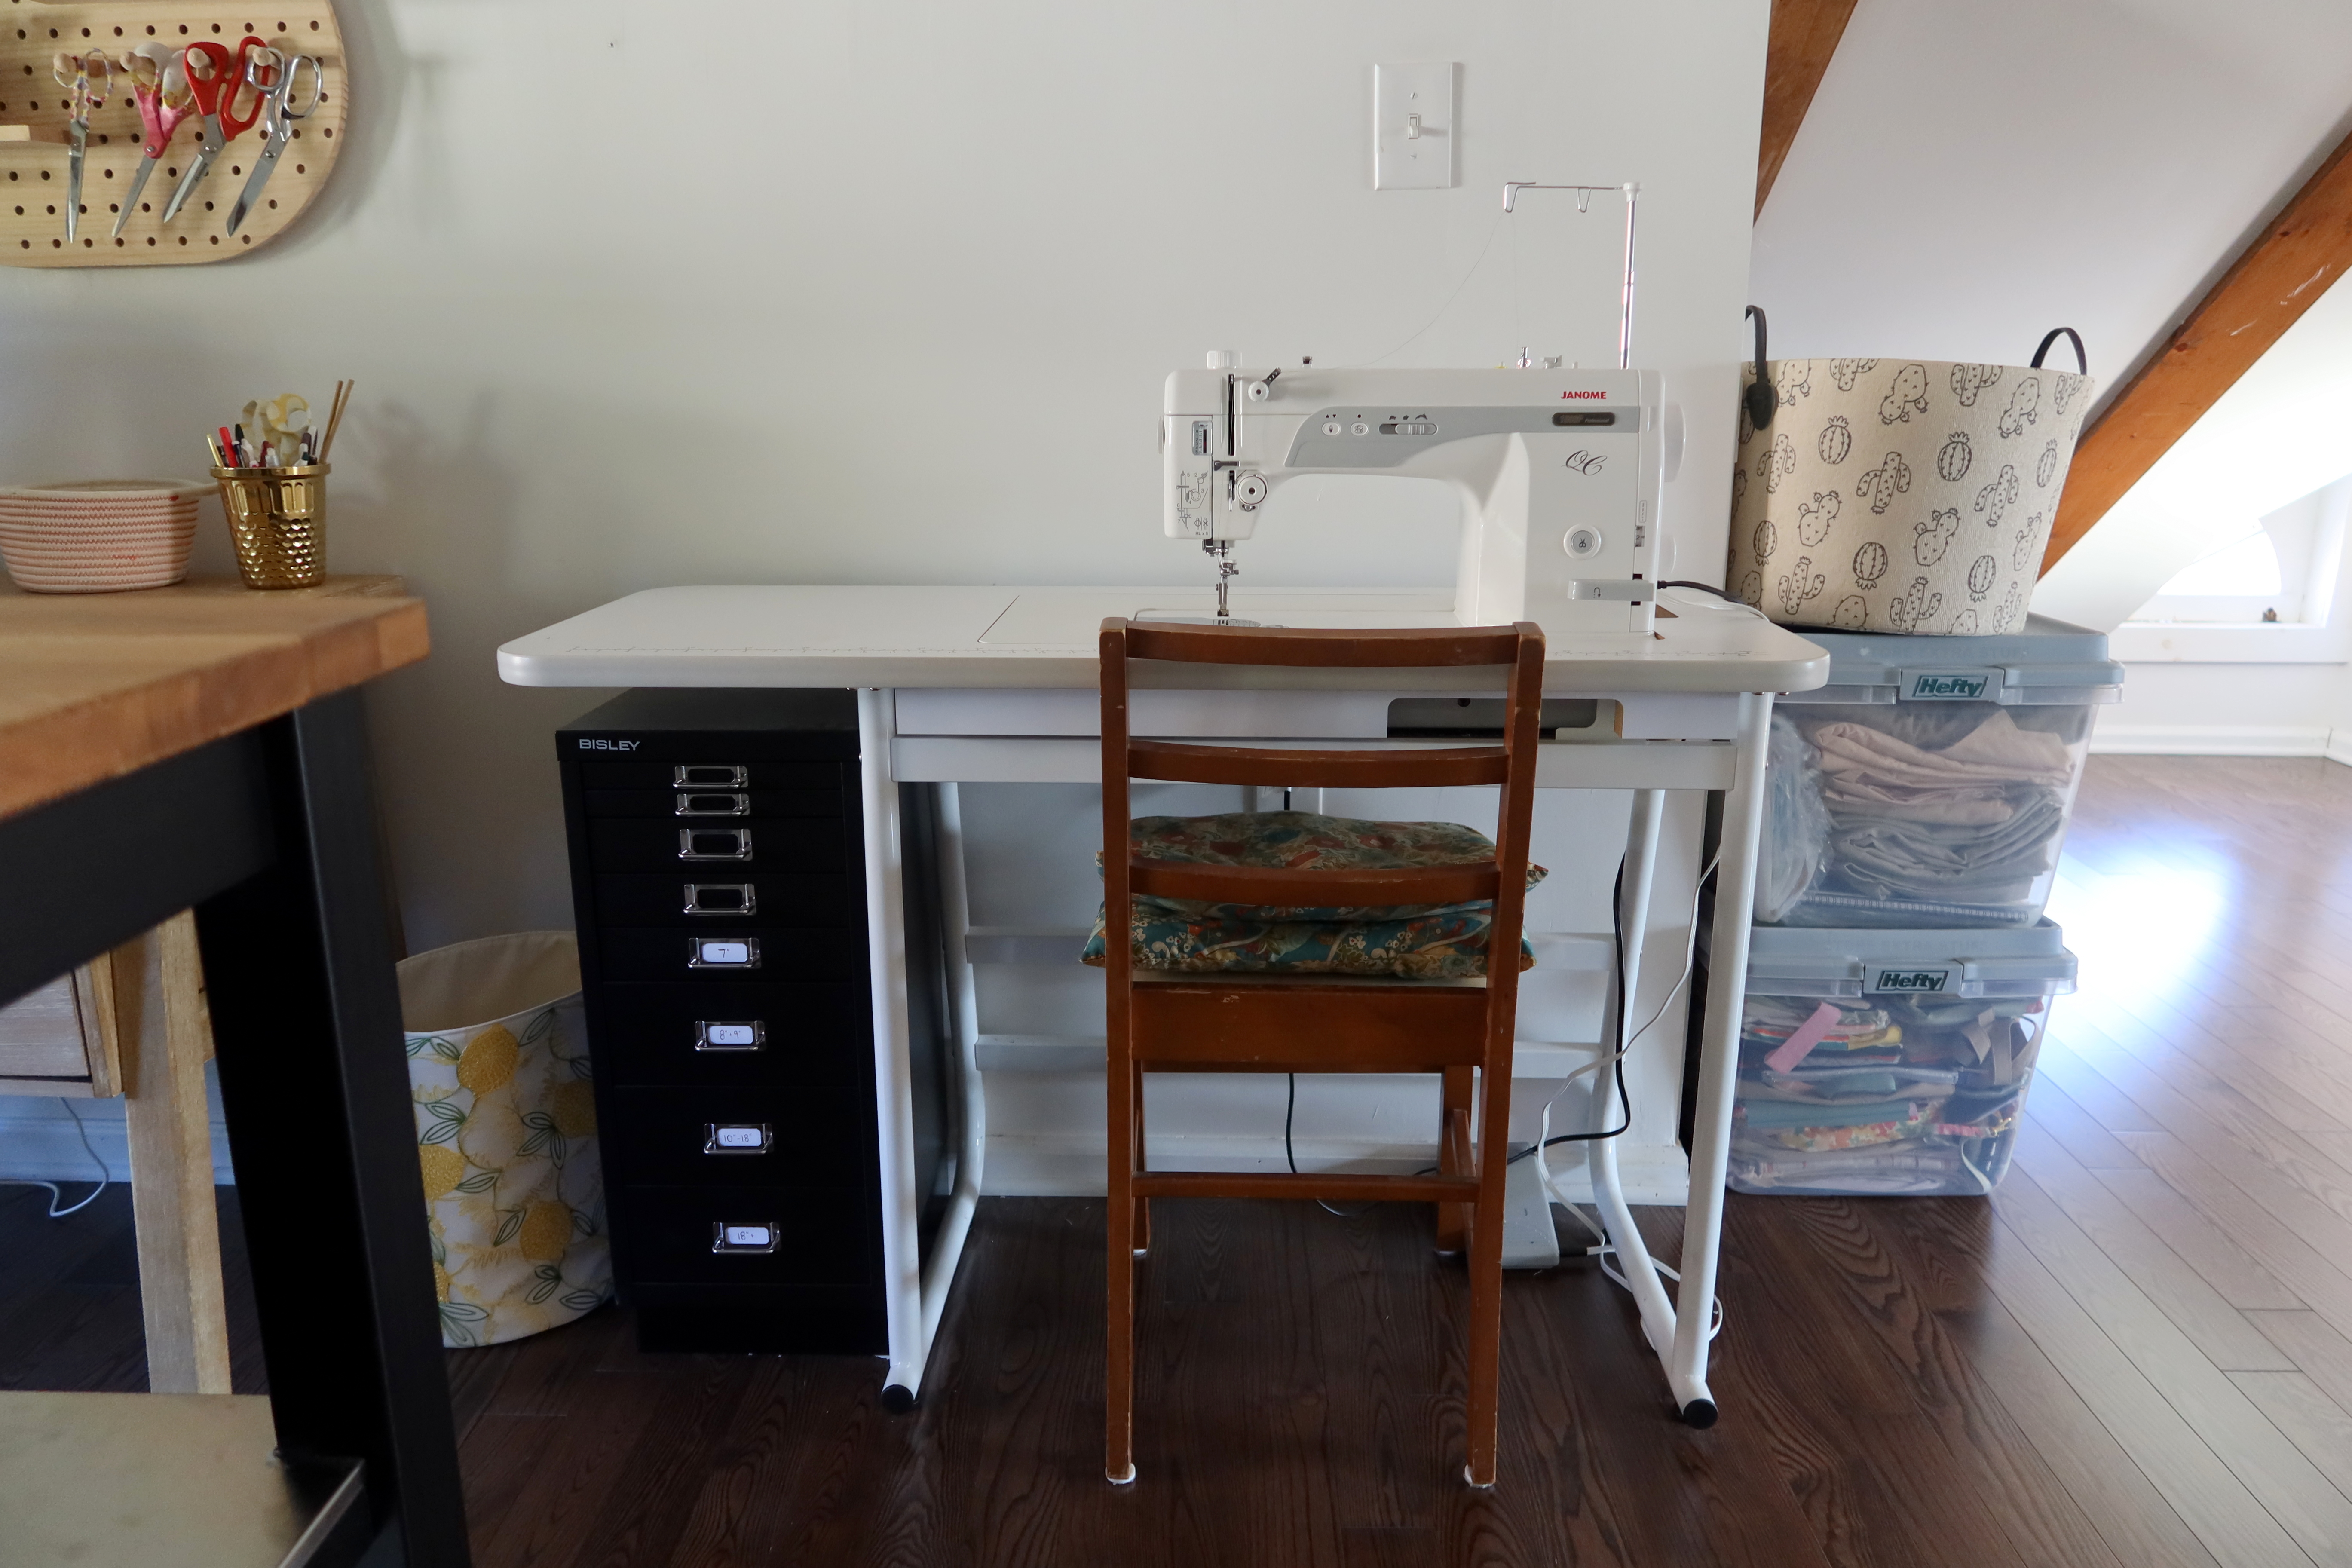
Next to my desk is a little garbage bin I made from a table runner (I hope to share this in a future post!), and my Bisley zipper cabinet. This was definitely an investment piece but I had been struggling so hard with organizing my zippers, this piece was perfect! I organize my zippers by size, which is much better than the shipping box I used to store them all together in. My zipper storage sits perfectly under my industrial machine table, which is it’s own desk.
In the middle of my sewing space is my island – which is a kitchen island from Ikea. I am so in love with my island, and getting to sit at it every day is such a treasure. I bought the Stenstorp, which is no longer available but a similar island is the Vadholma. There are so many sewing tables on the market, but many of them have drawers, cabinets, etc, and I wanted something more open. The back side is where I store my chair, stepstool and heater (the attic does get chilly!). The front shelves hold four fabric bins on bottom (mainly fabric for bags), and the top holds more tools, elastics and trim, embroidery threads, sewing machine accessories, and a bin of fabrics leftover from refashioning projects.
The top bins were my Mom’s, who cleaned out her closet and passed them along to me!
Under the island I store the embroidery machine hoops. Not an ideal spot but my embroidery machine and hoops are on loan from Janome so I don’t need permanent storage, but it needs to be accessible.
One of the more recent additions to my space was this little hook for my rulers! I’ve had a battle with storing my long rulers and was never happy with where I put them. I got a little hook at the Container Store and attached it to my island. The littlest things make me the happiest!
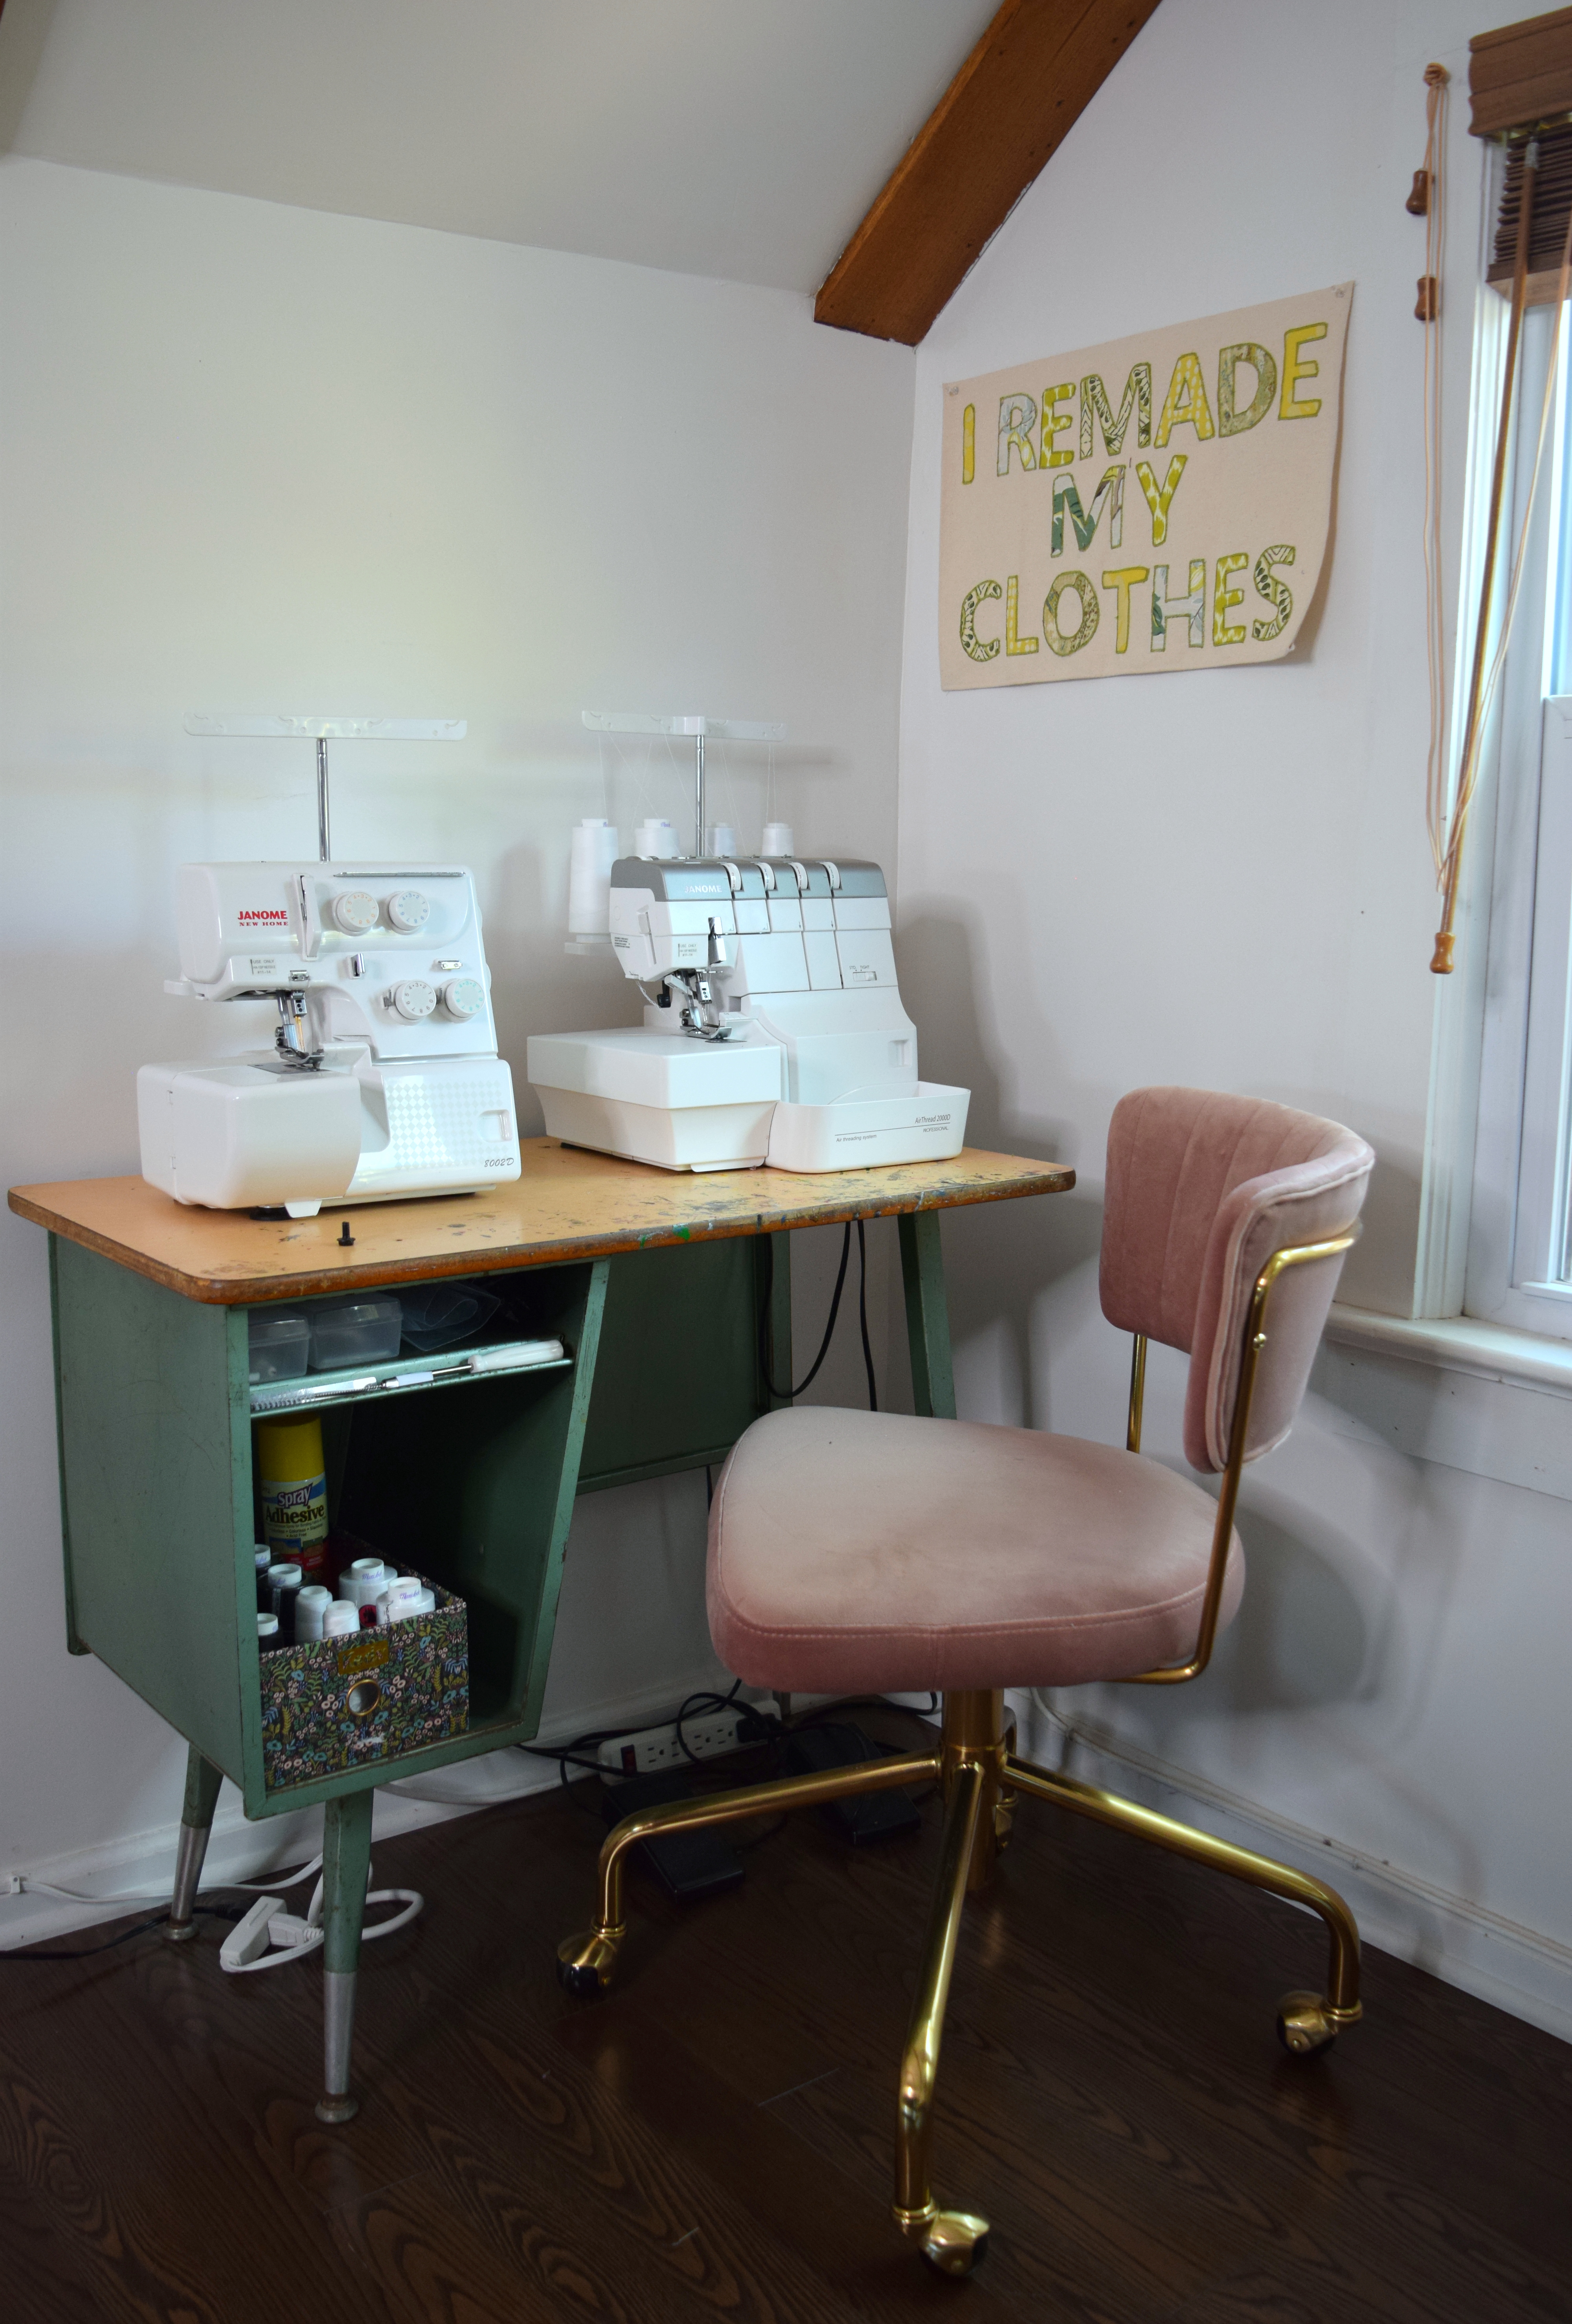
On the other side of my sewing area is my serger desk and ironing board. I’ve had three different desks in this area but this one is my favorite! This was in a discard pile from a family members storage area, and I scooped it up without a real purpose, but I fell in love with it instantly. A few months ago I added it to my studio and it feels like the perfect fit. It also stores my serger thread (in a KEDS Rifle Paper Co shoebox!) and machine tools. Also, I only have one pink chair – I just moved it around for photos! (I’m on the lookout for a metal stool to go with this desk, but my other chairs work great for now) I stitch with two sergers, one is mine and one is on loan from Janome. Usually I have one with black thread, and one with white but I took off the black thread while cleaning the machine and haven’t re-threaded yet!
My ironing board stays up 24/7, and I have a mini tabletop one that I put on my island for smaller projects. My dress form also hangs out over here.
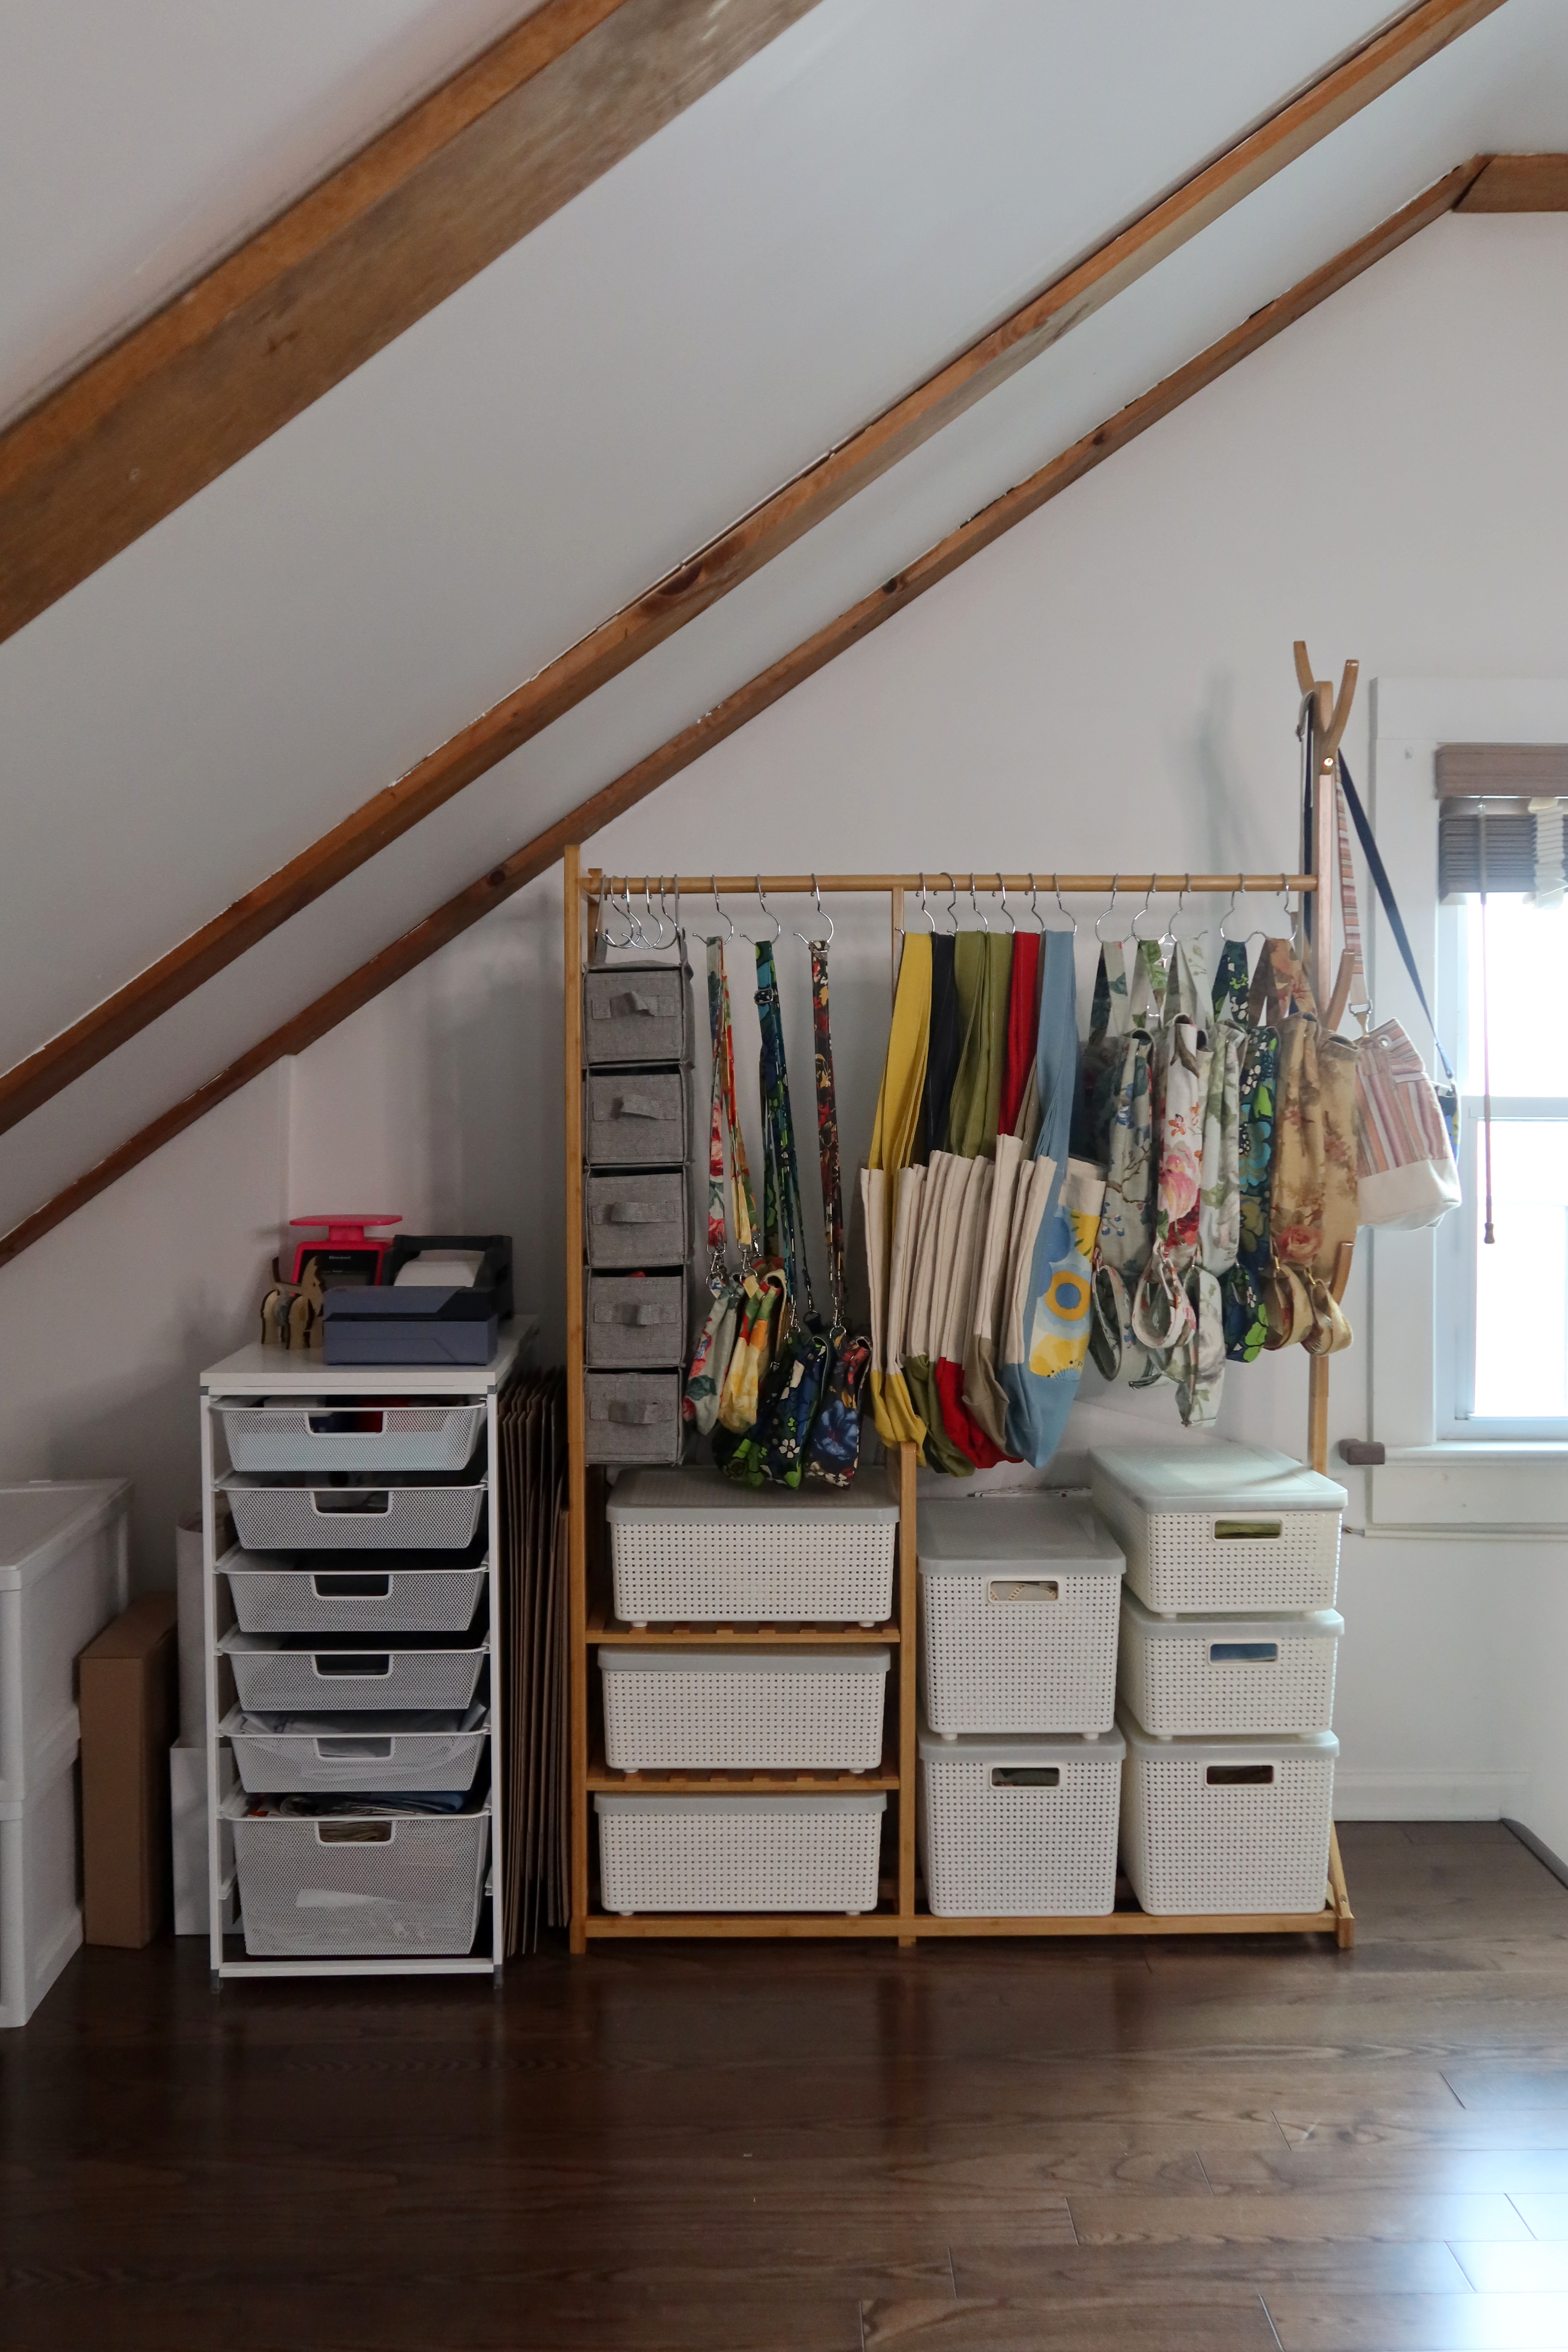
On the other side of the room is more fabric storage, my ”office” and bag storage. This side of our attic has vaulted ceilings, so finding storage to fit within the space has been difficult. I’ve re-arranged this side so many times in the past three years because nothing felt right. I finally feel in a great place with each area of this side, and it’s nice that each space has its purpose.
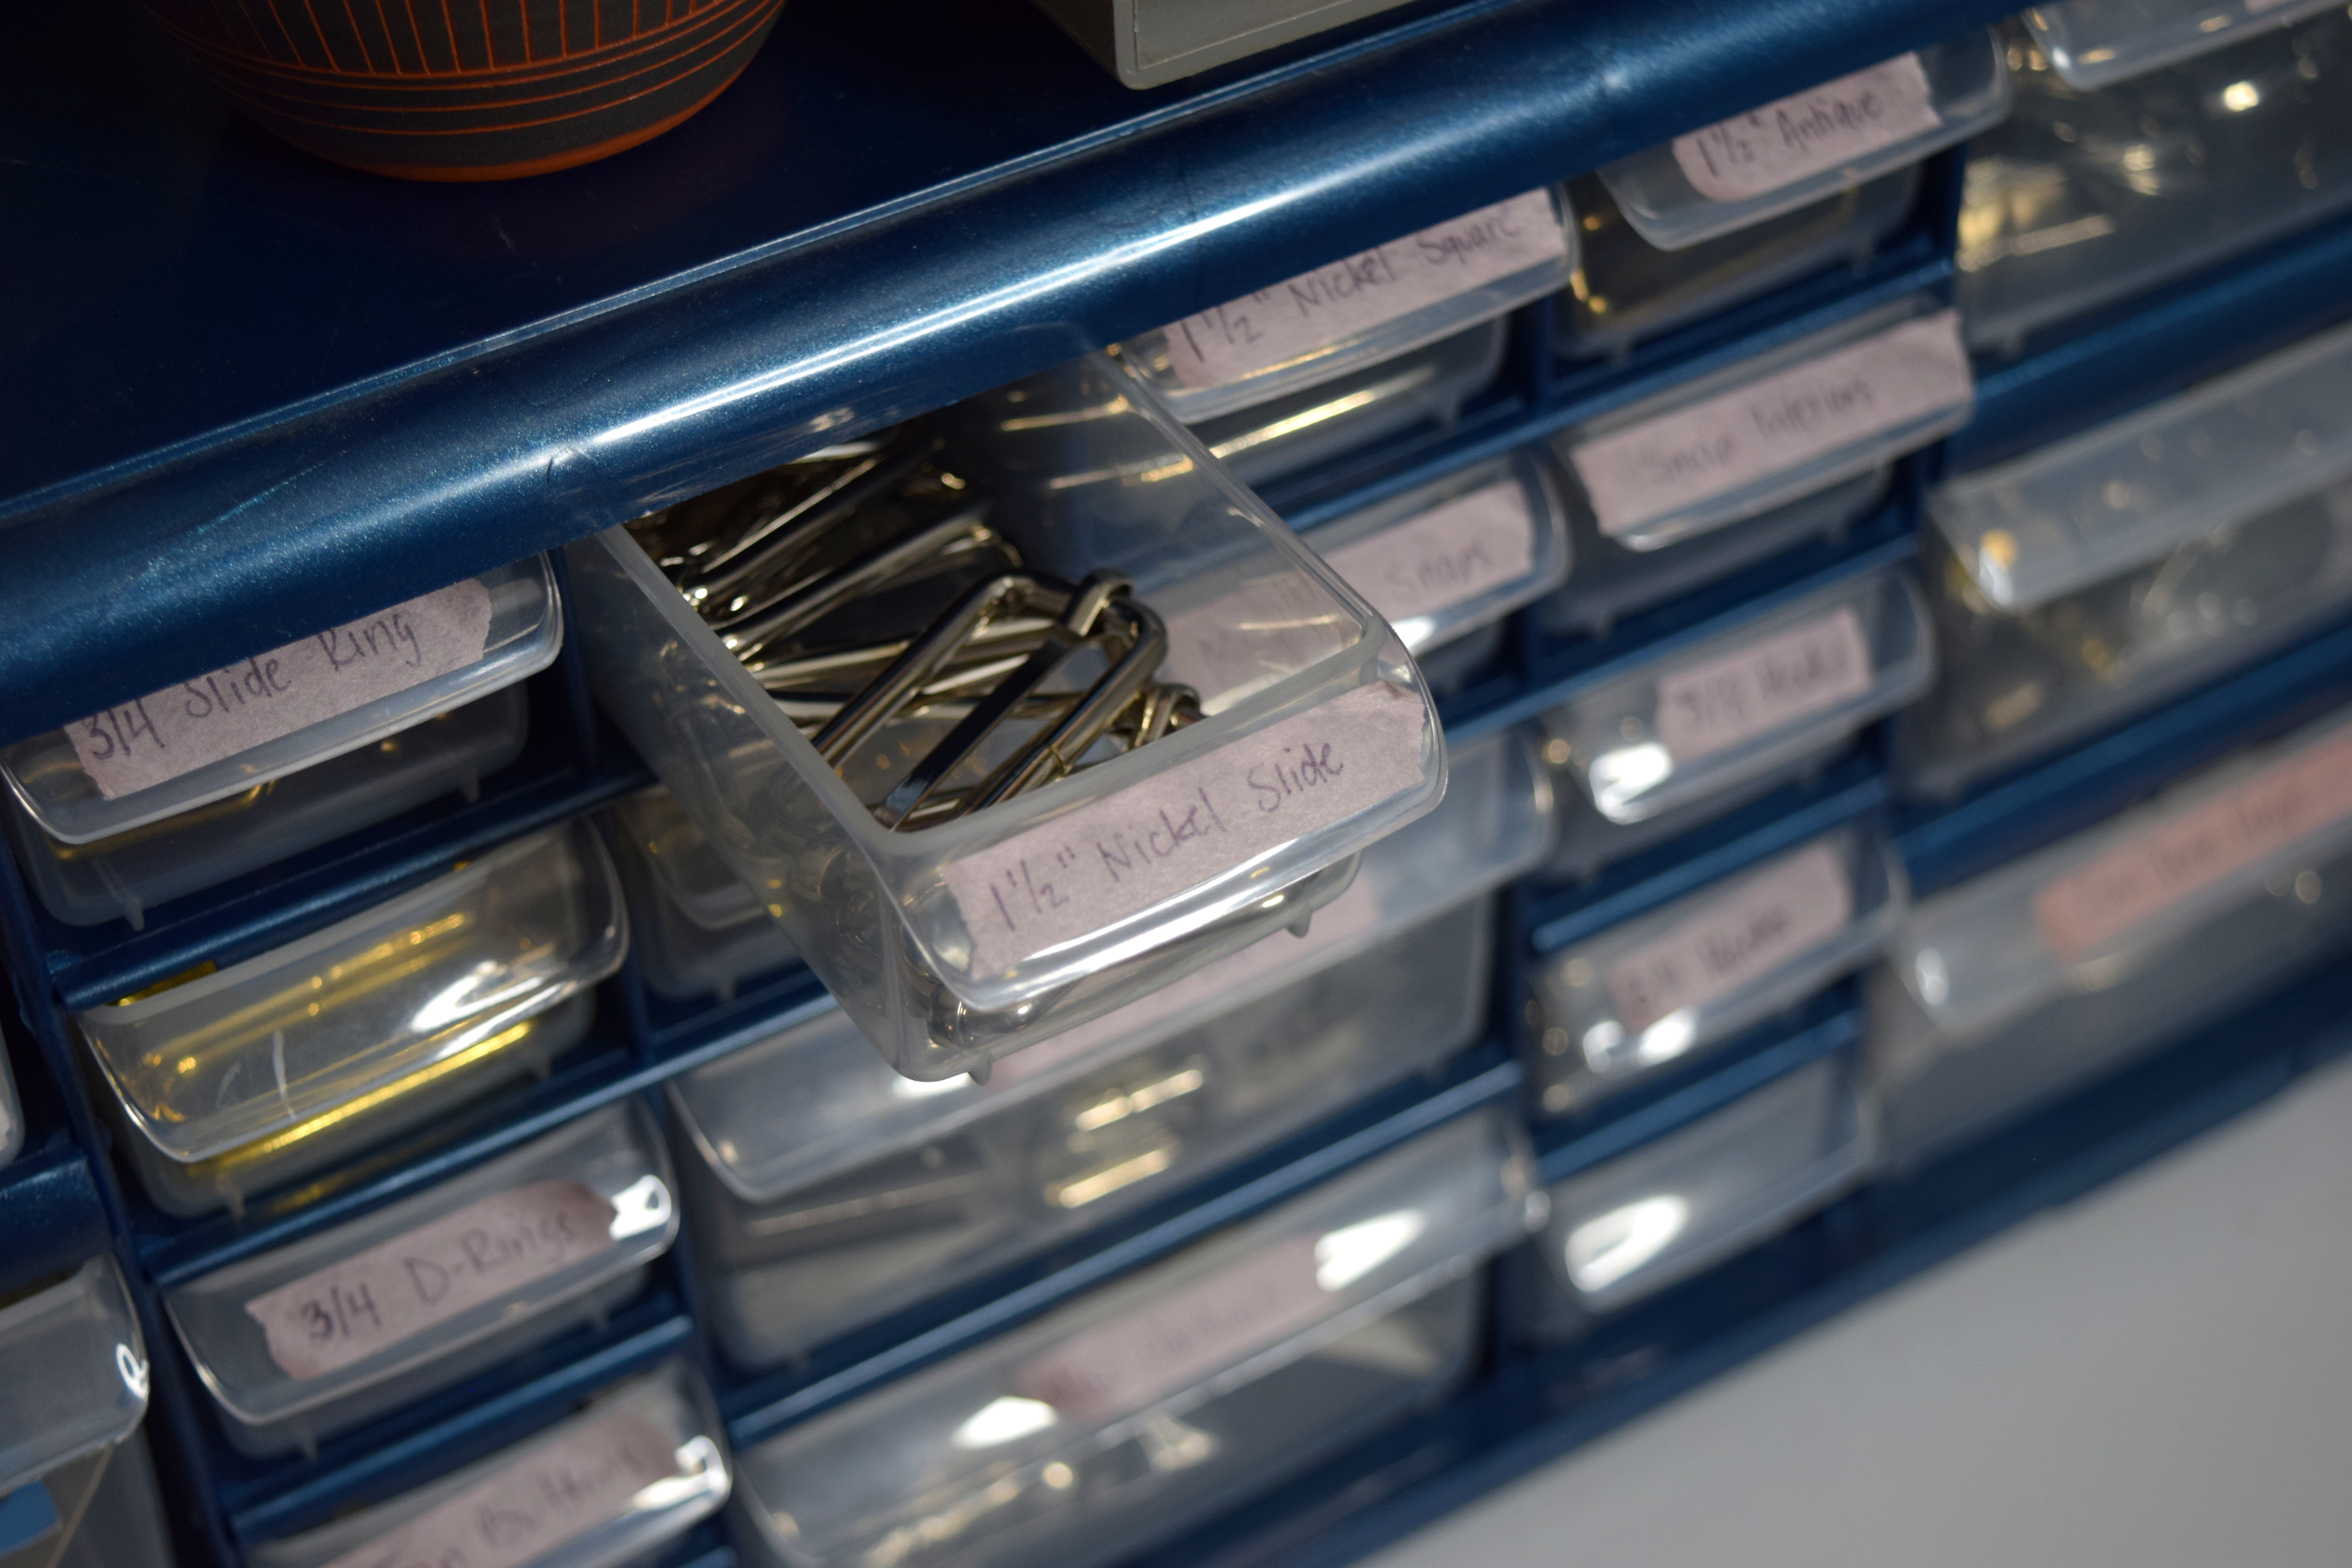
This little unit holds books, sewing patterns, fabric, and all my bag hardware. The larger bin on top holds my hardware, categorized by size. My smaller bin holds any other small things – lead for my sewing pencils, sewing machine tools, etc. My apparel fabrics are in fabric bins, and my collection of sewing books sit next to commercial sewing patterns in their envelopes. This space is also home to my interfacing.
Next to this unit is my rolling cart with current projects. This has helped me keep track of what I’m working on, without just piling it in an empty space. This is also where I store “ideas”, pieces that I want to work on but aren’t ready to start yet. We bought this cart for vegetables/general kitchen storage in our Hoboken apartment, so it’s nice to have a good use for it here.
Up next is my home office! I used to use my tablet on my island but didn’t have a space for it to stay set up until now! I got this desk in high school and now use it as a computer desk where I keep my tablet and a larger second monitor. This desk only has a small drawer that holds post-its, and tape (and my keyboards when not in use), so I use another rolling cart for other items. And yes, my desk chair has flamingos on it!
On this cart I keep my camera and camera accessories, and planning tools like markers and notebooks. The top of my cart has a lid where I can keep my tea/coffee cups and any meals I wind up eating while working. The side of my desk stores my tripod and ring light.
In the next section of my space, I have two storage bins: one of batting, interfacing, and linings, and the other with bag prototypes. The top storage basket holds muslin and sheets to be used for toiles. Behind that, I keep years worth of fabric scraps, which includes toiles from apparel projects, and the smallest scraps and threads. I want to make a few floor poofs, which I will fill with scraps one day, but I haven’t made them yet! (There’s also a small pile of secondhand fabrics that need to be organized)
The final side of my studio is my bag storage/shipping supplies! One of my most recent additions is this beautiful bamboo rack. This is where I keep my bags and accessories, and I use bag hangers from the Container Store, and plastic bins from there as well. I hang up backpacks, tote bags and crossbody bags, and store zip pouches and key fobs. Behind the rack, and on the side of the rack are larger shipping boxes. Bag storage has been another battle for years, and I really didn’t like them in tote storage because they would get squished, and it was hard for me to manage several totes in this space without feeling overwhelmed. I’m looking into garment bags for my bags to hang in, but I do love seeing my hard work all lined up. The two drawer unit is for sale items and pieces that still need to be photographed.
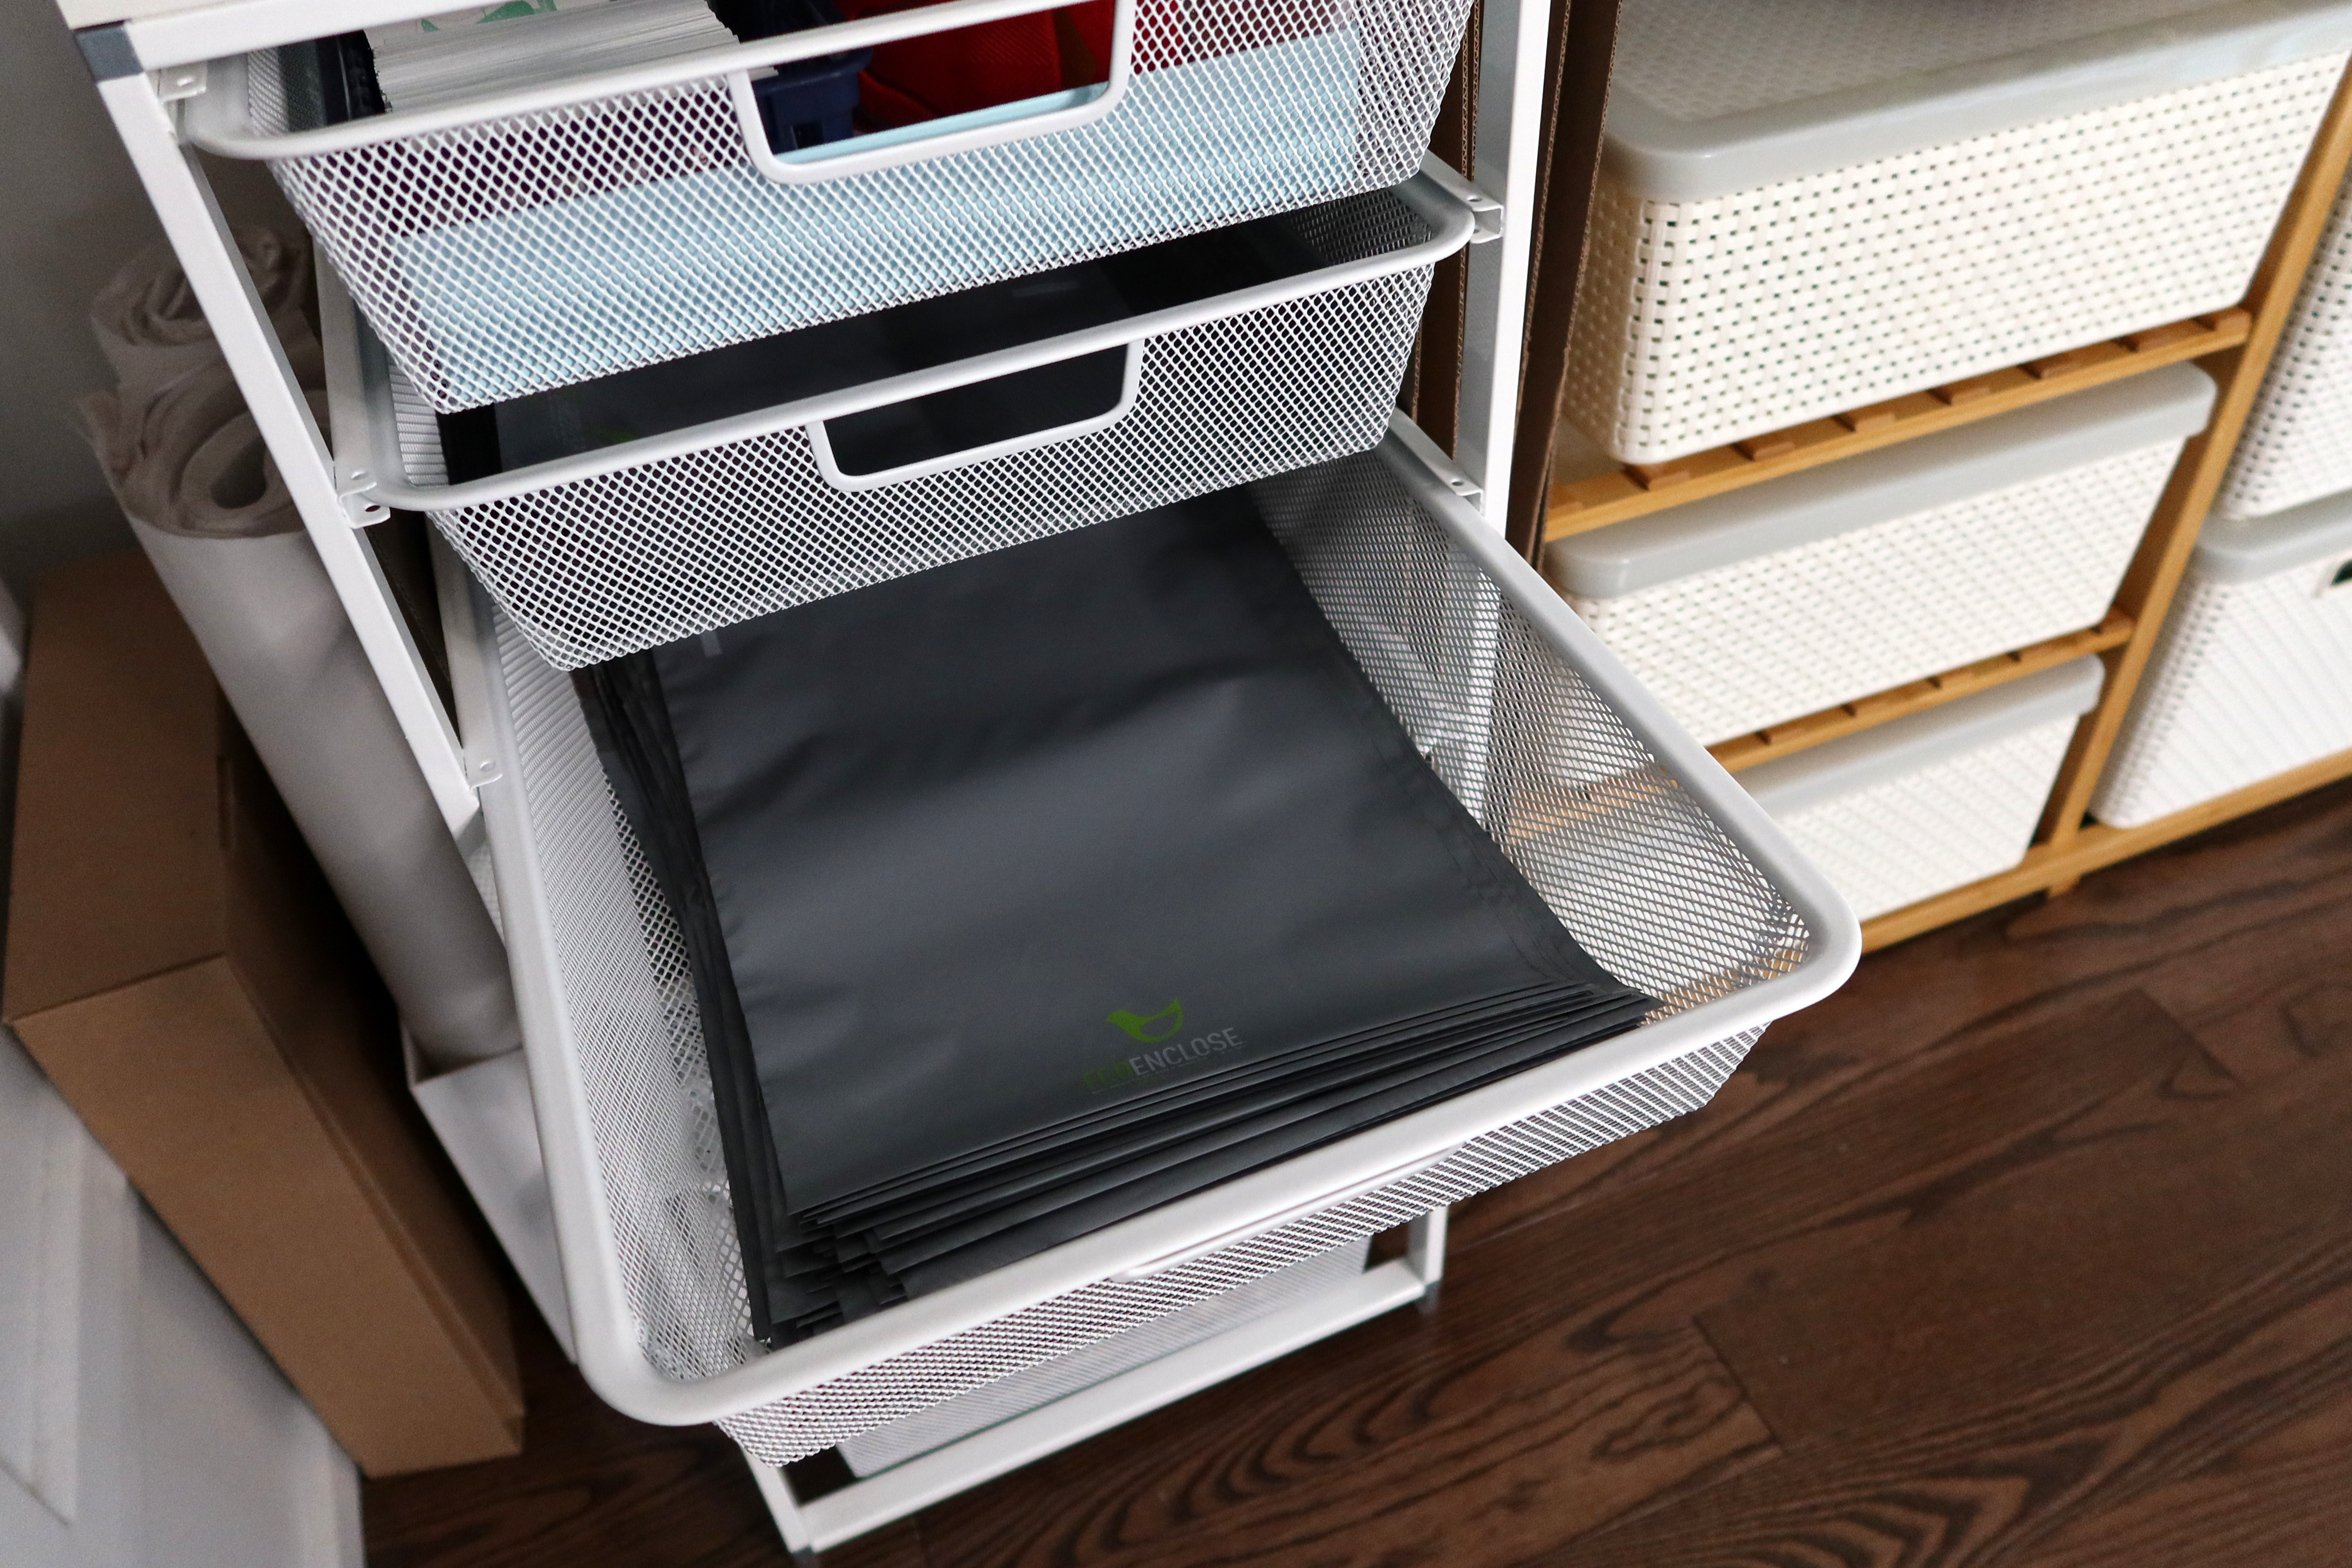
I have also been struggling with how to organize my poly mailers, and decided on this storage rack from The Container Store – and it’s been so great! I can store all my packaging materials, and each drawer gets a different size bag. The top holds my label printer, shipping scale and tape dispenser. Right next to the unit is my tissue paper.
While I have all this glorious space, I do keep my fabric swatch collection elsewhere. We have a few closets in our basement and one of them has shelves which I use for all my fabric swatches and swatch books. This definitely keeps my sewing space clearer, because I have a lot of swatches. (I can’t photograph this right now because our basement had a little water with Hurricane Ida and everything is a bit all over the place, but thankfully all my swatches were ok!)
Something else that really helped my space is general decluttering. Since I’ve been sewing for 16 years, I’ve accumulated a lot of fabric. Fabric I bought when first starting out, fabric that’s been given to me, or fabrics part of impulse purchases and overbuying. I had 5 garbage bags filled with fabric I no longer wanted. The quick solution would have been to drop it off at a thrift store and be done, but I tried to find a good home for it all. I reached out to a local church thrift shop to see if they could sell it, use it, or knew of someone who would want it. They put me in contact with someone who was more than happy to take it and I was able to organize a pick up. Being able to part ways with old fabric was so mentally clearing, and being able to pass it onto someone who could use it made my heart so happy.
I often think back to when I first started sewing, and remember my machine in my bedroom (on this green desk I’m using right now to type this out!) and using my parent’s kitchen table to cut out fabric. I experience so many moments of gratitude that I get to work from this space, and fill it with things I love. I am so excited to work in this space for years to come.
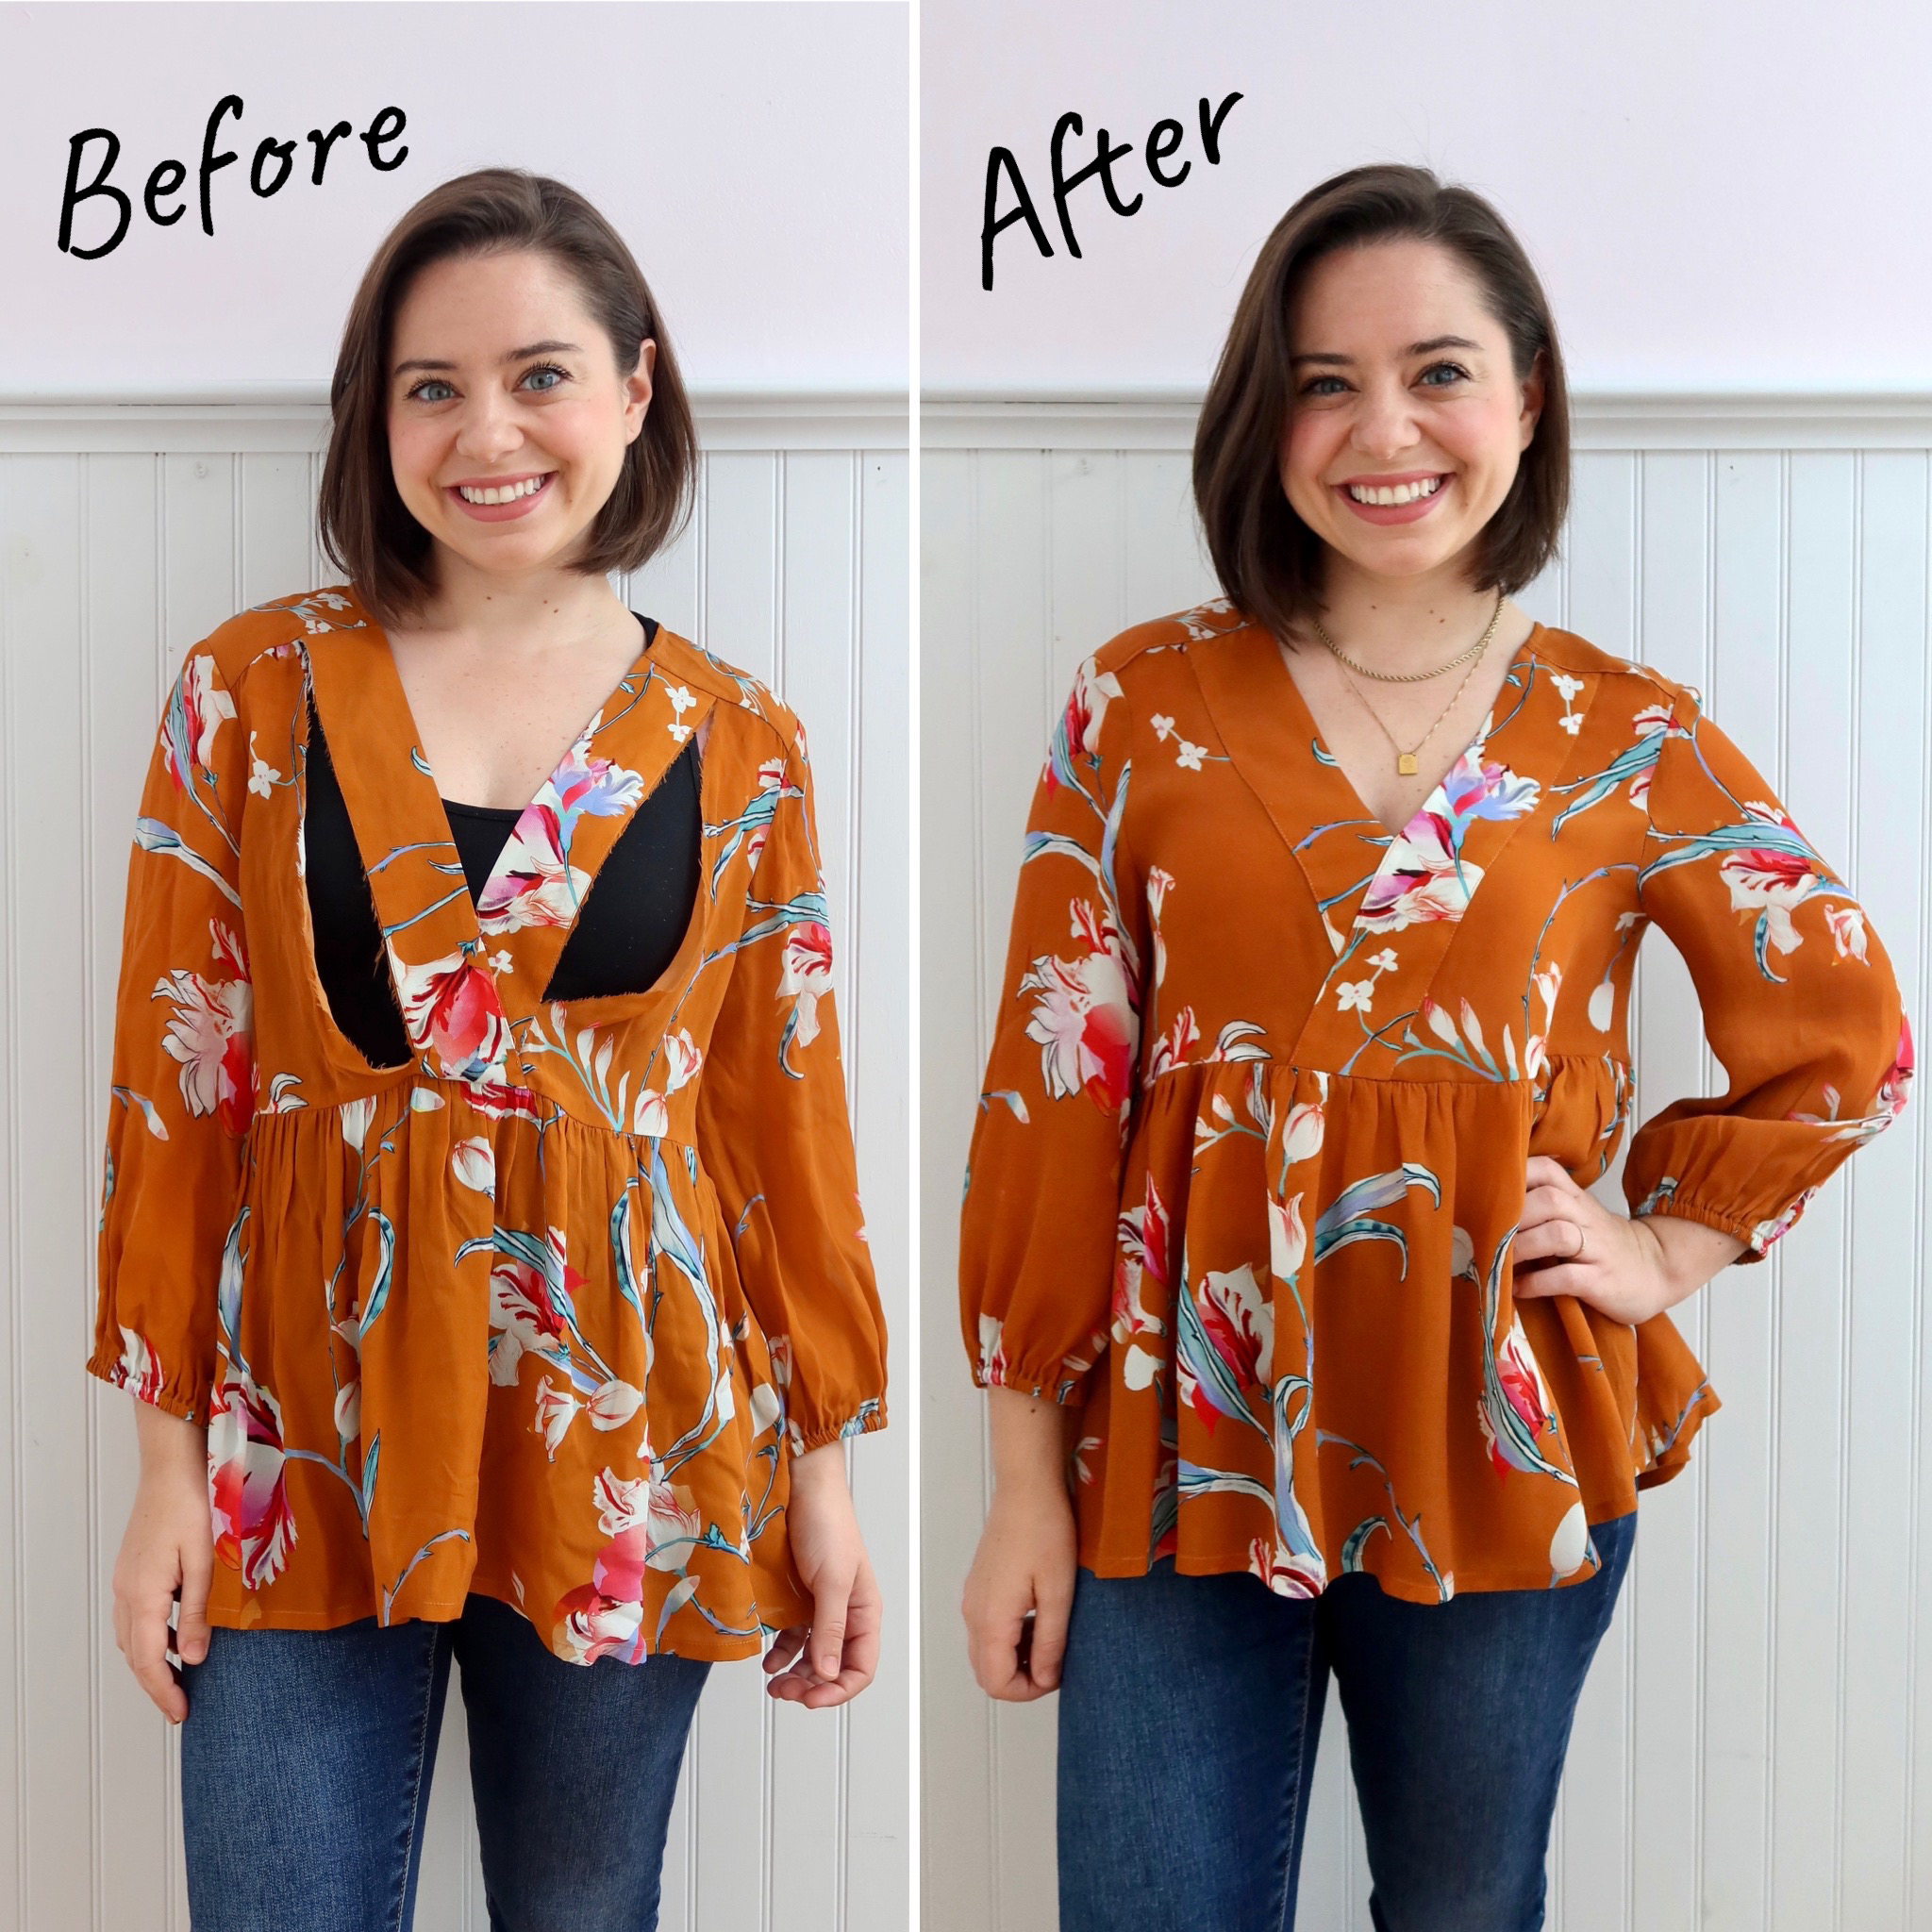
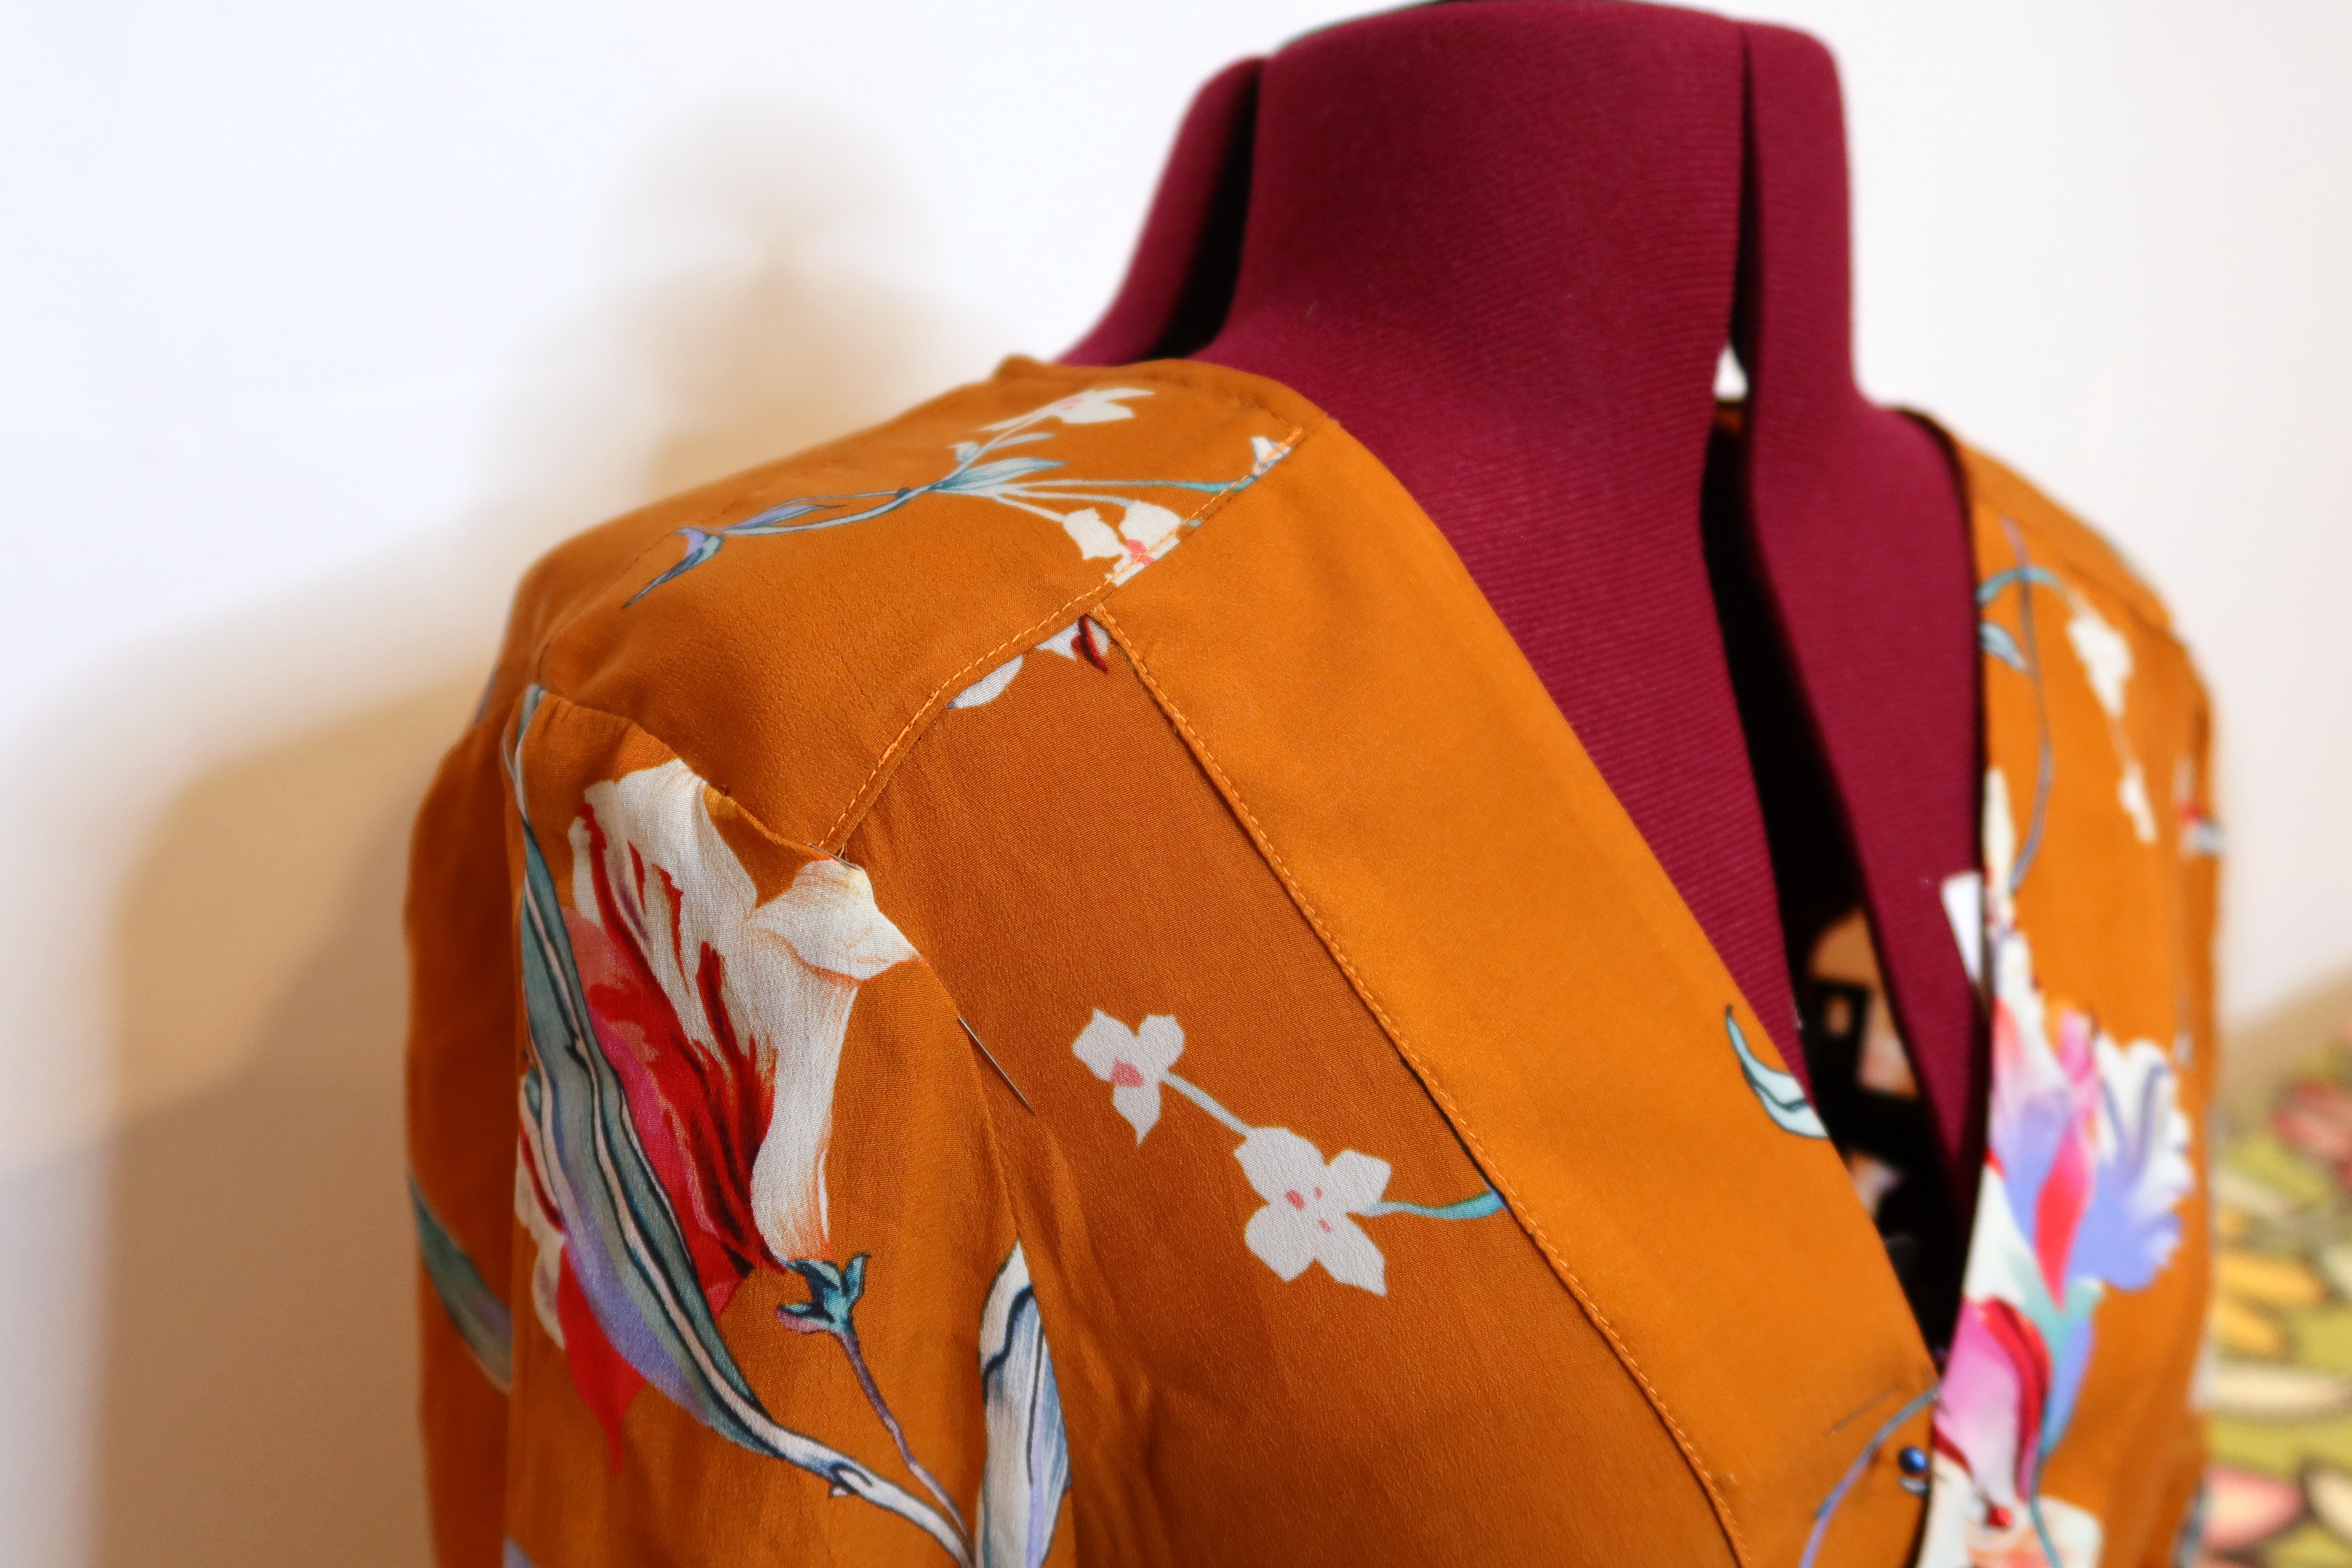
In August, I took a trip to Fab Scrap for some new bag fabrics. Drew and I went to the warehouse, where fabric is sold by the pound and a new section they had was the Mendables, which are racks that have sample garments from designers. These items may have holes, tears, writing, etc, all making them un-sellable. Fab Scrap takes these in and sells them by the pound! What I love about these pieces is that they are truly clothes that need TLC. This is one of the pieces I found at Fab Scrap, a beautiful top with the front cut. It looked like a simple fix, and a garment in my size, so all I wanted to do was repair it!
Whenever I believe a project will be quick or simple, I find it much easier to procrastinate getting it done. This top was no exception, as it took months for me to work on this! But I’ve been waiting on a hardware order before I can finish the jacket I’m making, so I thought this would be a great ‘in-between’ project.
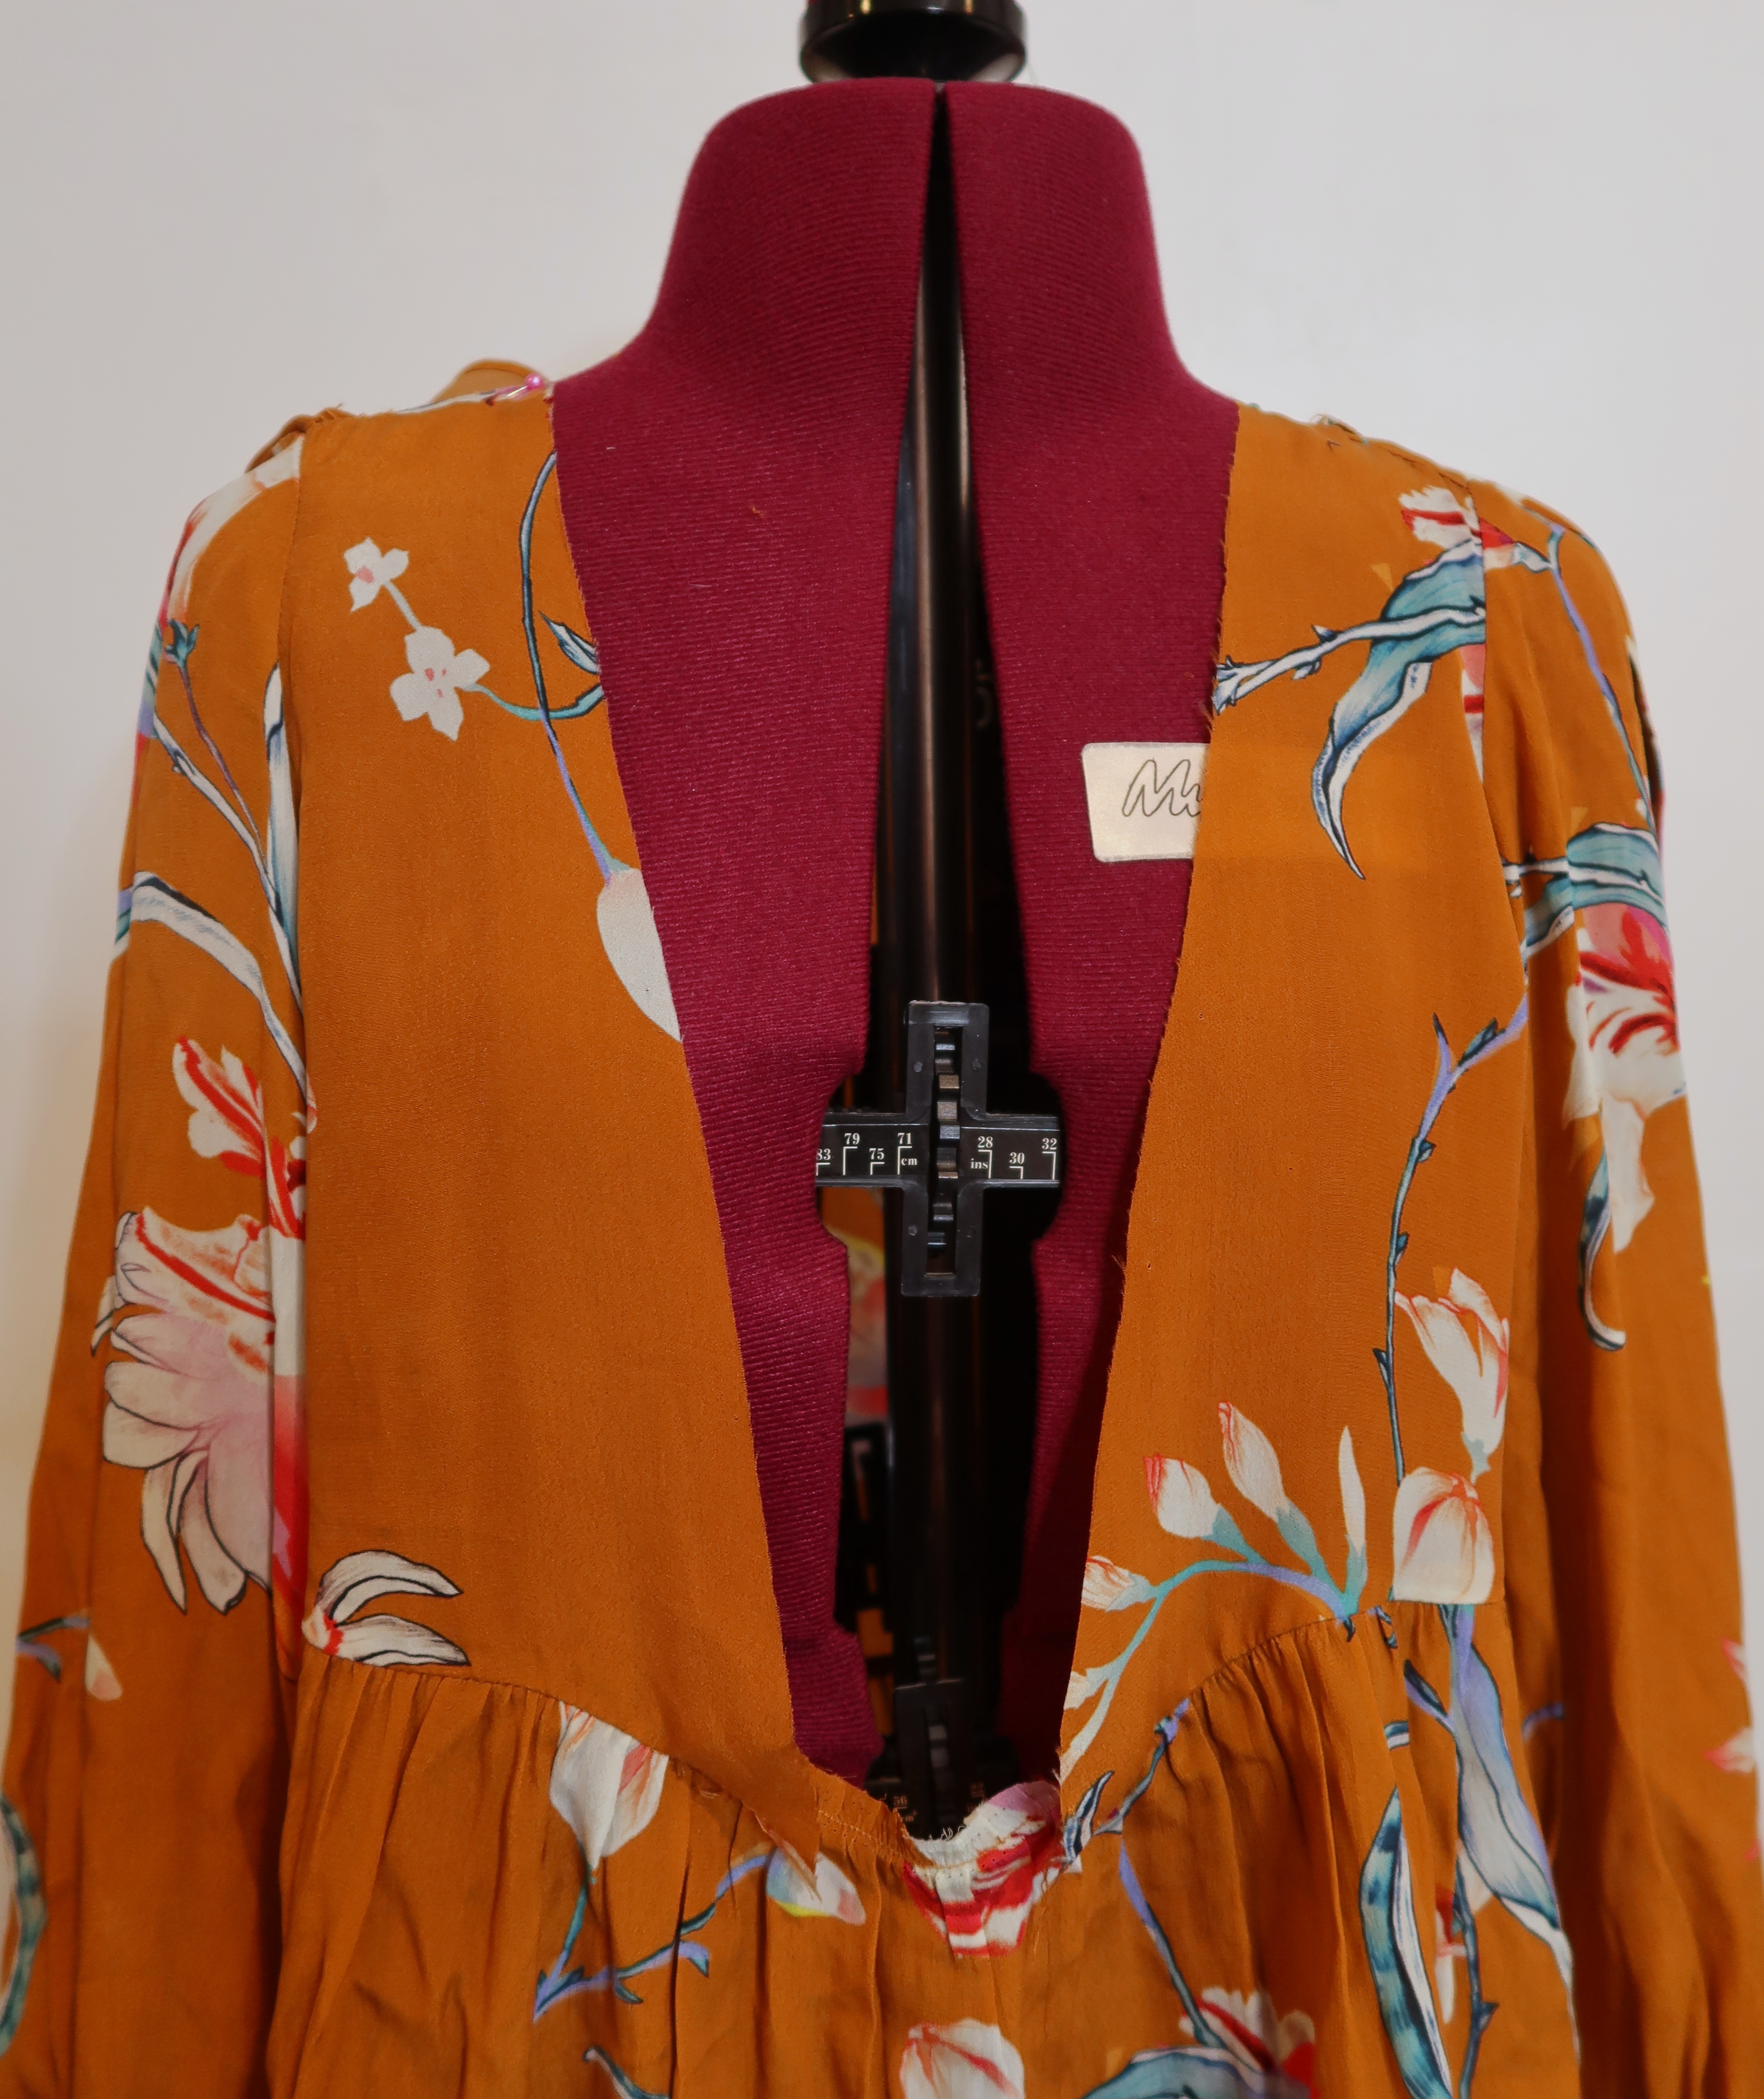
First step was cutting open the neckline facings. I also ripped the seam of the shoulder, and the waistline to be able to move the material better. I was then able to completely cut the slits out, and straighten the cut.
I stitched the newly straightened line back into the neckline, and topstitched each side shut.
Just under 1″ on each side was removed, meaning I had extra material on the top and in the waistband. Initially, I was going to gather the shoulder seam so I didn’t have to open up the sleeve, but after experimenting, it didn’t look how I wanted. I opened the top of the sleeve seam and pushed the extra fabric into the sleeve. I topstitched the shoulder seam, and re-stitched the sleeve after cutting off the excess.
Next I pinned the new neckline in place, bringing up the “V”, a bit higher than the original design. This had to be done several times, both on my body, and on my mannequin to be sure the best fit. It took some finessing to be sure the material would lay properly. Bringing the neckline too high up meant the material would pucker, however too low and I wouldn’t be comfortable wearing it. After pinning, there was a bit of excess fabric from the neckline pieces that needed to be trimmed, similar to the sleeves. (sorry – forgot photos of the extra fabric!)
The next step was to re-gather the waistband to include the excess fabric. This top was designed to have a flowy-er bodice, so making the waistband a little smaller still left me with room to get in and out of the top. I also wanted to remove some of the length, since the top was just a bit long on my frame. Instead of re-hemming, I decided to remove the entire waist and re-gather it. I cut 1/2″ off and re-gathered the material. The gathering was pretty annoying, and I had to re-do the waistline stitching several times to make the gathering even.
After the waistband was complete, I re-pinned the neckline one last time and topstitched in place. The final step was tightening the elastic on the wrist. I opened the wrist seam just enough to get to the elastic, and pulled it out a bit. I took about 1″ out of each wrist elastic. I stitched the seam back up and this top was finished!
I was debating with myself if this was a mend/repair or a refashion. Ultimately, I kept the garment and design in tack, and this project was more about repairing than changing the look.
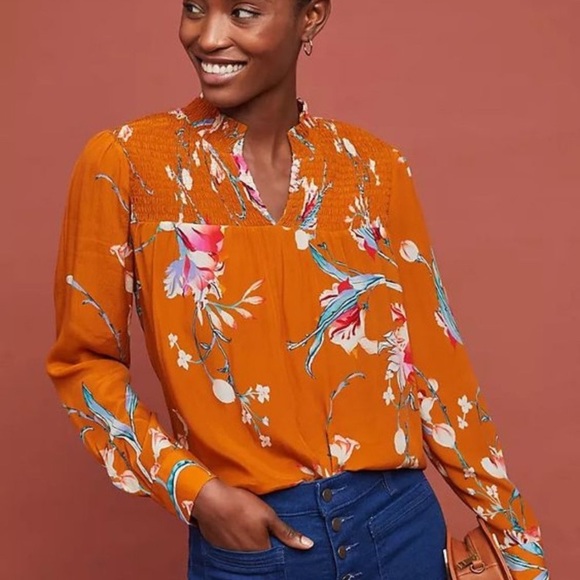
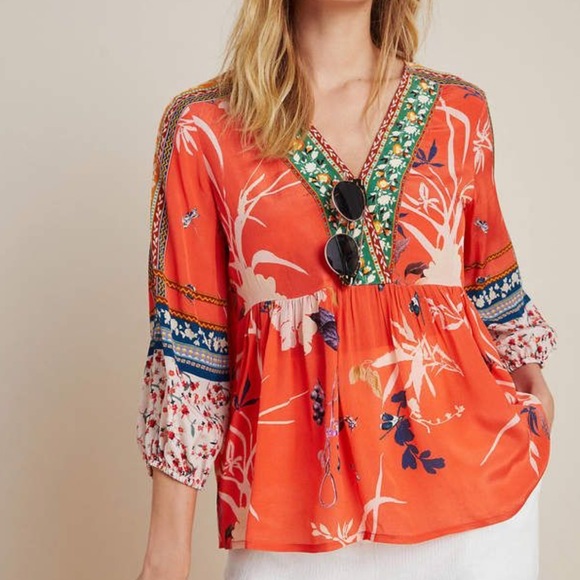
After completing this, I did do a little google search to find out about the designer, and what the final top looks like. Turns out this designer is sold at Anthropologie! I couldn’t find this exact top, but I did find the print in another style! How cool! I also found this style top in different fabrics, so it’s possible this was leftover fabric to create a new style. While I don’t know the reason for the neckline being cut, I’m so thrilled it found its way to Fab Scrap, and eventually to me!
(And a photo of me shopping the racks at Fab Scrap!)
I really love how this piece turned out, and am happy I finally took the time to fix it.
I sometimes hate mending/repairing my own clothes. It can be a task that doesn’t always feel fulfilling until after it is done and I get to wear my clothes again. I think many sewers have mending piles that take time to get to, because so often, new fabric is so much more fun to sew! Many of my mending projects turn into refashioning projects because I see it as a new way to look at the garment. Either way, it is so incredibly important to give these pieces another chance – the more clothing we can save from landfill, the better!
I have a few other pieces that I’m excited to repair, and while these posts aren’t going to be exact tutorials for items in your repair pile, I do hope they inspire you to fix some of the projects you may have been putting off!
Hello everyone! It’s been some time since my last blog post. Back in August, I shared a little bit of personal news over on Instagram and took a bit of an unexpected, but necessary break from posting sewing projects.
Over the past few years I’ve been dealing with headaches and migraines on a pretty consistent basis. The past several months they’ve been getting worse and I’ve been struggling with them. I’ve been seeing a Neurologist, and gotten blood work done, as well as had MRI’s and a CT Scan, which have all come back normal/clear. While this is a relief, it’s a bit frustrating to not have a more immediate answer.
I’ve been searching for a solution before going on any medication, and have spent the last month, to month and a half working on my health. I’ve been working on my eating habits and general nutrition, my exercise regimen, and I have been working hard on my mental health. While I don’t have an exact solution, I have been able to decrease many of my daily headaches by focusing on overall wellness.
I’ve been cooking, reading, cleaning, and exercising so much more that sewing hasn’t been my main priority. Although I did sew some new bags for Etsy, I didn’t work on any apparel projects. At first, I felt horrible about not having projects to share, but taking time to work on myself and a new daily routine has been preparing me to return to this space.
And now, I am so excited to get back to sewing! I have several projects that I’m ready to dive into – and a few to share here now! As mentioned above, I’ve been working on some new bags for Etsy, and here they are!
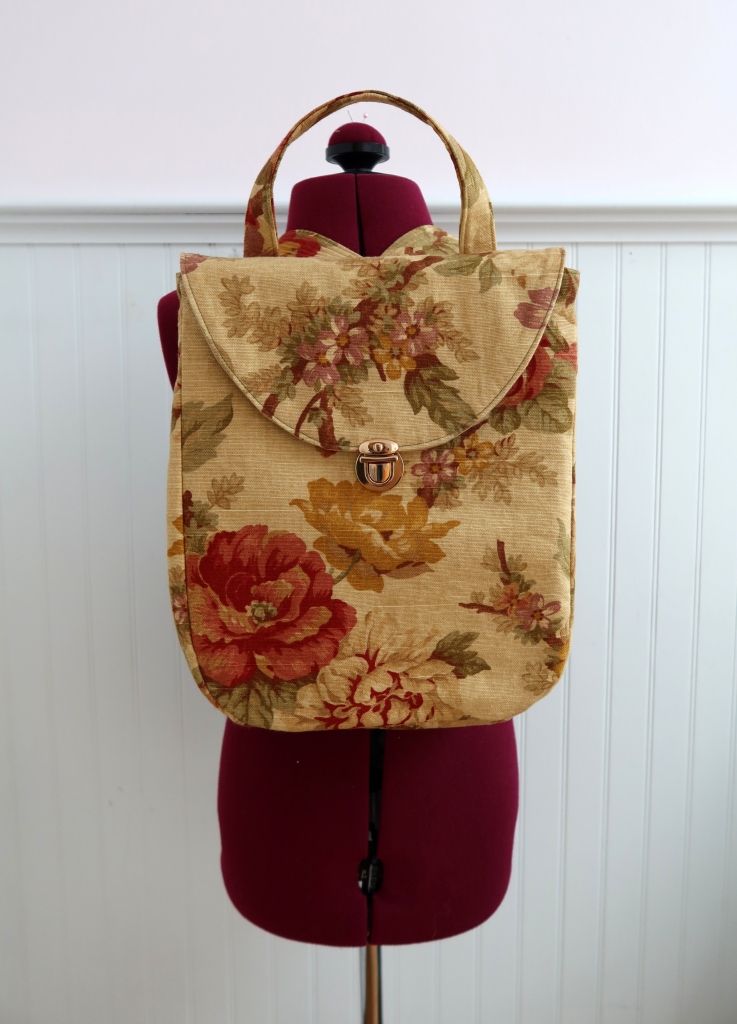
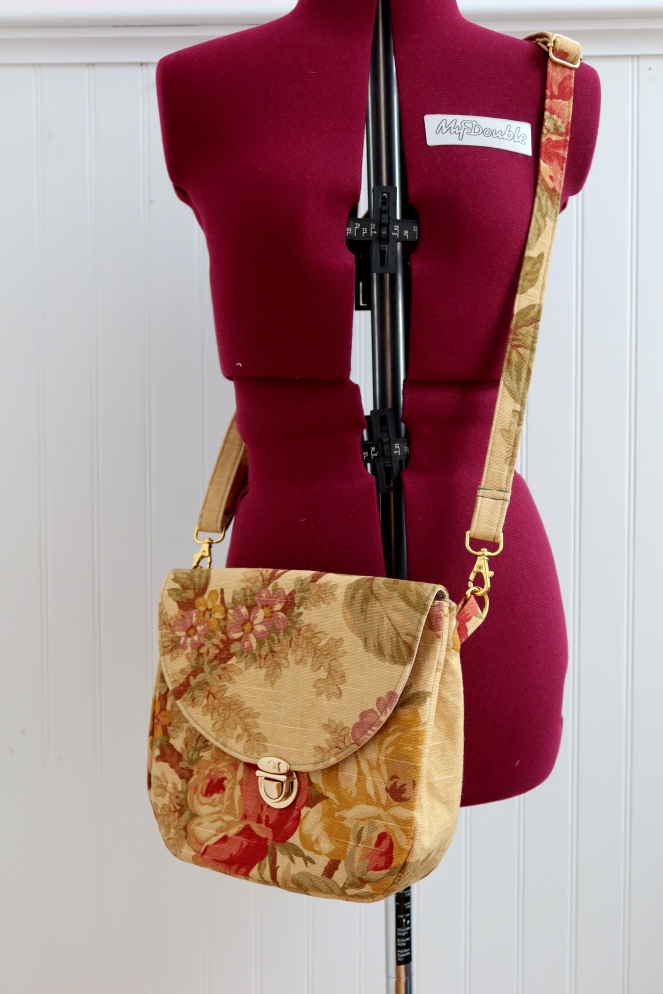
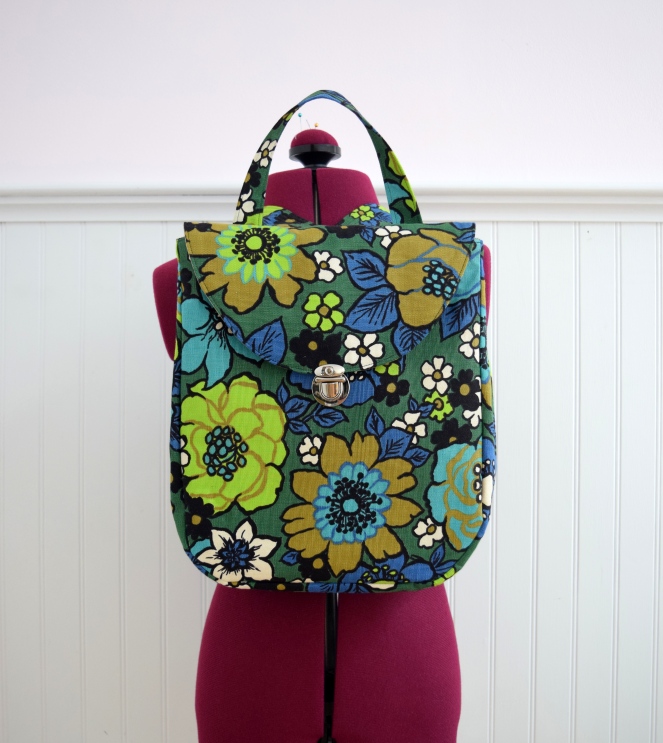
Fall Floral Backpack and Crossbody Bag
I’ve worked so hard on both my backpack and crossbody bag patterns over the years, and I am so proud of them! Each bag features a push lock (tongue lock) close, back zipper pocket, and side snaps to expand the bag. This is the first collection where I’ve used gold hardware and I love the look against this beautiful floral print. Each bag is made with secondhand floral upholstery cotton, and they are lined with reclaimed khaki cotton from FabScrap.
Here’s a little behind the scenes making the backpacks!
More new bags in my shop:
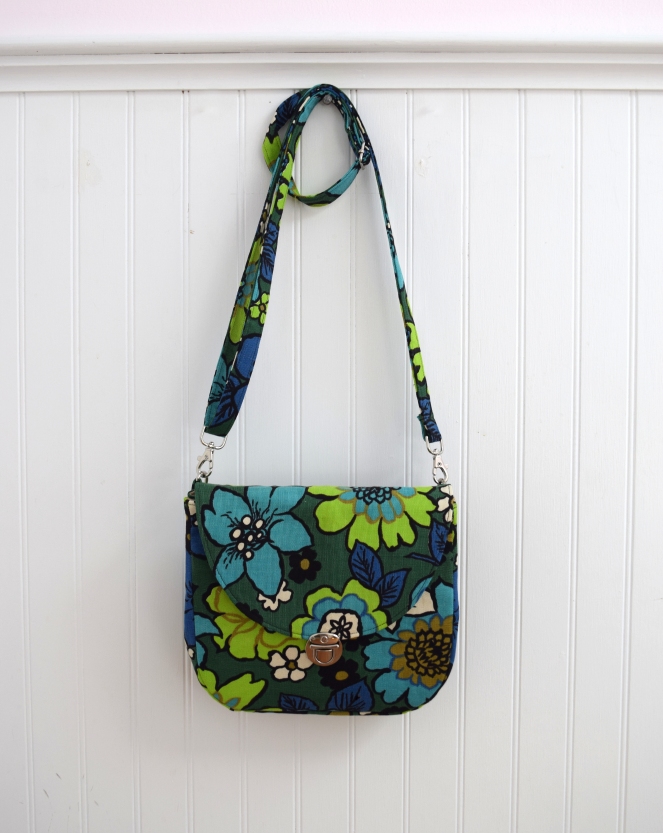
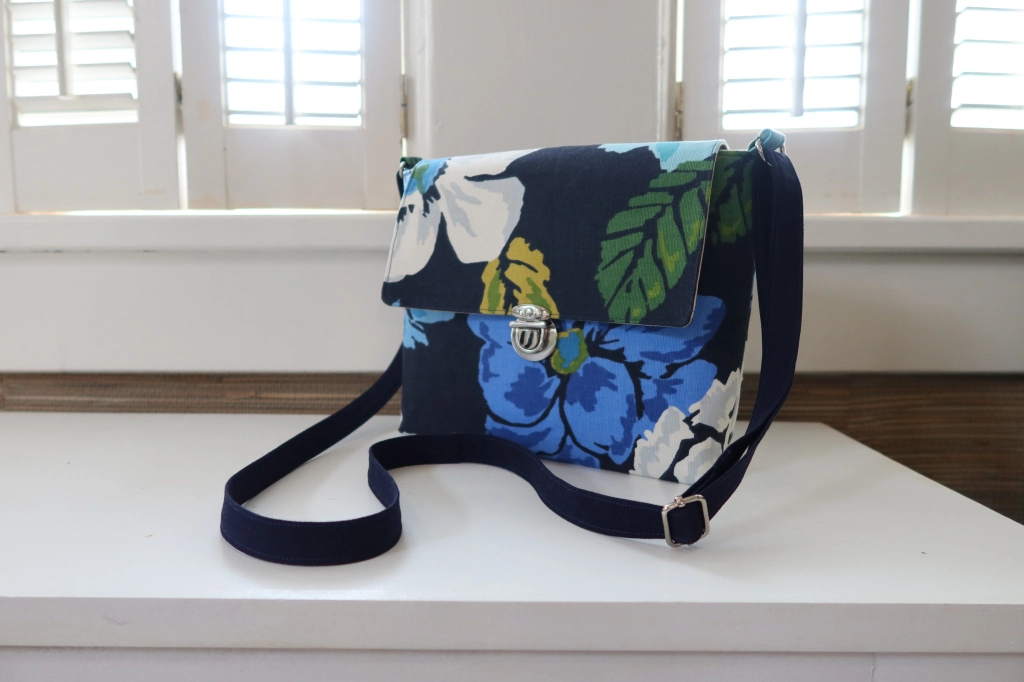
This bold floral collection is made from a secondhand 70’s print! (I also used this fabric for another project – a future tutorial to share with you!)
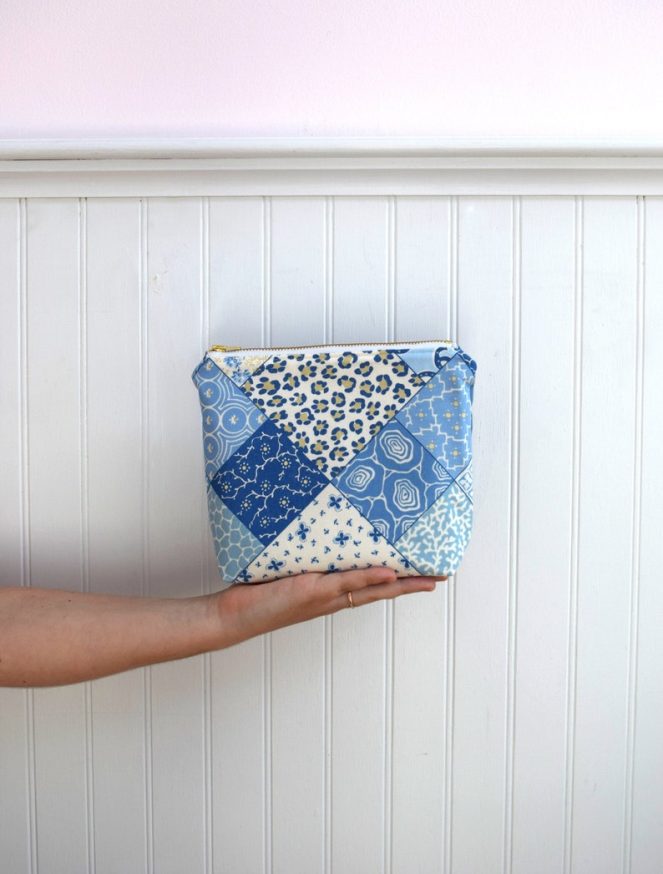
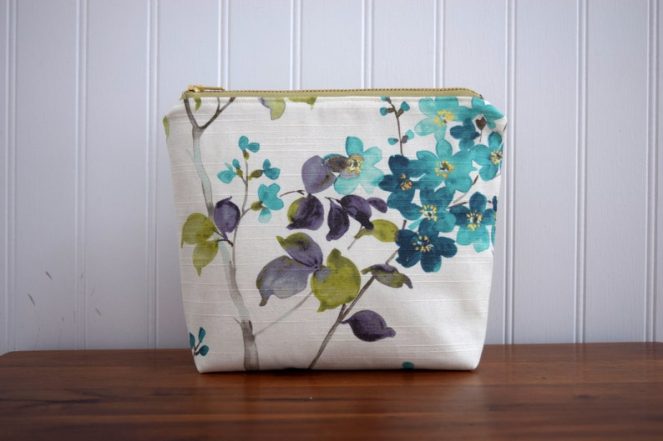
And some adorable zipper pouches made with reclaimed fabric swatches! Each bag is made with two coordinating fabrics, one print on each side, and are perfect for makeup, sewing supplies, toiletries for travel, etc.
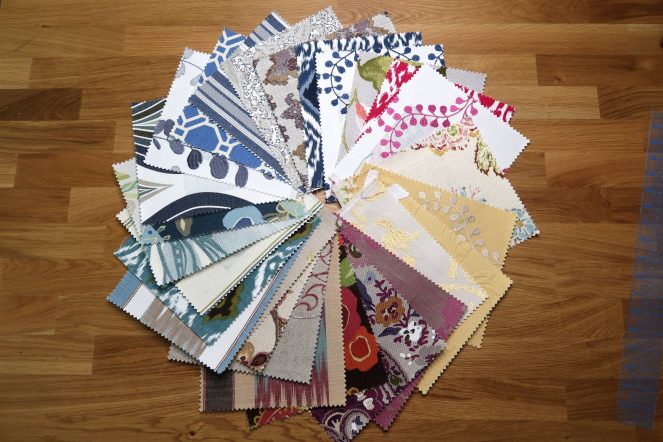
Speaking of fabric swatches…for anyone interested in sewing with swatches, my Swatch Shop is finally up and running on Etsy! I’m selling both pre-opened swatch books and complete swatch books, as well as curated sets of swatches.
I am so incredibly excited to share this post! I’ve been working on this tutorial for a while and am so happy to finally share it! I absolutely love making bags, and know that bag making can be pretty intimidating, so I wanted to create an in-depth tutorial for one of my favorite style bags to make!
This tutorial is for a small lined crossbody bag with a push lock (or tongue lock) close, with a flat bottom, adjustable strap and exterior zipper! This bag is similar in style to the bags I designed for my etsy shop, but much quicker and easier to make! I’ve created a PDF tutorial filled with photos and instructions, and there’s a video tutorial on YouTube!
One of the things I love most about this pattern is that it is totally customizable! Don’t want an exterior pocket? No need to include it, or use the instructions to make an interior pocket! Want to make the straps removable? Stitch the strap ends to swivel hooks! You can curve the front flap into a half circle shape, and if you want, make the bag bigger or smaller by adjusting the measurements provided! This is a great bag to introduce you to bag making, or to get some more experience with bag hardware and zippers! (If you are looking for online spots for materials, I shop most hardware at Purse Supplies R Us on Etsy, zippers come from ZipIt, and Push Locks from Pacific Trimming!) The exterior fabric used in this bag is a large upholstery fabric swatch from my collection, and the lining and pockets are cotton.
I hope you love this bag! If you make it, let me know! I would love to see your version! Any questions, I am here to answer!
I can’t believe we are already halfway through June! I’ve been working on several projects, but some haven’t been going according to plan and I needed a simple project to cleanse my sewing palette.
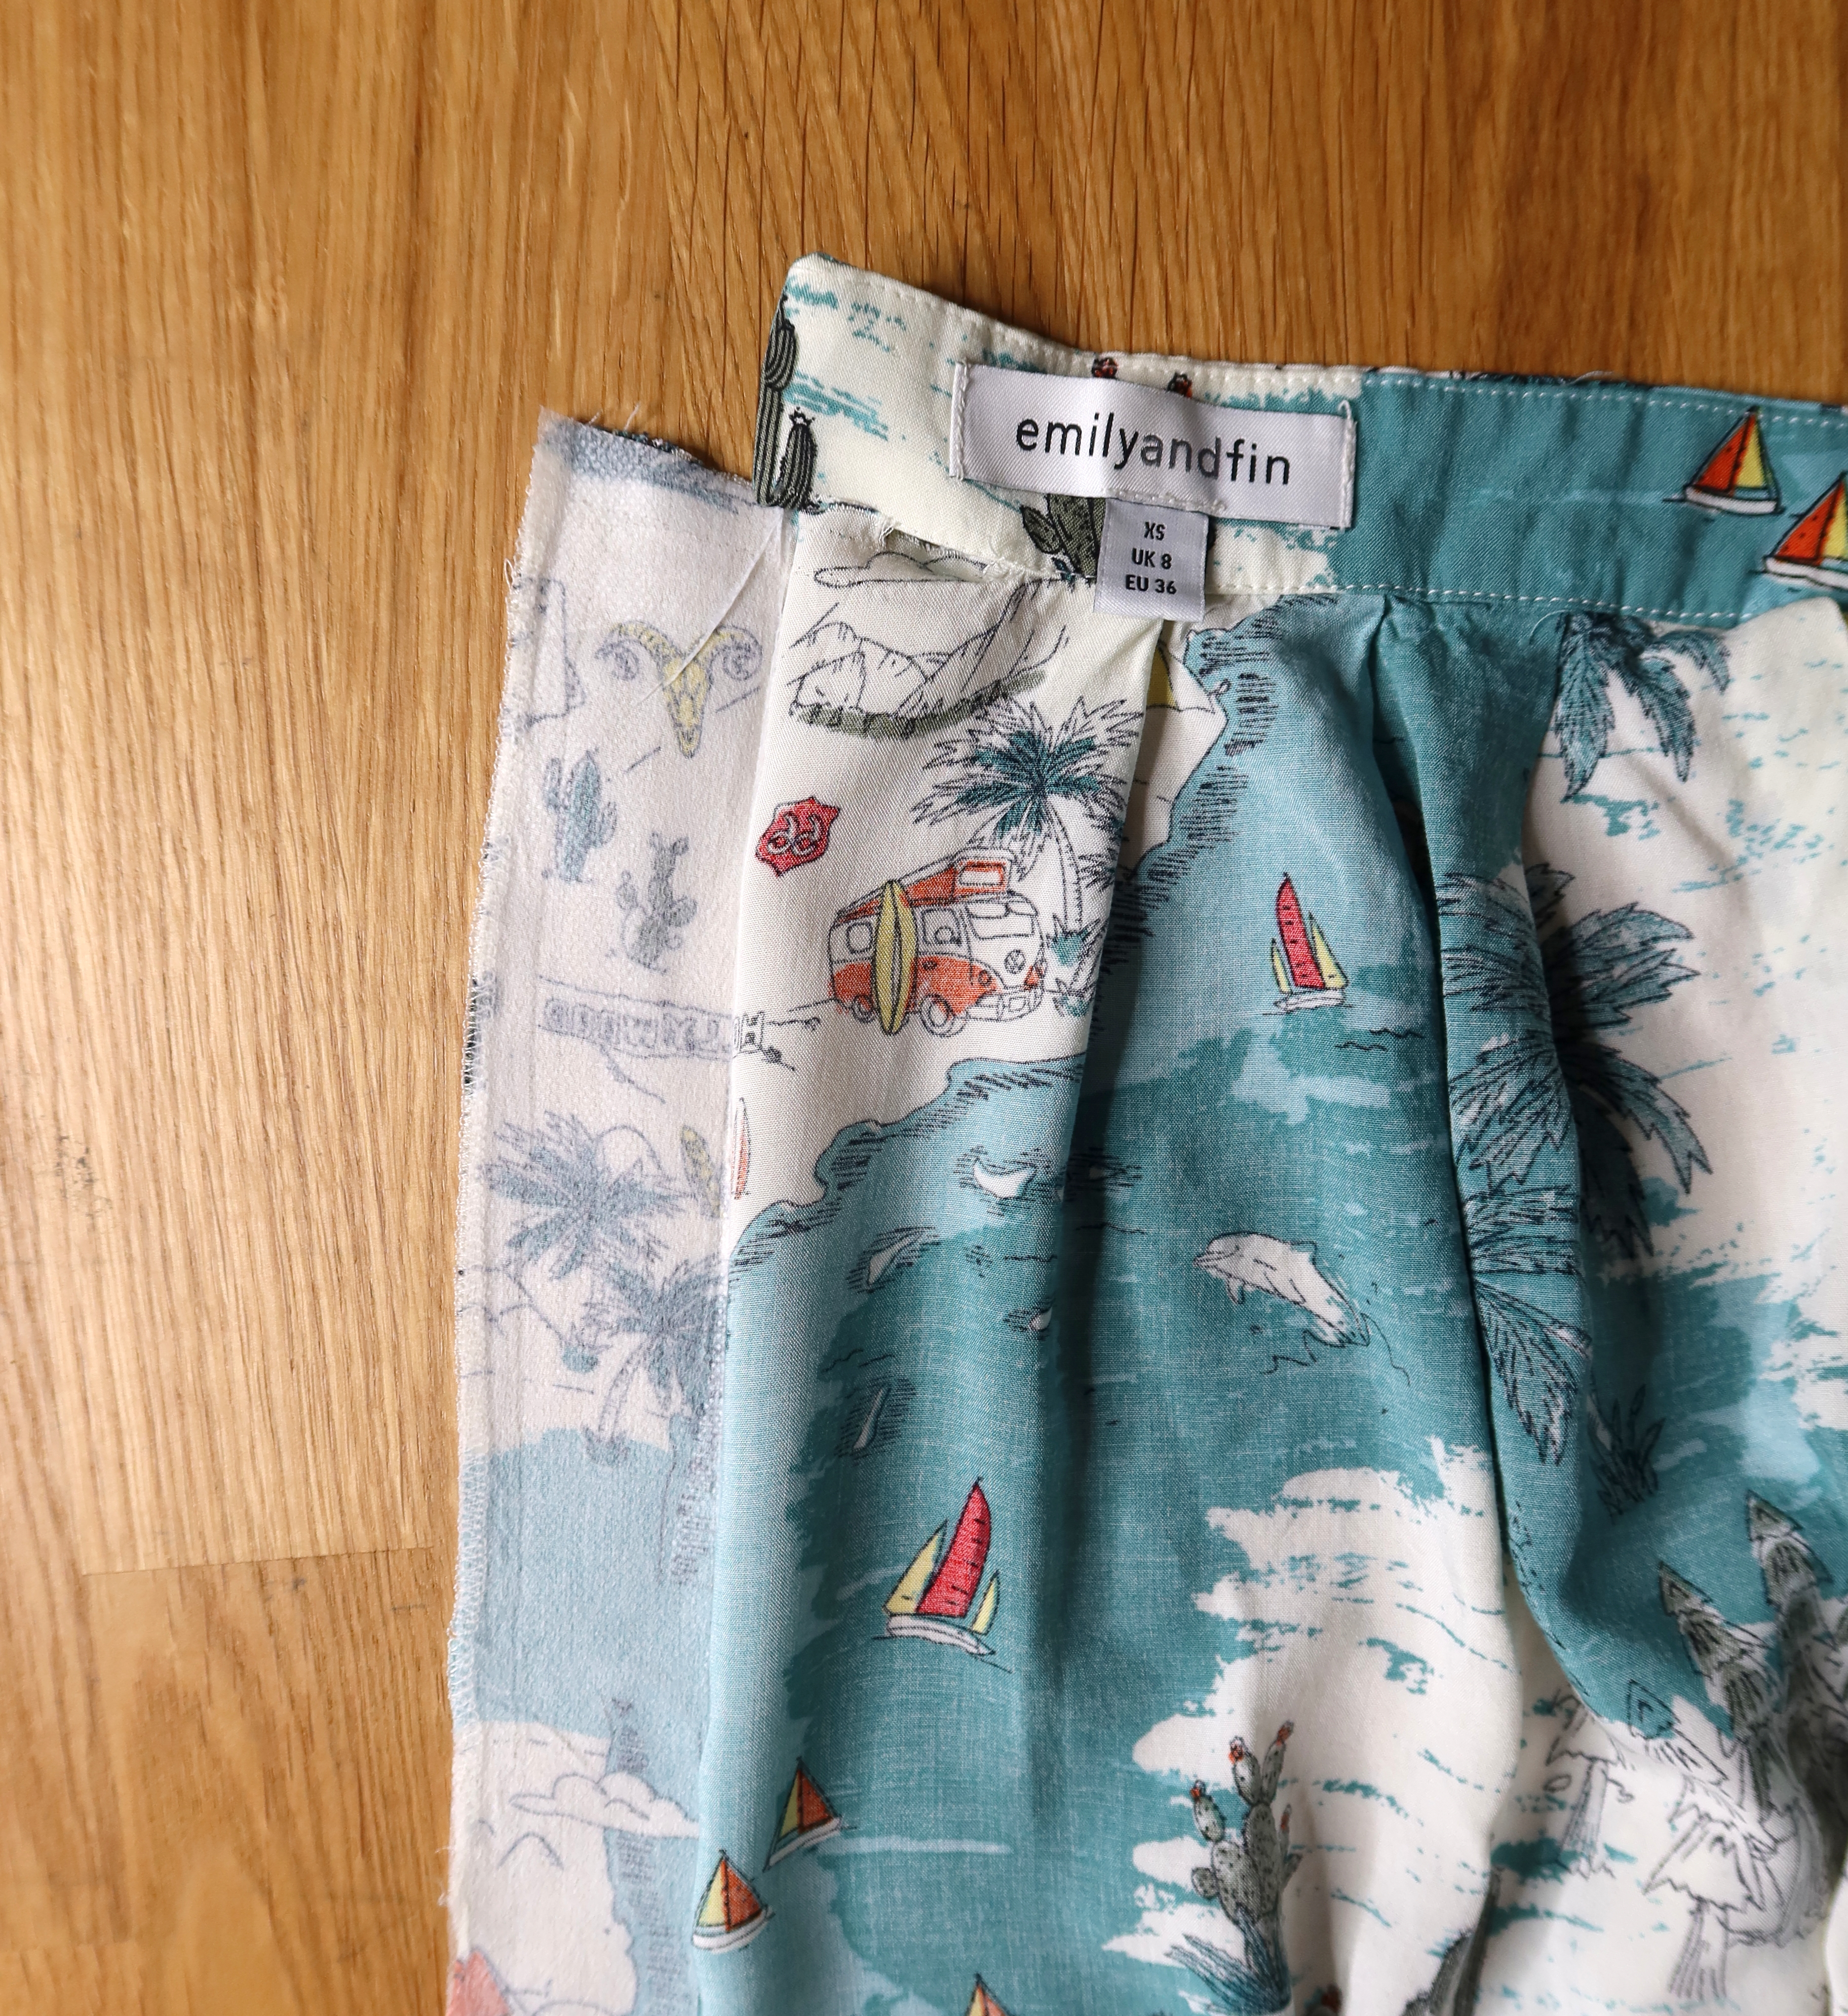
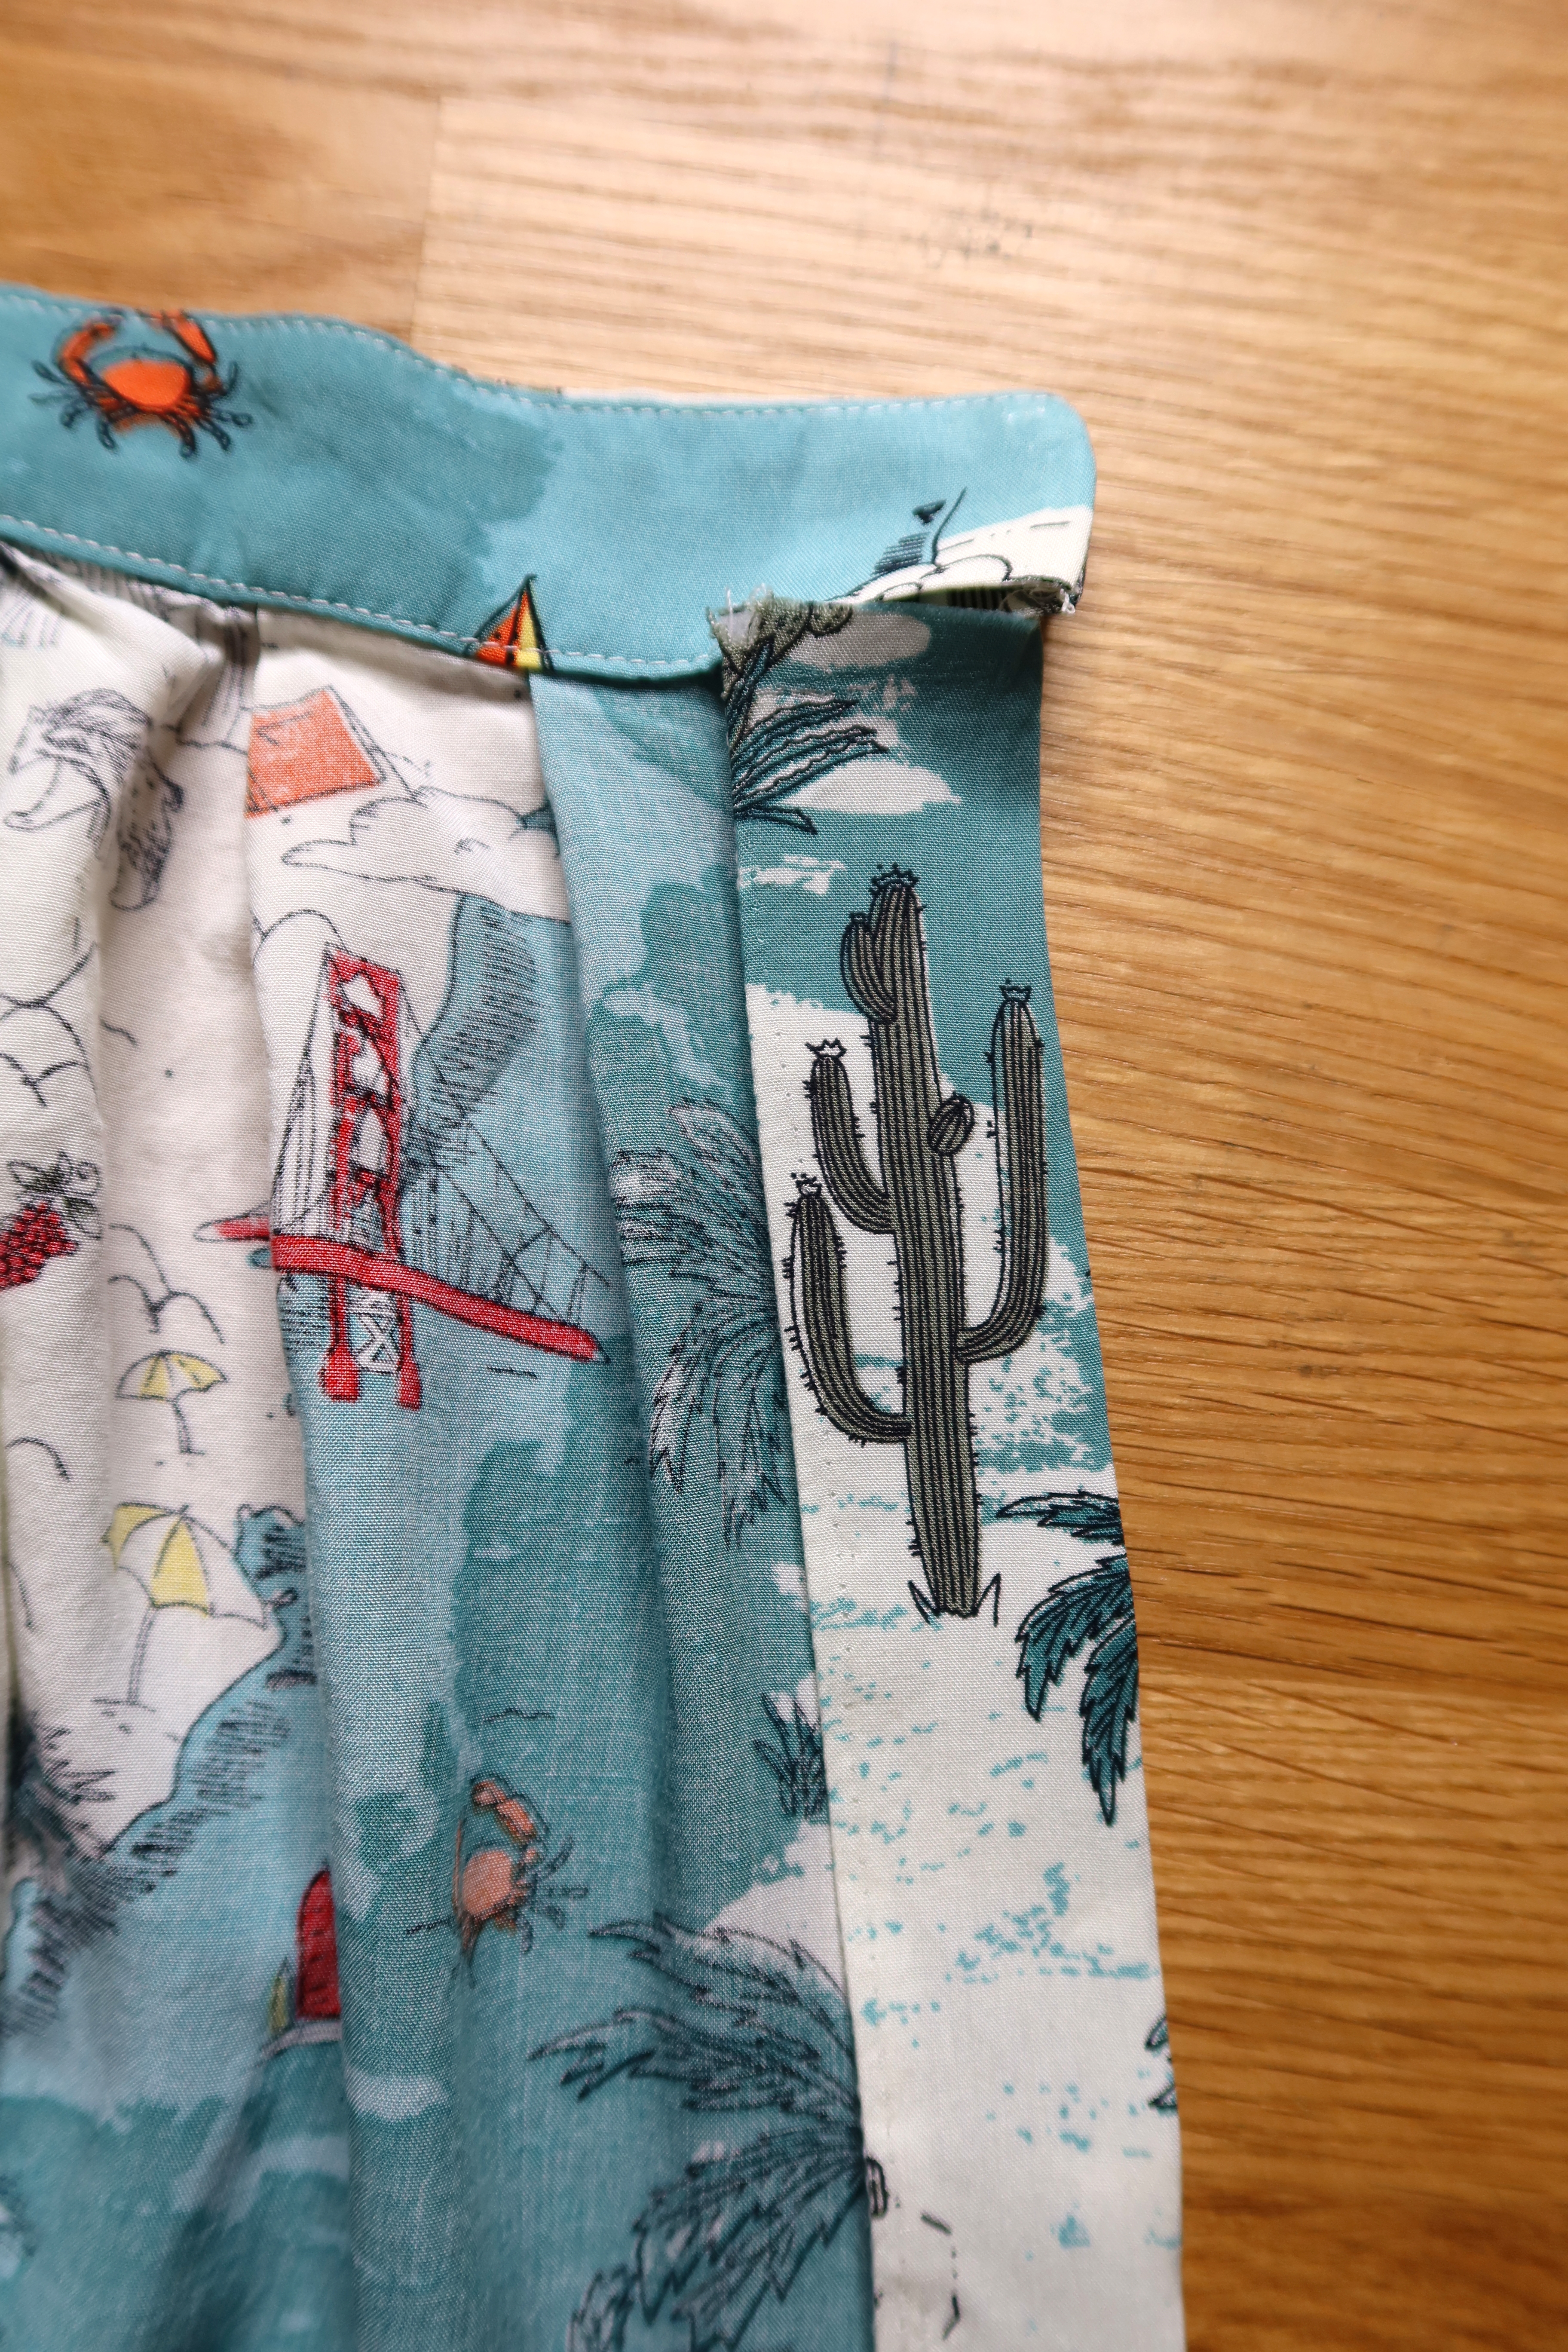
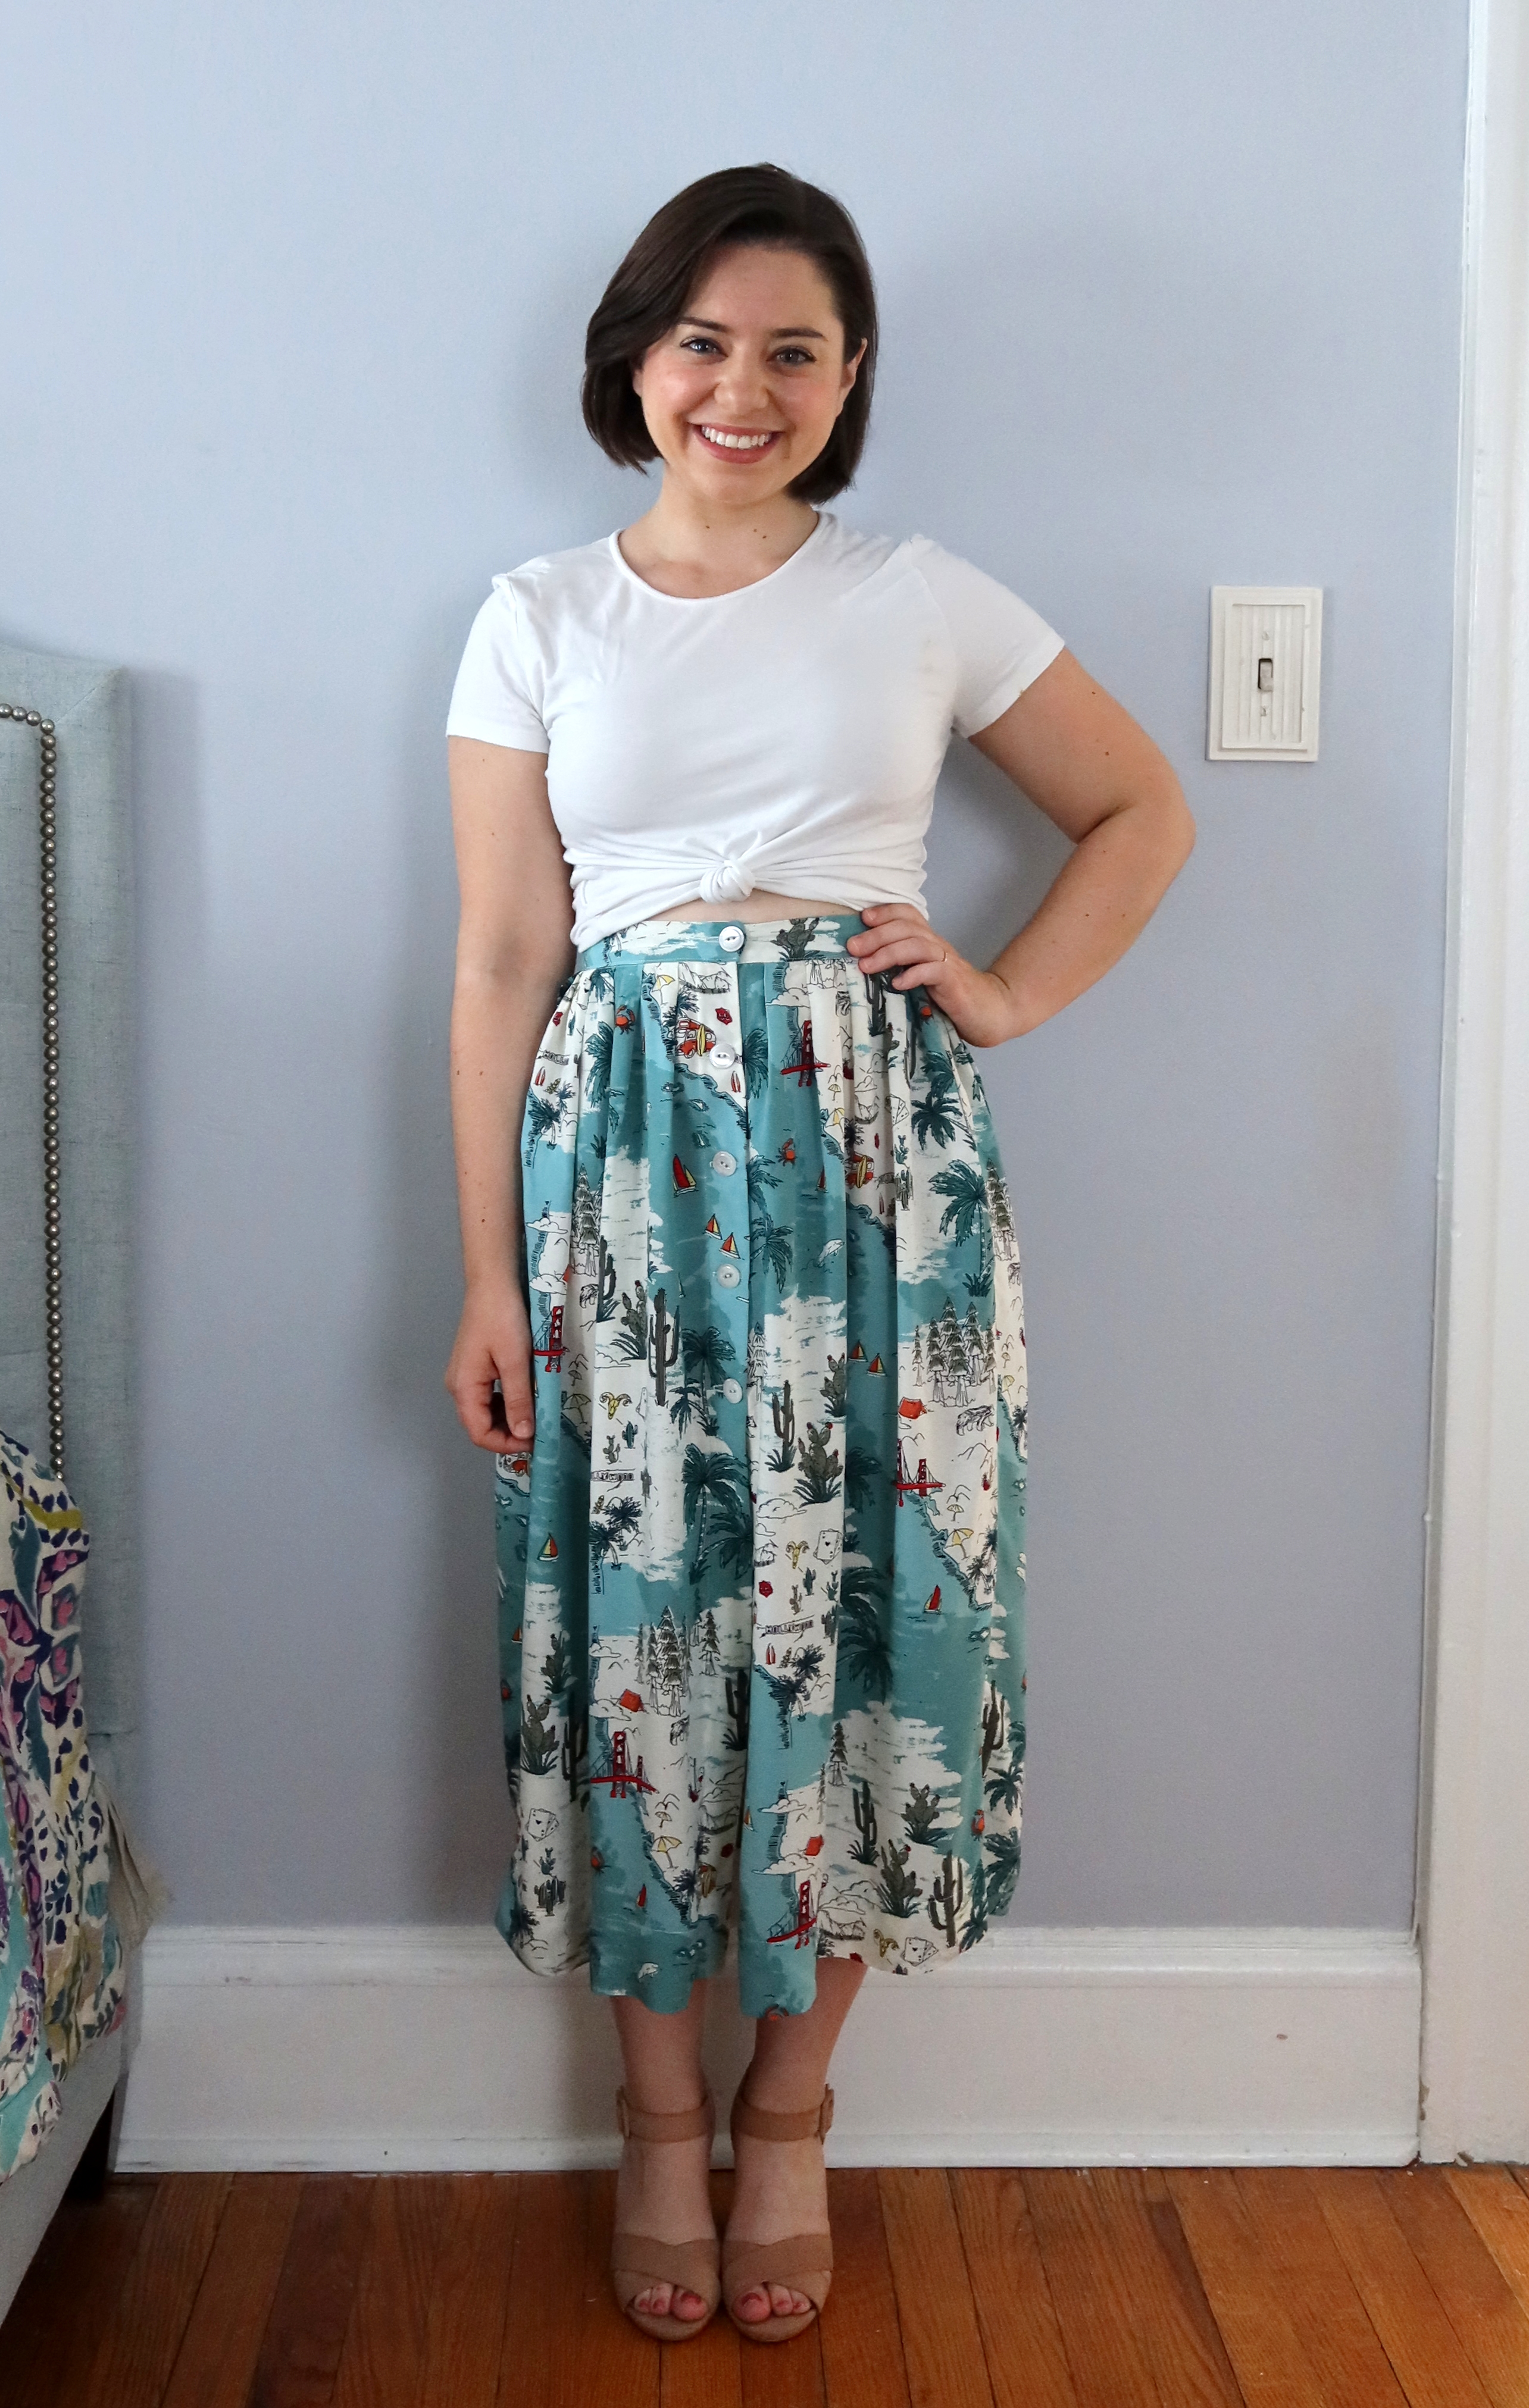
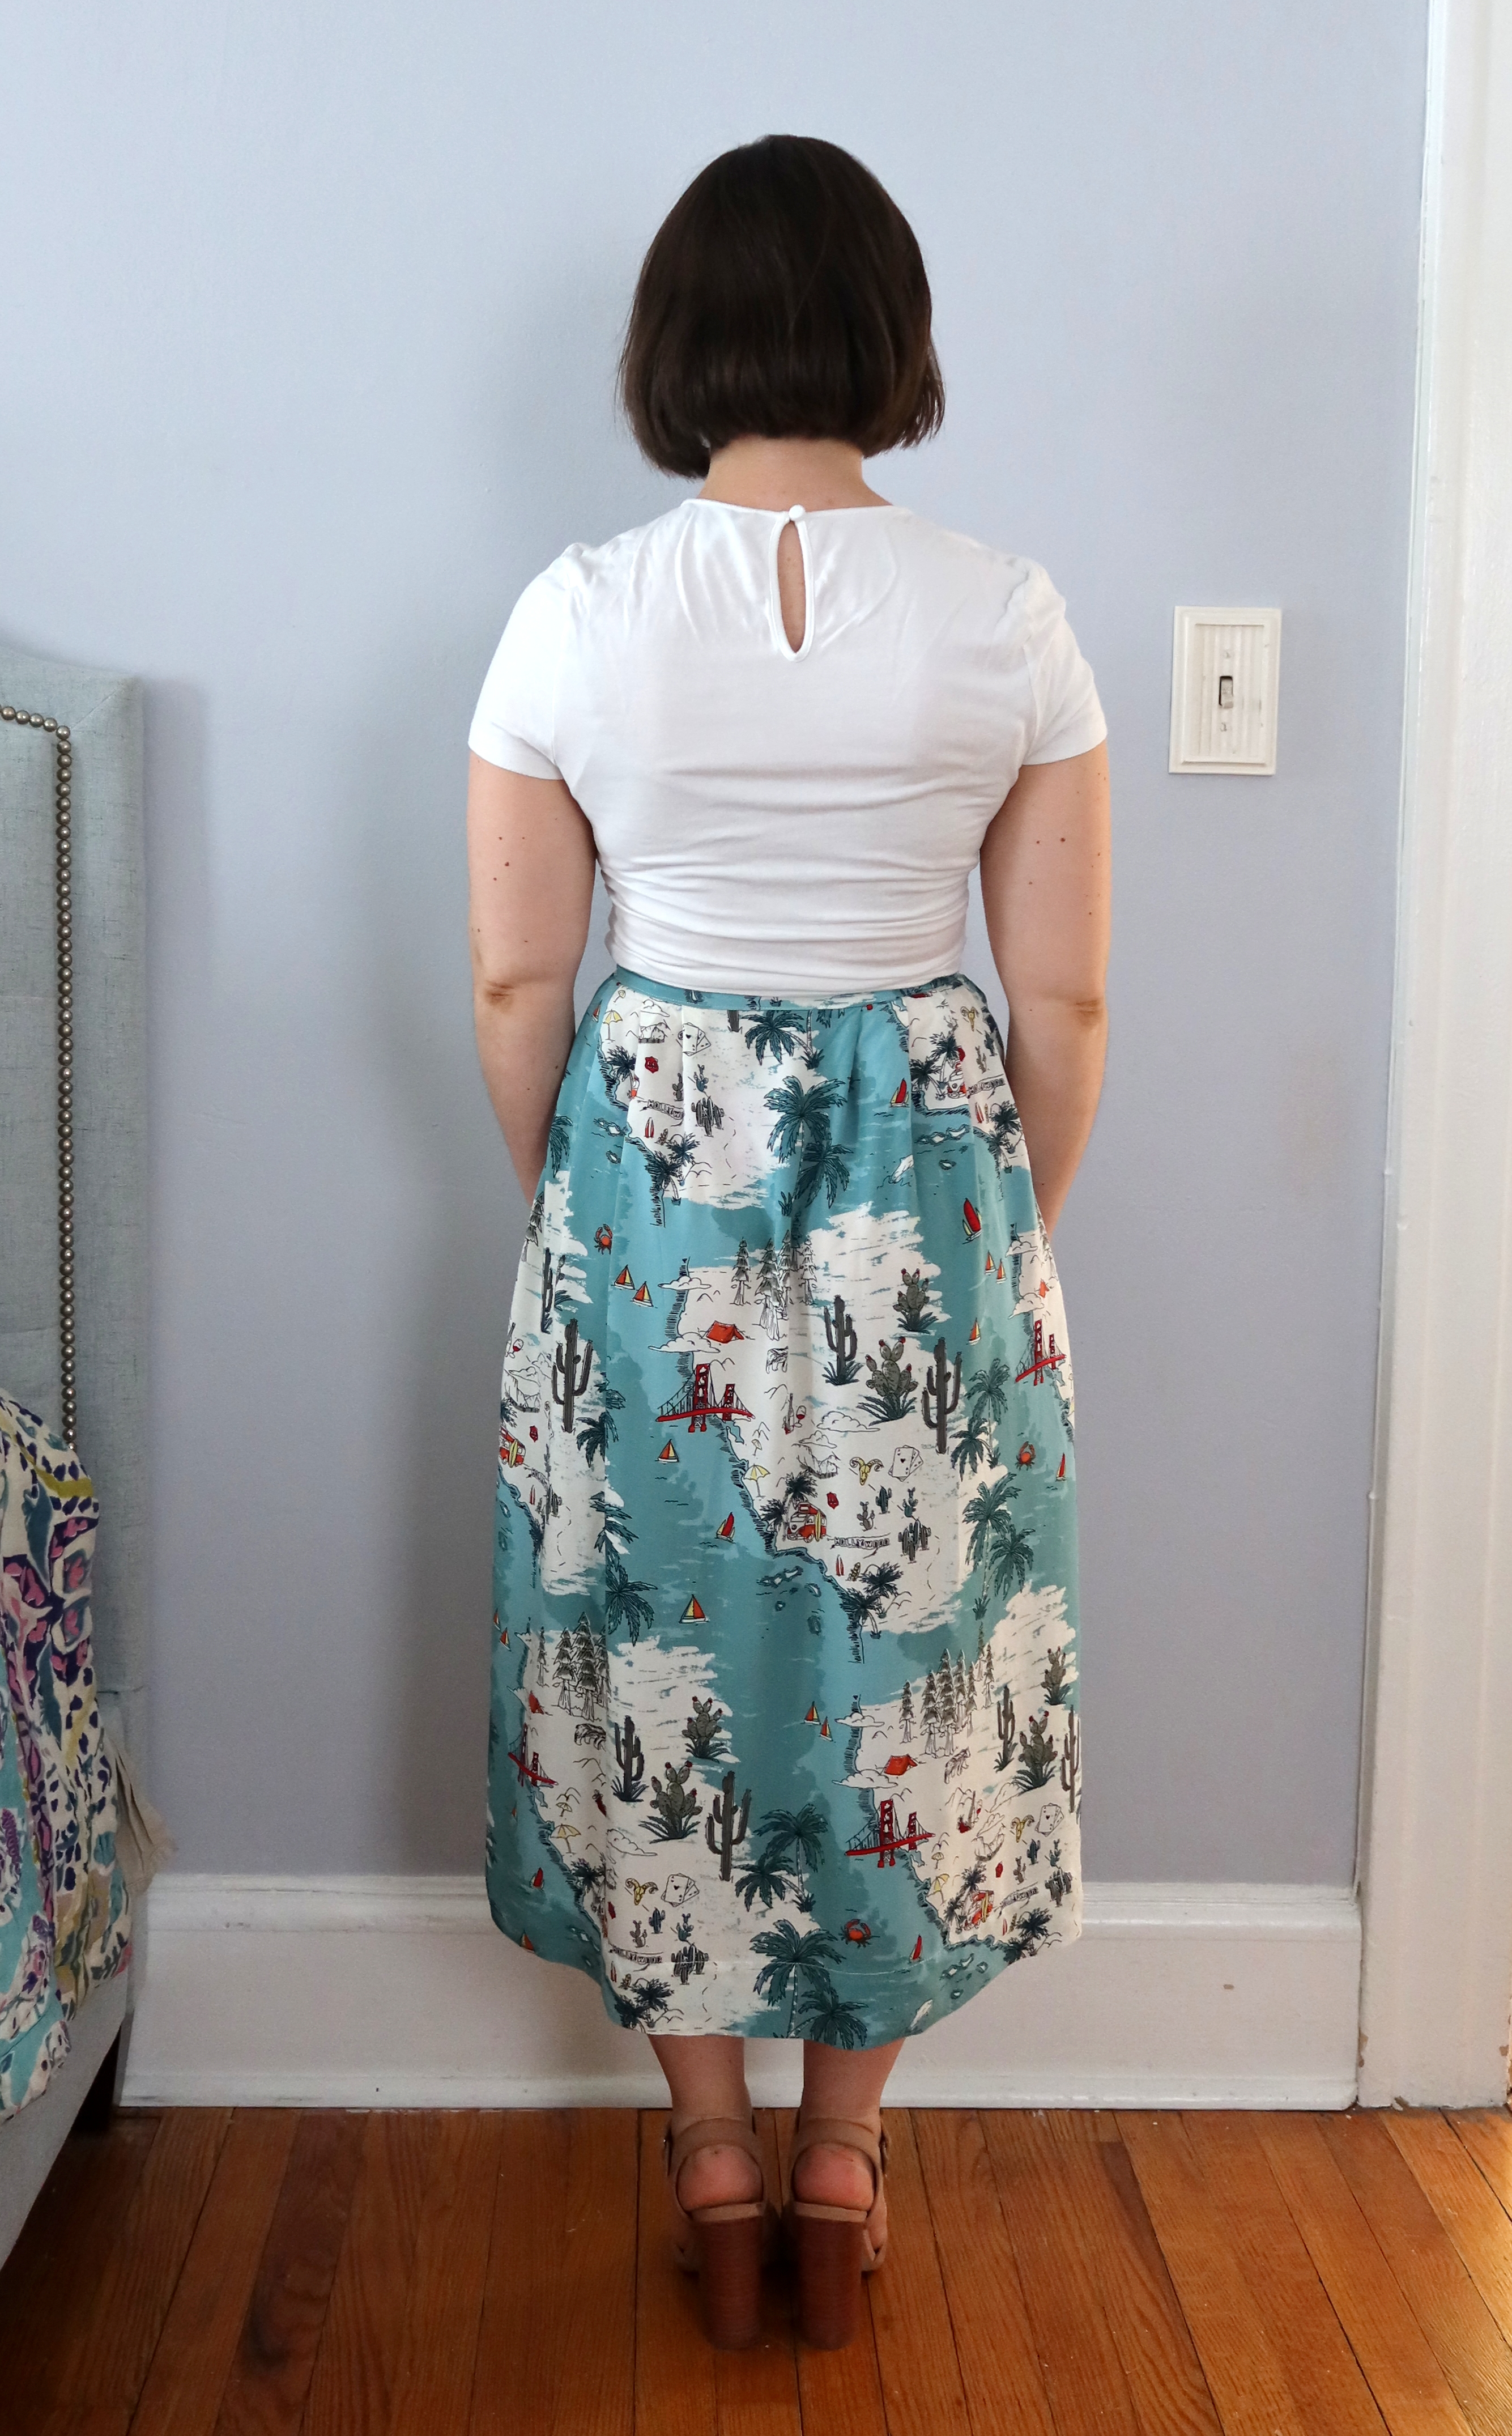
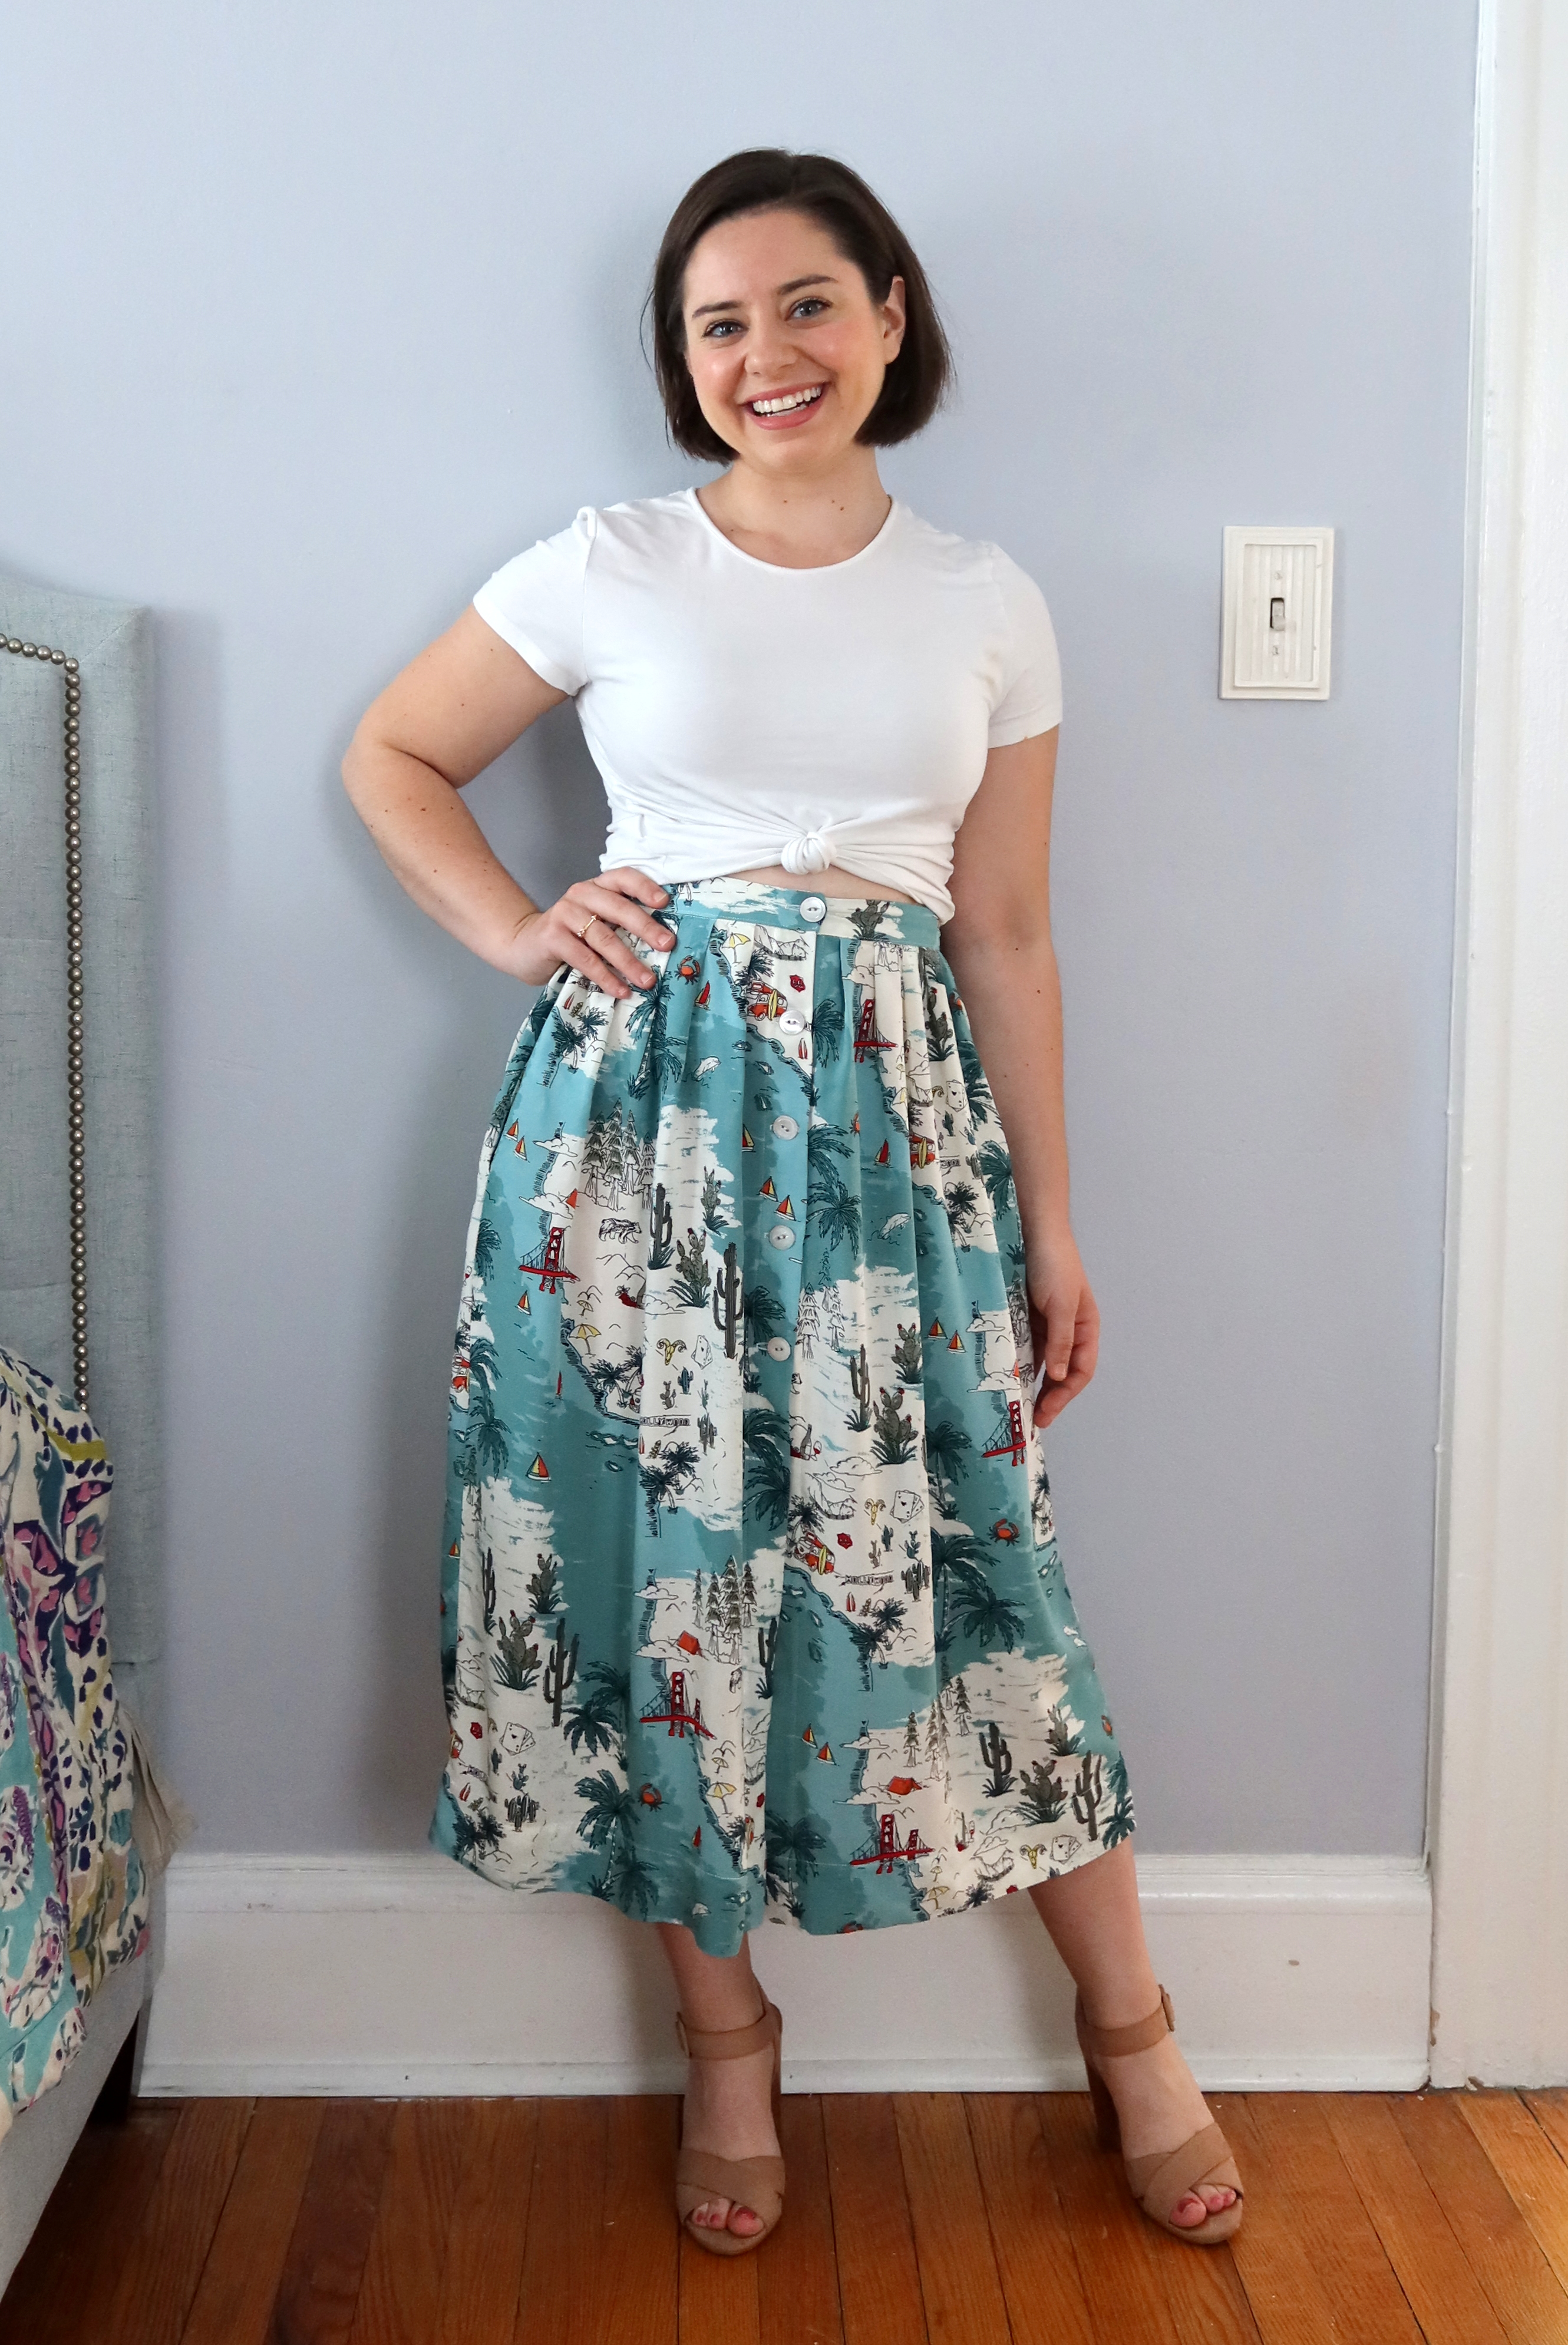
I found this skirt on Poshmark two or three weeks ago. I was just buying a top but before checking out from the closet, I saw this skirt and fell in love! It’s by Emily & Fin and the listing said it was from Modcloth, but I also found it sold through Anthropologie. It has a really cute California inspired print with images of the Hollywood sign, the Golden Gate Bridge, Wine Country, and cacti and palm trees. Best of all- it has pockets! After getting the skirt and trying it on, I realized I wasn’t a huge fan of how it laid on my lower half. It felt a little blah. I really loved the print and colors and wanted to make this work for my wardrobe.
I was imagining putting a slit in the side or the front when I thought about adding an entire button front. This would allow me to add some detail and let me have a leg opening!
The original plan was to cut right down the center front of the skirt, but this skirt already had a seam, it was just in the back! Want to do a similar alteration? I’ve documented the steps below!
This alteration will work well with skirts that are gathered or has pleats, and works best with a back (or front) zipper. This skirt had pleats so I was able to remove two to give me more material. You can certainly add extra material to make a button front as well. Another tip for wanting to DIY this look, you may need extra material for your waistband. My skirt was originally meant to sit down towards the hips, but I fit it to my natural waist and was able to tighten it just a little bit.
Step one is to remove the back zipper, and seam rip the back seam.
Step two is to remove a pleat on each side, or remove gathering. This step definitely depends on the style of your skirt. If you have gathering, you may want to consider removing the waistband and redistributing all gathering, but this is totally optional!
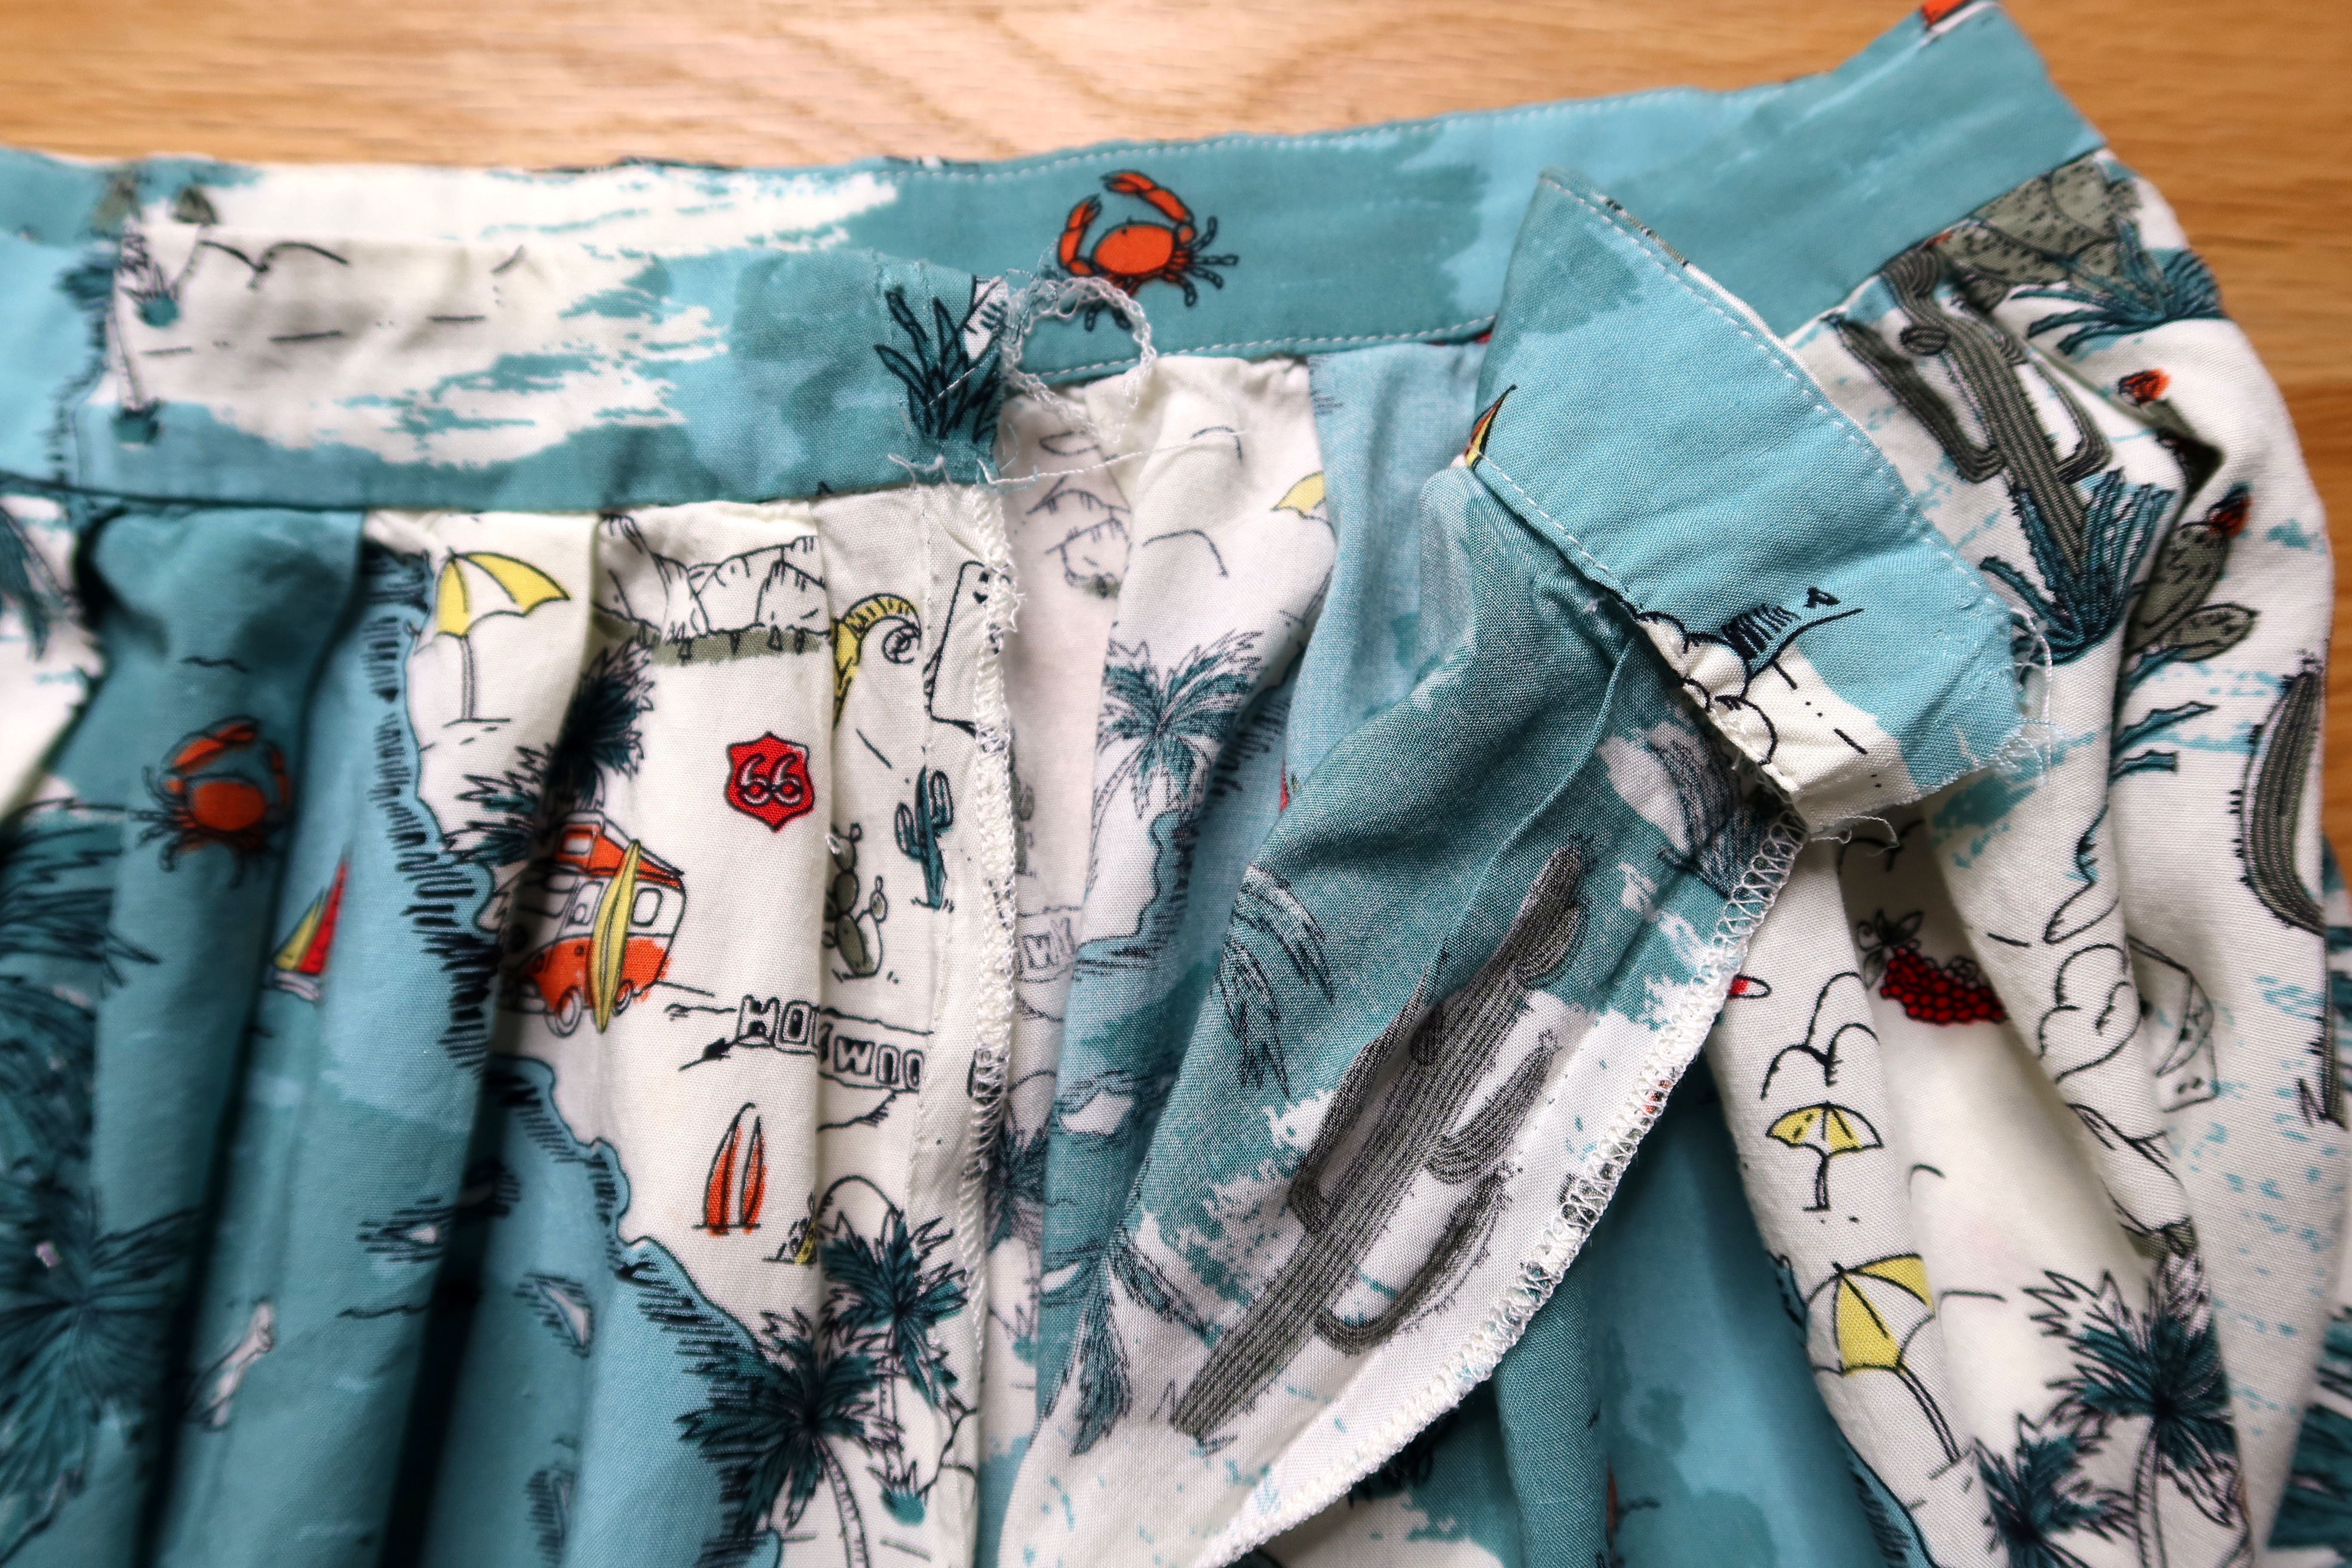
Step three, open the stitching on your waistband. Re-stitch waistband ends with right sides together to create clean ends. The bottom of the waistband remains open to re-insert the skirt.
Step four, mark where the skirt lines up with the edge of the waistband and measure. This will be the fold point for the button front. My fold measured 1.5″. I marked this measurement on both sides of the skirt opening, and folded them in. Interface this folded section with lightweight fusible interfacing. I folded in the serged edge of each side, folded again to finish the button front and top stitch closed.
Step 5, baste mark the top of each button front where the original skirt stitching was. This line becomes where the waistband gets re-attached. Fit new skirt in-between wrong sides of waistband and stitch shut. I stitched all the way around my waistband but you can handstitched shut if you don’t want stitching to show.
Step 6, mark buttonholes and stitch. My buttonholes are 2.25″ apart. I only had 5 matching buttons on hand, so I only made 5 buttonholes but it works perfectly! It’s the perfect amount to get a great opening.
And that’s it! This was a pretty quick alteration – I feel weird calling it a refashion because the garment wasn’t really re-vamped.
This was a pretty quick project, although made a little longer when photographing and recording, but it’s a nice project to take on! I made a little behind the scenes video which you can find on my Pinterest!
You can also see my new haircut and glasses (1st photo)! I cut 10″ off two weeks ago and it feels great! I also finally updated my frames! I’ve had the same glasses frames for about 10 years and never felt the need to get new frames until this year when I got a new prescription. (I mostly wear contacts so glasses don’t often make an appearance.)