sewing · sewing activewear

Arlo Track Jacket- Athleisure Set with Craft and Thrift Shop

I am so excited to once again be working with Amy from Craft and Thrift Shop! Amy is so passionate about sustainable fabrics and it shows in the pieces she offers on etsy. Amy carries vintage, secondhand and deadstock fabrics and has a wide selection of prints and solids, and fabrics ranging from knits to cottons and silks! Thank you so much to Craft and Thrift Shop for sponsoring this post! All fabric in this post is from Craft and Thrift Shop on Etsy, and scroll down for a coupon code!

This year I started out really strong with my physical activity, and ran the Disney Dopey Challenge (48.6 miles in one weekend) with my Dad. It was a lot of training and once the race weekend was over I gave myself a break. Then COVID and stay at home orders started and motivation to work out really left my mind. Throughout the year I’ve been trying to get back on track, and within the last few months I’ve been figuring out a schedule that works well for me and I’ve been putting in a lot of effort to become consistent!

Part of my motivation is coming from making wardrobe pieces for this area of my life. I LOVE making activewear, and while I have been thrifting a lot of my active wardrobe, I want to get back into making workout clothes!

My goal with this outfit was to make some post workout gear; some fun pieces of athleisure! I came across the Arlo Track Jacket from Friday Pattern Company and fell in love! I’ve been wanting an easy throw on and go jacket, perfect for cooling down outside after a workout, or even before the workout when the body is just warming up, and this jacket looked perfect!

I chose to make it with this beautiful mauve scuba fabric from Craft and Thrift Shop. This fabric was awesome to sew with and the perfect weight for a track jacket. Amy is a fellow sewist and knows the important details to add to the fabric description, and seeing that this material had 20% stretch let me know my dream of this fabric as an Arlo Track Jacket was possible. Click here to see all the Scuba in Amy’s shop!

This jacket was a great pattern to make! It is a unisex pattern with three lengths and option for color blocking. It came together easy and the instructions were wonderful (no second guessing any steps!). I made a size Small in the short length and overall, it has the perfect fit. What really drew me to this pattern was the seam lines. I love the detailing, and love all the topstitching. This is a great pattern for color blocking, or using up scraps. I also love the generous side pockets!

I had a good amount of fabric left over and figured out it was juuuuust enough to make a pair of cropped Hudson Pants! This makes my fourth pair of Hudson Joggers, and my first cropped pair. I love them to pieces and love that I have an awesome set now!

To pull the whole look together, I made a Rumi Tank from Christine Hayes out of this beautiful ribbed jersey from Craft and Thrift!

Here are some of my favorites from Craft and Thrift!

Burgundy Daisy Cotton Rayon

Yellow Plaid Cotton

Cotton Tucan Print

Forest Green Scuba

Shop Craft and Thrift with a 20% discount code! Use TRISH20 at checkout!

sewing · Uncategorized

Striped Anni Jumpsuit

Happy Thursday! Over the past few weeks it’s been really hard to get motivated and stay motivated . I find myself having good days and bad days, but am fortunate to have a great partner who frequently tells me it’s ok to have bad days. We’ve been playing a lot of ping pong and UNO, making sure we take time to just relax and breathe.

At the end of March, beginning of April, I made 80 masks for friends who work in hospitals, and for family working in grocery stores. If you’ve made masks, you can know how time consuming it can be, but more than that, how exhausting. While it was hours of labor, it was also mentally exhausting for me thinking about who would be using them, and the guilt for not making more or not going fast enough. It became a little too overwhelming and I had to stop. Last week I took some time for selfish sewing and made a project that’s been on my list for a few weeks.

I picked up this stripe fabric on my last trip to Fab Scrap, and originally planned to make some sort of dress, but the more I looked at Pinterest, the more I was attracted to striped jumpsuits! I had bought the Anni Jumpsuit Pattern for a different project that I didn’t have enough fabric for, but I had just enough striped material to make this jumpsuit.

What really attracted me to this pattern was the unique bodice design. I fell in love with the diamond shape and the options that came with the Building Block Bundle. This pattern was a little pricier but with several options, it was a price that made sense to me, and a pattern I could see making multiple versions of.

Now, if you want to make this bodice option, I do not recommend this as a beginner pattern. I don’t consider myself a sewing expert but I do have experience, and I wanted to throw these instructions out the window. The instructions and photo representation for this bodice pattern were not enough for me. I spent hours sewing seams, then directly ripping them out. It was frustrating. But eventually I got it, and it was one of those “ah-ha” moments. Once it was actually sewn, the instructions made sense. I could see how it worked, but couldn’t explain it to someone else. While it was frustrating at first, I would make this bodice again in a heartbeat. I don’t say this information to scare you away from making it, but as a warning that it may be difficult to get it at first.

Pattern details: I made Anni Size 4, shortening the bodice by 1” and shortened the pant length. I forgot to save the bottom of the pants to confirm how much I cut off, but my full length pant pattern measures 37”. After sewing the pants, I shortened the top rise by 1.5” as the crotch was just too long for my torso. I also tapered in the pants by 1” as well. I spent so much time making sure my stripes were as matched as I could make them, the last thing I wanted on this jumpsuit was a poor fit.

The last step I did was insert the zipper – and then found another fit issue. After sewing in the zipper, it felt like the jumpsuit back was too long. I went back in and removed 1/2” from the center back, under the waistline to eliminate some of the sloping. Seeing the photos made me question what was actually wrong – and I figured it out. The belt is tied a little too tight causing the zipper to puff out and the butt to look a little more sloped than it actually is. I have since tried it on with the belt tied looser – and no belt- and the fit is great.

I had just enough fabric left over to make a fabric belt to complete look. The pattern does not call for a belt, but I really love defining my waist, and think this striped version looks cuter with the belt.

I love this jumpsuit! I’ve been spending a lot of time defining my style, cleaning out my wardrobe and re-thinking my look, and this fits right in with how I want to dress! Floral prints are definitely still my style, but I love adding in stripes as well.

For anyone interested, the pattern I used for my masks was from Instructables – for a nurse, by a nurse. For family I have been making the pattern from Mimi G.

handmade wardrobe · Make Nine · sewing

Measure Fabric Lounge Wear Set

Hello, hello! I feel like I haven’t blogged in so long! I have an exciting project to share that I finished a few weeks ago. I feel like I have so much to share that I’ve been sharing over on Instagram but not here.

The first thing: I’m a Measure Maker! For the next few months, I will be sharing a project made with fabric from Measure: A Fabric Parlor. My first project with them is something on my Make Nine! I chose to work with this amazing White and Grey Abstract Double Knit Ponte. It has this beautiful feel, the white part is slightly risen and super soft. It’s very stretchy, but thick, as ponte typically is. What I really love, besides the unique print of this fabric, is that the wrong side is the perfect contrast and it helped me in making the details on my new lounge wear.

Lounge Wear Set with Measure Fabric - Trish StitchedLounge Wear Set with Measure Fabric - Trish StitchedLounge Wear Set with Measure Fabric - Trish Stitched

I’ve been seeing these lounge wear sets just about everywhere I look lately. First I thought they were a trend with teens, but when Anthropologie came out with their sets, I knew I had to try it out. It felt like this project magically came together. I got the perfect fabric from Measure, and I had a lounge wear pattern on my Make Nine: the Hudson Pants. For this look, I made my first pair of Hudson Pants, and a hacked version of Seamwork Skipper.

Lounge Wear Set with Measure Fabric - Trish StitchedLounge Wear Set with Measure Fabric - Trish StitchedLounge Wear Set with Measure Fabric - Trish StitchedLounge Wear Set with Measure Fabric - Trish StitchedLounge Wear Set with Measure Fabric - Trish Stitched

I can’t believe it took me this long to make Hudson. When they first came out, I was seeing them everywhere, and I thought they were cute, but not my style. After seeing the different variations over the years, they really grew on me and I needed to try them out.

I made all the pant details out of the “wrong side” of the fabric, the pant cuffs, the waistband and pocket edges. I really love how the look of it came out. These pants are so comfortable and they are perfect for an after workout look, or just a great pair to lounge around in.

Lounge Wear Set with Measure Fabric - Trish Stitched

The matching top is made from a very cropped Seamwork Skipper! I was actually hoping to make the hood, which is why I chose Skipper, but wound up not having enough fabric for it. I wanted to follow through and use the wrong side of the fabric for the details on the sweatshirt as well, so the cuffs, bottom band and neck band are all made from the wrong side.

Lounge Wear Set with Measure Fabric - Trish StitchedLounge Wear Set with Measure Fabric - Trish StitchedLounge Wear Set with Measure Fabric - Trish Stitched

I loooove the set together. It is so comfortable and fun. I can wear the pieces separately or together, but I probably wouldn’t wear the sweatshirt without the pants unless I get some high waisted pants (which is another item on my make list!)

Details on my makes:

Hudson Pants: Size 0, View A, no changes

Seamwork Skipper: Size XS, Cropped.

Fabric: Abstract Grain Double Knit Ponte from Measure. 

I will definitely be making another pair of Hudson’s, I already have the fabric. I want to make another Skipper, hopefully one with a hood!

Second piece of news, that I totally forgot to post about last week: I did a Simplicity Instagram Takeover! Simplicity reached out to me a few months back about working together, and I took over their Instagram for the week talking about Refashioning!

I do have all the videos saved and I’m hoping to put them together so anyone can watch it whenever. I talked about my tips for refashioning. Where I get inspiration from, how I find pieces in thrift stores to refashion, etc. I also shared a new refashion! I’ll be doing a whole blog post about this hopefully soon, but here’s the final look!

Trish Stitched

I’ve already received my second round of fabric from Measure, and have a project in mind so I’m excited to start working on that! Happy Spring!

sewing · sewing activewear

Pine Crest Fabric: Recycled Work Out Wear!

I am so excited to be writing this post right now! You guys know I love my activewear, so I’m so happy to share another workout outfit with you! A super special thank you to Pine Crest Fabric for the most beautiful fabrics!

When Pine Crest Fabric first reached out to me and I did my research on the company, I saw a section on their site about recycled fabrics (you may remember me mentioning this in my floral workout wear post: here). Well, a few months ago, Molly from Pine Crest reached back out to me about the recycled fabrics and I am so excited to review them for you! You guys. I’m freaking out. In the best way possible!

Pine Crest Fabrics with Repreve: Recycled Active Wear - Trish StitchedPine Crest Fabrics with Repreve: Recycled Active Wear - Trish Stitched

Activewear is a huge passion of mine, and since I love running (and now cycling), I love workout wear. But my eco-friendly mindset has struggled with creating activewear. Good workout gear is not eco friendly, and to be honest, I can’t workout in cotton – or other natural fibers because I sweat A LOT. (Sorry, a little too much info, but it’s the truth). So I need strong clothes that can take a beating through wash and wear.

While I’ve tried buying second hand workout wear, I still don’t get the same satisfaction as making my clothing. So when Pine Crest came out with their Repreve Collection, I was so happy. Repreve fabrics are made with recycled water bottles!

And, in terms of creating the fabric, Pine Crest says this about Repreve, “Compared to the virgin fiber creation process, these eco-friendly fabrics have fibers using new petroleum. This allows for lower greenhouse gas emissions and the ability to conserve water and energy in the process.” We are getting closer and closer to being able to enjoy better fabric options- sustain-ably!

While I certainly have tried to limit my plastic waste over the years, and have done a pretty good job with it, the reality is that not everyone controls their amount of plastic waste. There are so many plastic bottles in the world, just like waste in general. While the sustainable movement is definitely growing, plastic use also grows, and this is a great product to re-use the waste.

You guys know I love my colors and prints, but I have dreamed about a pair of sustainable black leggings for the longest time, and now was my chance! I got 2 yards of black Valor, 2 yards of Virtue in the most beautiful color, Cosmo, and a yard of their Olympus galaxy printed fabric (not recycled), to put together the perfect workout outfit. (Scroll down to get links!)

Pine Crest Fabrics with Repreve: Recycled Active Wear - Trish StitchedPine Crest Fabrics with Repreve: Recycled Active Wear - Trish Stitched

I decided on making all new patterns for this project, and turned to Greenstyle Creations Patterns. I’ve never sewn these patterns but have been seeing them all over the place and had to try them out.

I’m wearing the Power Sports Bra, Peg Leg Leggings, and the Tie Back Tank.

Power Sports Bra: oh my god. If you are looking for a good sports bra pattern- this is it. Not only are all the options great, but the construction is so much cleaner than other bras I’ve made. I decided on the strappy back, and LOVE how the straps were made. I also made this bra with removable cups, and a mesh lining. I was between sizes and sized down because I wanted a tighter fit. It’s perfect!

I’ve already talked about Olympus fabric from Pine Crest, and how much I love it, and again, it did not disappoint. This fabric is such a great weight for active wear – and for sports bras, it’s got a great stretch while being secure enough to do some serious activity.

Pine Crest Fabrics with Repreve: Recycled Active Wear - Trish StitchedPine Crest Fabrics with Repreve: Recycled Active Wear - Trish Stitched

The tie back tank was a quick and easy make. I did the binding option with the racer back. It was an easy make, and the fit is very nice. Again, another pattern with a number of options, which is always nice to have! I made a size XS. (Shown here without being tied in front, and below once tied)

Pine Crest Fabrics with Repreve: Recycled Active Wear - Trish StitchedPine Crest Fabrics with Repreve: Recycled Active Wear - Trish Stitched

The leggings were a free pattern from Patterns for Pirates – the Peg Leg Leggings. I also downloaded the free add-ons offered by the company and made the leggings high waisted, with a side pocket. I really love the fit of these, but wanted to add elastic to the top of the waistband to make these extra secure for running.

Pine Crest Fabrics with Repreve: Recycled Active Wear - Trish StitchedPine Crest Fabrics with Repreve: Recycled Active Wear - Trish Stitched

When it comes to black leggings, I always get nervous they will still be see through, but I have not had a single issue with these! I do have a little bit left that I’m hoping to make a pair of shorts from. I am so impressed by this fabric.

The leggings and bra are both great for running, and I love having the top to throw on after working out or for hopping on the bike! I did a short run so far with the leggings and bra and both were successful in terms of wear and feel. I didn’t hit maximum “sweat-age” just yet, but they did feel great during my run.

I still can’t believe I have a source for recycled active fabrics. And now you do too! Fabric.com is stocking these materials, so no need for a wholesale account through Pine Crest. Although, if you did want to start an active wear apparel brand – I totally recommend using Pine Crest for your fabric source!

Here’s more detail:

Pine Crest Fabrics with Repreve: Recycled Active Wear - Trish Stitched

Virtue is a lighter weight fabric created in an array of colors that’s perfect for swimwear or active tops. Virtue is the material I used for my top, in Cosmo. Click the Fabric.com link below to get this fabric!


Valor is a bottom weight fabric that comes in both classic black and white (for printing), which is the perfect weight for leggings, shorts, etc. Fabric.com will be adding this to their site soon and I’ll update the post as soon as I get the link!

The third fabric I’ve tested from Pine Crest is called Olympus. It isn’t recycled, but the quality is out of this world. Shop the galaxy print fabric here: (And it’s on sale!!)


This was a great way to kick off my active wear sewing for the year. And I have a pair of Hudson Pants on deck, and plenty of fabric to make shorts for Spring and Summer!


{Please note: this post may contain affiliate links. While I was given fabric to review by Pine Crest Fabrics, all opinions are my own.}

handmade wardrobe · sewing · sewing activewear

Pine Crest Fabrics: Floral Workout Gear!

Happy Friday! Long time, no blog, I know! It’s been crazy the past few weeks – so much sewing but not a lot of sharing! I had a craft show a few weeks ago that had me in a sewing frenzy! To top that off, two of my machines were down and I had to get them serviced. But lucky for me, the sewing repair store had my dream machine on sale and I got my first “industrial” machine! It is the Janome 1600P, Janome’s version of an industrial machine, and I LOVE it. I was sewing on it 9 hours straight for three days and it was pure bliss. Eventually I’ll get around to writing a full review, because it’s a sewing machine not a lot of people know about!

I got my machines back last week (Janome HD3000 and Janome Serger) and I was able to work on this new active wear project I’m super excited to share! A few weeks ago, Pine Crest Fabrics reached out to me about trying some of their fabrics, and of course, I was intrigued. I wasn’t familiar with Pine Crest but now I’m so happy I know about them!

Pine Crest is a wholesale fabric company specializing in active wear fabrics! They offer many different types of fabrics including performance, costume, gymnastics, dance, and even medical fabric! They offer features like compression fabrics, mesh and moisture wicking – so they are pretty well rounded in the athletic fabric department. Their biggest seller, Olympus (75% Poly and 25% Spandex) was the fabric I was asked to test.

Pine Crest told me to pick a print out of their digital print library, which currently houses 7,720 different prints, and I was basically a kid in a candy store! I looked at every single print because I wanted to choose the right one. I had a list of about 10 and eventually narrowed it down to the most amazing floral print. (Yes, I skipped over the cacti prints because I really need to limit the cacti in my wardrobe) Pine Crest graciously sent me a few yards of the floral and a few yards of their solid Olympus in matching copper.

Pine Crest Fabric: Floral Workout Gear - Trish StitchedPine Crest Fabric: Floral Workout Gear - Trish Stitched

First things first, this fabric is stunning. The dark floral has a white backing so I was a little nervous about stretching and revealing the white underneath, but the fabric is such a wonderful weight that I had no problems! One of my biggest concerns about activewear fabric is that many tend to be too thin, and when shopping online, that’s a huge issue you can face, especially when you are sewing bottoms. Thankfully, I now know the brand to look for because this fabric is going to be my go-to legging fabric.

I can always use another pair of leggings, and there was a new sports bra on the market I wanted to try out. So for this set, I turned to Simplicity 8632. (May also appear as D0949) I love high waisted leggings, and I really liked the idea of a longer-line sports bra. With high waisted leggings, I don’t feel super exposed, and I feel like I can really bend and stretch without the fear of the back creeping down.

DSC_1032Pine Crest Fabric: Floral Workout Gear - Trish Stitched

This fabric is a dream to sew with. I’ve done a fair amount of active wear sewing, and while I’m not an expert, I immediately know when a fabric will work for me – and this fabric WORKED. It feels substantial without being too thick, and sewed beautifully. There was a section on the sports bra I had to unpick, and I was nervous with what that might do to the material but no problems here! And the print is stunning. I definitely made the right choice! While some printed fabrics can get blurry if done improperly, this print shows all the details including the lines on the flowers and leaves. And on a quick note- Pine Crest’s site shows you how the print will look on garments so if you are concerned with the size of the repeat, just click a few photos and see how it’ll look on a dress or bathing suit. Test it out here!

Now for the pattern details:

Sports Bra: I made a size small, and could have sized down to an XS. (I had to take the sides in a little). This is a low impact sports bra. It does not come with instructions on adding cups, but I’m sure it’s possible. This bra would be great for yoga, cycling, core workouts, but anything where you are jumping or running is probably better suited with more support. Even though the back has a really cute design, it’s better left at home on a long run. Another alteration I made was omitting the bra back closure and I just sewed the ends together. I would definitely make this bra again!

Pine Crest Fabric: Floral Workout Gear - Trish Stitched

Leggings: Again, I made a size Small, and while I thought they fit well, after walking around a bit, I noticed something interesting…they had a lot of extra material in the knee area. Now, I do like my leggings tight, and prefer unsaggy back knees (is there an actual term for this part of the body?), so I had to go in and pin the knees in tighter. It was a simple alteration, but a strange one I’ve never encountered. I’m not sure if it was due to being petite, but you can actually see the back leg sagging on the pattern envelope so perhaps this was how they were drafted. Another note, I took about 1″ off the waistband because with my shorter torso, they were a little too high. If I make them again, I’ll probably take it off the top of the legs instead of the waistband. I also shortened these roughly 8″ to capri length because I have about 4 pairs of full length leggings and need capri length in my wardrobe! I could have sized down on these as well, but I’m a crazy person and like things suuuuper tight- they are perfectly fine the way they are!

Pine Crest Fabric: Floral Workout Gear - Trish Stitched

Now onto my top. While the envelope made it look super cute, I was not a happy camper while making this. I know that is not what you want to hear when talking about pretty fabrics and new patterns but I need to share my honest opinion. Simplicity 8704 was not my friend. I received a few yards of the solid Olympus fabric in Copper – and it is a lighter weight than the printed material. I actually really like the contrast because you can do a lot with both and I wanted to test this fabric on a top. This fabric is a great weight for a long sleeve top or base layer because it will keep you just warm enough while you are working up a sweat.

Pine Crest Fabric: Floral Workout Gear - Trish Stitched

I decided to make View C because it was simple, and I really didn’t want a cell phone pocket. This top started out normal, and having just made a simplicity pattern in the bra and leggings, I thought I knew what to expect. I have never worked with a pattern that made me feel so stupid. I’m a pretty confident seamstress, and have made a lot of patterns over the 12 years I’ve been sewing. The directions and photos were awful. The front pocket was a mess and I had to re-do it about 4 times. To be honest, if I didn’t already cut my gorgeous fabric, I would have thrown this project in the trash. I suffered through and got the pocket straightened out and thought I was home free. Next headache was the zipper and after needing to re-do that 3 times, I was just about done altogether.

Laying flat on my sewing table, the top was cute and looked wearable, but physically wearing it, the zipper looked all sorts of messed up, I was cringing. Being given this fabric, I wanted to make something spectacular! Especially since the fabric is so beautiful, I wanted to do it justice. But this top crushed my poor little sewing soul. I was left with two options – try to salvage it and turn it into something wearable or cut out the crop top from Simplicity D0949 and start all over.

So my refashioning brain got to work and I cut out a new front to salvage the top. I completely omitted the pocket and zipper and just made a turtleneck pullover top (the key to making this work with the neck was to use a serger so the seams can stretch!)

Pine Crest Fabric: Floral Workout Gear - Trish StitchedPine Crest Fabric: Floral Workout Gear - Trish Stitched

So the top is technically saved. And it’s ok, and I will totally wear it because the fabric is beautiful and having another top is great – but I will never make this pattern again. As a seamstress you never want to produce anything bad. It’s in our blood to make pretty, wearable garments where people can’t tell you made it. But more than that, when you work on a project for another company, you want everything to come out picture perfect. But if I lied and said this was the way I wanted the top to be, then I wouldn’t feel happy with myself, and I wouldn’t be able to tell you about the really great thing to come out of this.

Pine Crest Fabric: Floral Workout Gear - Trish StitchedPine Crest Fabric: Floral Workout Gear - Trish Stitched

For as many seams as I ripped out and re-sewed with this fabric, it looked as if I never sewed a stitch in the first place. And I ripped out a lot of seams. This fabric held up so well, I’m shocked. Sometimes with knits you can get a few holes or the fabric gets snagged when you fight your machine but I had no problems with the material. That’s the sign of a good fabric.

Now I know you are probably reading this and asking yourself, why is this girl telling me about wholesale fabrics? Because that was one of the first concerns I had about Pine Crest – where am I supposed to buy it if I fall in love?! Well, well, well – you can buy it at fabric.com – this exact print! Fabric.com does not have the solid copper, but they do offer many other color options!

Shop this floral print here:


Shop all of Pine Crest on fabric.com here:


Now, for all my sustainable lovers out there – which come on, should be EVERYONE – I was doing a little digging and came across Pine Crest’s commitment to the environment. While they do a lot of recycling within their own offices (and you can read all about their personal practices here) they also stock Repreve which is fabric made from recycled water bottles!  In their own words, “Repreve® is one of the most certified, earth-friendly fibers available in the world. High-quality, recycled Polyester yarns are made from 100% recycled materials, including post-consumer plastic bottles, pre-consumer industrial waste or a hybrid blend of both.”

Now I wasn’t able to find an online retailer selling Repreve by the yard (although this etsy shop has fabric made from water bottles), but my contact at Pine Crest let me know that they are working with fabric.com to get recycled fabrics at the retail level! How cool is that?! No word on timeline but we are becoming a little closer to getting more sustainable fabrics! If you have a local business who you think should check out Repreve – direct them here!

Pine Crest Fabric: Floral Workout Gear - Trish Stitched

Thanks so much for reading! If you try either of the patterns mentioned above, let me know! And if you make something with Pine Crest, I would love to see!

{Please note: this post may contain affiliate links. While I was given fabric to review by Pine Crest Fabrics, all opinions are my own.}

handmade wardrobe · sewing

Coming Up Roses Wedding Guest Dress

Hello, hello! I usually write blog posts during the day or in the early morning, but this night seems like the perfect time. I’m watching the ONLY craft show I know of, Making It, on NBC. Have you seen it? We are on week 2, so not deep into the show just yet, but it’s cute. I do wish there was a seamstress to represent the sewing community, but the makers on there are all very talented. And I am a huge fan of Parks and Rec, so seeing Amy Poehler and Nick Offerman together again is a dream come true! (Now if only Andy and April would make a surprise appearance!)

I finally took detailed photos of the dress I wore to my cousins wedding and am very excited to share!

Coming Up Roses Wedding Guest Dress - Trish Stitched

I didn’t intend on making a dress. After my weight struggles, I was feeling so discouraged, I just wanted to buy a dress, but once I started feeling more myself, I wanted to show off my hard work. (I was also really scared that the dresses in my wardrobe wouldn’t fit so making a dress that fit my current measurements felt safer).

I wanted a dress to accentuate my top half, something a bit low cut and flirty, because that isn’t my typical style. I had a really difficult time finding a pattern to go with the look I wanted. The skirt portion wasn’t as important to me, but I really wanted a bodice with boning, spaghetti straps and low V neck. This style is becoming very popular in the “wedding guest dress” world and I wanted a fashionable piece rather than a timeless piece. I was also looking for a pattern that included a full lining with clean finishes. There are so few occasions that I make pretty formal dresses, that every chance to test my skills, I want to take.

I always want to make indie patterns first. They normally fit better, and have detailed sew-a-longs with the pattern in case you run into any problems. The issue with a lot of indie brands is that they don’t dive far into the special occasion dresses. Sure there are a few full length options, and some fun flirty dresses, but I couldn’t find a pattern with the structure I wanted. Needing to turn to the “big 4” of sewing patterns, my first thought was Vogue. But they didn’t have anything I was looking for! (Man, some of these patterns are really bad!!) But I finally found the perfect pattern in McCalls 7720.

Coming Up Roses Wedding Guest Dress - Trish Stitched

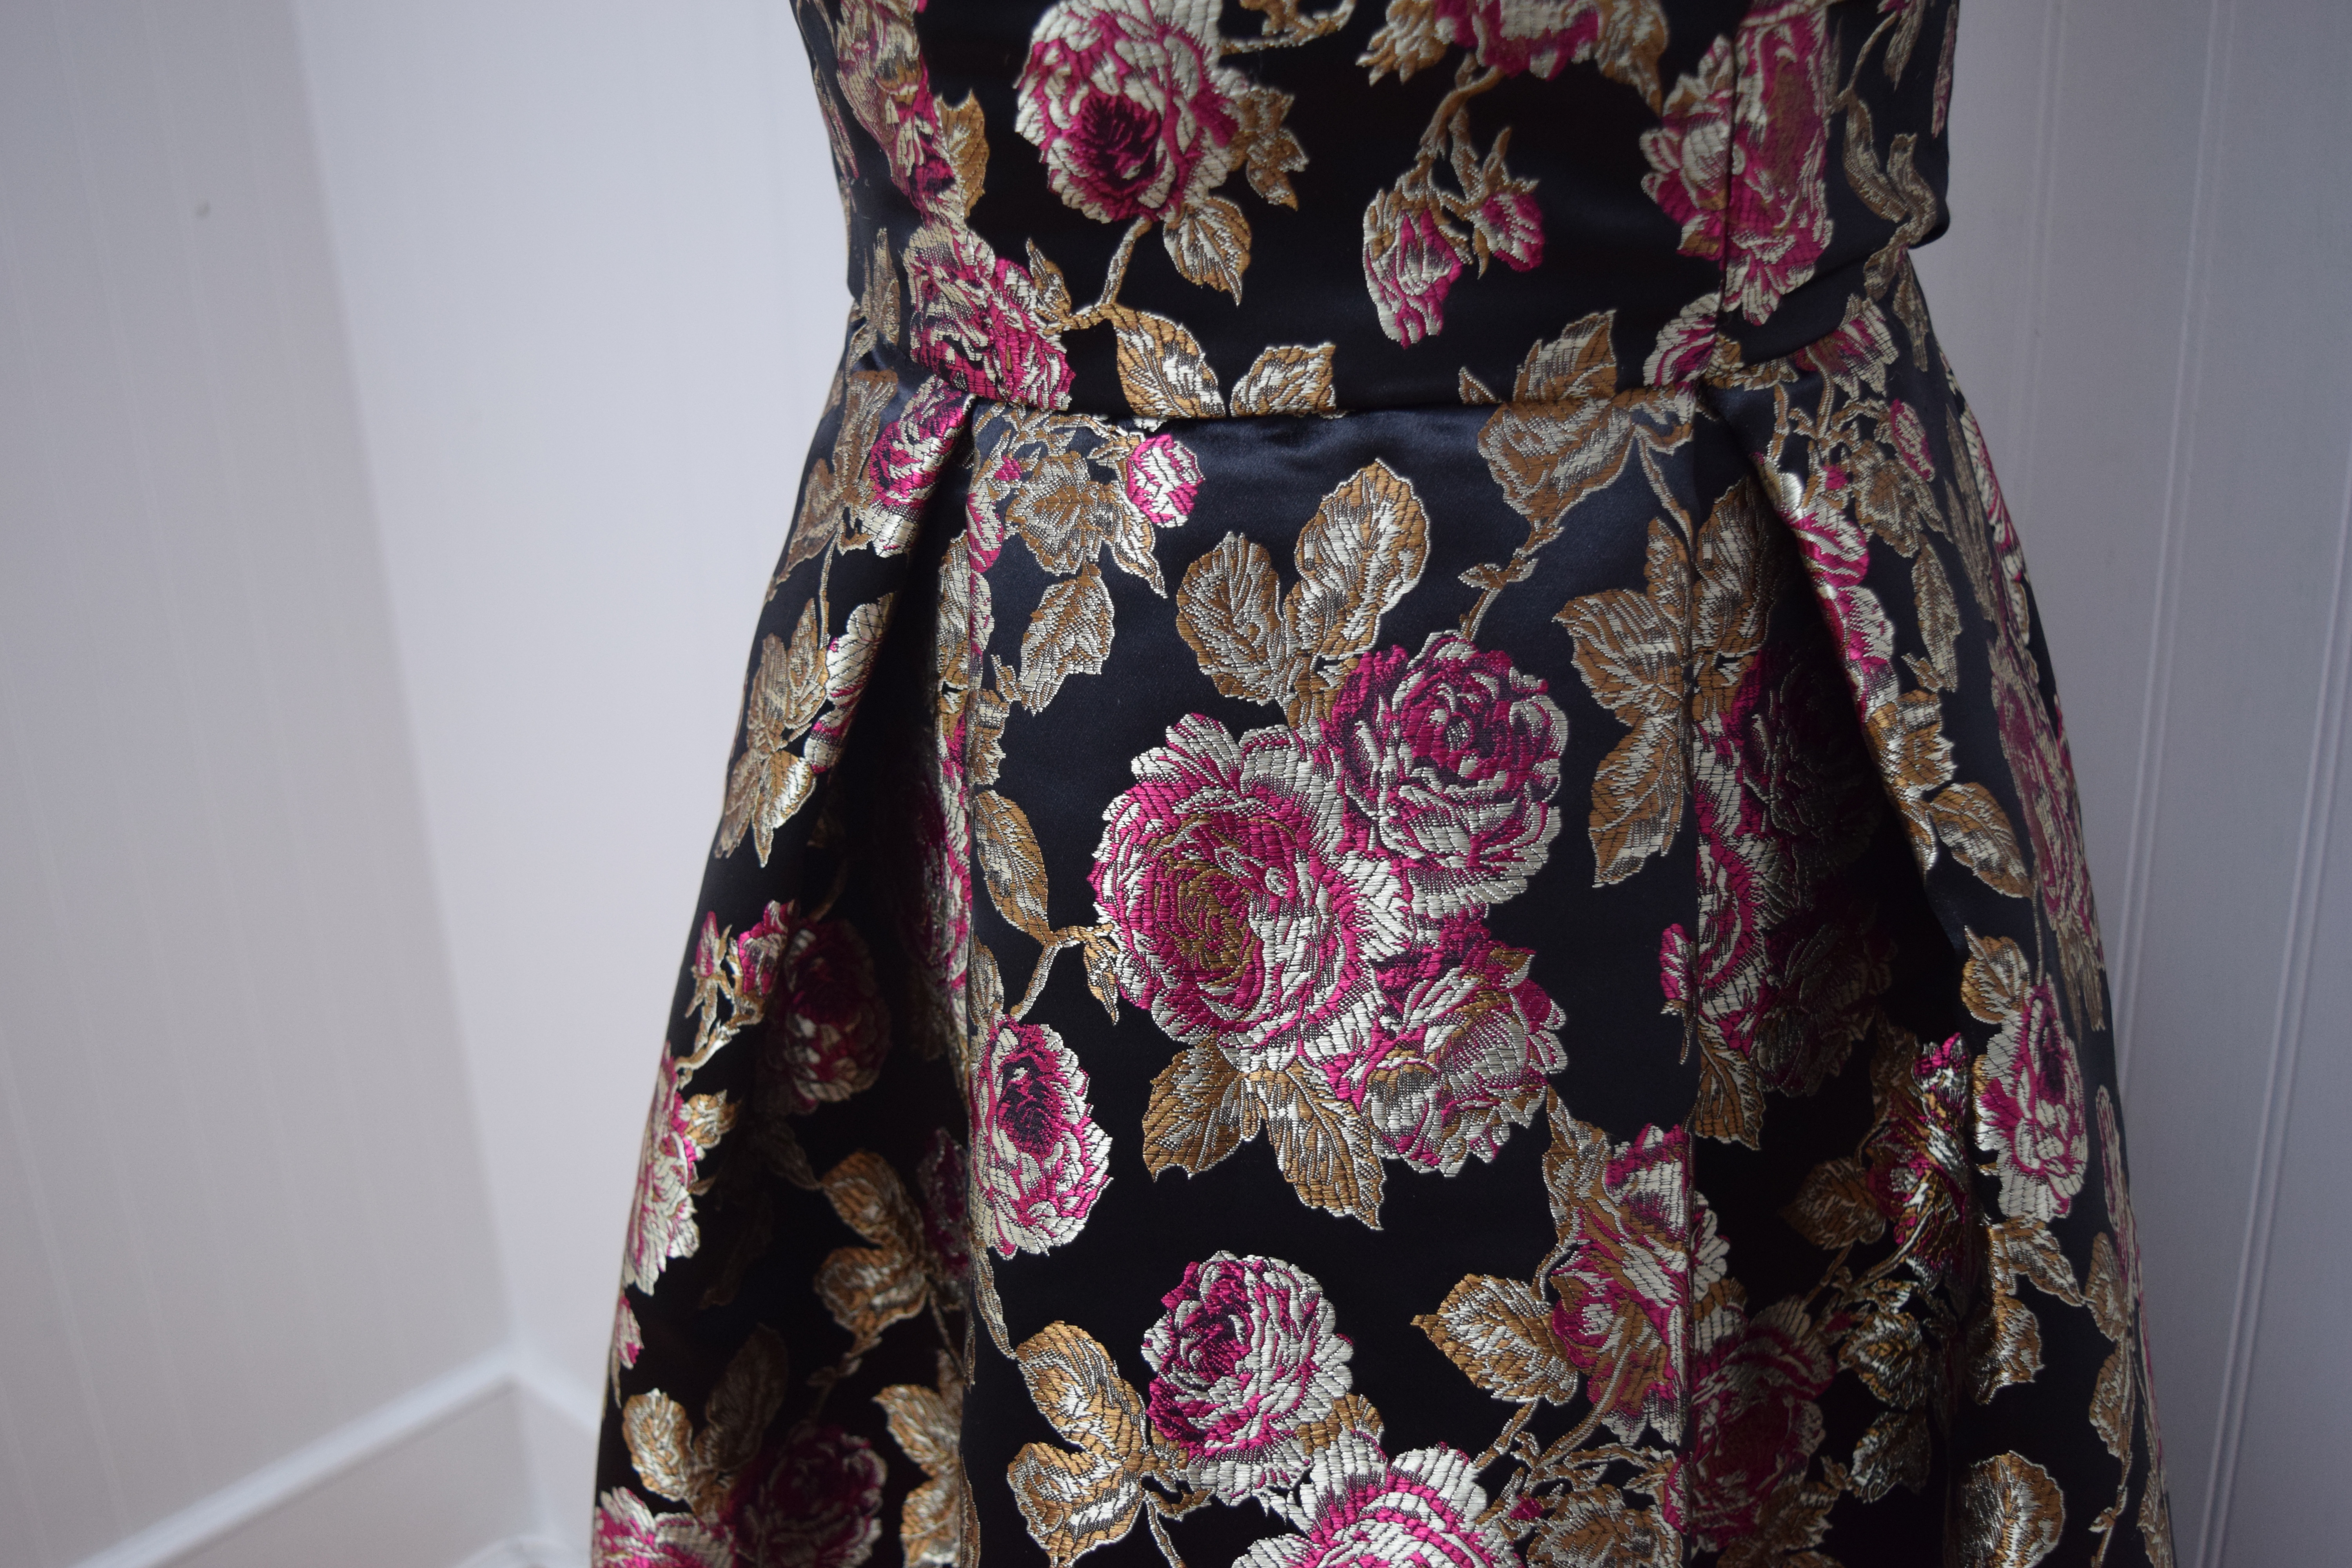
Once the pattern was selected, I ran to Joann’s to find fabric. I knew I needed to start this dress fast, and didn’t have time to wait for shipping, so I headed to my local Joann’s where I found the perfect print. This rose print brocade was not on the “recommended fabrics” list, but I knew the pattern would be able to support the structure of the fabric.

With my measurements, I made a size 10. Normally in McCalls, I’m a size 8, but sizing up a bit was a chance I needed to take, as it’s easier to make something smaller than making something bigger! I also made a muslin of the top, because I wanted to be sure those measurements were accurate. My muslin fit well, as I was mostly concerned with the size around my torso, I was afraid I wouldn’t be able to fit in it once the zipper was in. Once I determined the fit was comfortable, I moved onto my fabric. The bodice came together very quickly. Even with the addition of boning, and a fully lined top, I was surprised it was a decently quick/easy sew.

Coming Up Roses Wedding Guest Dress - Trish Stitched

One of my alterations to this dress was with the straps. I never understand using ribbon for straps. I get that it makes life easier, since you don’t have to turn a skinny tube inside-out, but to me, real straps give the dress a more professional feel. If you look at the actual pattern, I made the straps much shorter, meaning they don’t technically sit where the pattern calls them to sit. This was a personal preference, and in reality, I could have sized down on the bodice, but I didn’t have enough fabric to re-cut.

Coming Up Roses Wedding Guest Dress - Trish Stitched

My original plan was to shorten the skirt to right above the knee, to keep with my flirty vibe, but after making the skirt that came with the pattern, it was a no brainer to keep it. I just had to cut a good chunk off the bottom to align better with my height. I cut off about 3.5″. I also thought the bodice would look too “long”, but once it was pinned in place, it hit appropriately and I kept the length.

The skirt pleats were…interesting. I had to read the directions over several times because the lines just weren’t making sense. These pleats are huge. Like, really big. It makes for a VERY full skirt, and by making it in a brocade, it was super roomy. I did love that the pattern called for sewing a hem band, rather than just turning up 5/8″.

Coming Up Roses Wedding Guest Dress - Trish StitchedComing Up Roses Wedding Guest Dress - Trish StitchedComing Up Roses Wedding Guest Dress - Trish Stitched

Coming Up Roses Wedding Guest Dress - Trish StitchedComing Up Roses Wedding Guest Dress - Trish Stitched

After completing the dress, and trying it on, I noticed there was a little gaping in the bodice, as my bust didn’t fill the bodice as it was supposed to. This alteration didn’t appear in my muslin, partially because I didn’t add the lining. I don’t think my bust measurement decreased that much within the 2 weeks I was making this dress, but that was one of the first sections of my body to go back to normal when I changed my diet plan, so the fit could be a mixture of things.

I, of course, didn’t want to take the entire dress apart to fit this issue, and I considered just leaving it, but as the point of my new dress was to show off my hard work, I couldn’t let it go. Since my dress form isn’t super true to size anymore either, I turned the dress inside out, zipped it up (which is not easy, thanks Drew), and pinned darts in place on my own body to keep it from gaping. (You can also see a little bit of pulling on the dress above the dart, which I’m not very pleased with, but my dart alteration happened the day of the wedding and I didn’t have that much time to fix it. Thankfully when I’m wearing it, it looks much better. If I remember to do so, I will go in and let the dart out on this side a bit more.)

Coming Up Roses Wedding Guest Dress - Trish StitchedComing Up Roses Wedding Guest Dress - Trish Stitched

This alteration wasn’t the cleanest finish, and you can certainly see where the dress was fixed, but the fit is much better this way.

I tend to stay away from alterations in finished garments, as that is an area that is super scary for me to wrap my head around. I don’t mind doing them for myself, but whenever someone asks me to fix something for more than just a simple stitch, I turn them down. I hope to get better over time, and learn the “cause and effect” of fit issues.

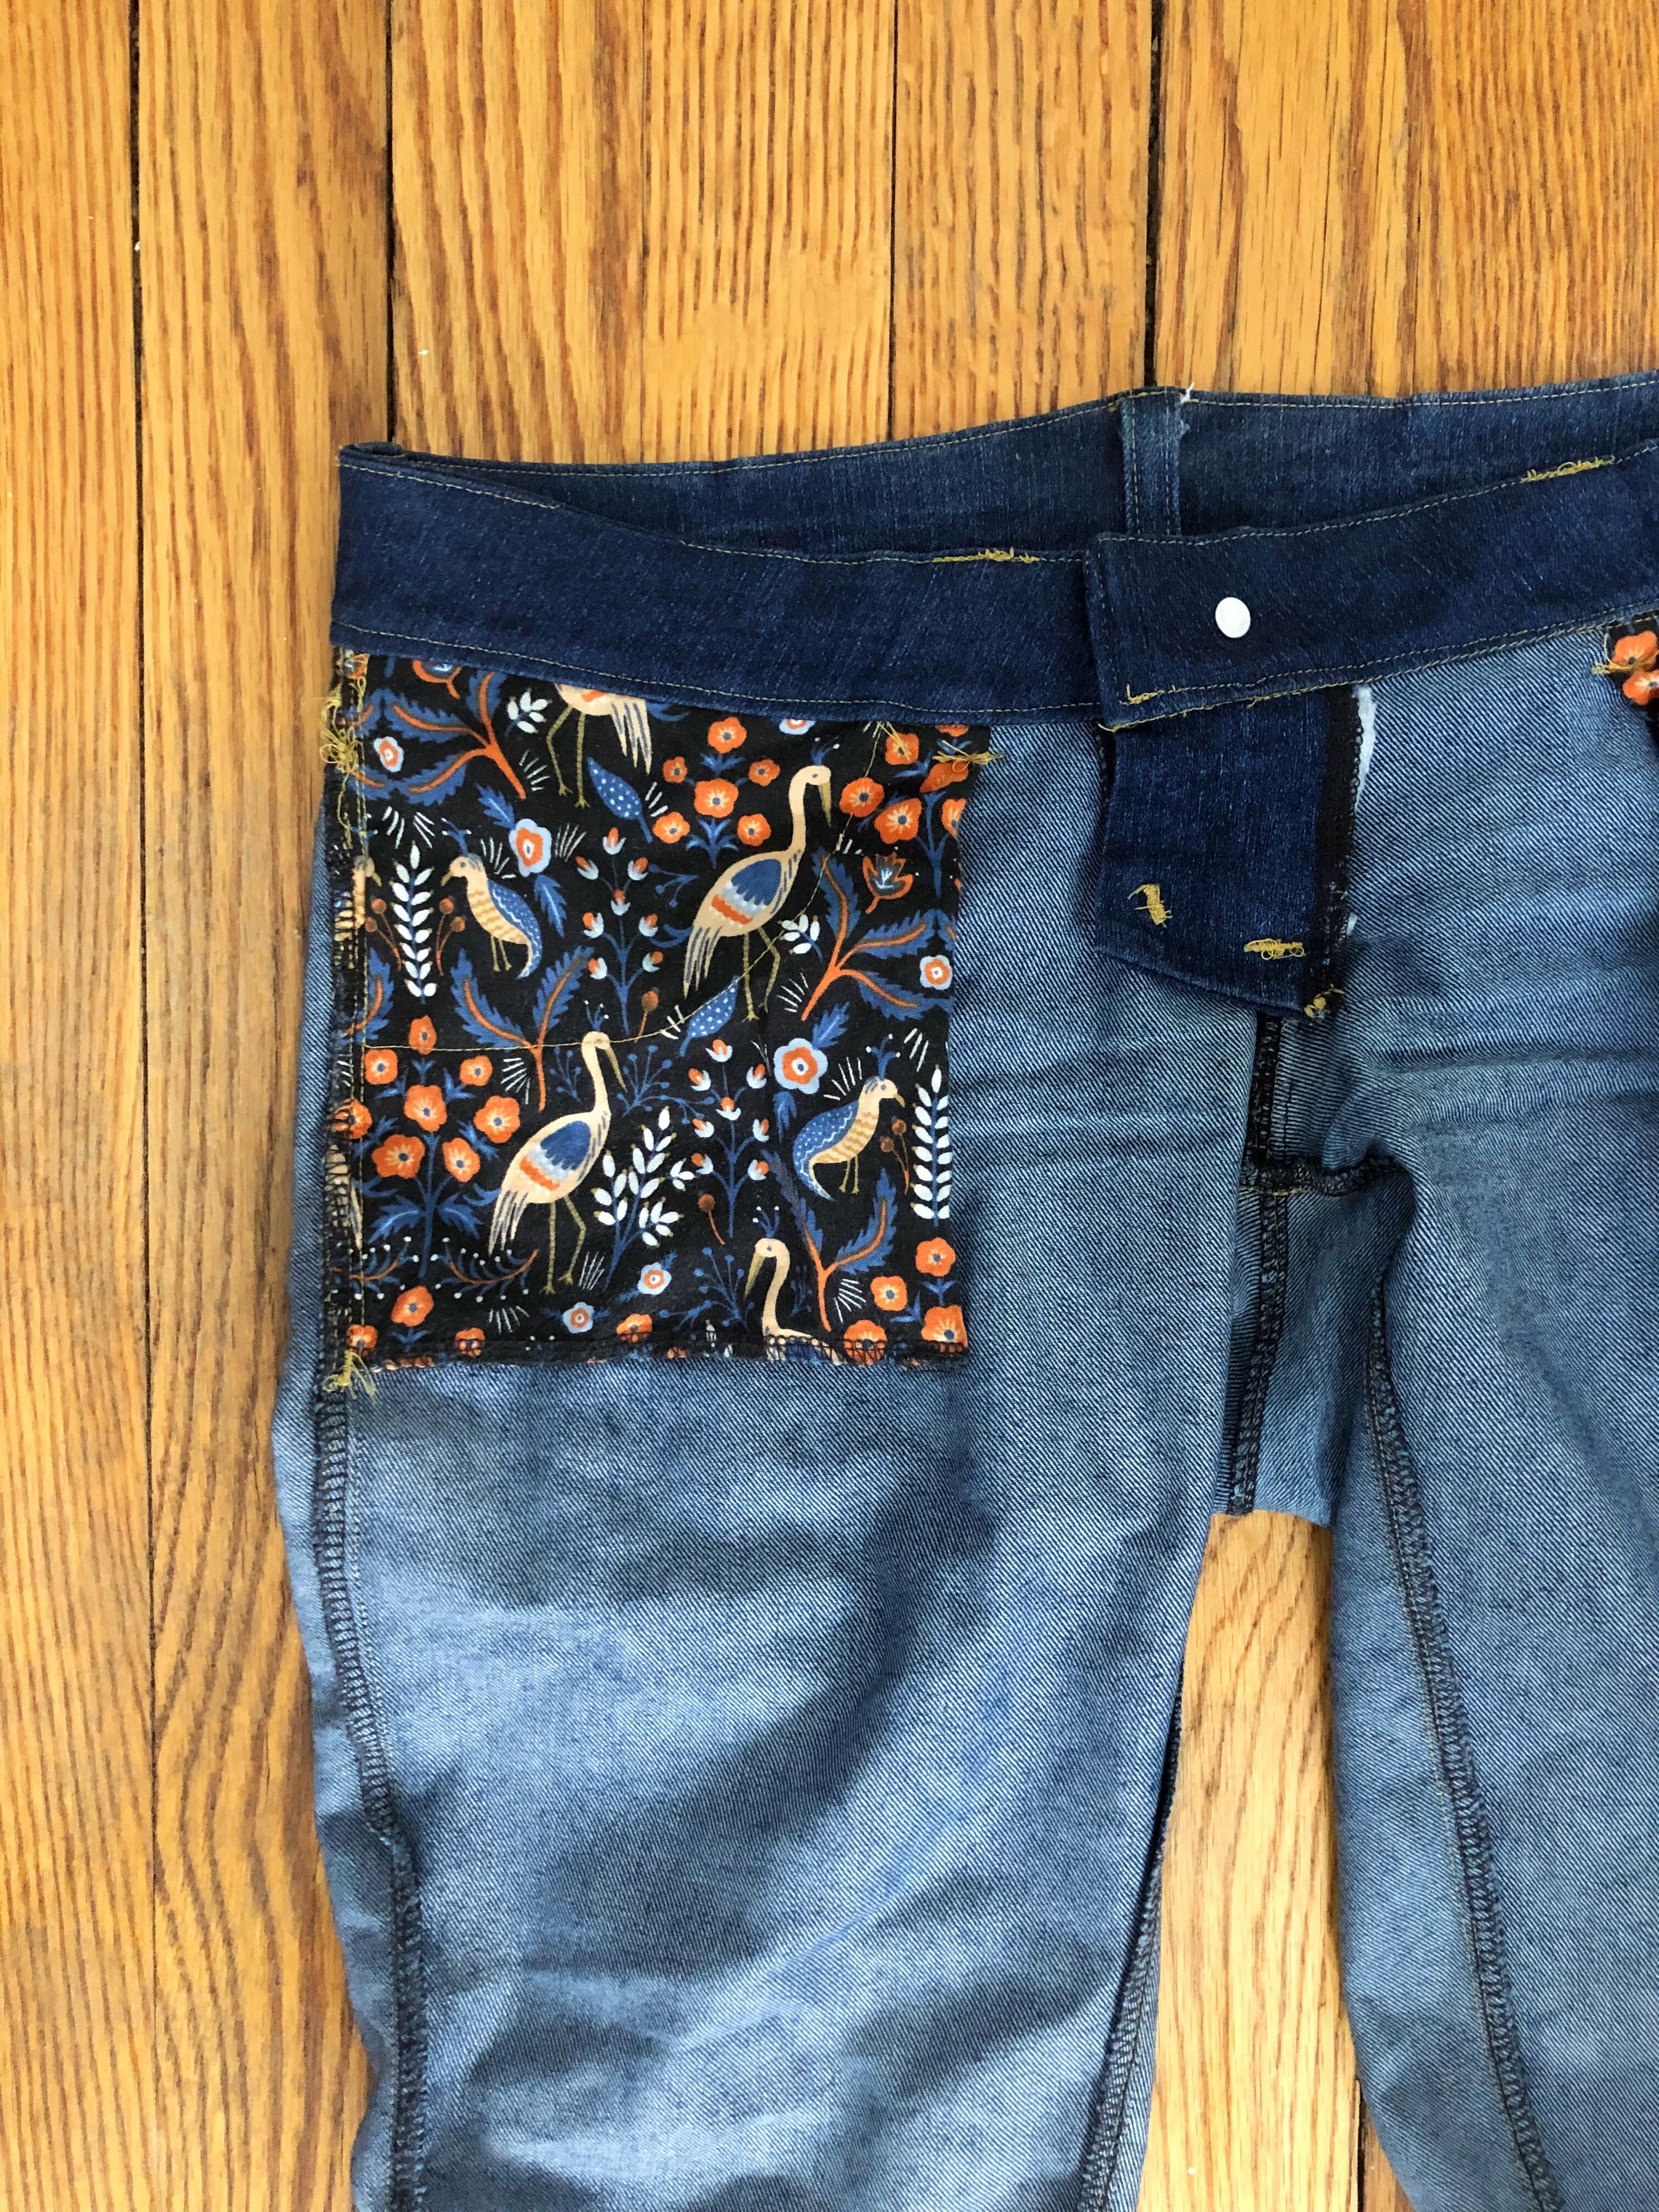
I LOVE the clean interior on this dress. I didn’t do any fancy seams, just finished with some serging, but you can only see them when you lift the lining. The skirt also has a very faint high-low look, which I love.

Coming Up Roses Wedding Guest Dress - Trish StitchedComing Up Roses Wedding Guest Dress - Trish StitchedComing Up Roses Wedding Guest Dress - Trish StitchedComing Up Roses Wedding Guest Dress - Trish StitchedComing Up Roses Wedding Guest Dress - Trish StitchedComing Up Roses Wedding Guest Dress - Trish Stitched

All in all, if I were to make this dress again, I would size down. I would also take the time to make a better muslin. I’m getting better at making a practice version, but sill need to take it further. (I’m still learning guys!) The finished dress is pretty and comfortable, and was a very easy sew, which all make me really happy with the outcome! Obviously the dress isn’t perfect, but I’m still proud of it.

The wedding itself was nice, and I’m happy the rain held off on the outdoor ceremony until we went inside! Since my grandparent’s passed, we haven’t been that close with my mom’s side of the family, so it was a little awkward, but I’m happy that my parent’s, sister and Drew make family events fun.

I was only able to get a few photos wearing the dress, but it held up well on the dance floor! We have another wedding to attend in October, and since that is Halloween month, I think having this dress to wear will make the month go smoother.

Coming Up Roses Wedding Guest Dress - Trish Stitched

Coming Up Roses Wedding Guest Dress - Trish Stitched

Drew and I have been to A LOT of weddings in the past few years, and it’s been a fun adventure. We pretty much know what we would and wouldn’t want for our “big day”, even though we aren’t engaged hah! But lets be honest here, I’ve been planning for a long time – even though I keep it in my head. I have to say, the older I get, the simpler I want my wedding to be and elopement is looking like a really great option (although that would never fly with my guy!) There are a few things I know for sure, the man I want to marry and that I want to make my wedding dress. Having practice formal dresses get me a step closer to creating my perfect dress!

Dress Details:

Pattern: McCall’s 7720

Size Cut: 10

Alterations Made: Fabric Straps, Added bust darts, Hemmed 3.5″

Fabric: Pink Roses on Black Brocade – Joann Fabrics

Coming Up Roses Wedding Guest Dress - Trish StitchedComing Up Roses Wedding Guest Dress - Trish Stitched

#RefashionFriday · handmade wardrobe · inspiration · refashion · Uncategorized

#RefashionFriday Denim Jacket Re-mix

Happy Friday!

This refashion has been such a long time in the making, I am so excited to share it with you! The story for how this came about it a little long, so I wanted to share my photos in-between all that text!

DSC_0050

Before this refashion, the only denim jacket in my wardrobe was from middle school. I feel like I’ve mentioned that before here on the blog, but it’s true, my Gap Kids denim jacket is still getting its wear in my wardrobe. The sleeves are way too short, and the body looks awkwardly short with pants and shirts, so the arms always stay rolled, and I only wear it over dresses. I don’t wear it all that often, but I haven’t found a RTW version that I liked to replace it.

So when Seamwork Audrey came out, I knew it was a pattern to go on my “make list”. My initial thought was to make it out of recycled materials, because there is a crazy amount of used denim in the world! The only old jeans I had in my stash were a mix of light and dark denim and I just didn’t want that much shade difference to make it look super upcycled. Not having the proper pieces, I decided to wait to make it.

DSC_0034

A few weeks ago I was thrifting for some jeans for another project (I’ll share soon!) and had some leg remnants left over – as well as an extra pair I didn’t end up using for the other project. So I finally had a good amount of fabric to play with!

DSC_0100-001DSC_0017-006

The plan was in place, the materials gathered, I was ready. Then I saw this beautiful photo on pinterest and a little lightbulb went off in my head. I would finally be able to use this fabric remnant I’ve been dying to use!

We all have those pieces in our stash that you have a general idea for, and even though it doesn’t feel 100% right, there is an eventual purpose for that fabric. No, just me the hoarder? Alrighty then.  Well, I had this remnant I got from a friend and the print was so beautiful, I wanted to make a shirt for myself to enjoy the print. I was struggling with finding the right pattern and fabric to mix with it, and (if you zoom in on the photo) there were grommets on each panel, so the only true usable piece was the top corner. So this piece sat until I could spend more time on it. (I should also mention it’s similar to a quilting cotton)

IMG_6897[2602]

DSC_0041-001

After seeing that inspiration, I knew this fabric was destined to go with my new denim jacket.

I have a huge problem when it comes to sewing projects, because even if I have a whole pile of unfinished things, I need to start new ideas to constantly keep my mind flowing. So I left behind a dress due in a few weeks and cutting out new backpacks to make this jacket.

Seamwork’s goal has always been about quick projects you can finish in a few hours, and I’m not sure why my mind accepted that to be true for something like a denim jacket. They shifted their pattern’s a few months ago to be a little more detailed, so this project took way longer than expected. I was hoping to finish last week, but I really wanted to take more time to make it perfect, so I waited to share and I think it was worth it.

DSC_0055-002

Audrey has a lot of pattern pieces.  And since I’m tiny, my jeans are tiny, so I had a lot less fabric to work with – and I really had to stretch my thinking when cutting out the fabric. I used one pair of remnant jean legs, one full pair of jeans, and had to make the sleeves and a few other pieces out of fabric leftover from my handmade jeans, as well as using the fabric remnant for the back piece and pocket linings.  If you want to make your own recycled denim jacket, I would suggest to get 4-5 pairs, to be safe.

DSC_0188-001DSC_0176

I have seen versions of recycled denim jackets (scroll down to see more inspo!) and knew I wanted mine to have symmetry and purpose, not just a bunch of scraps thrown together. I made sure each side “matched” denim (ex. each center middle panel were cut from the same pair of jeans). When it comes to using multiple pieces to make something new, it really comes down to fabric placement to create the final look.

DSC_0119-003

Details about Audrey:

Cut: Size 2

Modifications to pattern: Added 1″ to the sides of Back Center Panel & removed 1″ from Back Side Panel.

Problem Areas: The welt pockets. I’ve made welt pockets before (Refashioned Bomber) but they are not commonly on my radar. Once I read the directions about 10 times to let them really sink in, it all clicked. Seamwork does have an article about Welt Pockets, which is a great resource as well.

Everything else went together smooth. I also ran out of topstitching thread, so not all areas have the pretty gold stitching, but I think it works out well that way.

DSC_0114-001DSC_0124DSC_0120-001DSC_0117-001DSC_0138-002

Details about my back modification: My fabric panel had this beautiful border and I wanted to use at least a bit of it on the back. To make this happen, I extended the back center panel 1″ on both sides, and took 1″ from the back side panel to account for the modification. I also quilted my back fabric to give it a little more body. It was a simple quilting, but adding batting and a backing, definitely gave the back a sturdier feel.

I added this lace leftover from my refashioned kimono right under the panel. Originally I had it going cross the entire back, but re-did it to go across just the panel as it looks cleaner.

DSC_0186-003

My hope for this jacket is to rough it up a little. It does have a worn in feel since it’s almost all used jeans, but taking some sand paper or a razor to a few sections is something I’m looking into. I also wouldn’t mind adding more trim if I come across cohesive trim I like. I really feel like this could turn into one of those pieces that stays in my wardrobe until I’m old and grey and my kids want to borrow it for a “retro feel”. I’m excited to see what adventures there are for this jacket in the future.

Inspiration: 

This etsy shop is filled with “festival style” denim jackets and it’s huuuuge embellishment inspo!

il_570xN.1153702354_gmyl

Add a little colored denim for a more unique look.

fa329eae74c020192dd330b1e32c37c1

or mix light and dark denim like this:

3f081fd9c7e1398f8fd08068e0ee56e3

The Pin that started it all.

lola-guarch-12-min-e1526550881709

The next jacket isn’t super related but I have to share because it’s amaaazing!

A girl after my own creative heart: Once Upon A Lauren was featured on Hoboken Girl awhile ago and I’ve been in love with her work since! Tell me this hand-painted leather jacket isn’t drop dead GORGEOUS! Thrift Upcycling at it’s finest!

il_570xN.1520508802_536s

If you spot a great denim or leather jacket at a thrift store, or have one gathering dust in the back of your closet, I hope this inspires you to have a little fun!

handmade wardrobe · sewing

Summer Floral Blackwood Cardigan

Happy Saturday!

Last weekend Drew and I hosted our first party in our home, and it was a whirlwind. We’ve had multiple projects going on in and outside the house, so just prepping for people coming over was a huge chore. My future sewing space is coming along, our first floor bathroom had a serious facelift, and a gigantic holly bush is finally gone from the front of our house! I am preparing a blog post filled with our projects so far, but today I’m talking apparel!

I wanted a quick sewing project and was browsing through my stash for inspiration, and came across this beautiful knit I picked up in LA last year from Michael Levine Loft. If I remember correctly, I bought a yard and a half, thinking maybe a dress would be fun. To be honest, I didn’t want to mess with linings with this fabric and after leaving it out of sight for a bit, I thought this would actually make a really pretty cardigan. The cut outs add a fun detail, which I rarely see in a colorful knit.

I know, a cardigan in summer? But I LOVE summer. I love the heat and the sunshine, and the past week of heatwave in Jersey has not been any damper on my days. Even though temperatures have been in the 90s-100s, I still get chilled easily, especially when the air conditioners are constantly running (no thanks to Drew!). Because of this, cardigans are a year round staple. I finished my first Blackwood Cardigan a few weeks ago but just got a handsome hand to help with photos (thanks, Drew!). 

I bought the Blackwood Cardigan pattern awhile ago when Helen was having a sale, and it’s been sitting in my stash waiting for fabric. I’ve been meaning to try this pattern and nail down my size and fit, and now was the time!

Summer Floral Blackwood Cardigan - Trish StitchedSummer Floral Blackwood Cardigan - Trish Stitched

The pattern was wonderfully made and written and I love the two length options (have you checked out the inspiration on Instagram for this?! #swoonworthy!) I made a size Small, View A and it fits great. I had to shorten the arms a bit since petite body = petite arms, but other than that, no alterations were made.

Summer Floral Blackwood Cardigan - Trish StitchedSummer Floral Blackwood Cardigan - Trish StitchedSummer Floral Blackwood Cardigan - Trish Stitched

I serged all my edges before I even started sewing. Since the fabric is decently “see-through” I wanted to be sure the edges weren’t raw. I also omitted the pockets because I didn’t want this breezy cardigan to feel heavy with anything extra. I was also a little concerned with having a bottom band, and even the wrist band because I didn’t want the wrong side of the fabric to show through, but after completing it, I don’t mind the up close look.

Summer Floral Blackwood Cardigan - Trish StitchedSummer Floral Blackwood Cardigan - Trish StitchedSummer Floral Blackwood Cardigan - Trish Stitched

A few notes:

I LOVE that this pattern comes in layers. This means that when you are going to print your PDF, you only have to print your size!

This cardigan does not cover as much in front as my store bought ones. This is the style, and it is made for layering, but something to consider if this isn’t your ideal cardigan style.

I can’t wait to make more of these cardigans! This is going to be one of those “staple patterns” that I make a few versions of. Some will probably be pretty basic and boring, but those are going to be my most worn!

Summer Floral Blackwood Cardigan - Trish Stitched

Enjoy the rest of your weekend!

handbags · Janome Sewing · refashion · sewing · Tutorials

TWO New Projects – Plus Tutorials!

Just a quick hello from me today! I’ve been busy doing sewing projects for a few of my favorite sites! Best part about these projects is that you can make them too!

My first ever downloadable bag pattern is over on Fabric.com!

Trish Stitched

If you are taking a short trip this summer, this bag is perfect for your travels! I wanted to create a basic pattern that would leave room for customization, and you can certainly customize this bag to have exactly what you want!

Trish StitchedTrish Stitched

Head over to Fabric.com to grab the pattern now!

And while you’re at it, add some more fabric to your stash! 😉


And if bag making isn’t your thing, maybe a new refashion is in your future! A brand new tutorial is over at Janome.com to turn an old dress into a kimono!

Trish Stitched

When we start getting into summer days, I sometimes feel like I have nothing dressier to wear over shorts and tanks, but a simple kimono style jacket adds flair without adding heavy fabric layers!

Trish Stitched

Trish Stitched

I love easy refashions – and this one is super simple! The hardest part is finding the right dress! {The machine used here was the Janome Skyline S9}

I’ve also created a YouTube channel and you can definitely expect more videos from me in the future! Subscribe to my channel here – and leave your channel in the comments so I can subscribe!


{This post may contain (i) links to third party websites and (ii) sponsored content. All opinions are my own and do not reflect the views or opinions of fabric.com or Janome.}
Me Made May

A New Home & Me Made May 2 Week Roundup

Happy middle of May! It’s been awhile since I blogged – and if you follow me on Instagram, you’ll know why! Three weeks ago we officially moved out of Hoboken! I’ve talked a little about it before but I wanted to share our first home-buying experience. (Please feel free to skip on down to my Me-Mades)

Trish StitchedTrish Stitched

In the beginning of last year, Drew and I decided that it was finally time to move out of our apartment. Hoboken had been good to us, and we were fortunate to have an affordable 2 bedroom apartment and a garage parking space (which is SO hard to come by), but we were ready to move on from the party town into a quieter space with a yard, and room to grow as a family. When we started looking at homes around March of last year, we were clueless and quickly learned what we had to do to find a home in our price range and in our dream area.

We found a realtor at an open house, and unfortunately, she “didn’t have time for us” and didn’t want to show us any of the houses we wanted to see. It was about a month of working with her that we wasted, and by May of last year, we were starting to get into the height of the market. We found another realtor, who we fell in love with, and she would send us 1-10 houses every week – and we would see 2-5 each weekend.

Drew and I fell head over heels for one house, and put in a bid over asking price. Because of the demand, we lost the house to a higher bid and our hearts were completely broken. We had felt like we were already searching for so long, and even met the owners of the home, that it was such a huge hit to us on a personal level. After another few months of looking, we found another house we loved and went through the process again. We actually went well over the asking price, and thought there was no way we could lose, but once again, we were outbid.

The winter months were very depressing, and we barely saw any homes, and we were getting very discouraged since we didn’t want to go through another spring/summer and compete with more families looking for homes. In early February we found another home, and immediately bid well over asking. We lost our third home and at this point, we were getting used to the rejection and were afraid to fall in love with another home.

That’s when a little yellow home with a white picket fence came on the market. The pictures were amazing – but we knew that pictures don’t always tell the whole story. We went to the open house and fell hard in love, but still talked very cautiously about our feelings like somehow loving it too much would be bad luck. This house checked all the boxes on our list: a cute backyard, space for a sewing studio and space for Drew to have a “man-cave”, with plenty of room for entertaining. We put a bid in and expected to lose – it felt too perfect of a house for us to get.

A few days later, we got the call that the house was ours. We were so excited! Closing took two months, but before we knew it- we were homeowners. It’s been a long, LONG process, but we are so happy with our home and we learned more than we could’ve imagined. Over the course of a year, we went to see over 70 homes, and saw more than double that in online listings.

Trish Stitched

Finding a home was a process, but now it’s time to actually fill it! We finally bought a dining room table, and our bed frame should be delivered later this week. Today we found a beautiful dinnerware set and last week I got my first watering can! (it’s the little things that make me so happy) We still need to find living room furniture and dressers, but we are slowly enjoying the process of finding pieces we love.

So that is why things have slowed down a bit on the sewing front. My machines are unpacked, but since we are doing a little construction in my future sewing studio, my temporary space is all disorganized.

I’ve been trying to keep up with Me Made May this year, (as it is my fourth year participating) but without a dresser, and always doing work to the house, I don’t want to ruin my me-made pieces and find myself wearing the same things over and over. Here’s a little two week roundup:

Day 1: Ginger Jeans & Seamwork Oslo in my future sewing studio. We plan on ripping up the carpet and tearing down the wall that splits the attic in two. I hope to get skylights for more natural light, but they may have to wait a while.

DSC_0043

Day 2: Closet Case Patterns Kalle Shirt in our garage! The previous owners added a bar in the garage and this was the back wall – perfect for photoshoots!

IMG_5795[2201]

Day 3: Cactus Print Lou Box Top & Ginger Jeans in our sunroom, in my cactus corner =]

Trish Stitched

Day 4: Cranberry Anorak (not pictured) & Handmade Backpack in our backyard! I’ll have more info about these backpacks soon!

Trish Stitched

Day 5: Closet Case Patterns Ebony Dress in front of our garage!

Trish StitchedIMG_5889[2203]

Day 6: Closet Case Ebony Tee, Kelly Anorak and Ginger Jeans at a craft show!

IMG_5894[2204]

Day 7 & 8: Not photographed- Handmade Leggings and Tanks.

Day 9: Seamwork Ariane & Handmade Cardigan in our (furniture-less) living room

DSC_0013-002

Day 10: Ginger Jeans & Refashioned Vest – this was a piece our realtor gave us!

Trish Stitched

Day 11: Ginger Jeans repeat – stuck on the side of the road.

IMG_5993[2205]

Day 12: Closet Case Ebony Tee – unblogged

IMG_5994[2206]

Day 13: Embroidered Peplum – didn’t get to photograph me wearing the past couple days

Trish Stitched

Day 14: Ginger Jeans repeat. I feel like I post these so often- but never the insides. Here’s my fun pockets!

Trish Stitched

Day 15: Handmade Floral Leggings and my denim jacket from middle school – not even kidding – I think I got this jacket in 7th grade. I just love the dark wash, even though the sleeves are too short, it’s that perfect worn in feel that makes it too comfy to get rid of!

Trish Stitched

Obviously Closet Case Patterns are my go-to. I just love the way they fit and the ease of styling. I do have three pairs of Gingers so I swear I’m not wearing the same ones every day!

I have definitely been defining my style more over the years, and have been weeding out the pieces I don’t wear, but overall, my goals for Me Made May remain the same: continue making more wearable pieces, and hunker down on basics! I always find myself needing to make tshirts but when it comes time to actually sewing them, I always find a different project to make. Some things are just so boring to make – even though they are items I need the most.

Are you participating? How has your Me Made May been going?